Houseboat
System Schematic
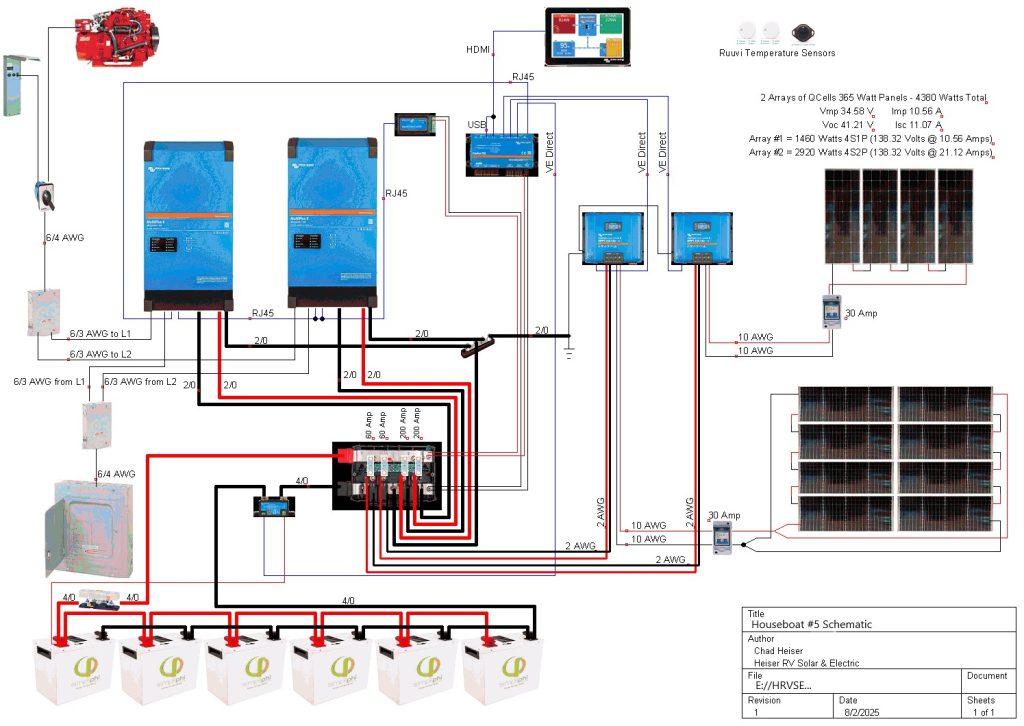
Basic Parts List
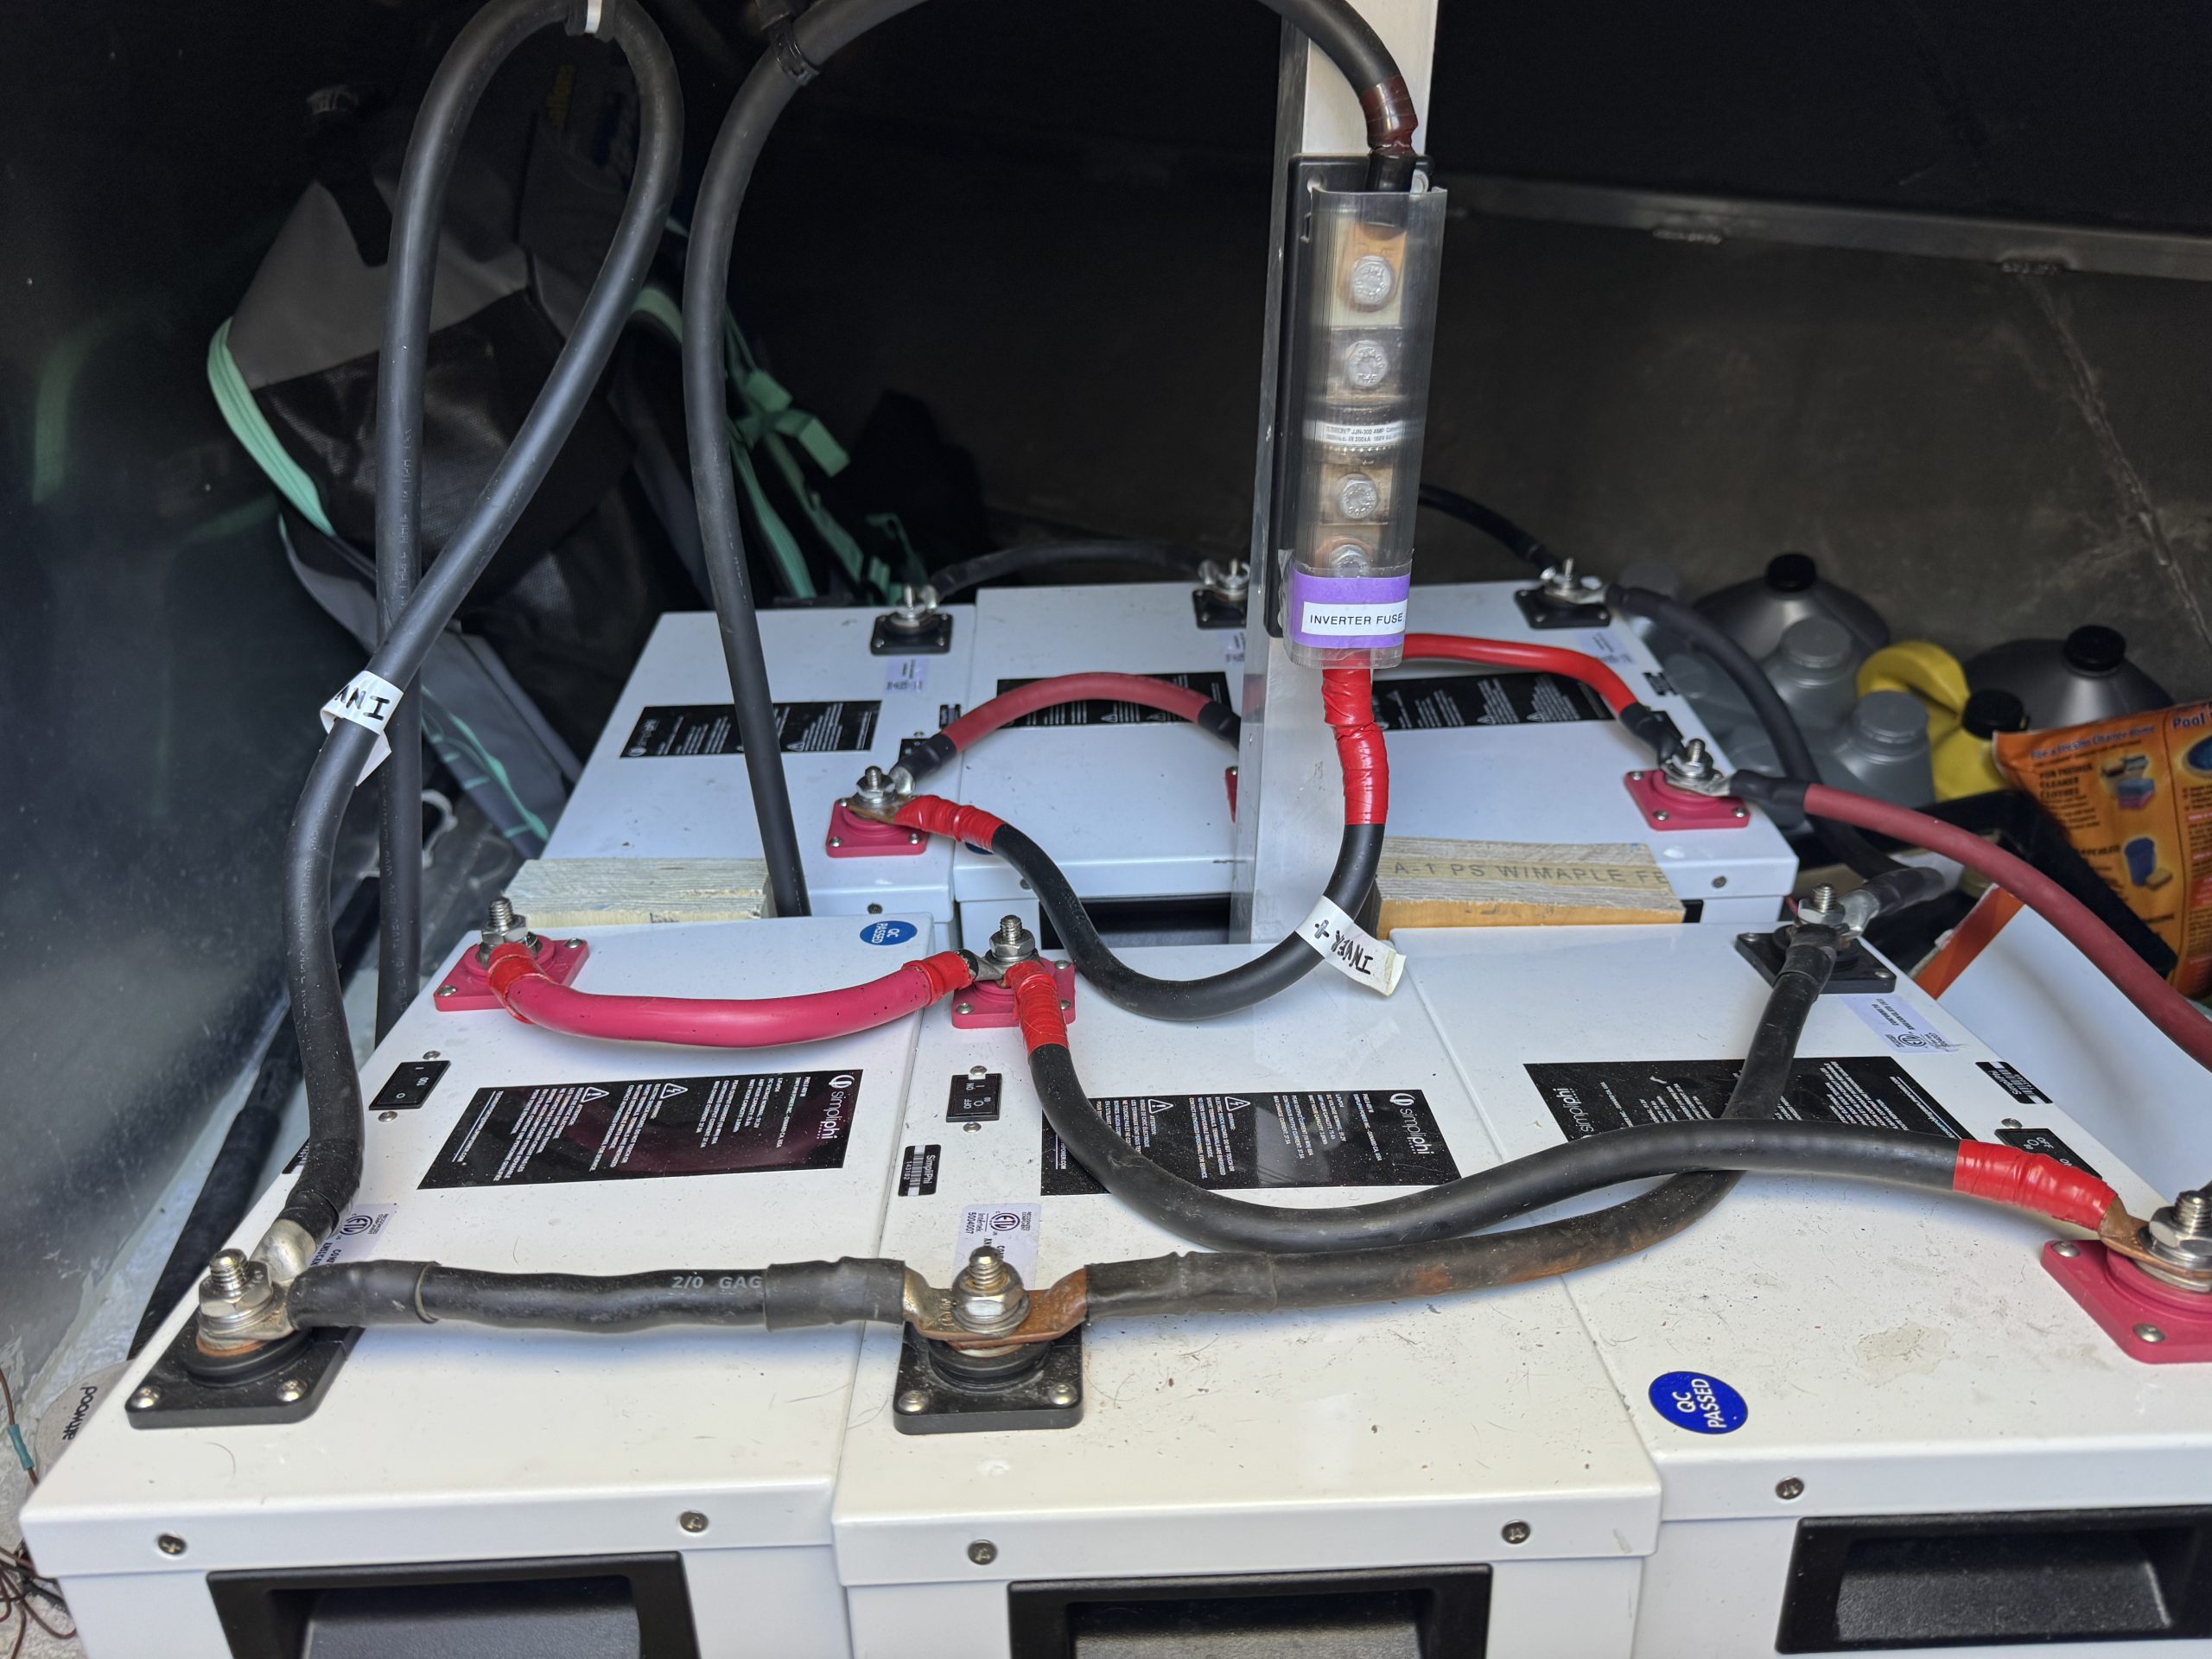
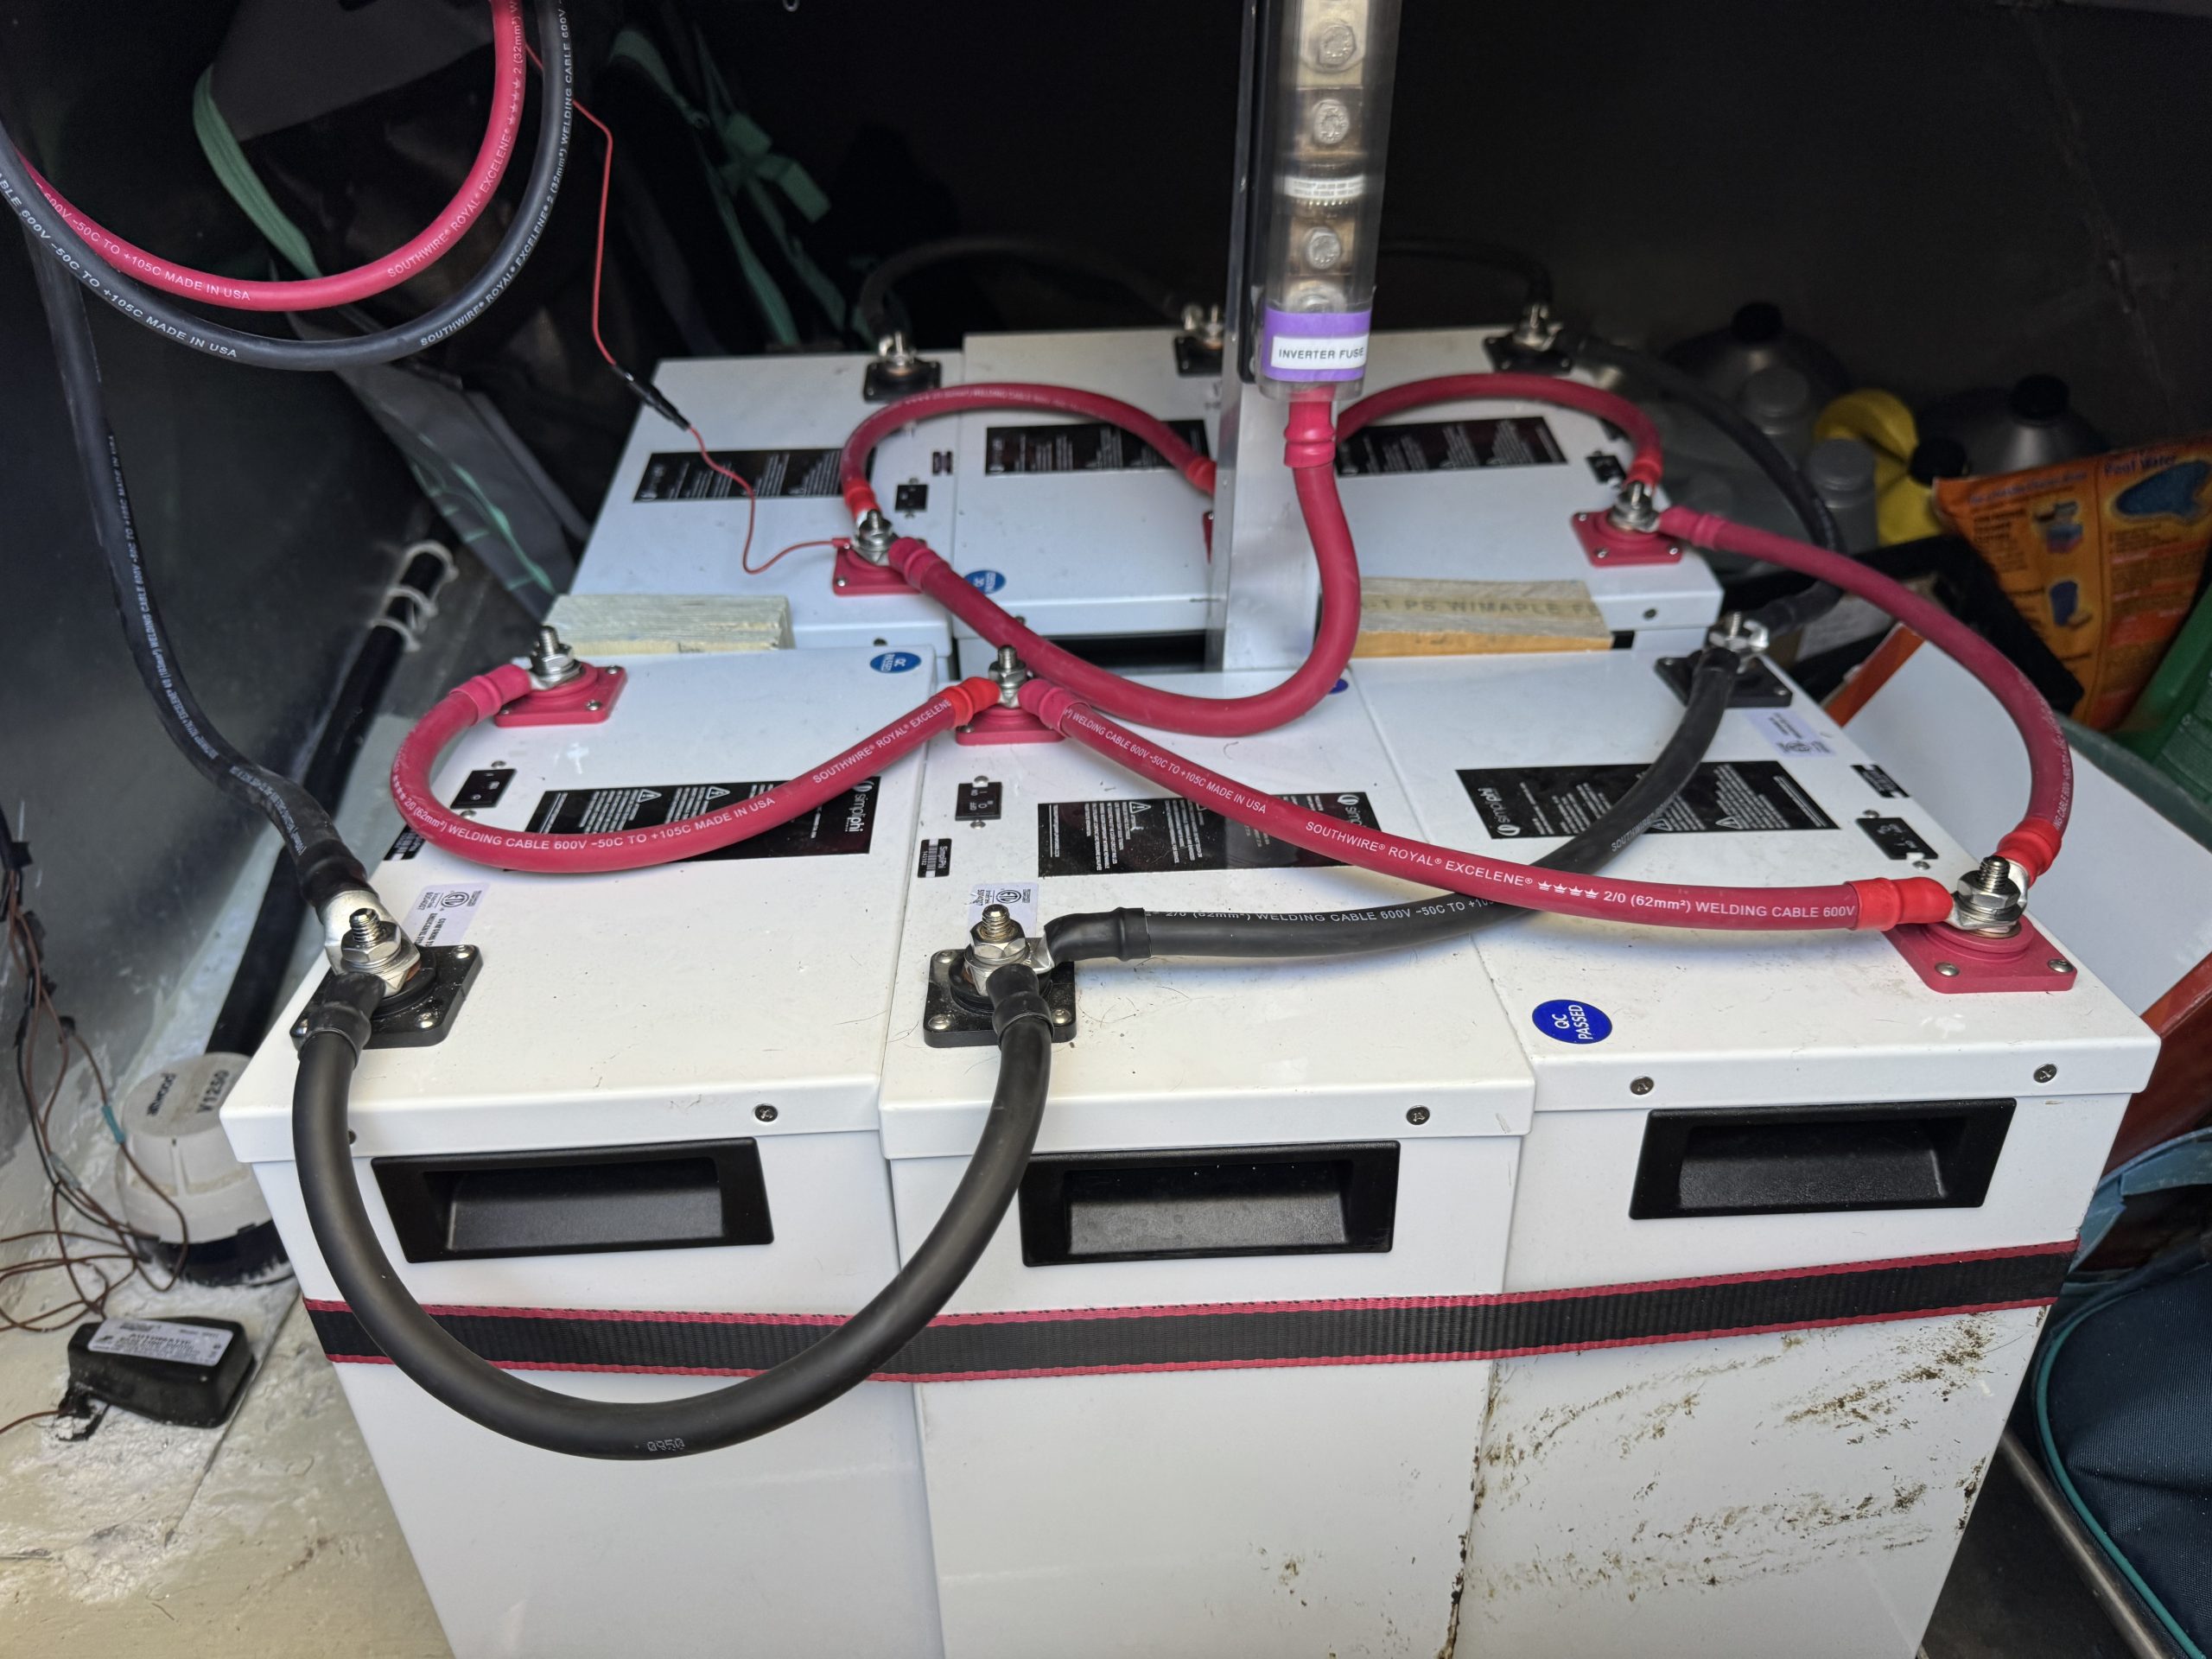
- 6 - Simpliphi 48 volt 75 Amp Hour Lithium Batteries (existing)
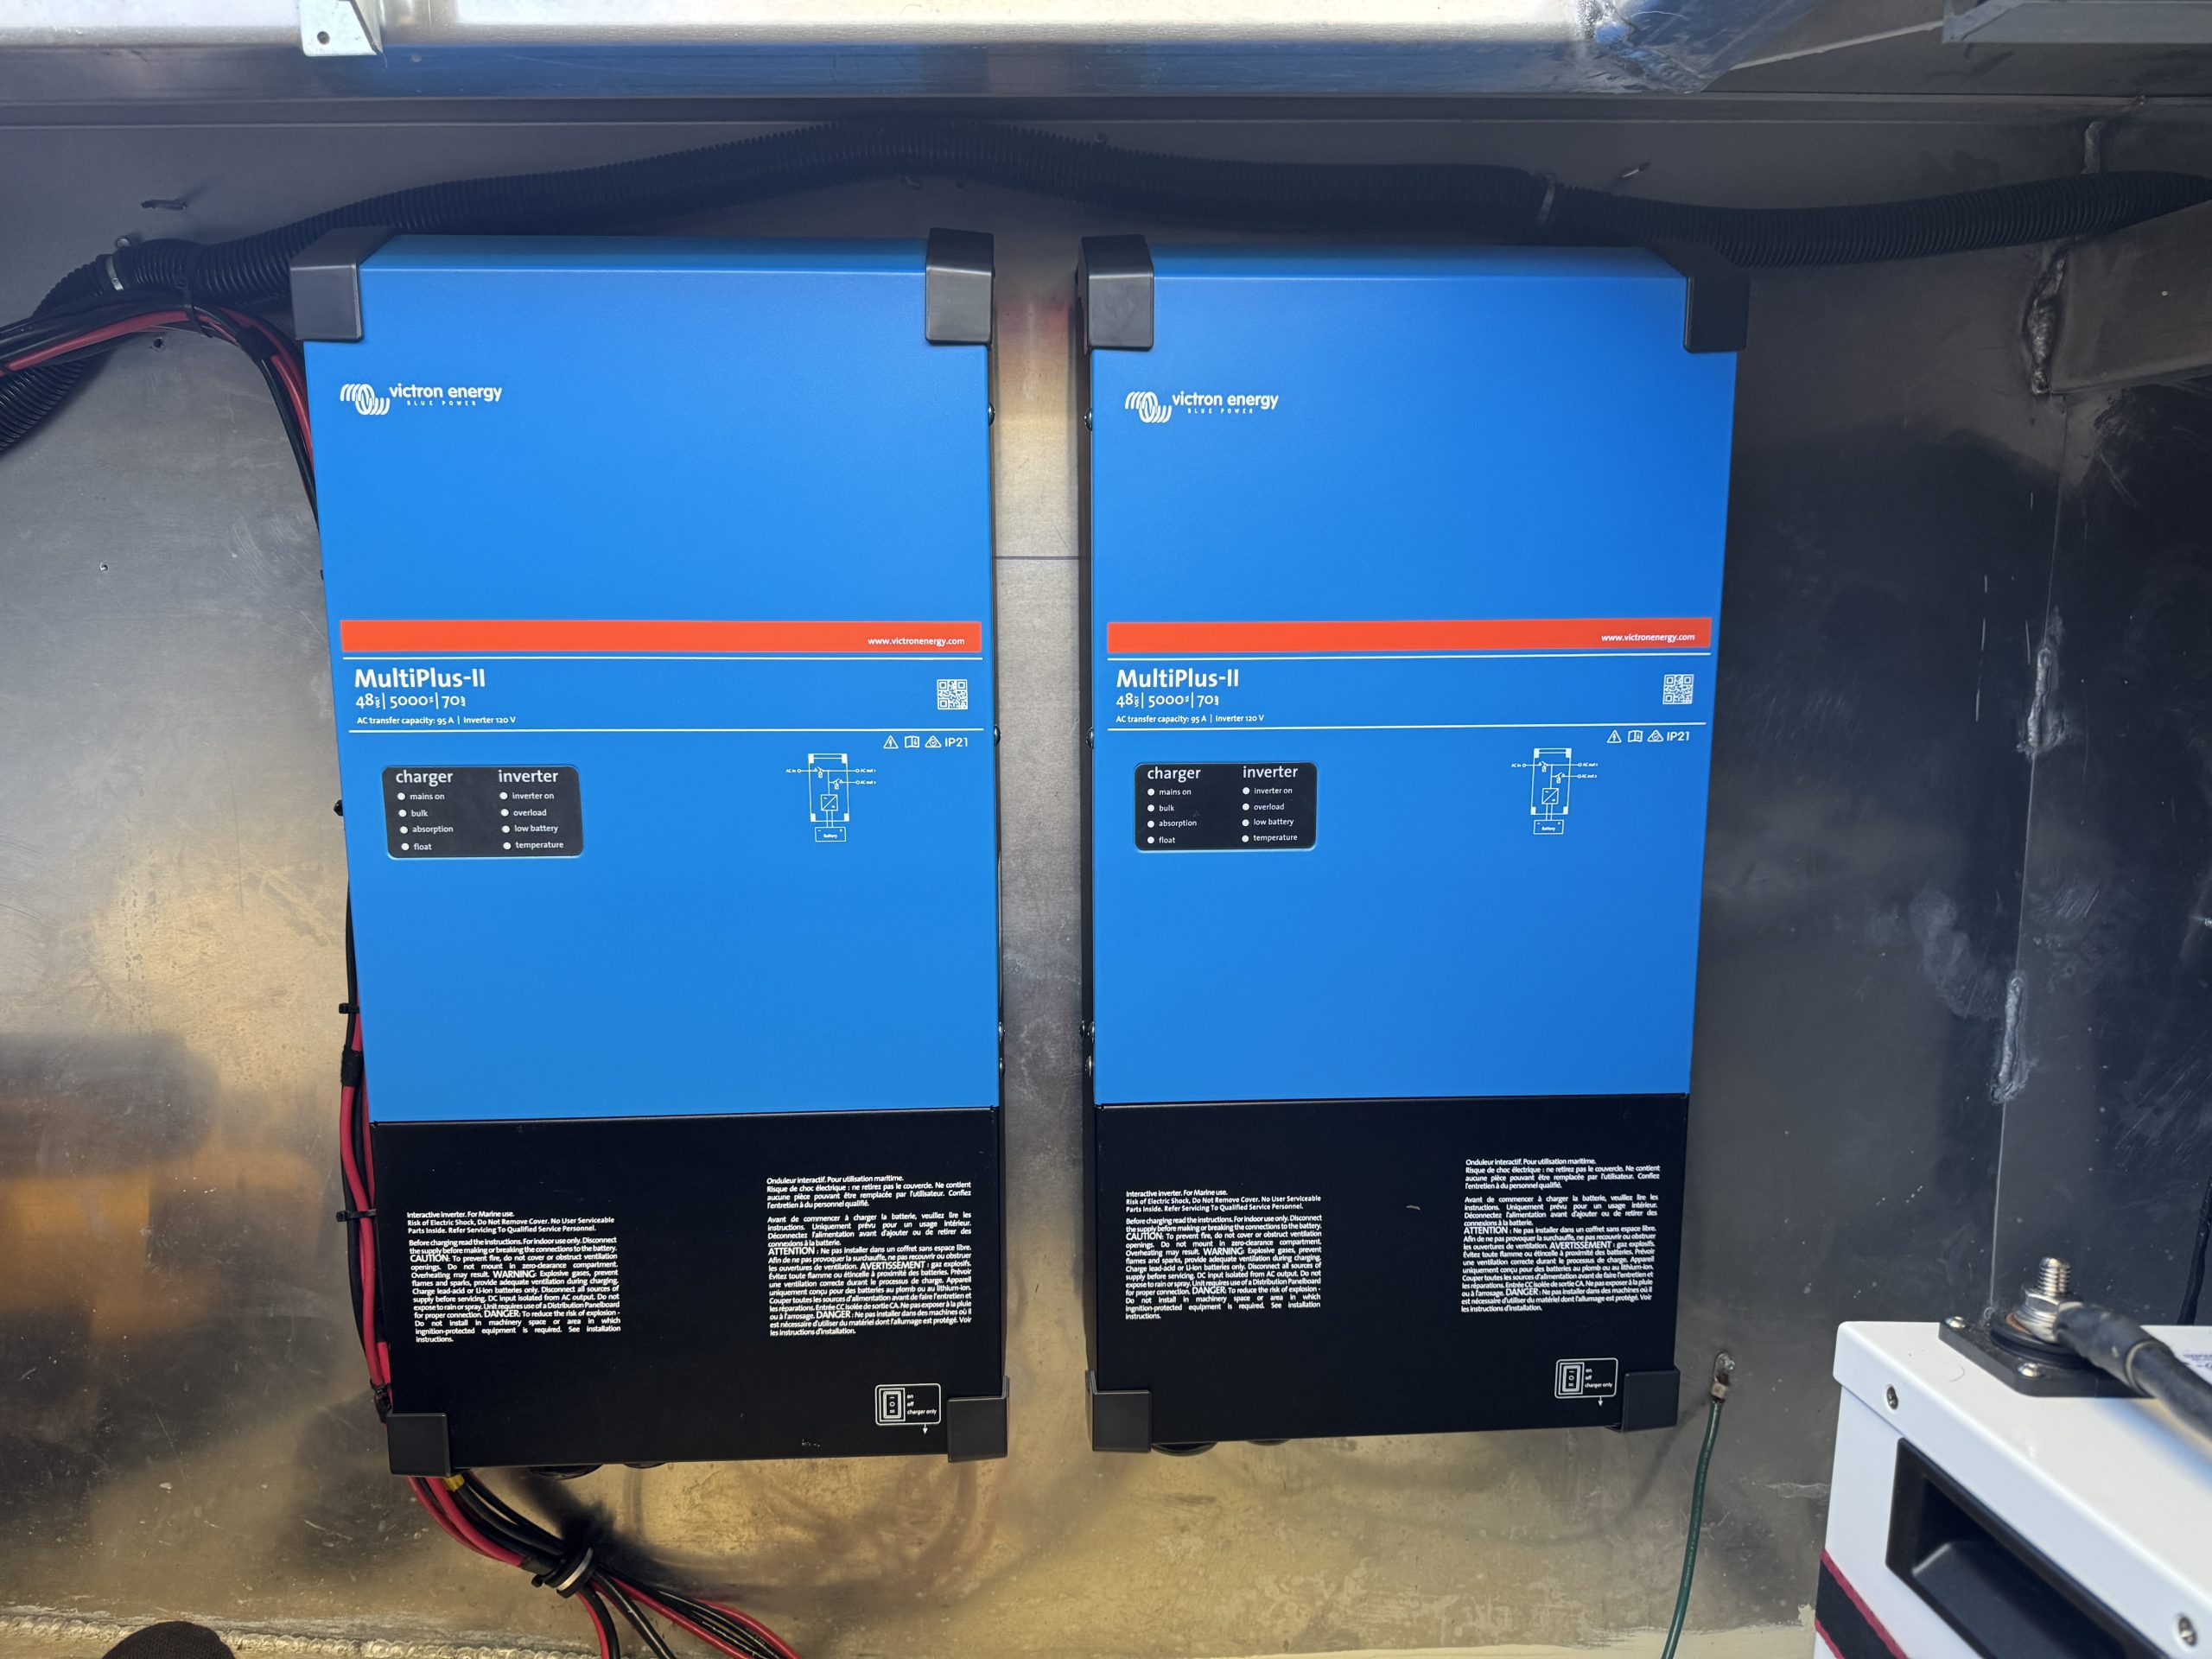
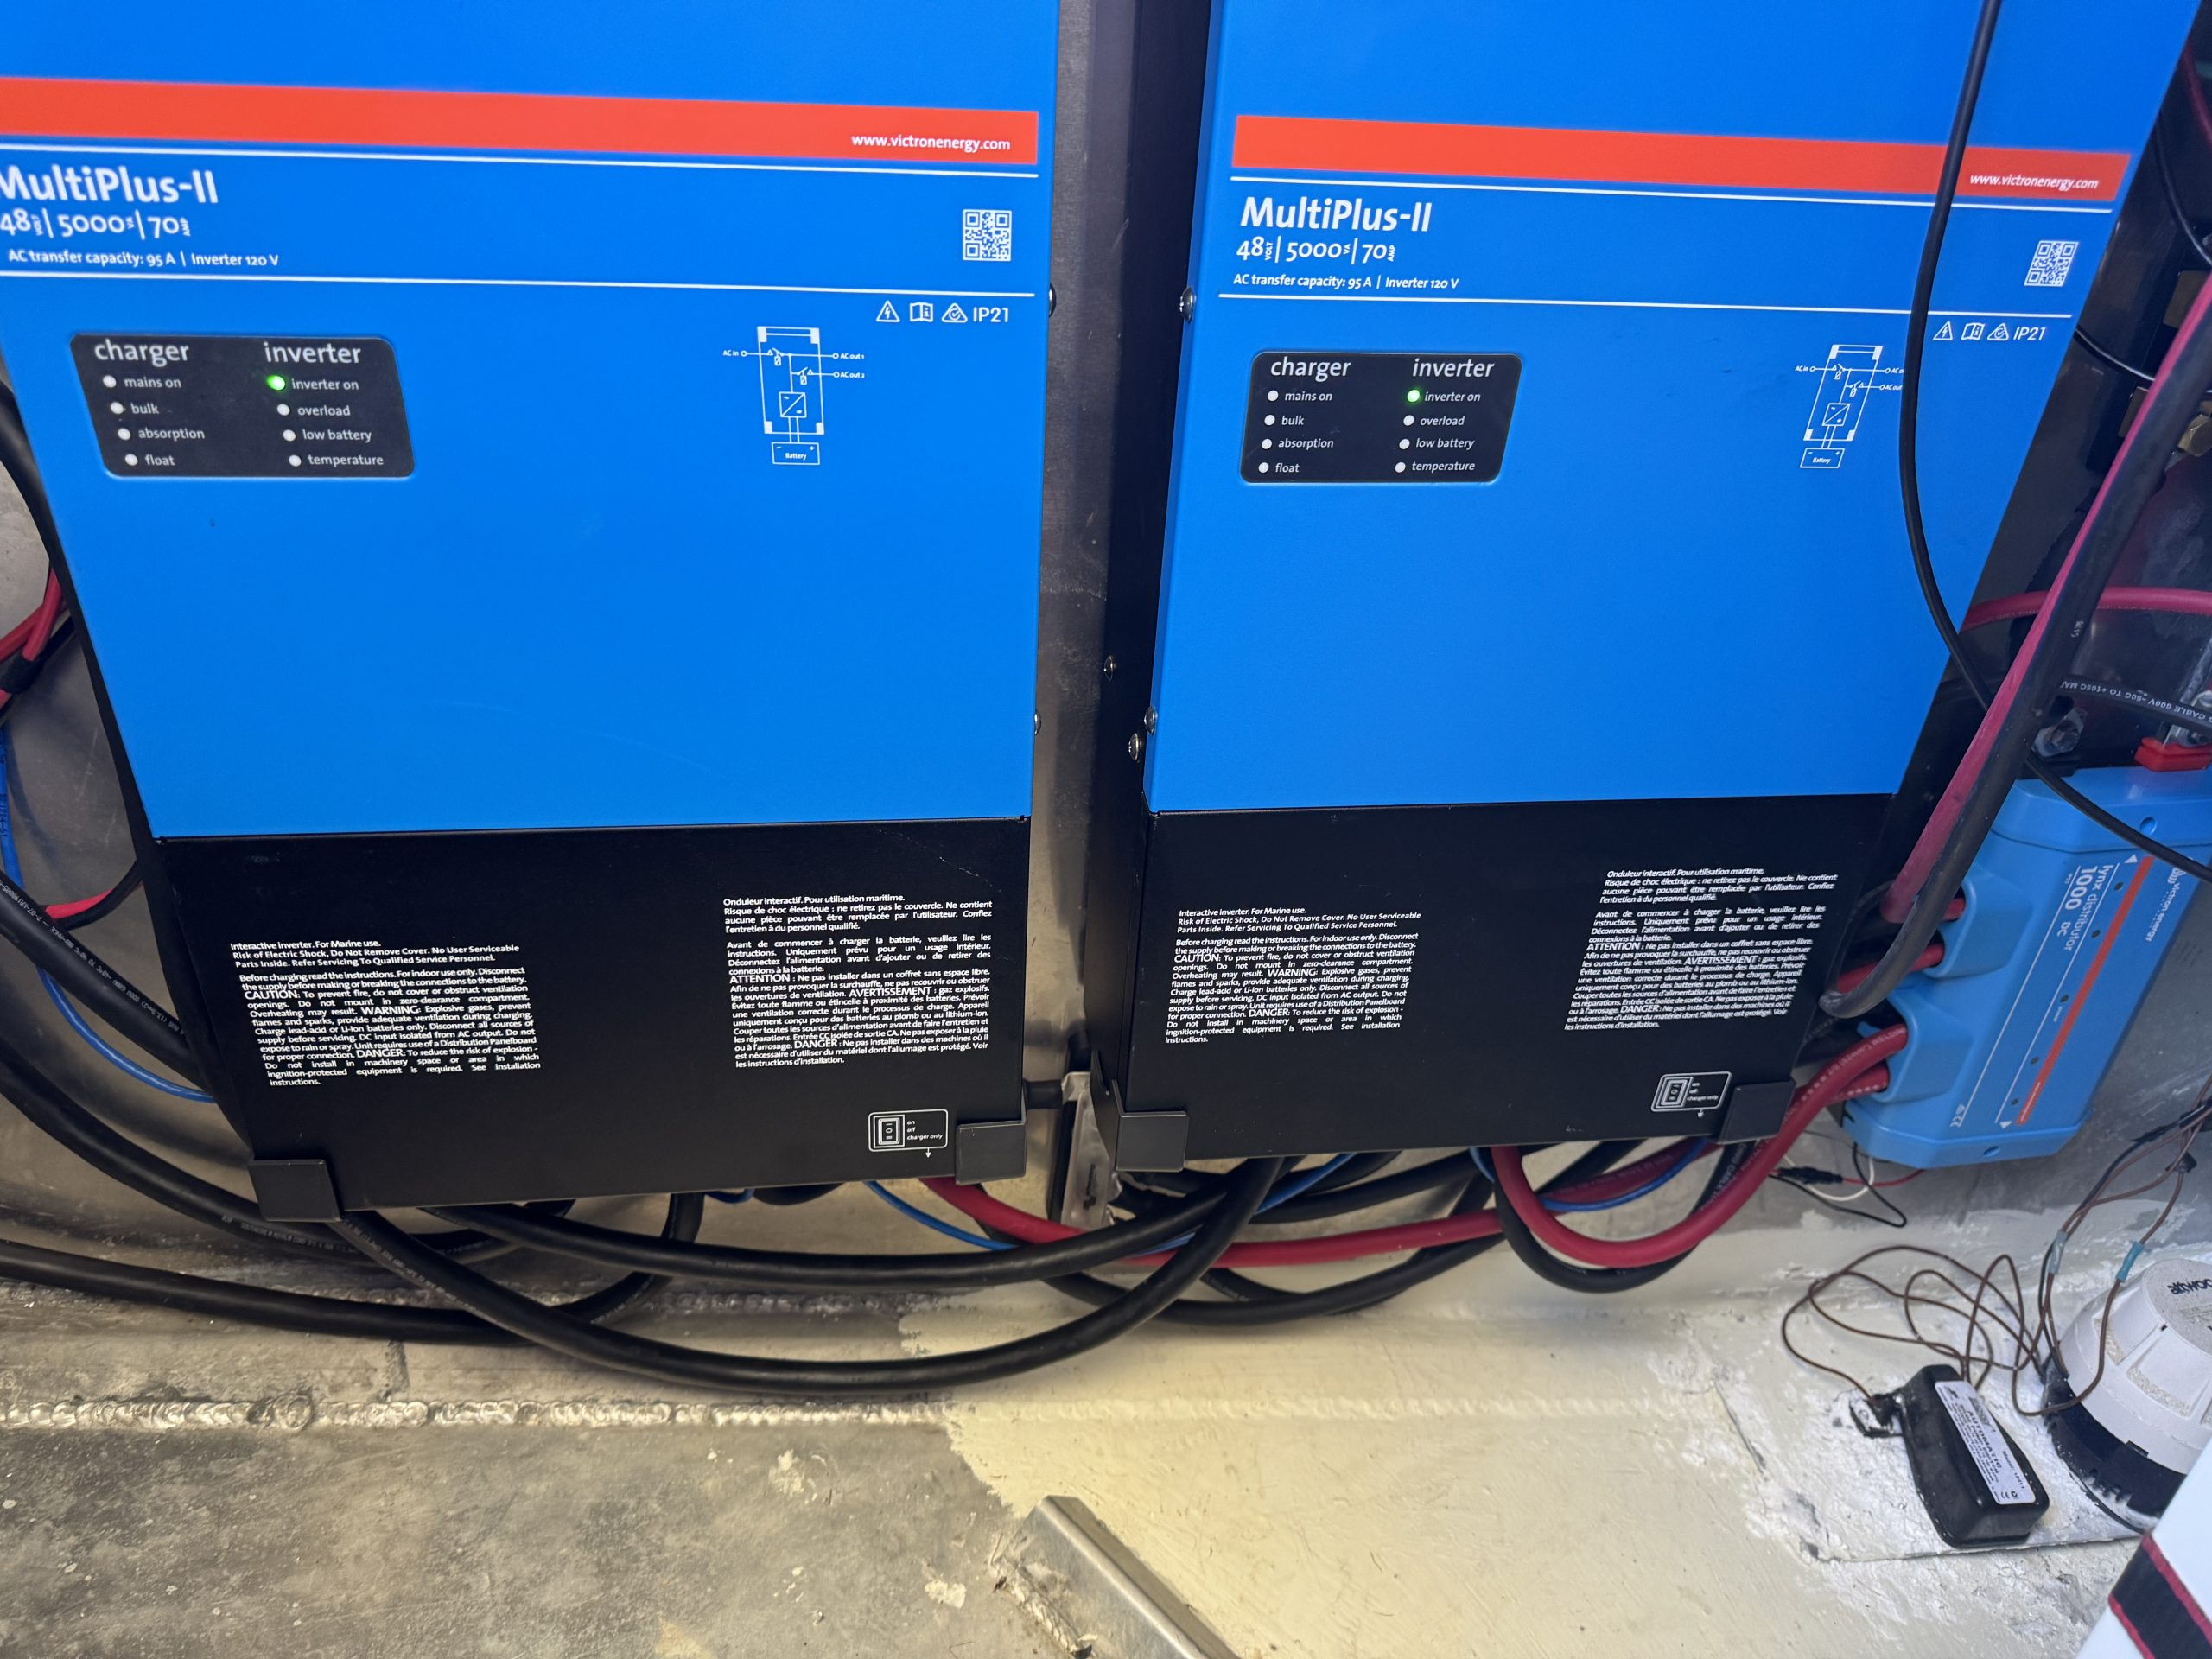
- 2 - Victron Multiplus II 48/5000/70-95 120V inverter chargers
- Victron VE Bus Smart Dongle
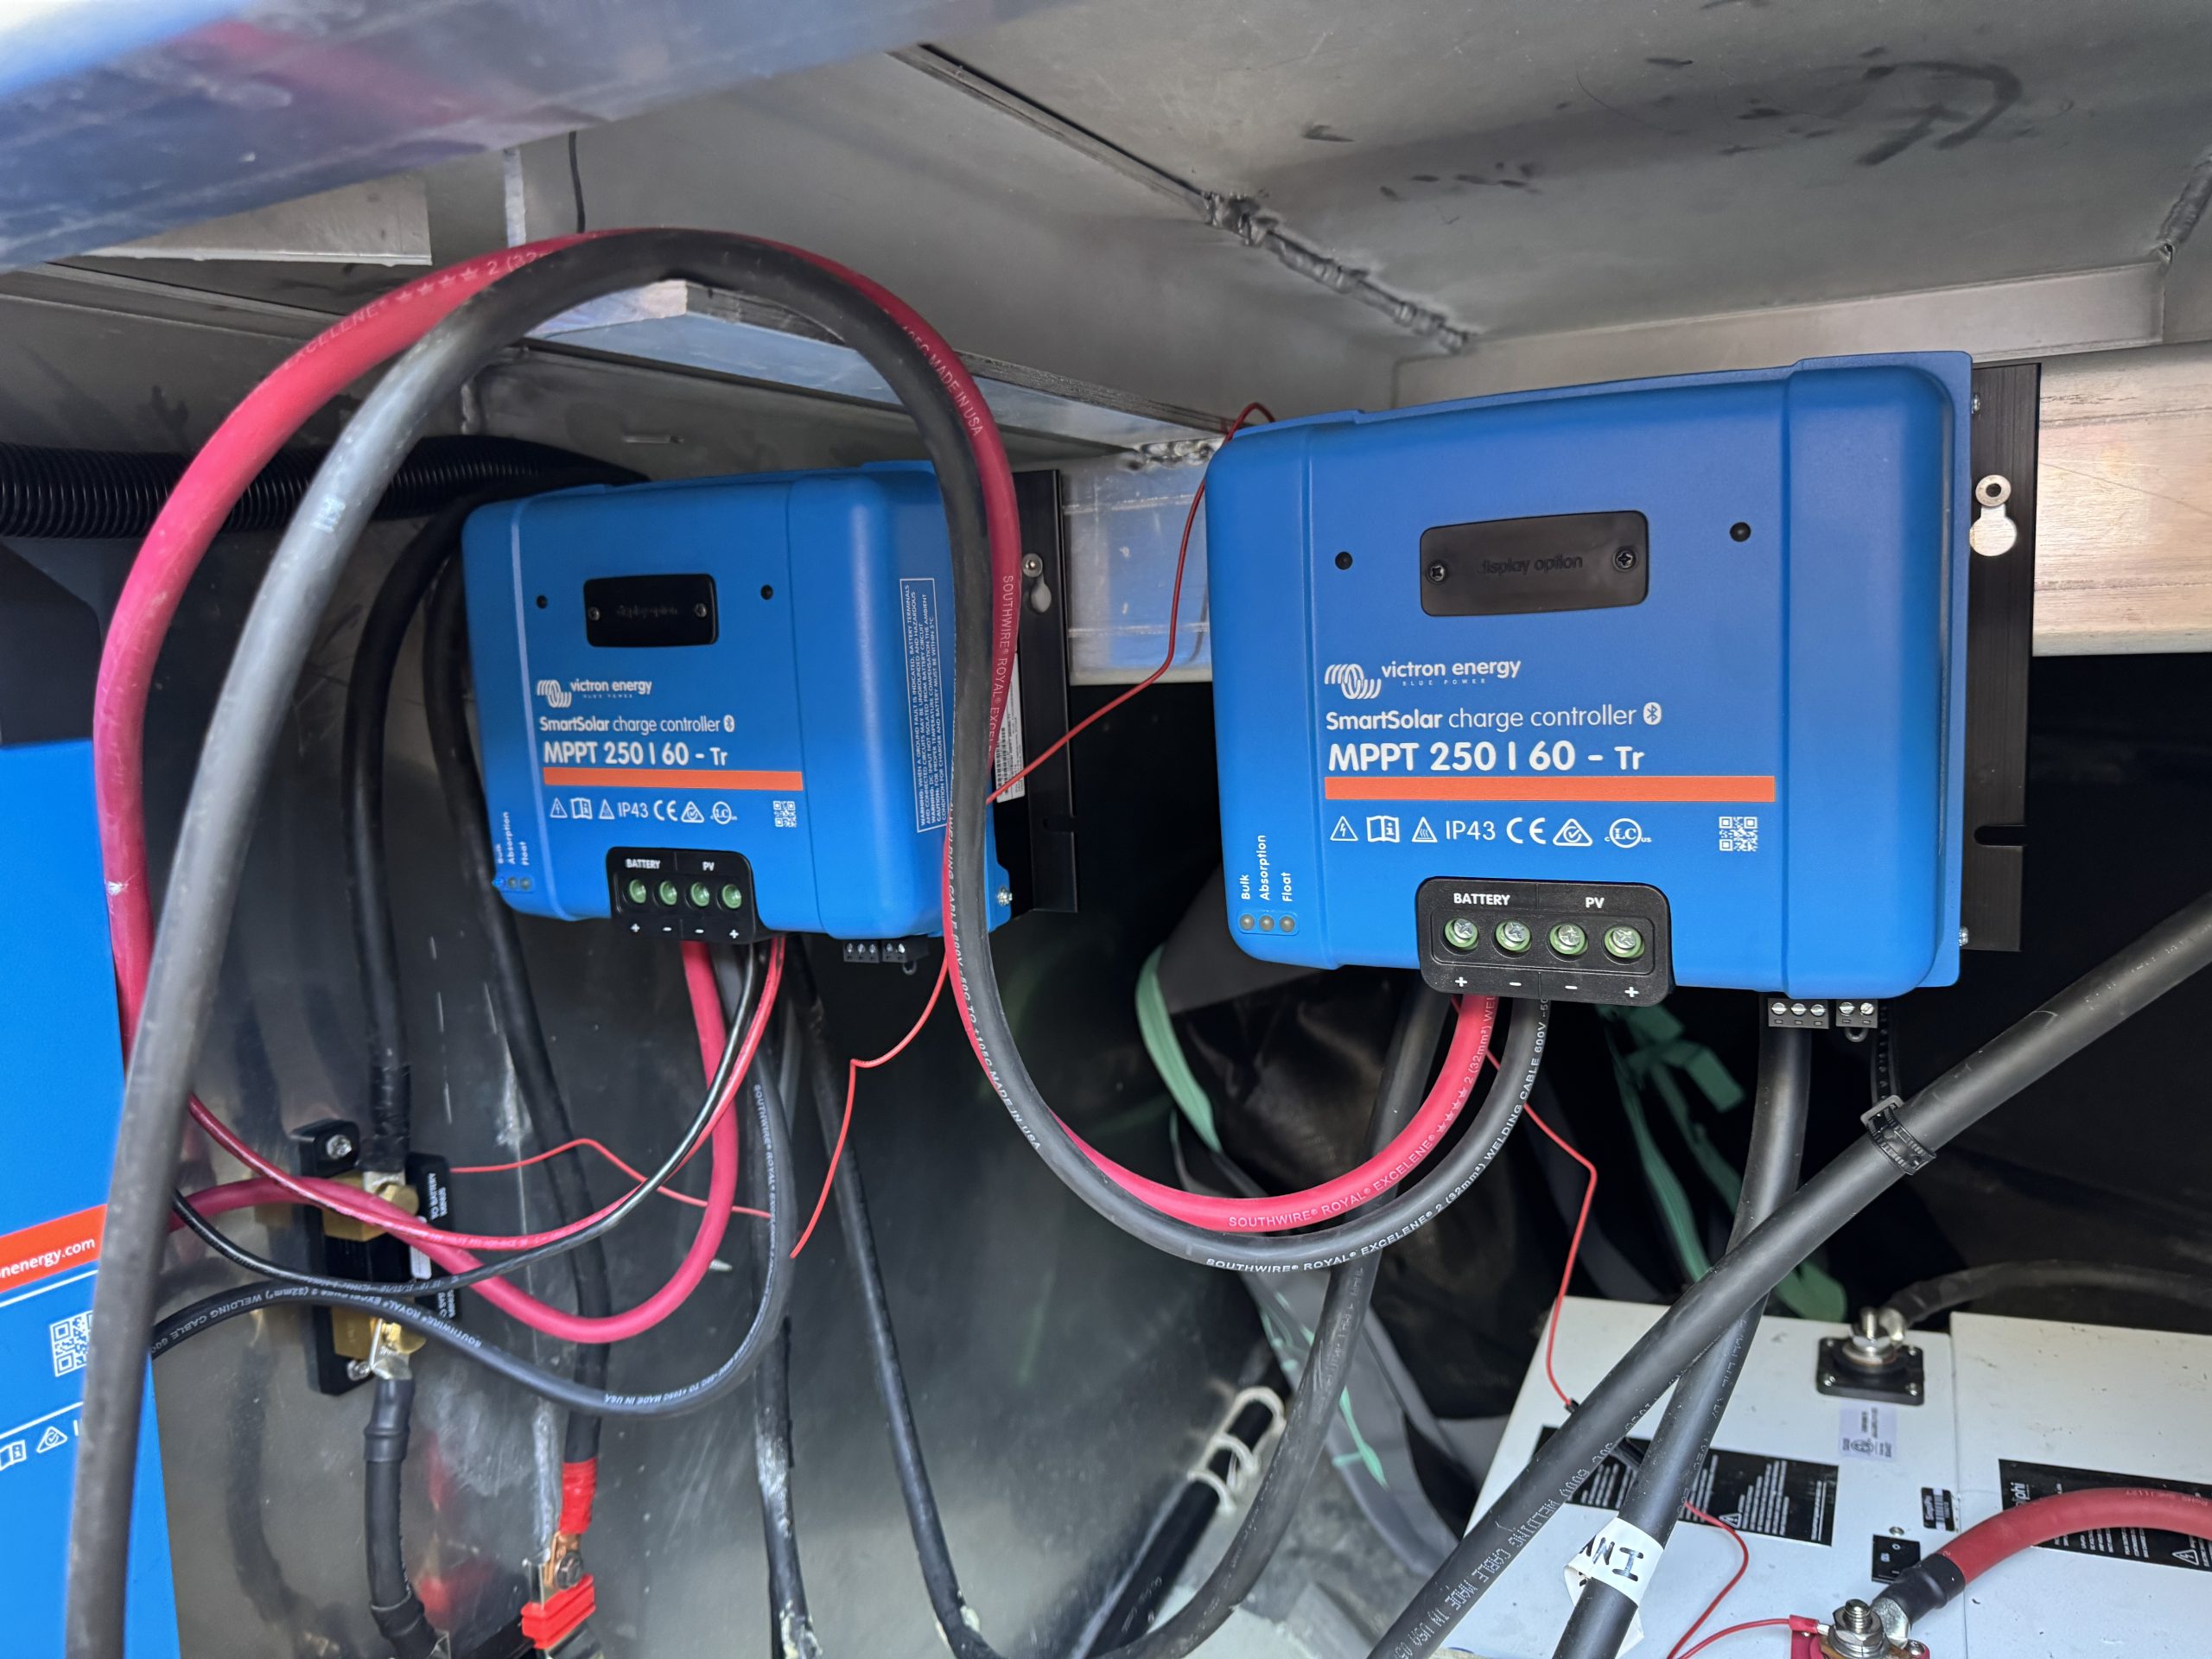
- 2 - Victron SmartSolar MPPT 250/60 Solar Controllers
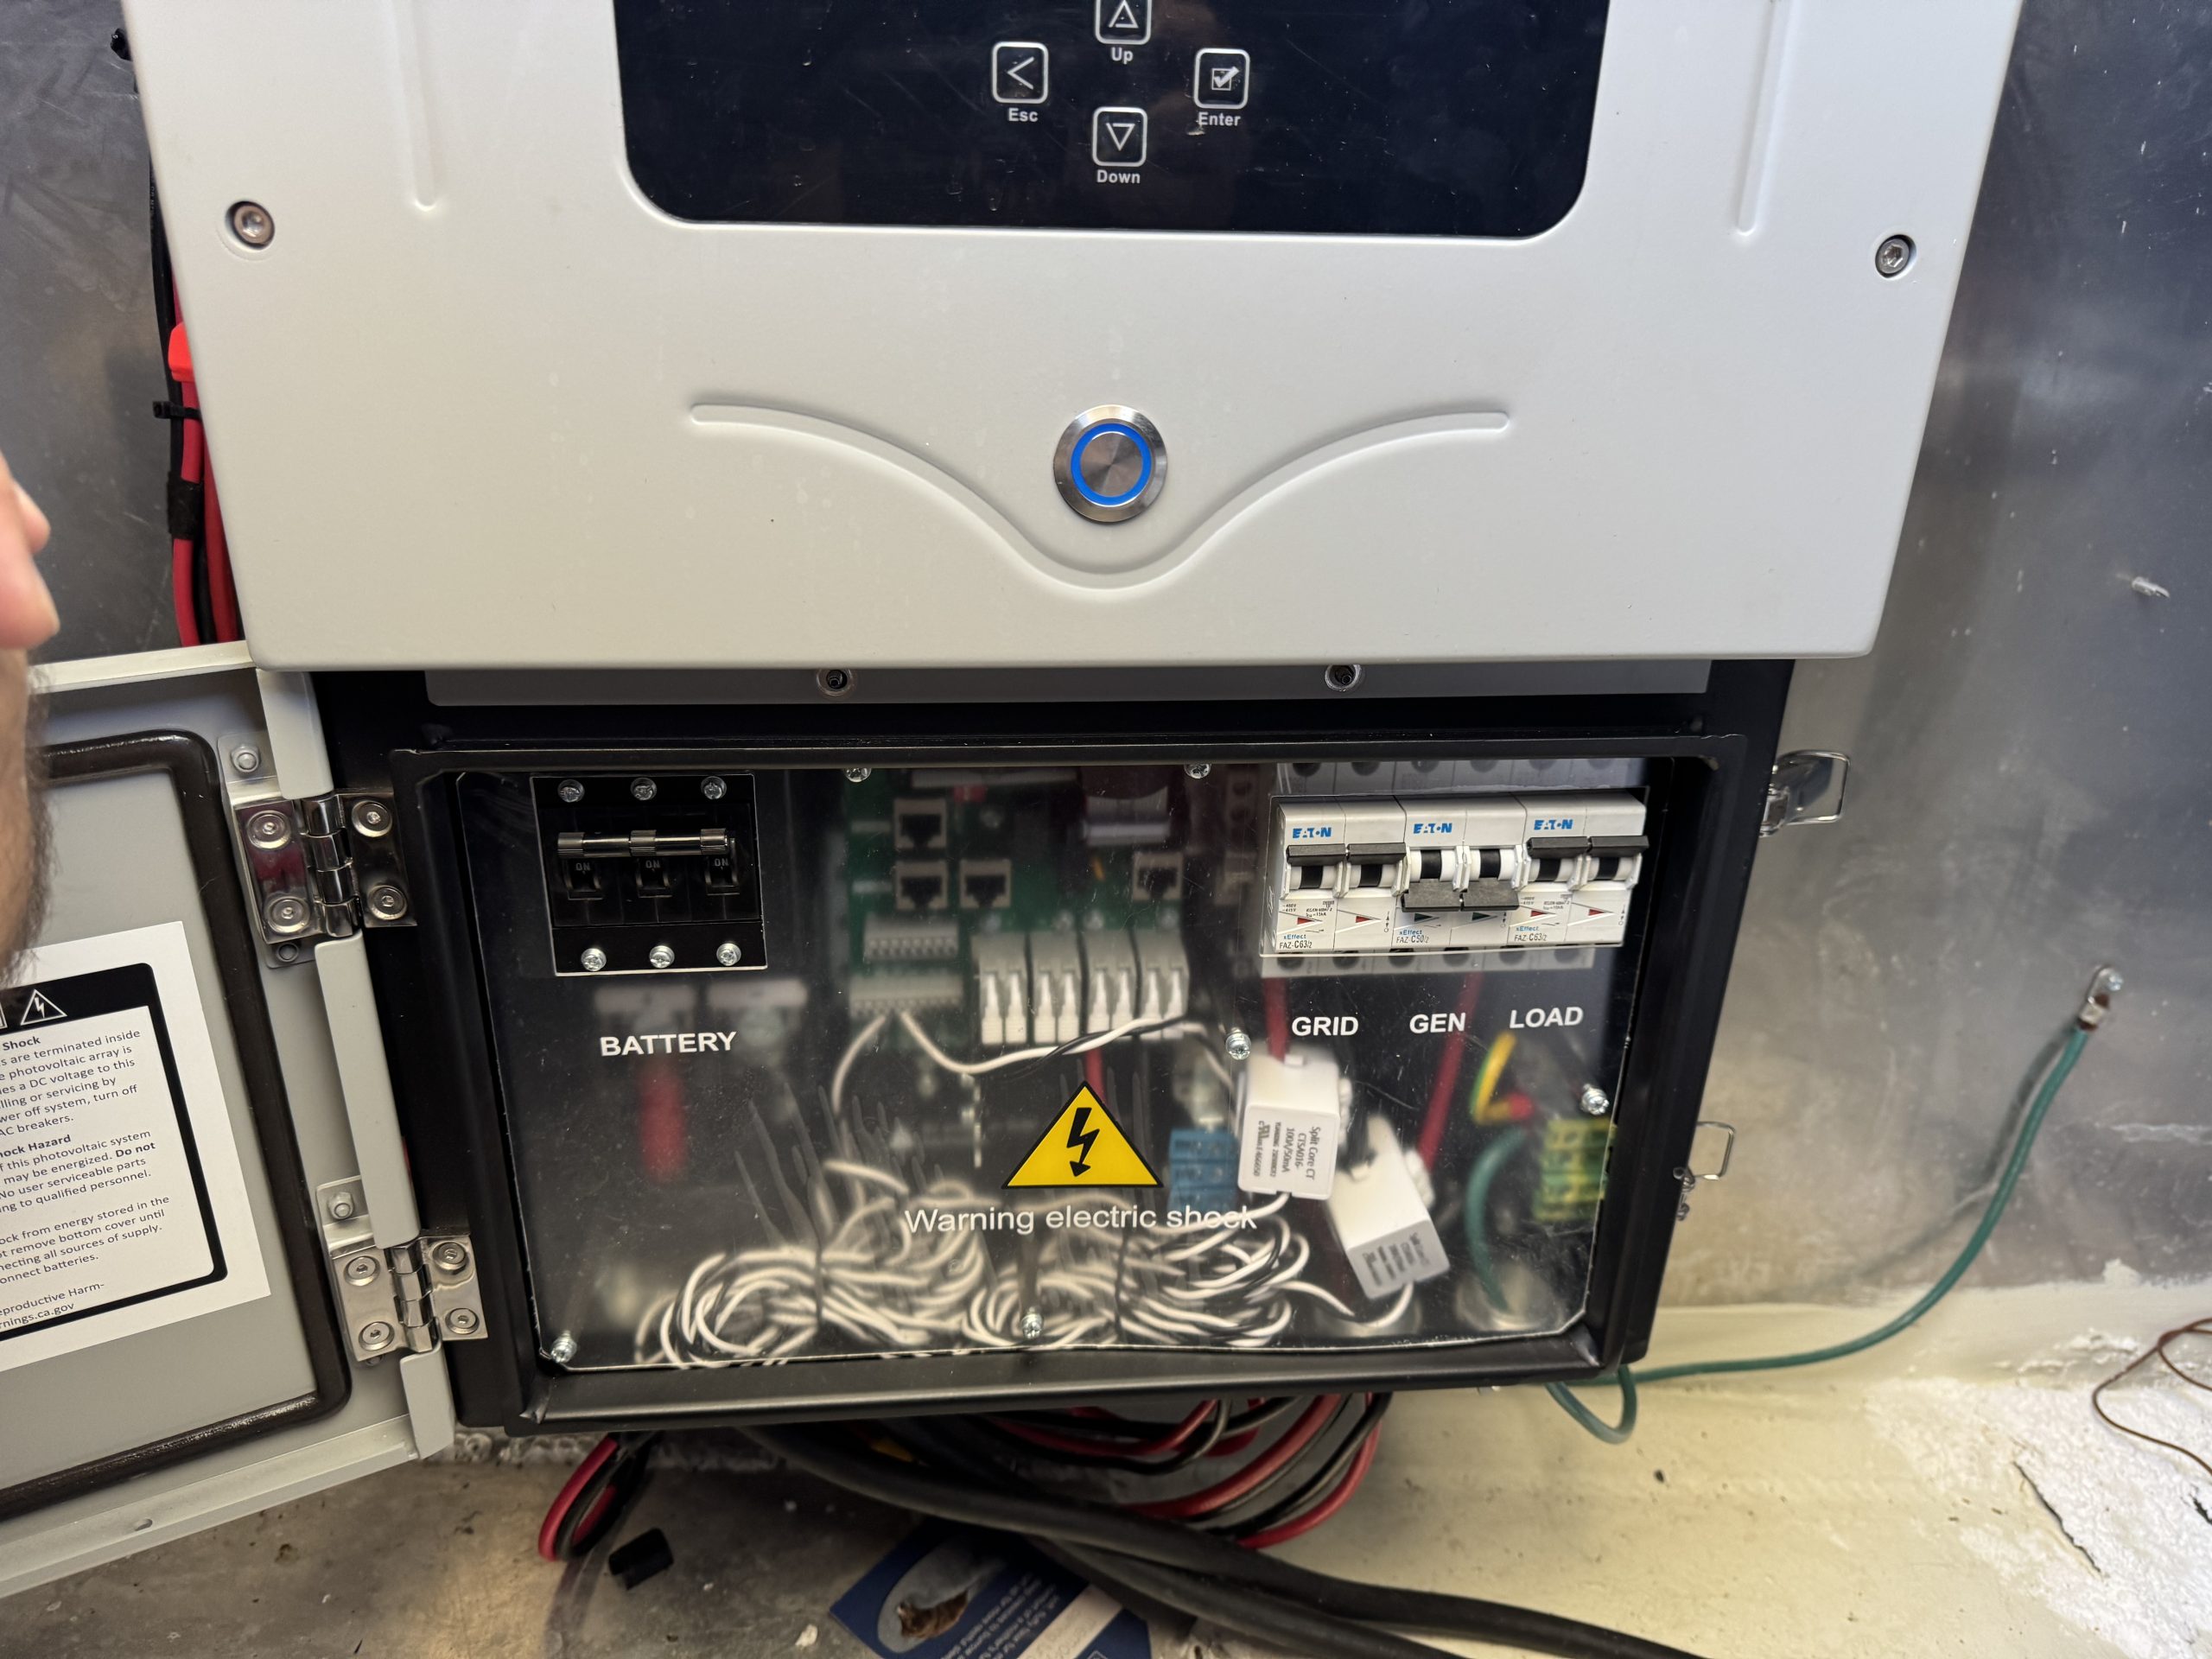
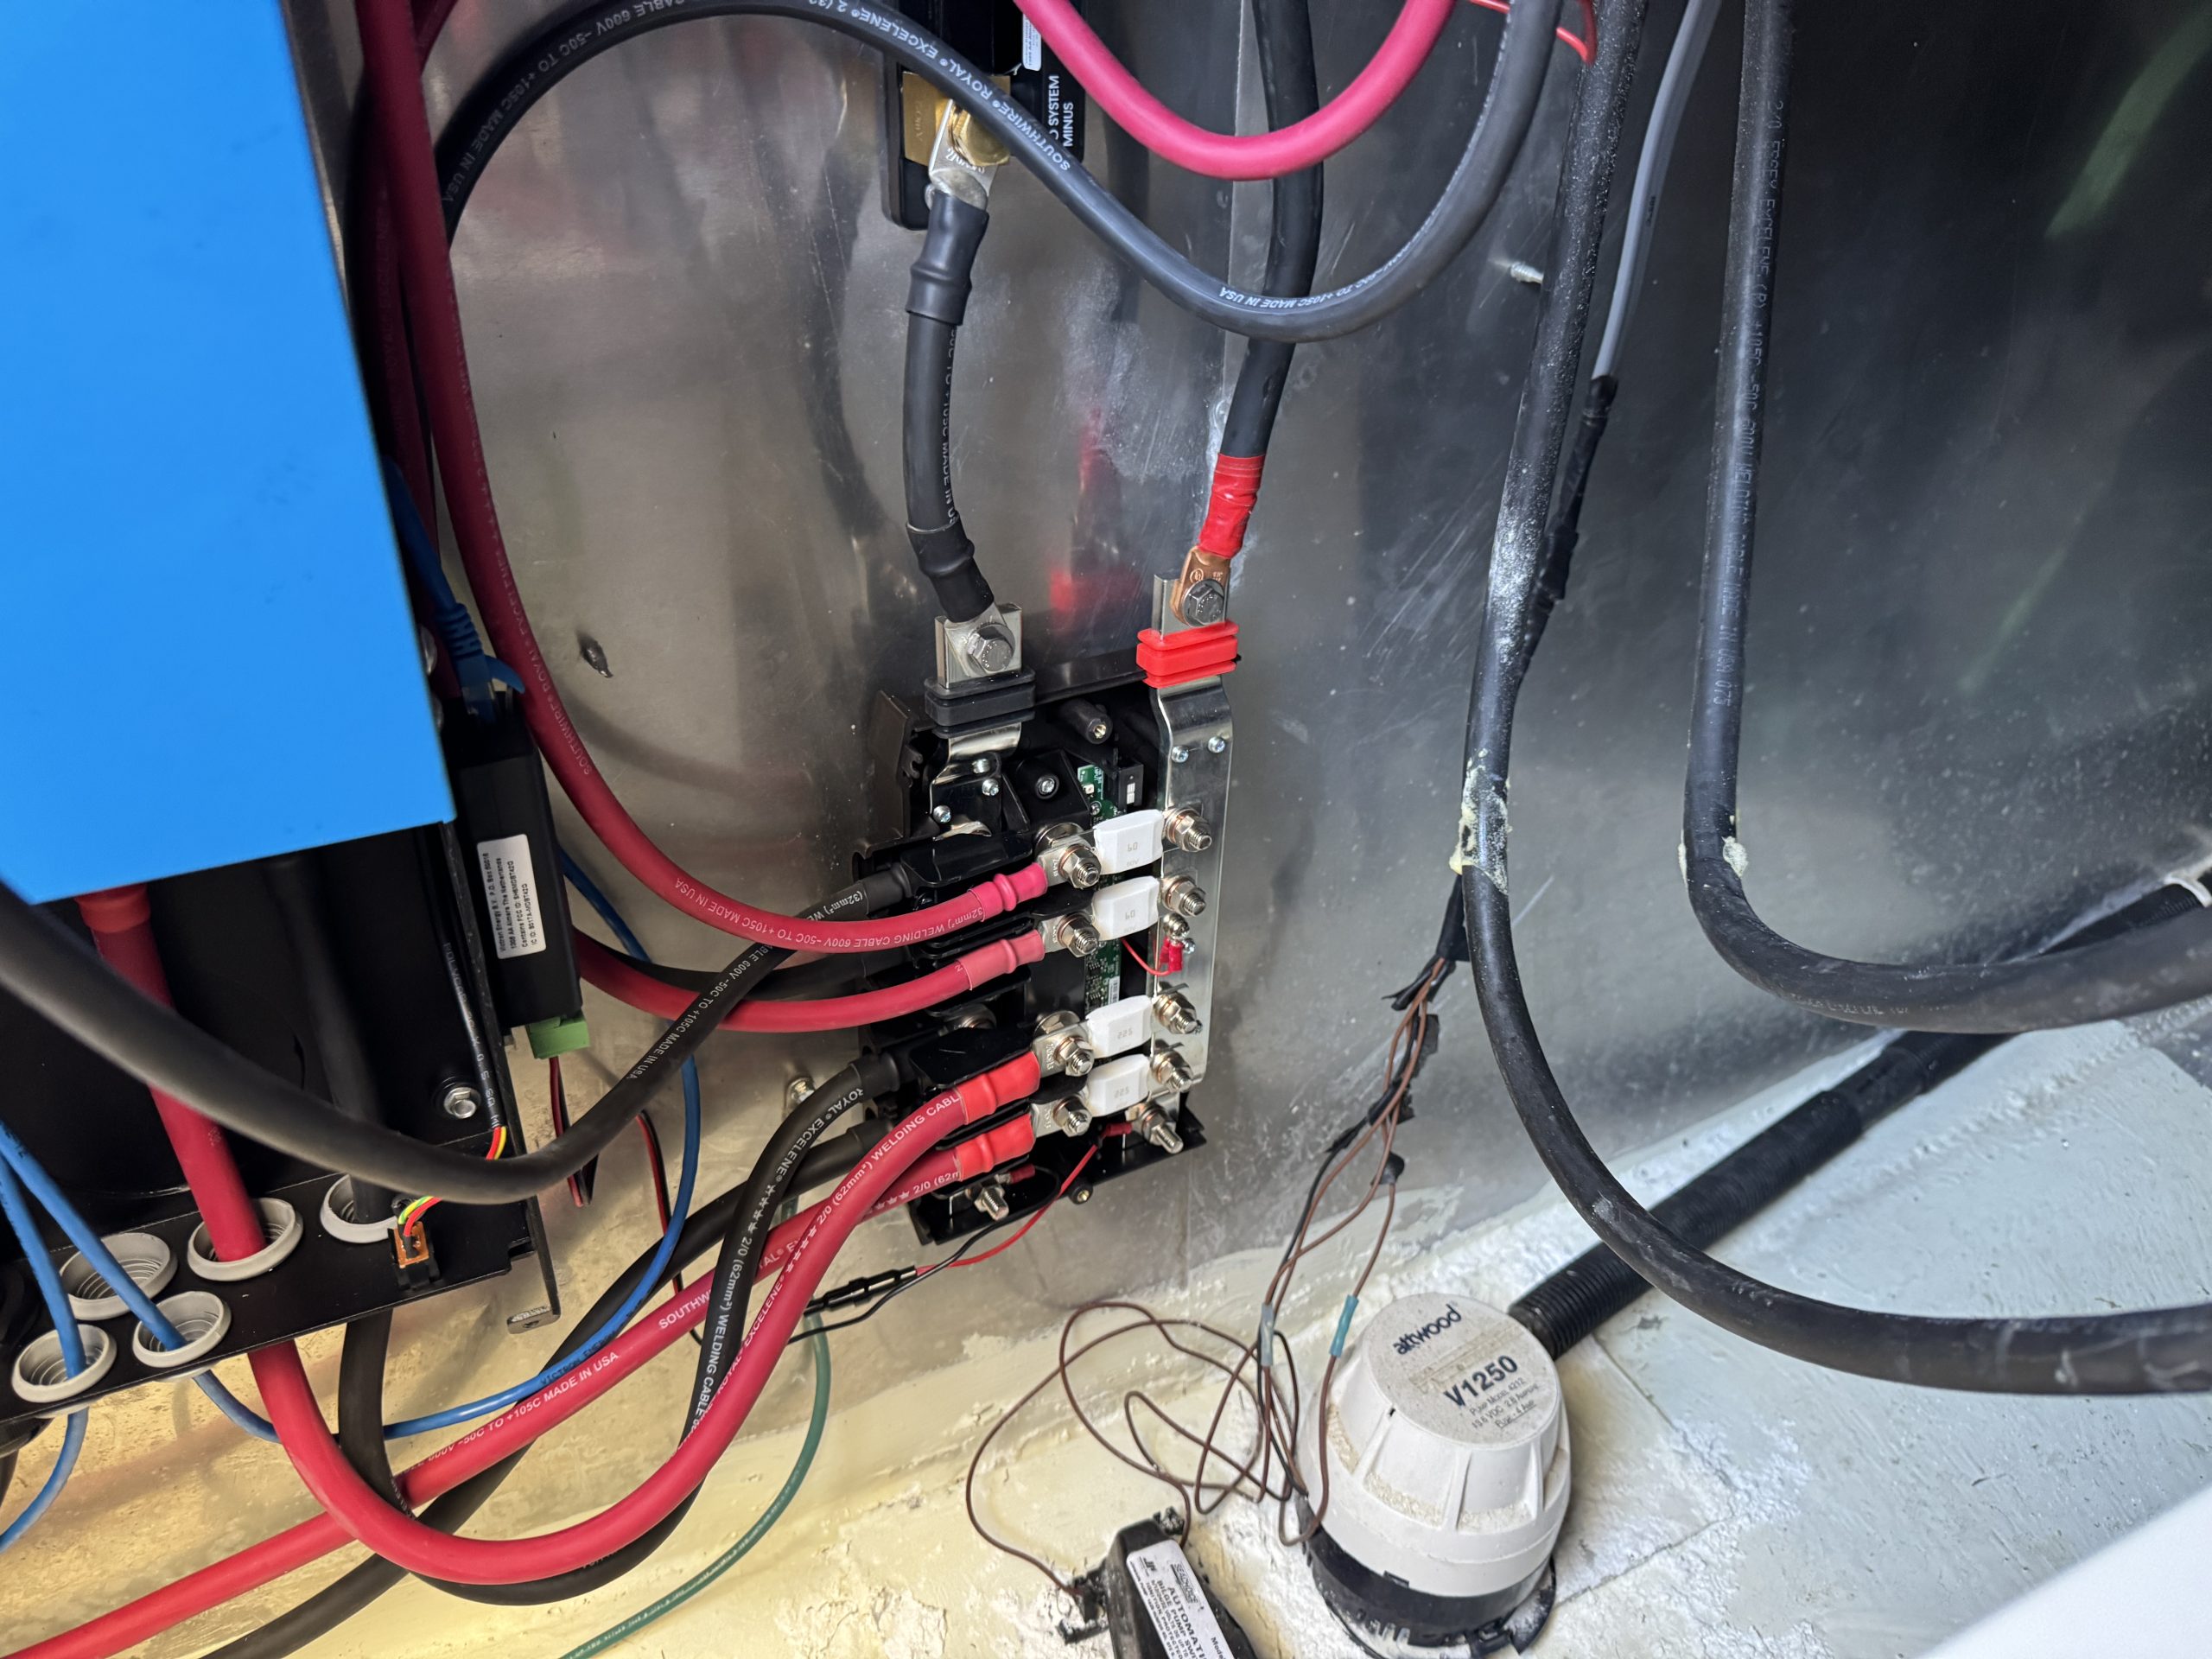
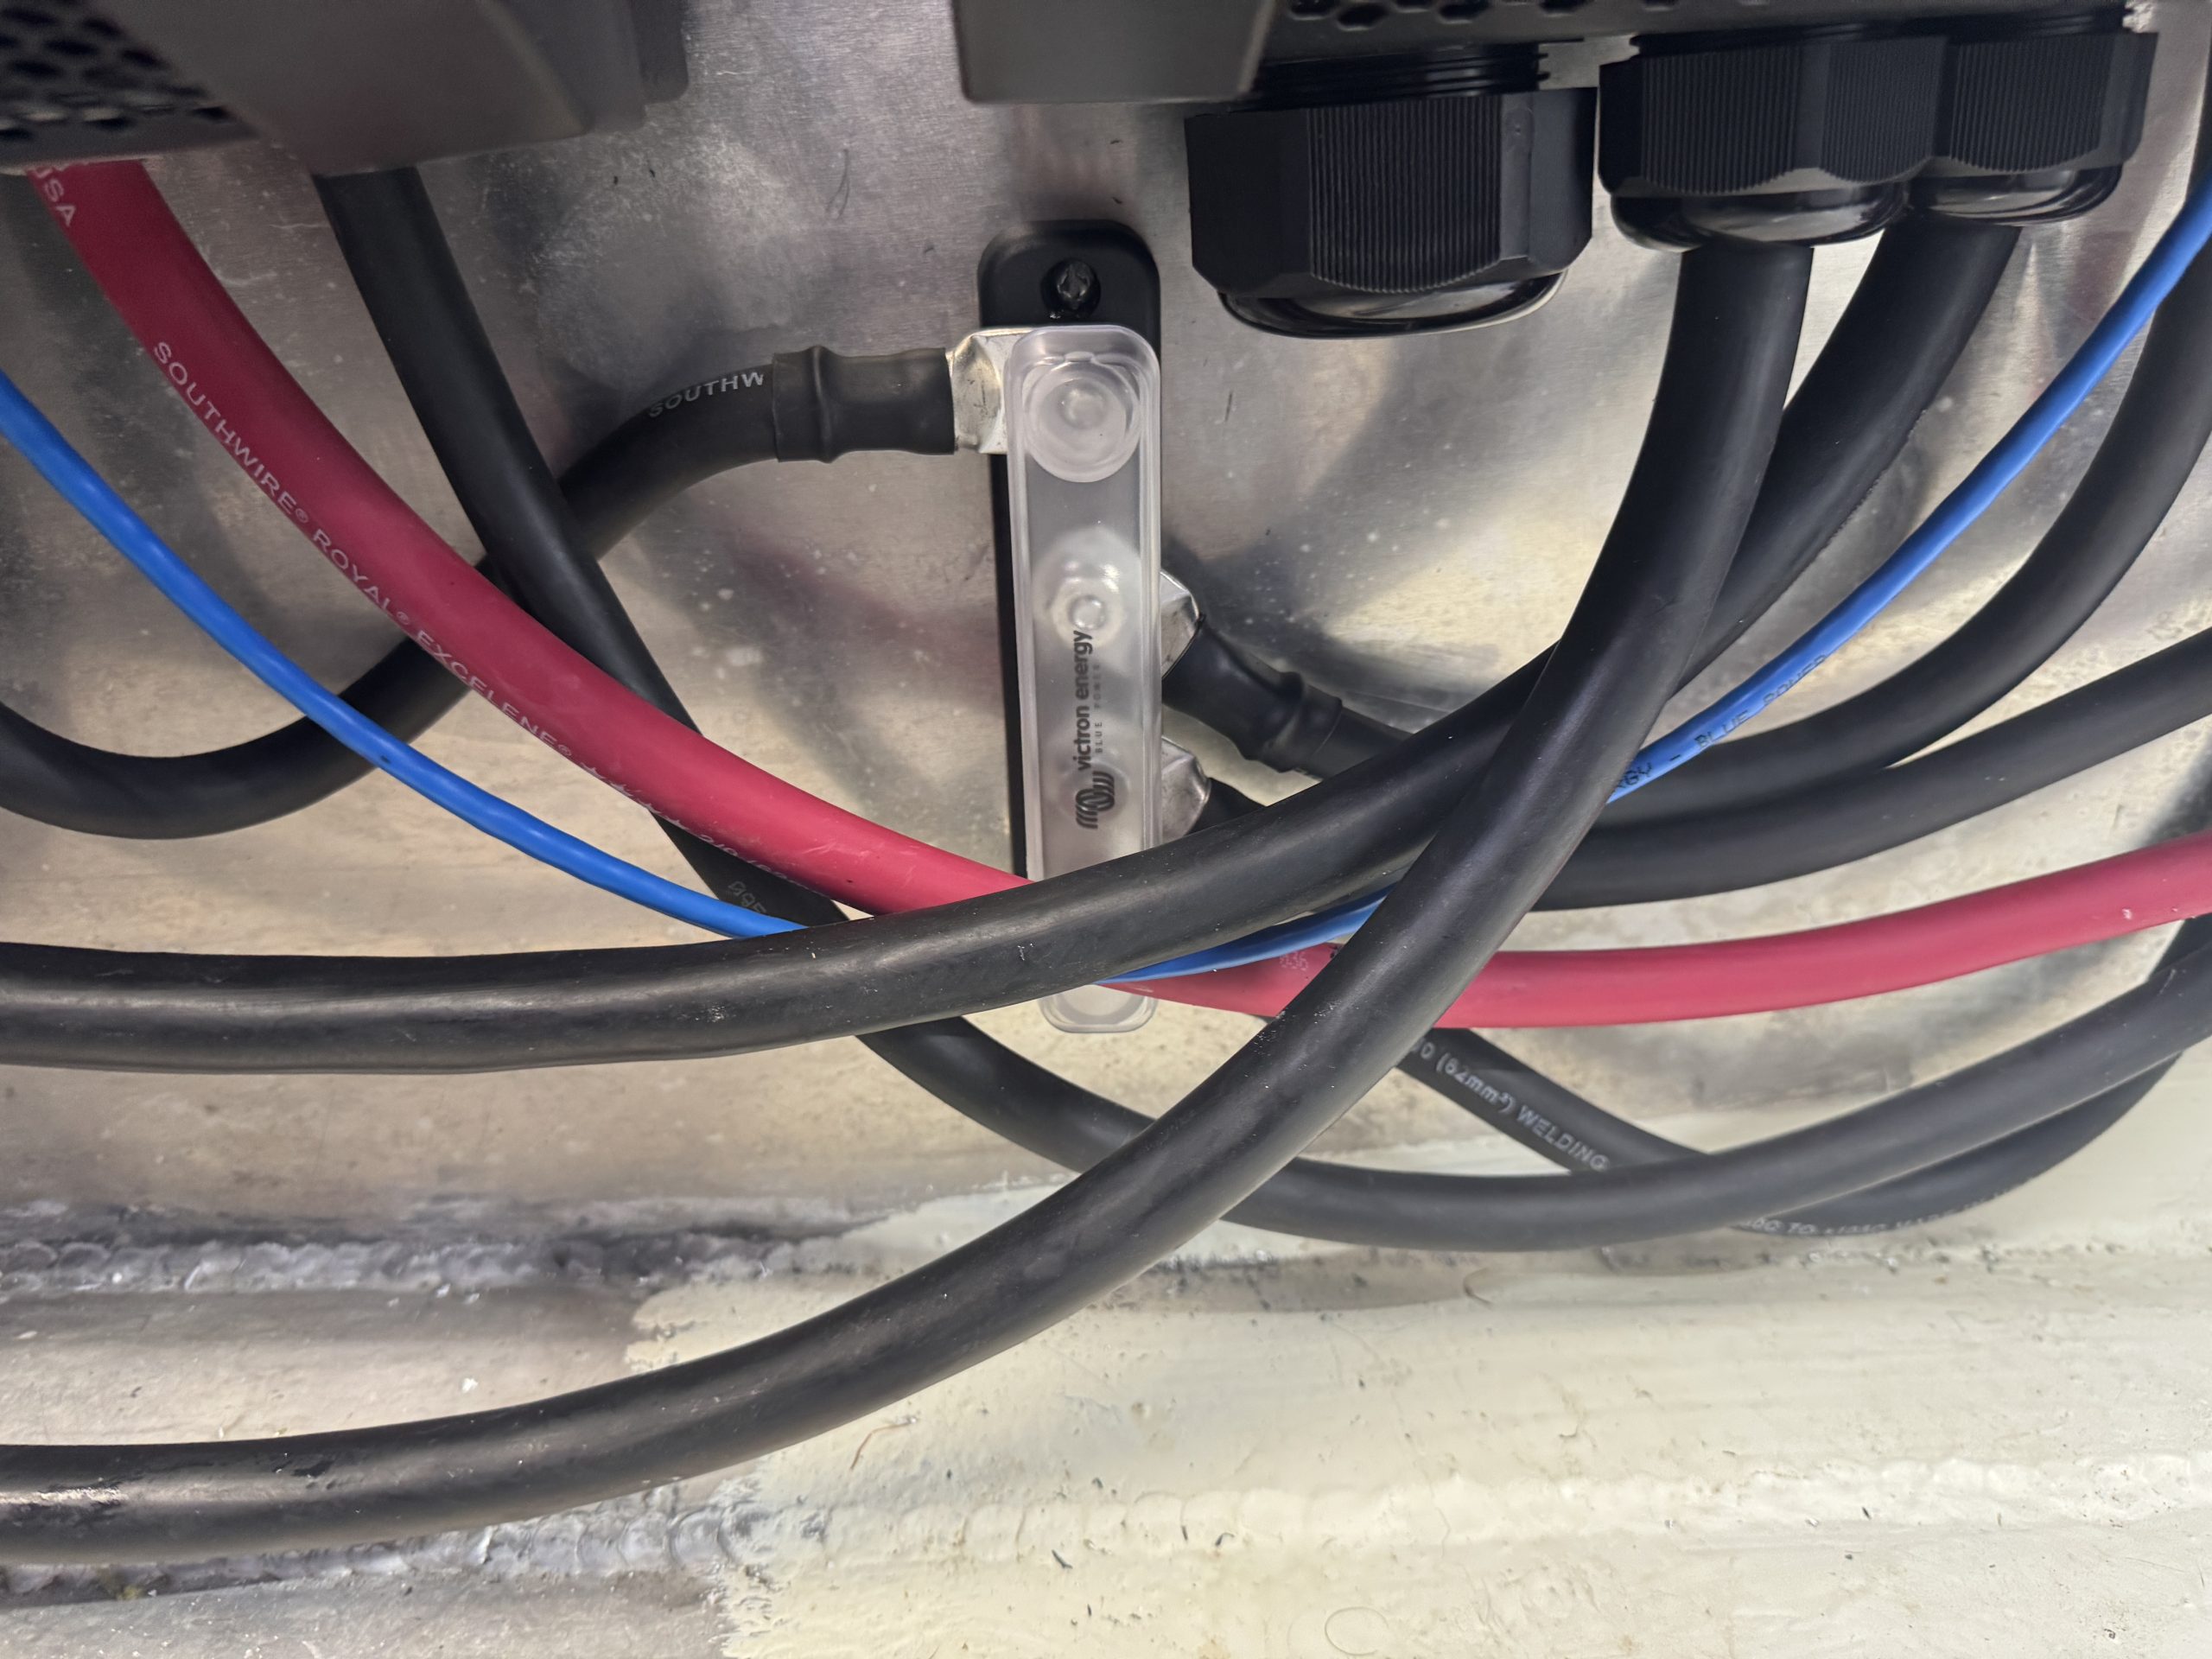
- Victron Energy 500 Amp SmartShunt
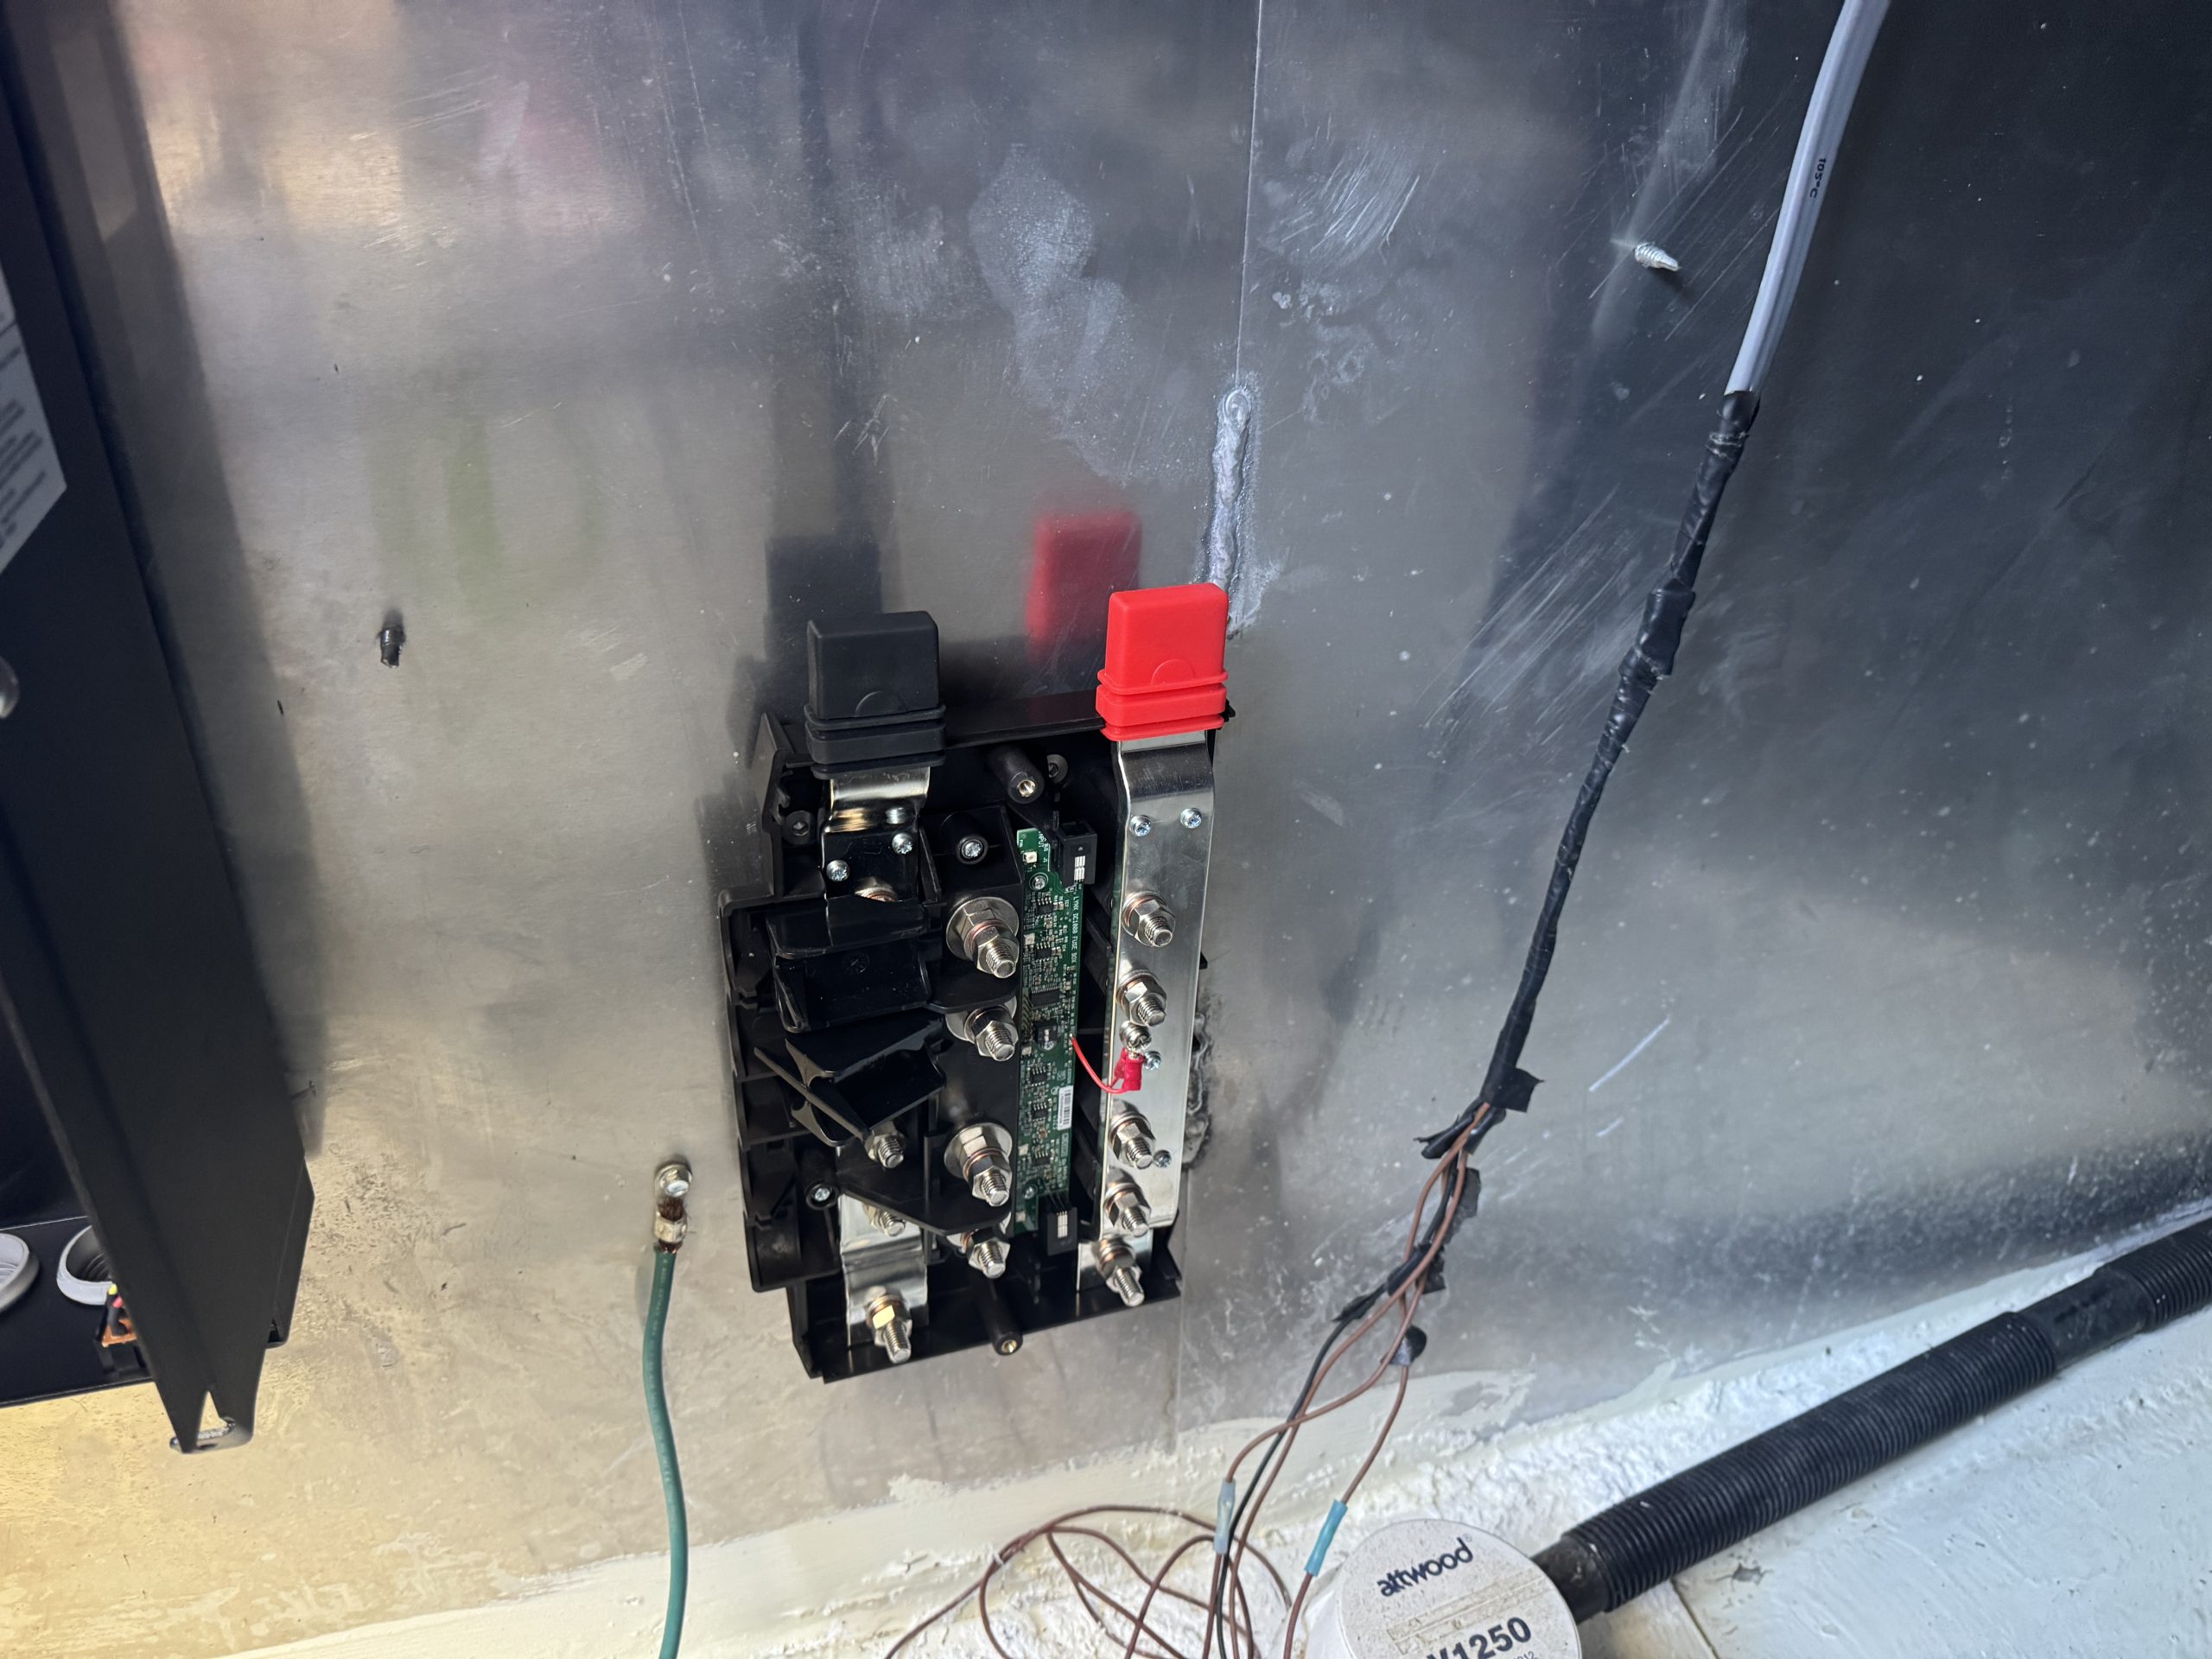
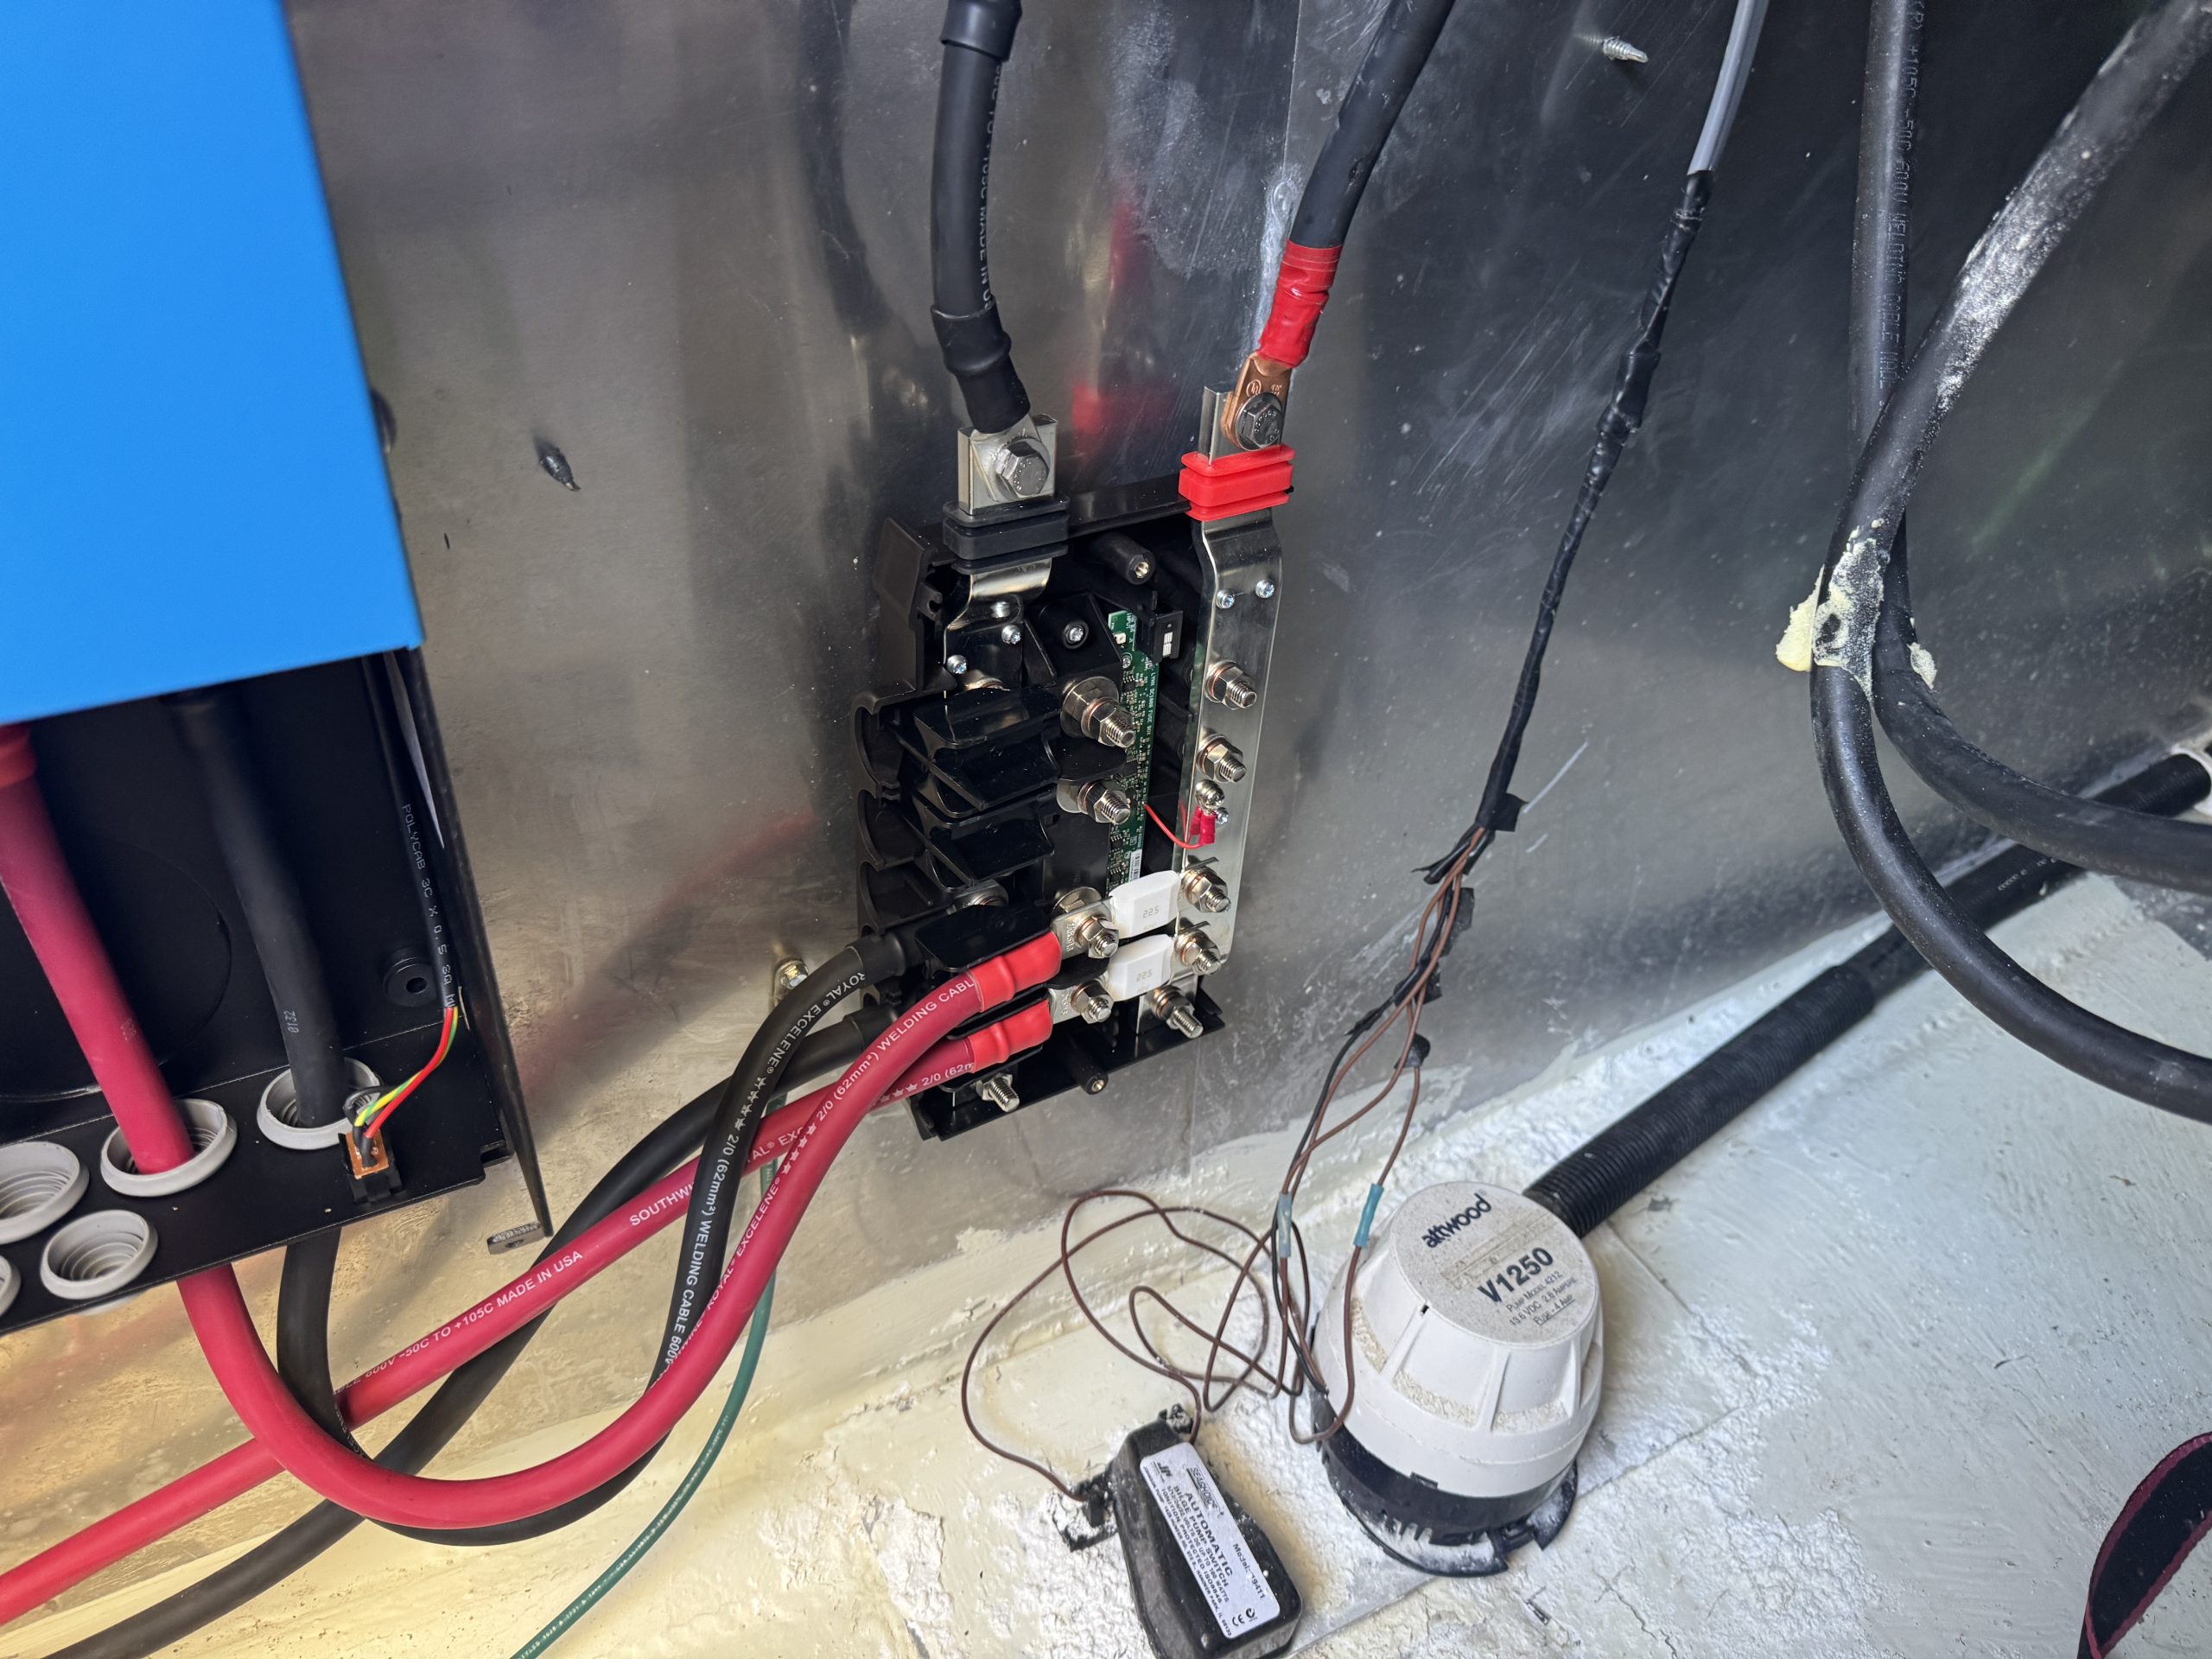
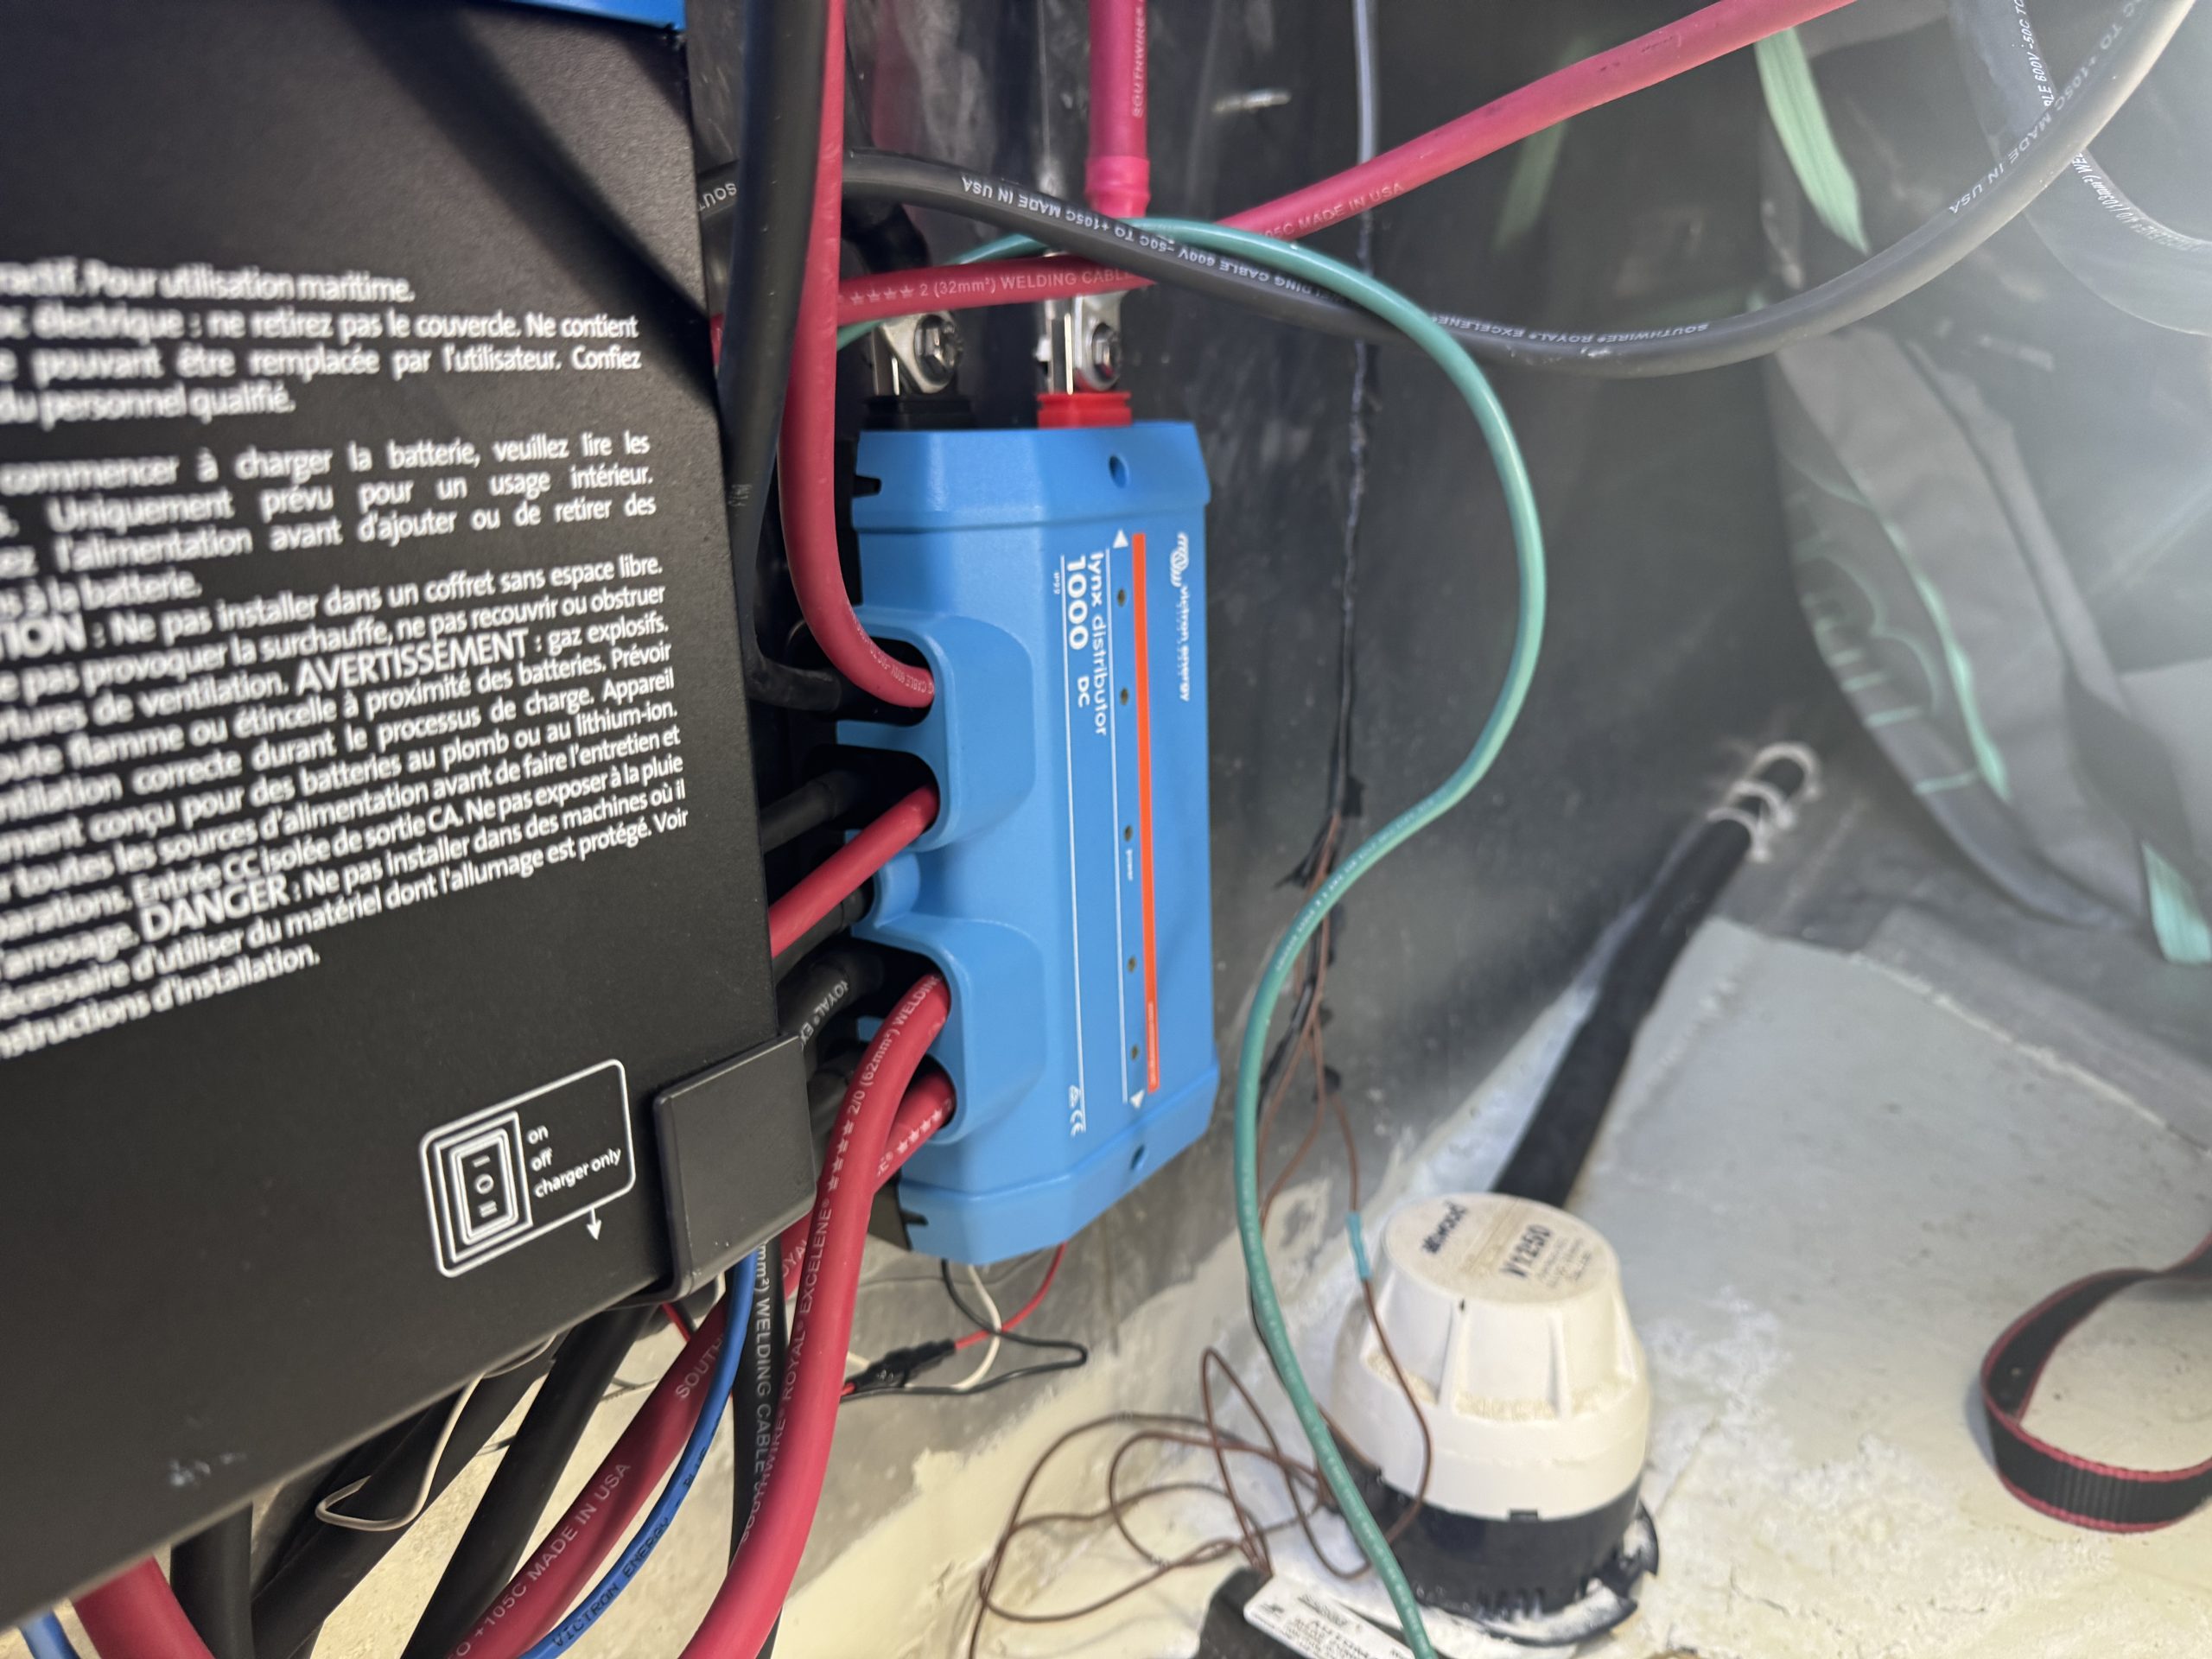
- Victron Lynx Distributor
- Victron Ceramic Mega Fuses (60A & 225A)
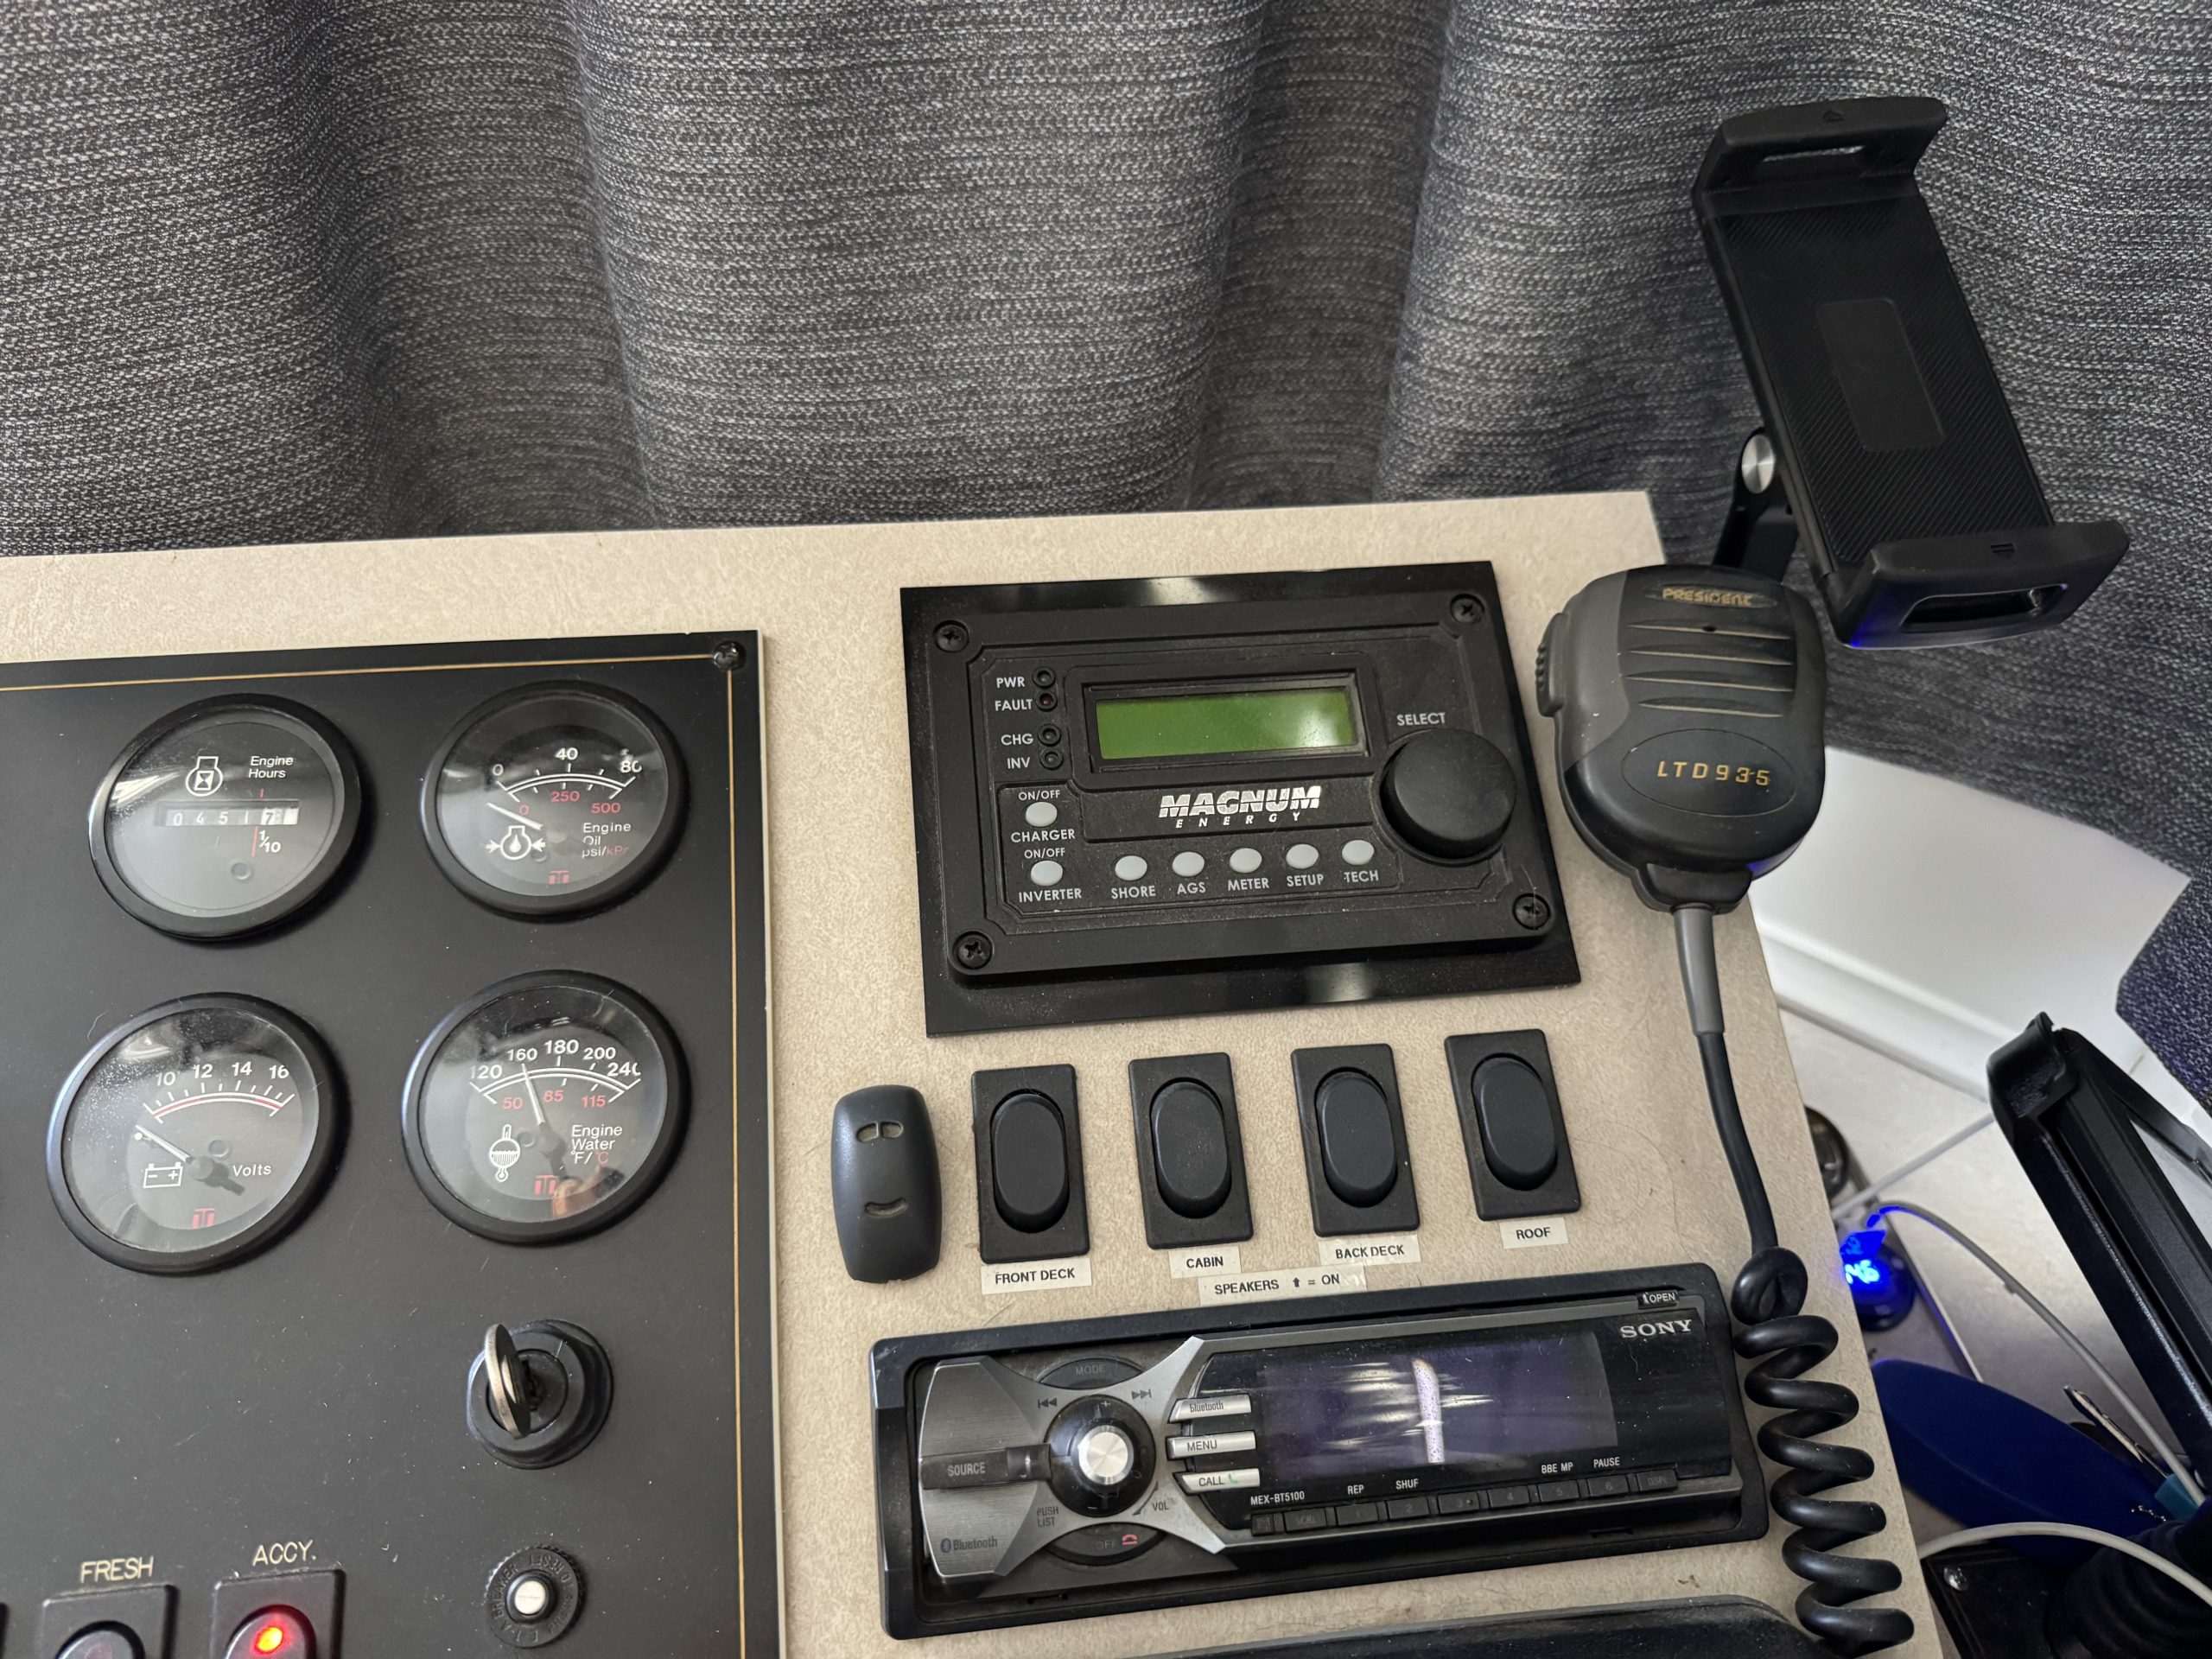
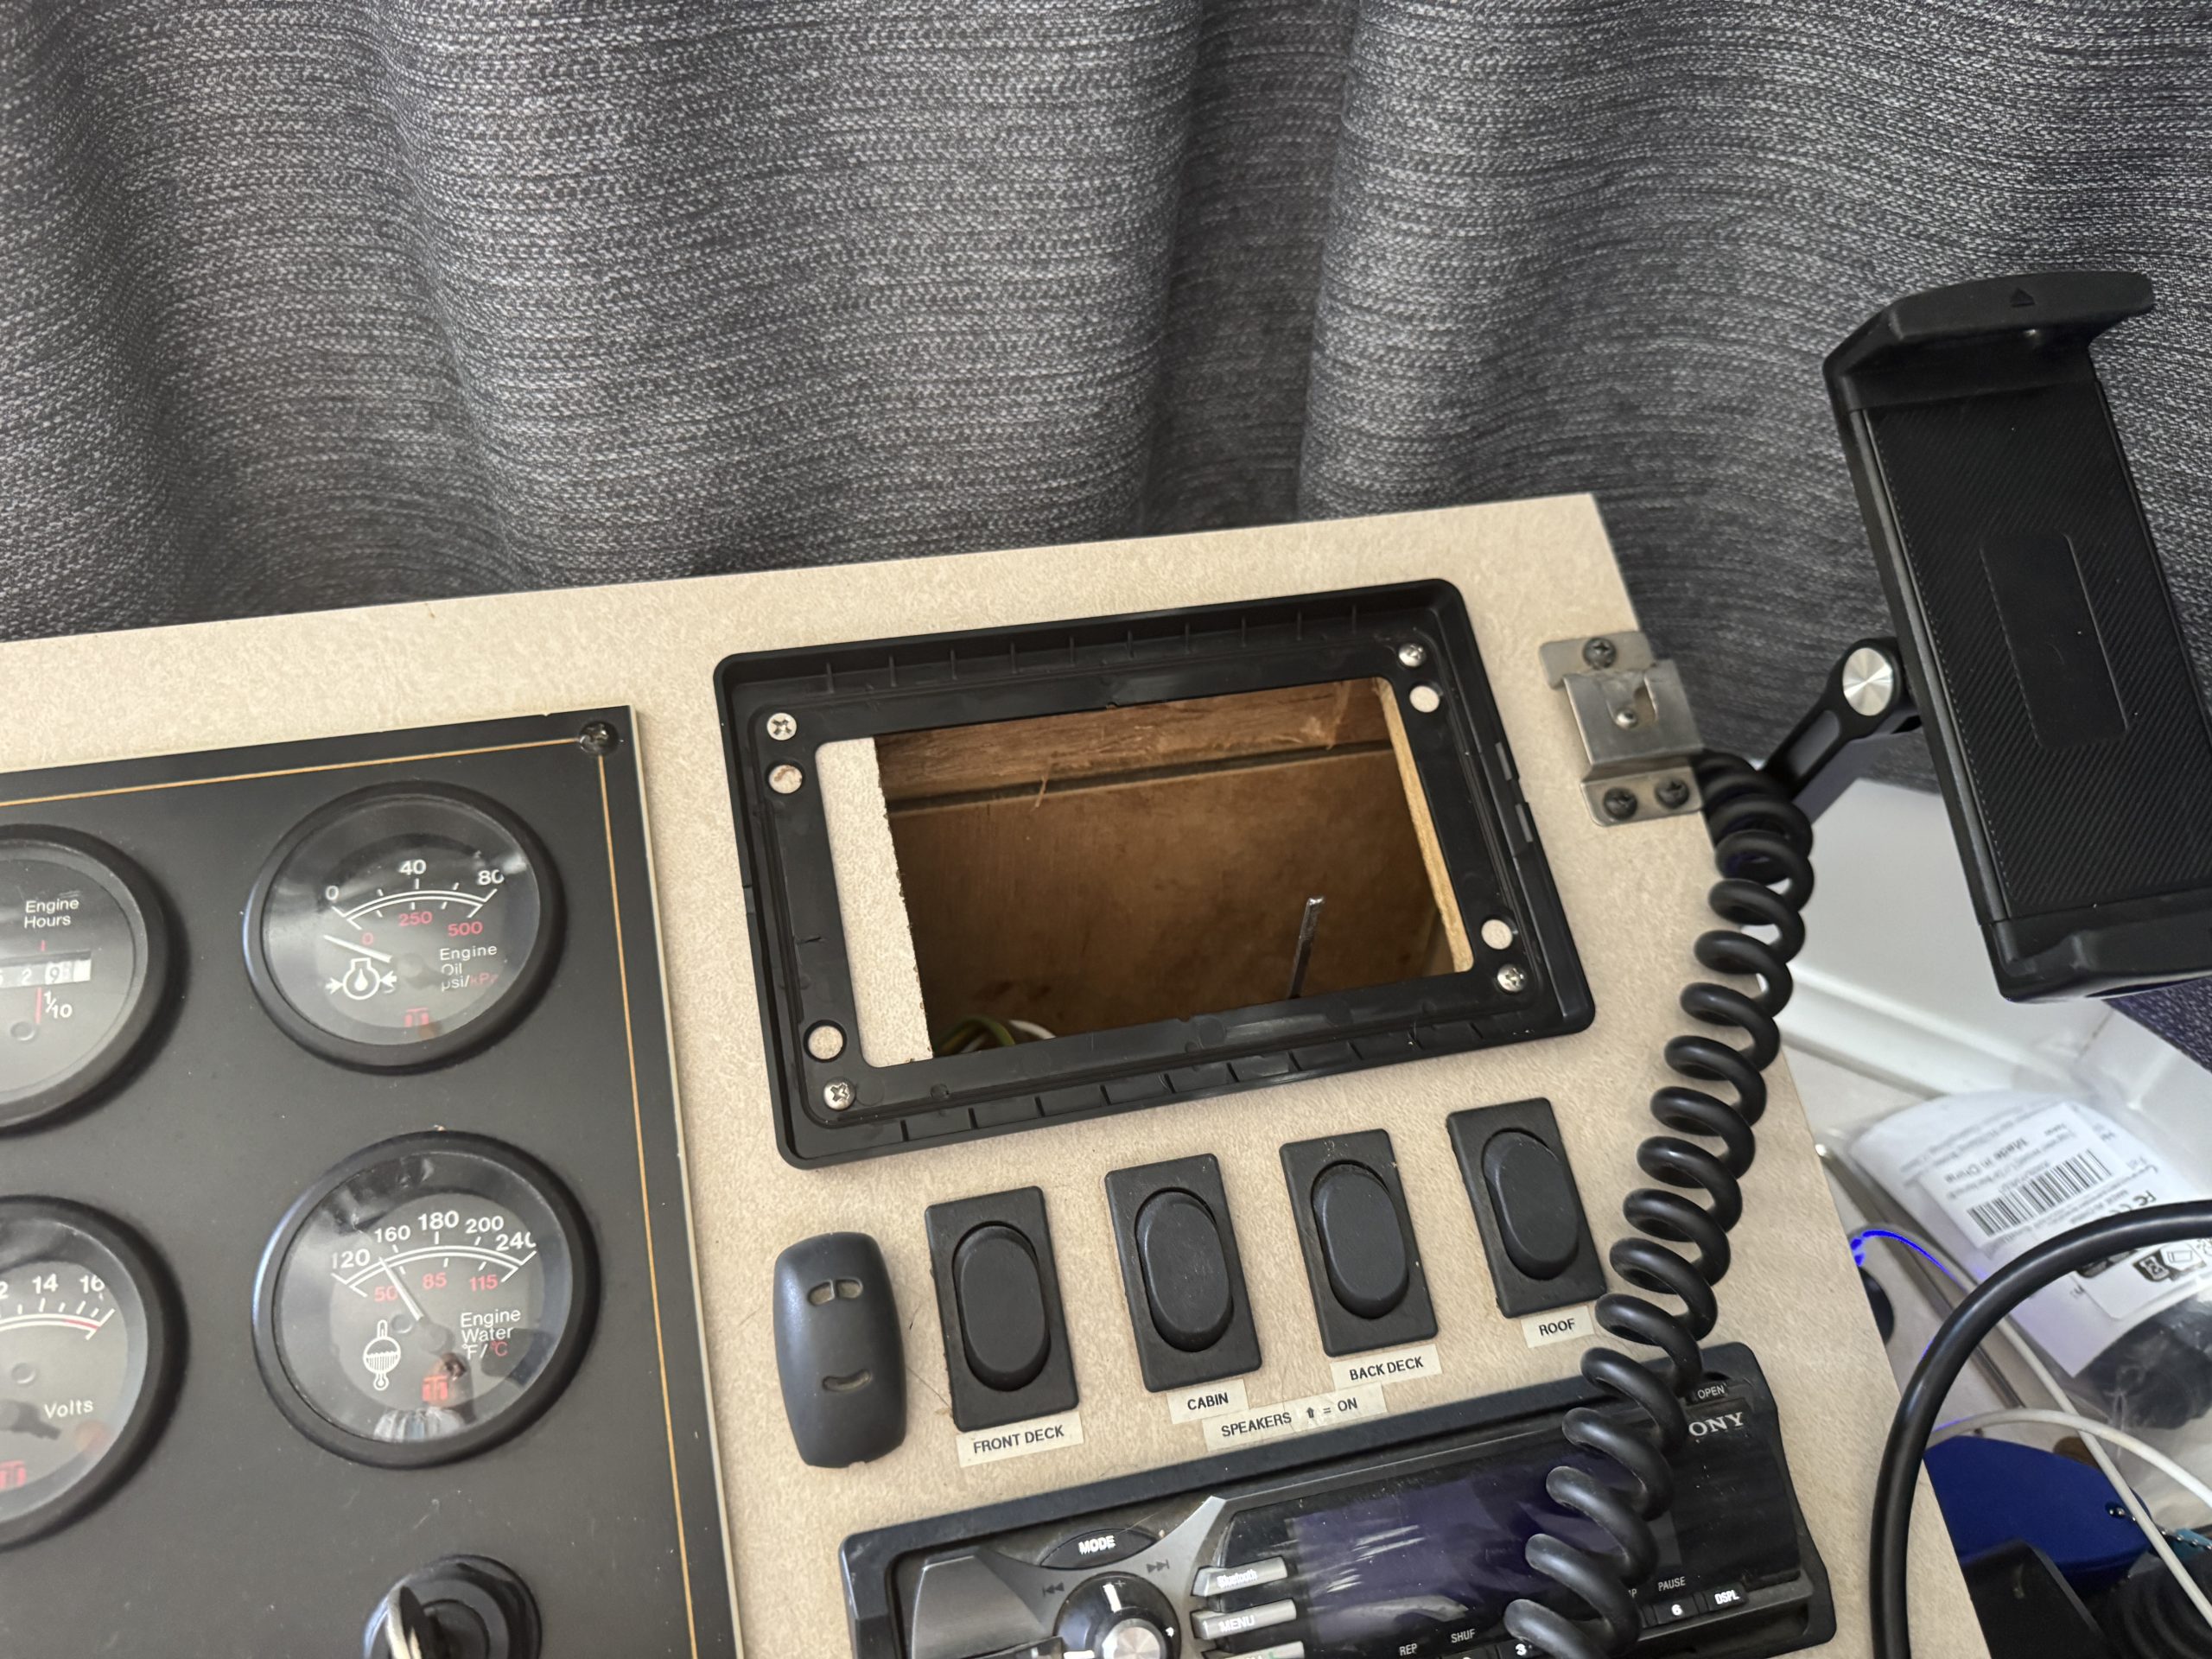
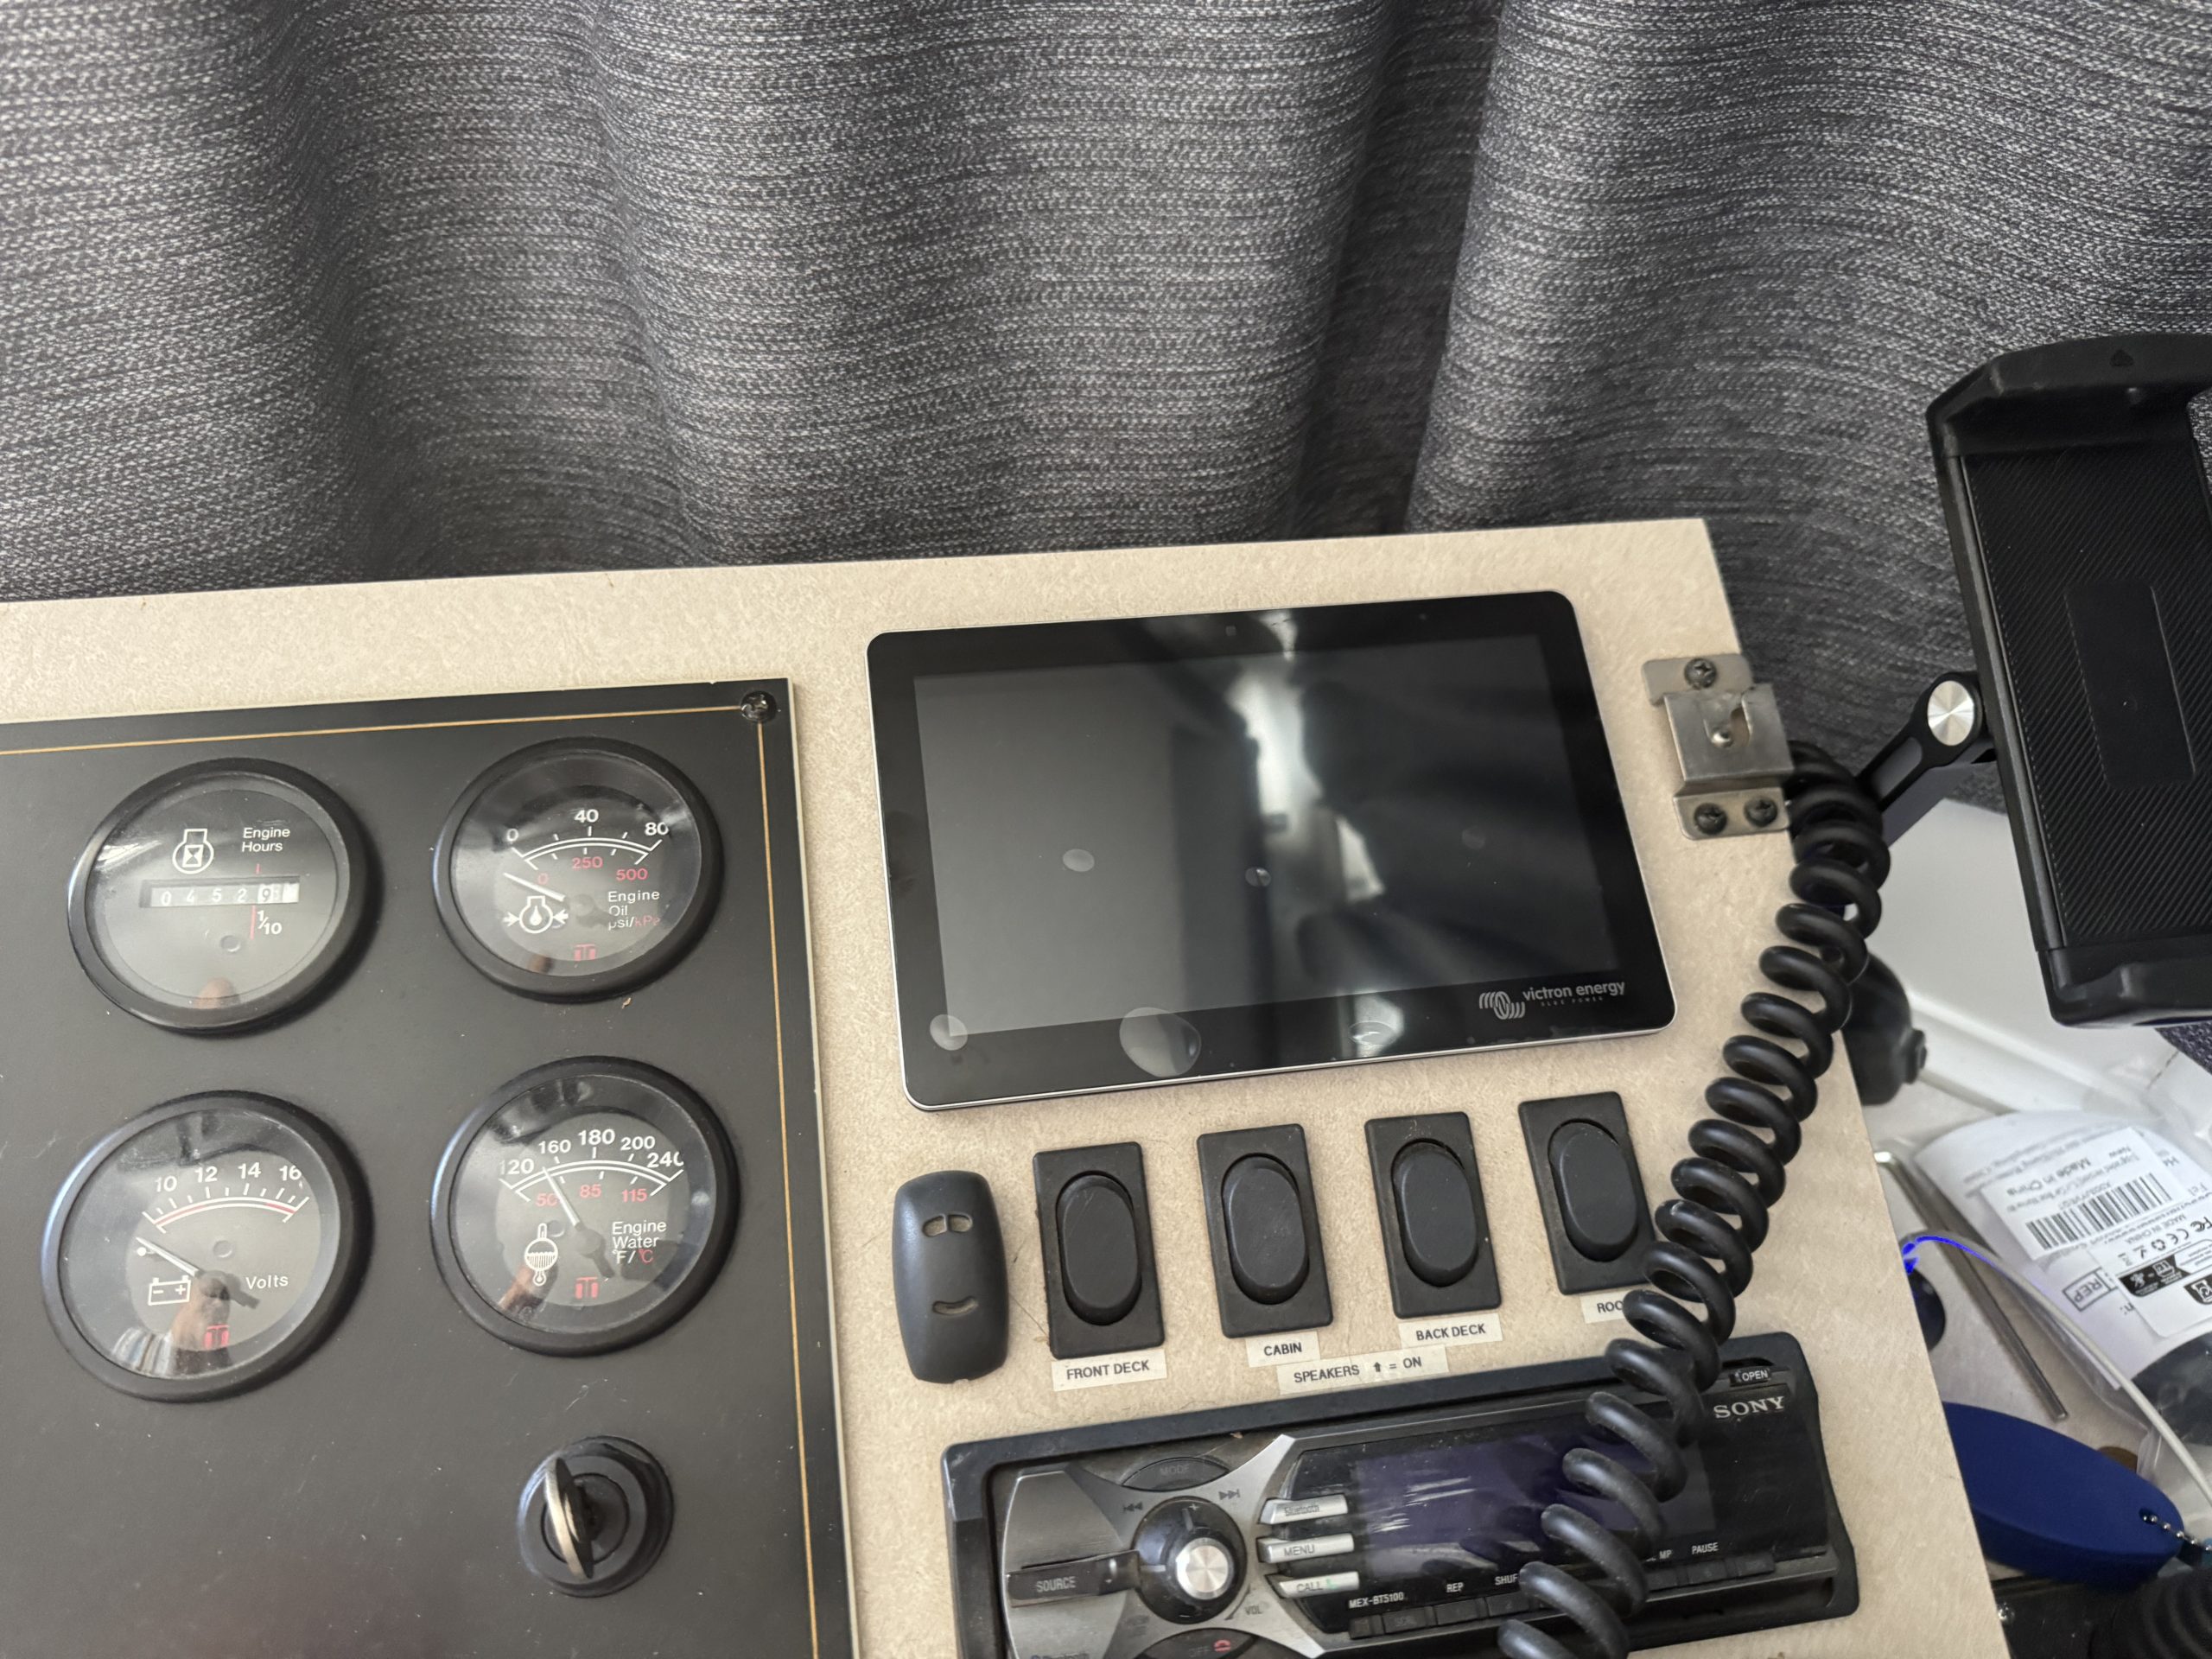
- Victron Cerbo GX MKII
- Victron GX Touch 70
- Various Victron VE Direct and RJ45 Cables
- Victron 150 Amp Bus Bar
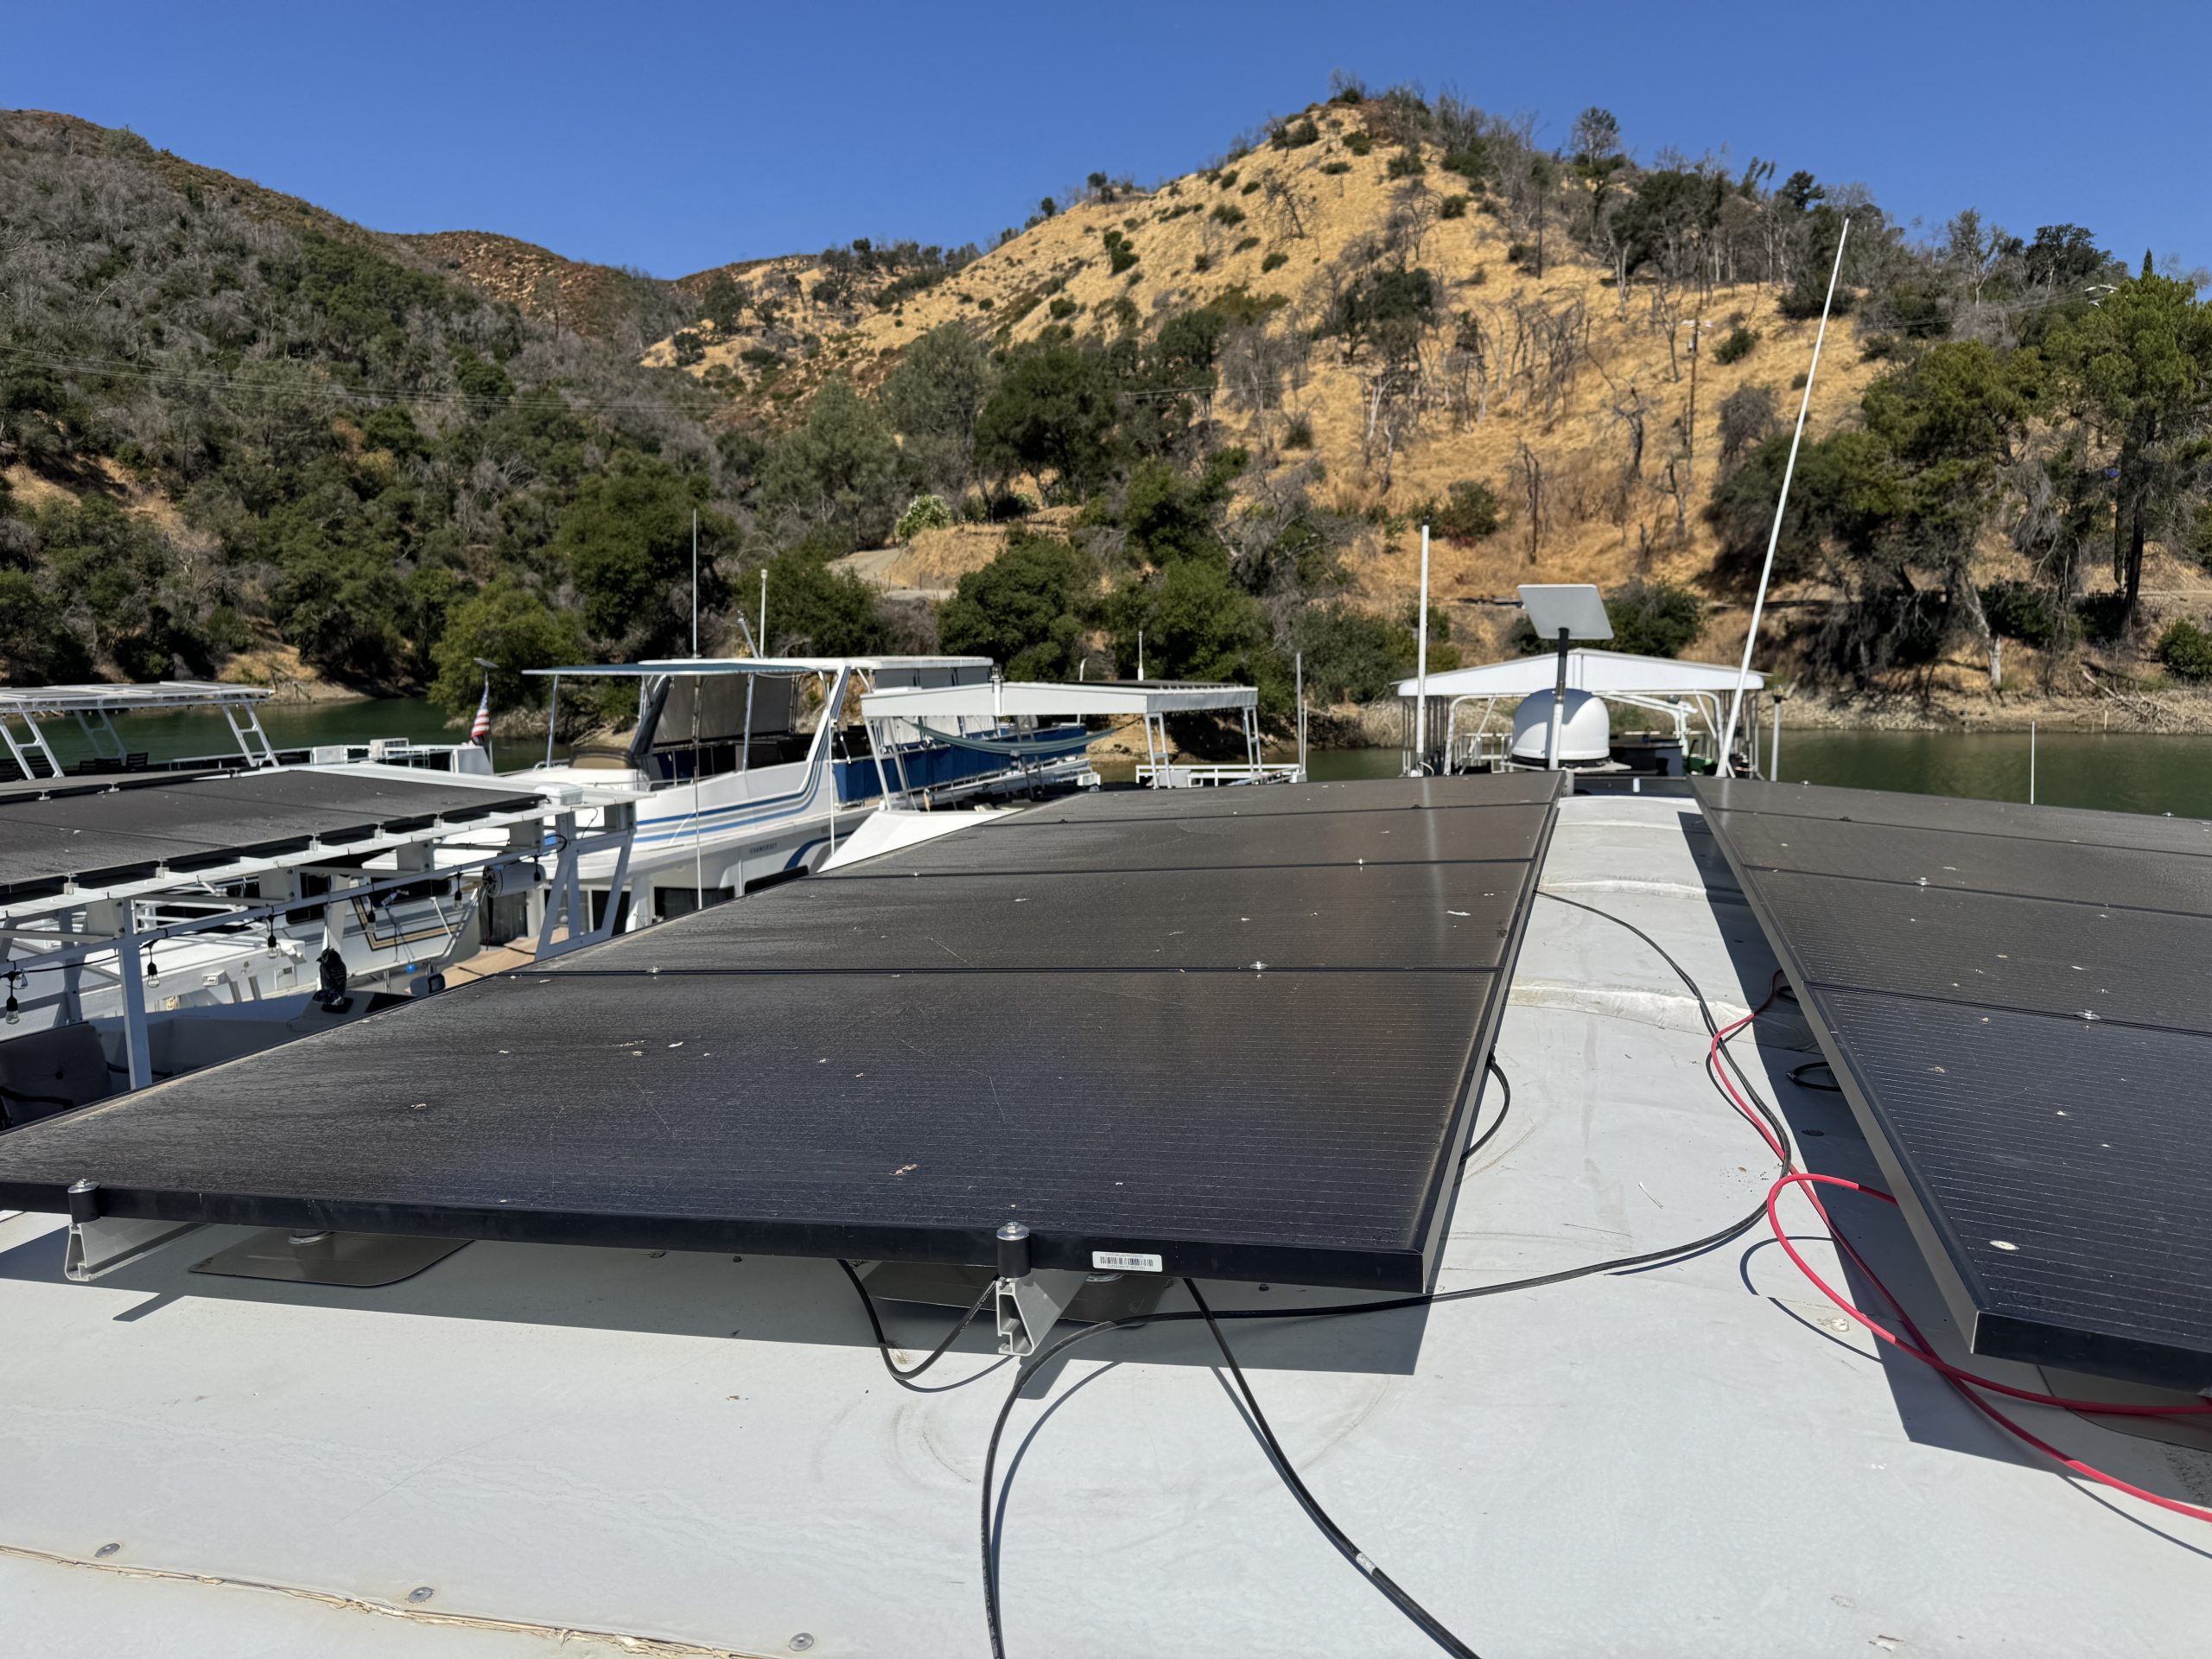
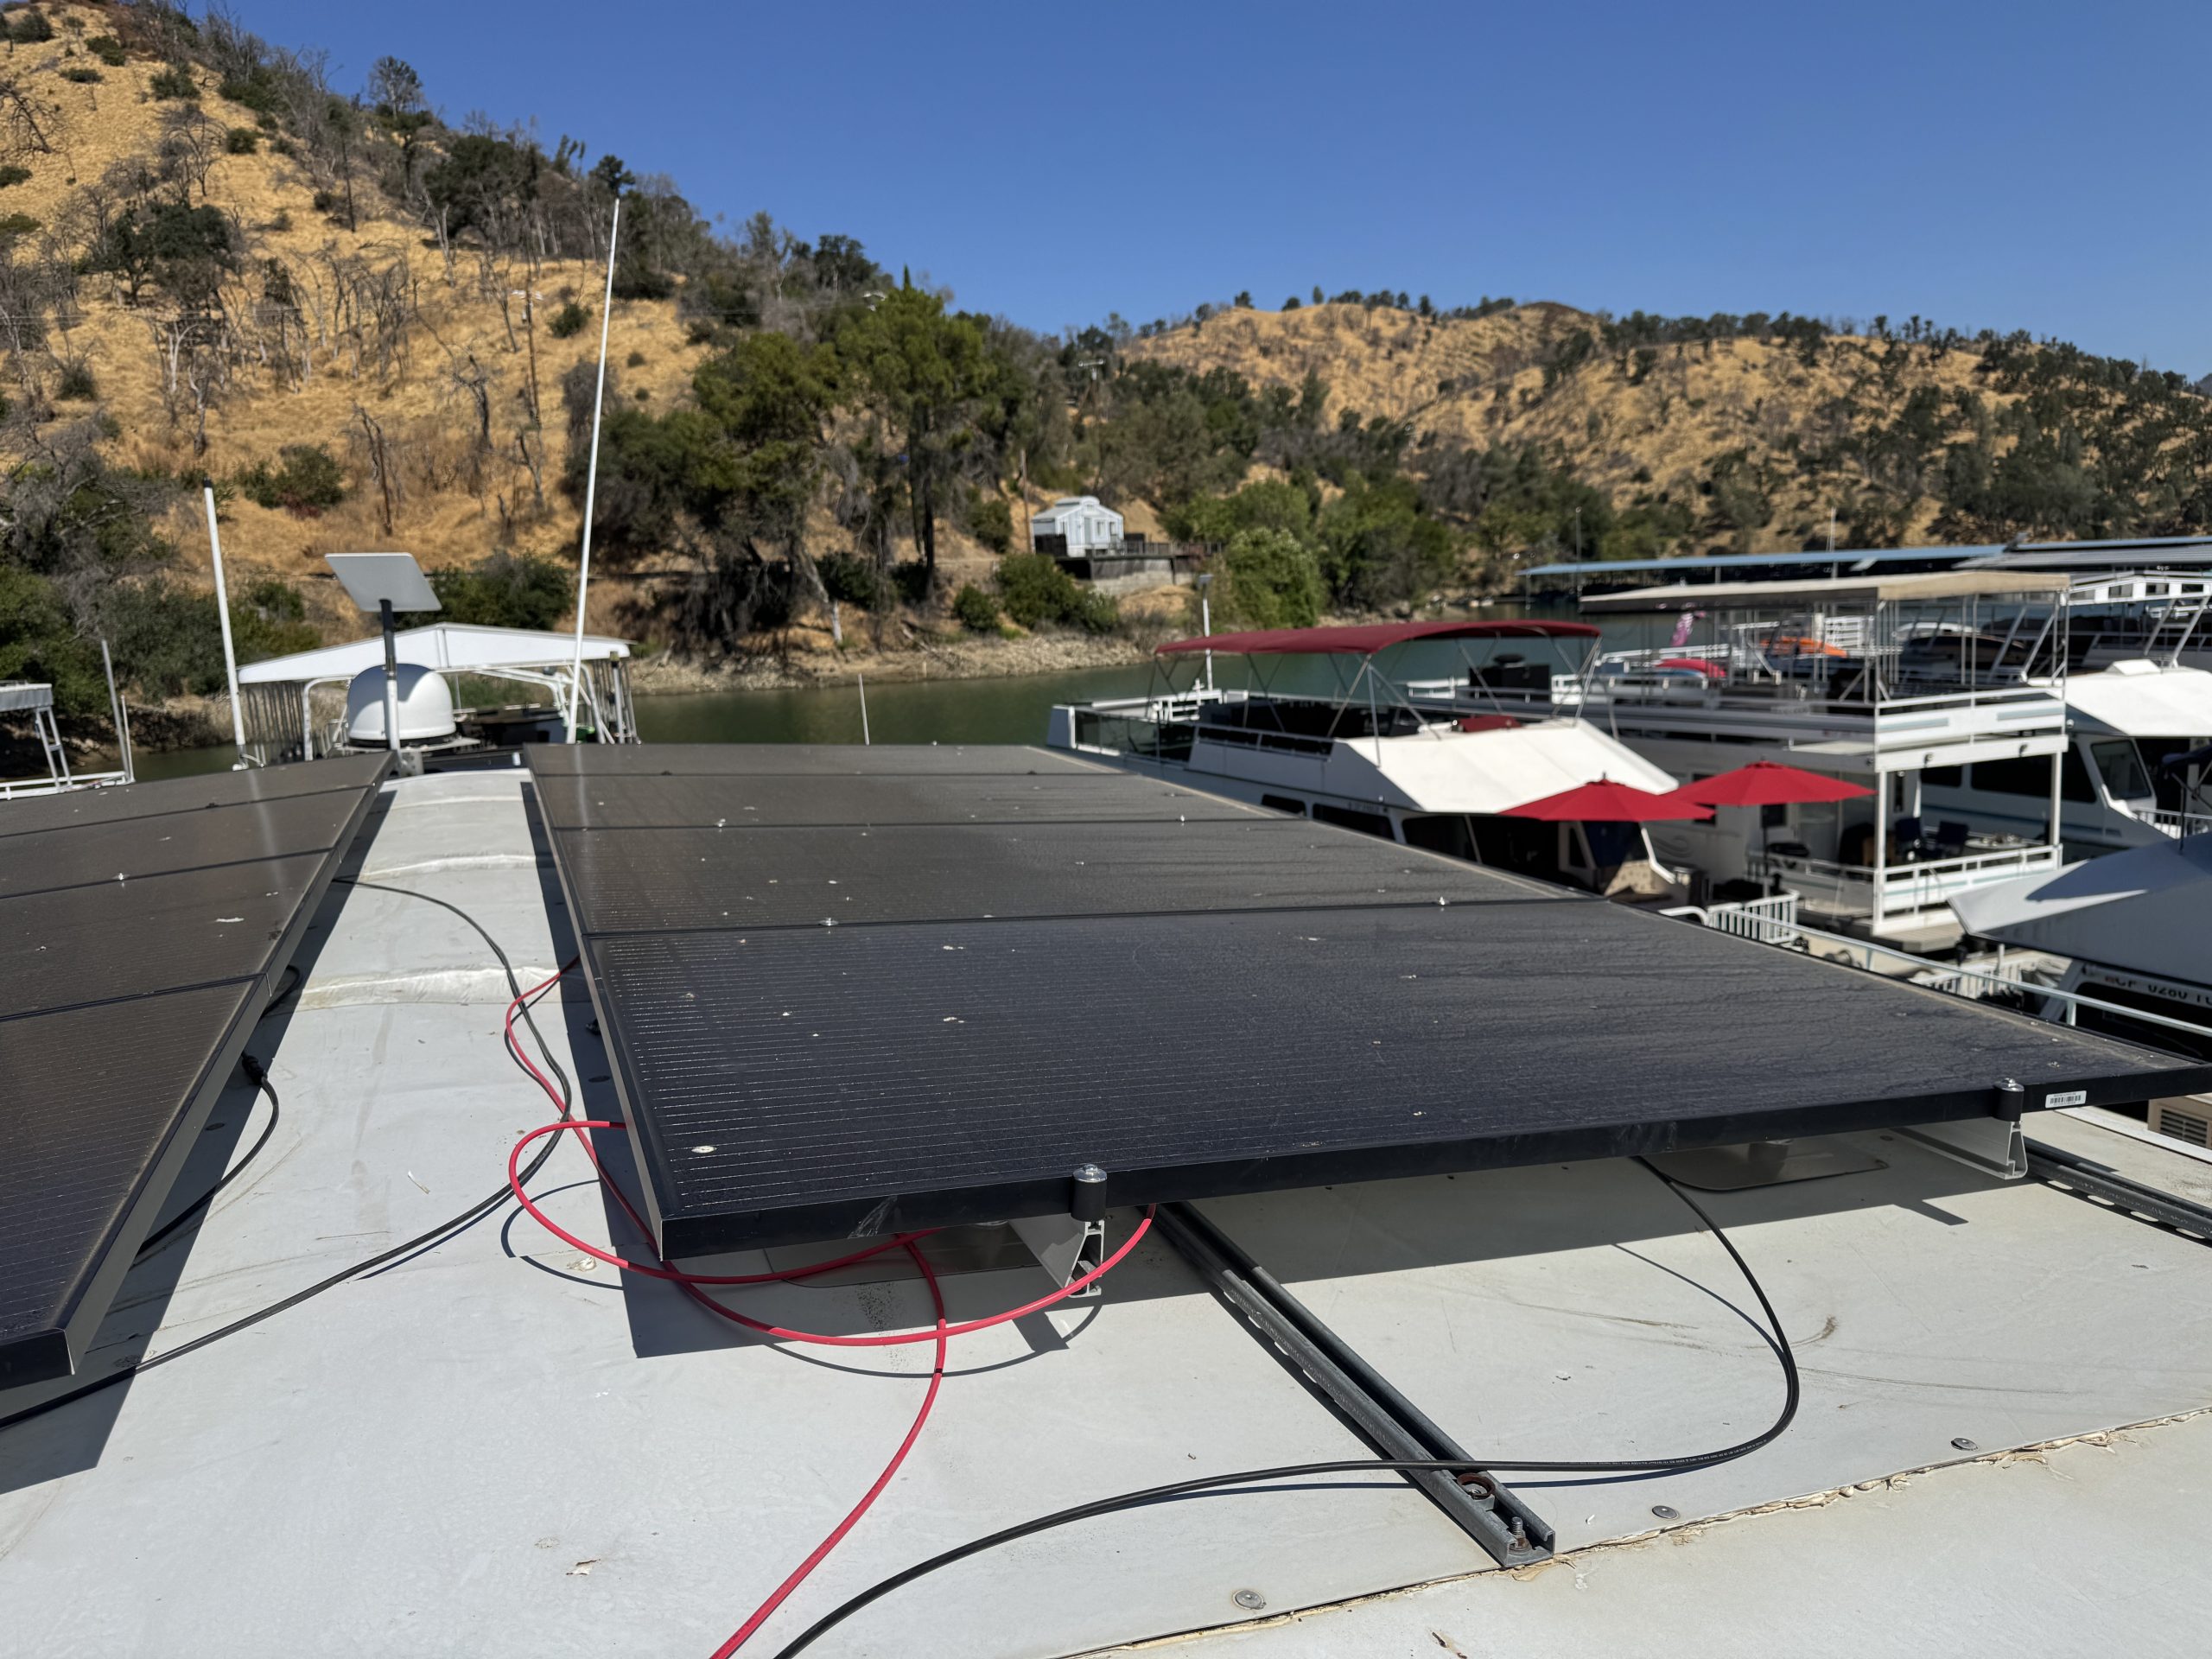
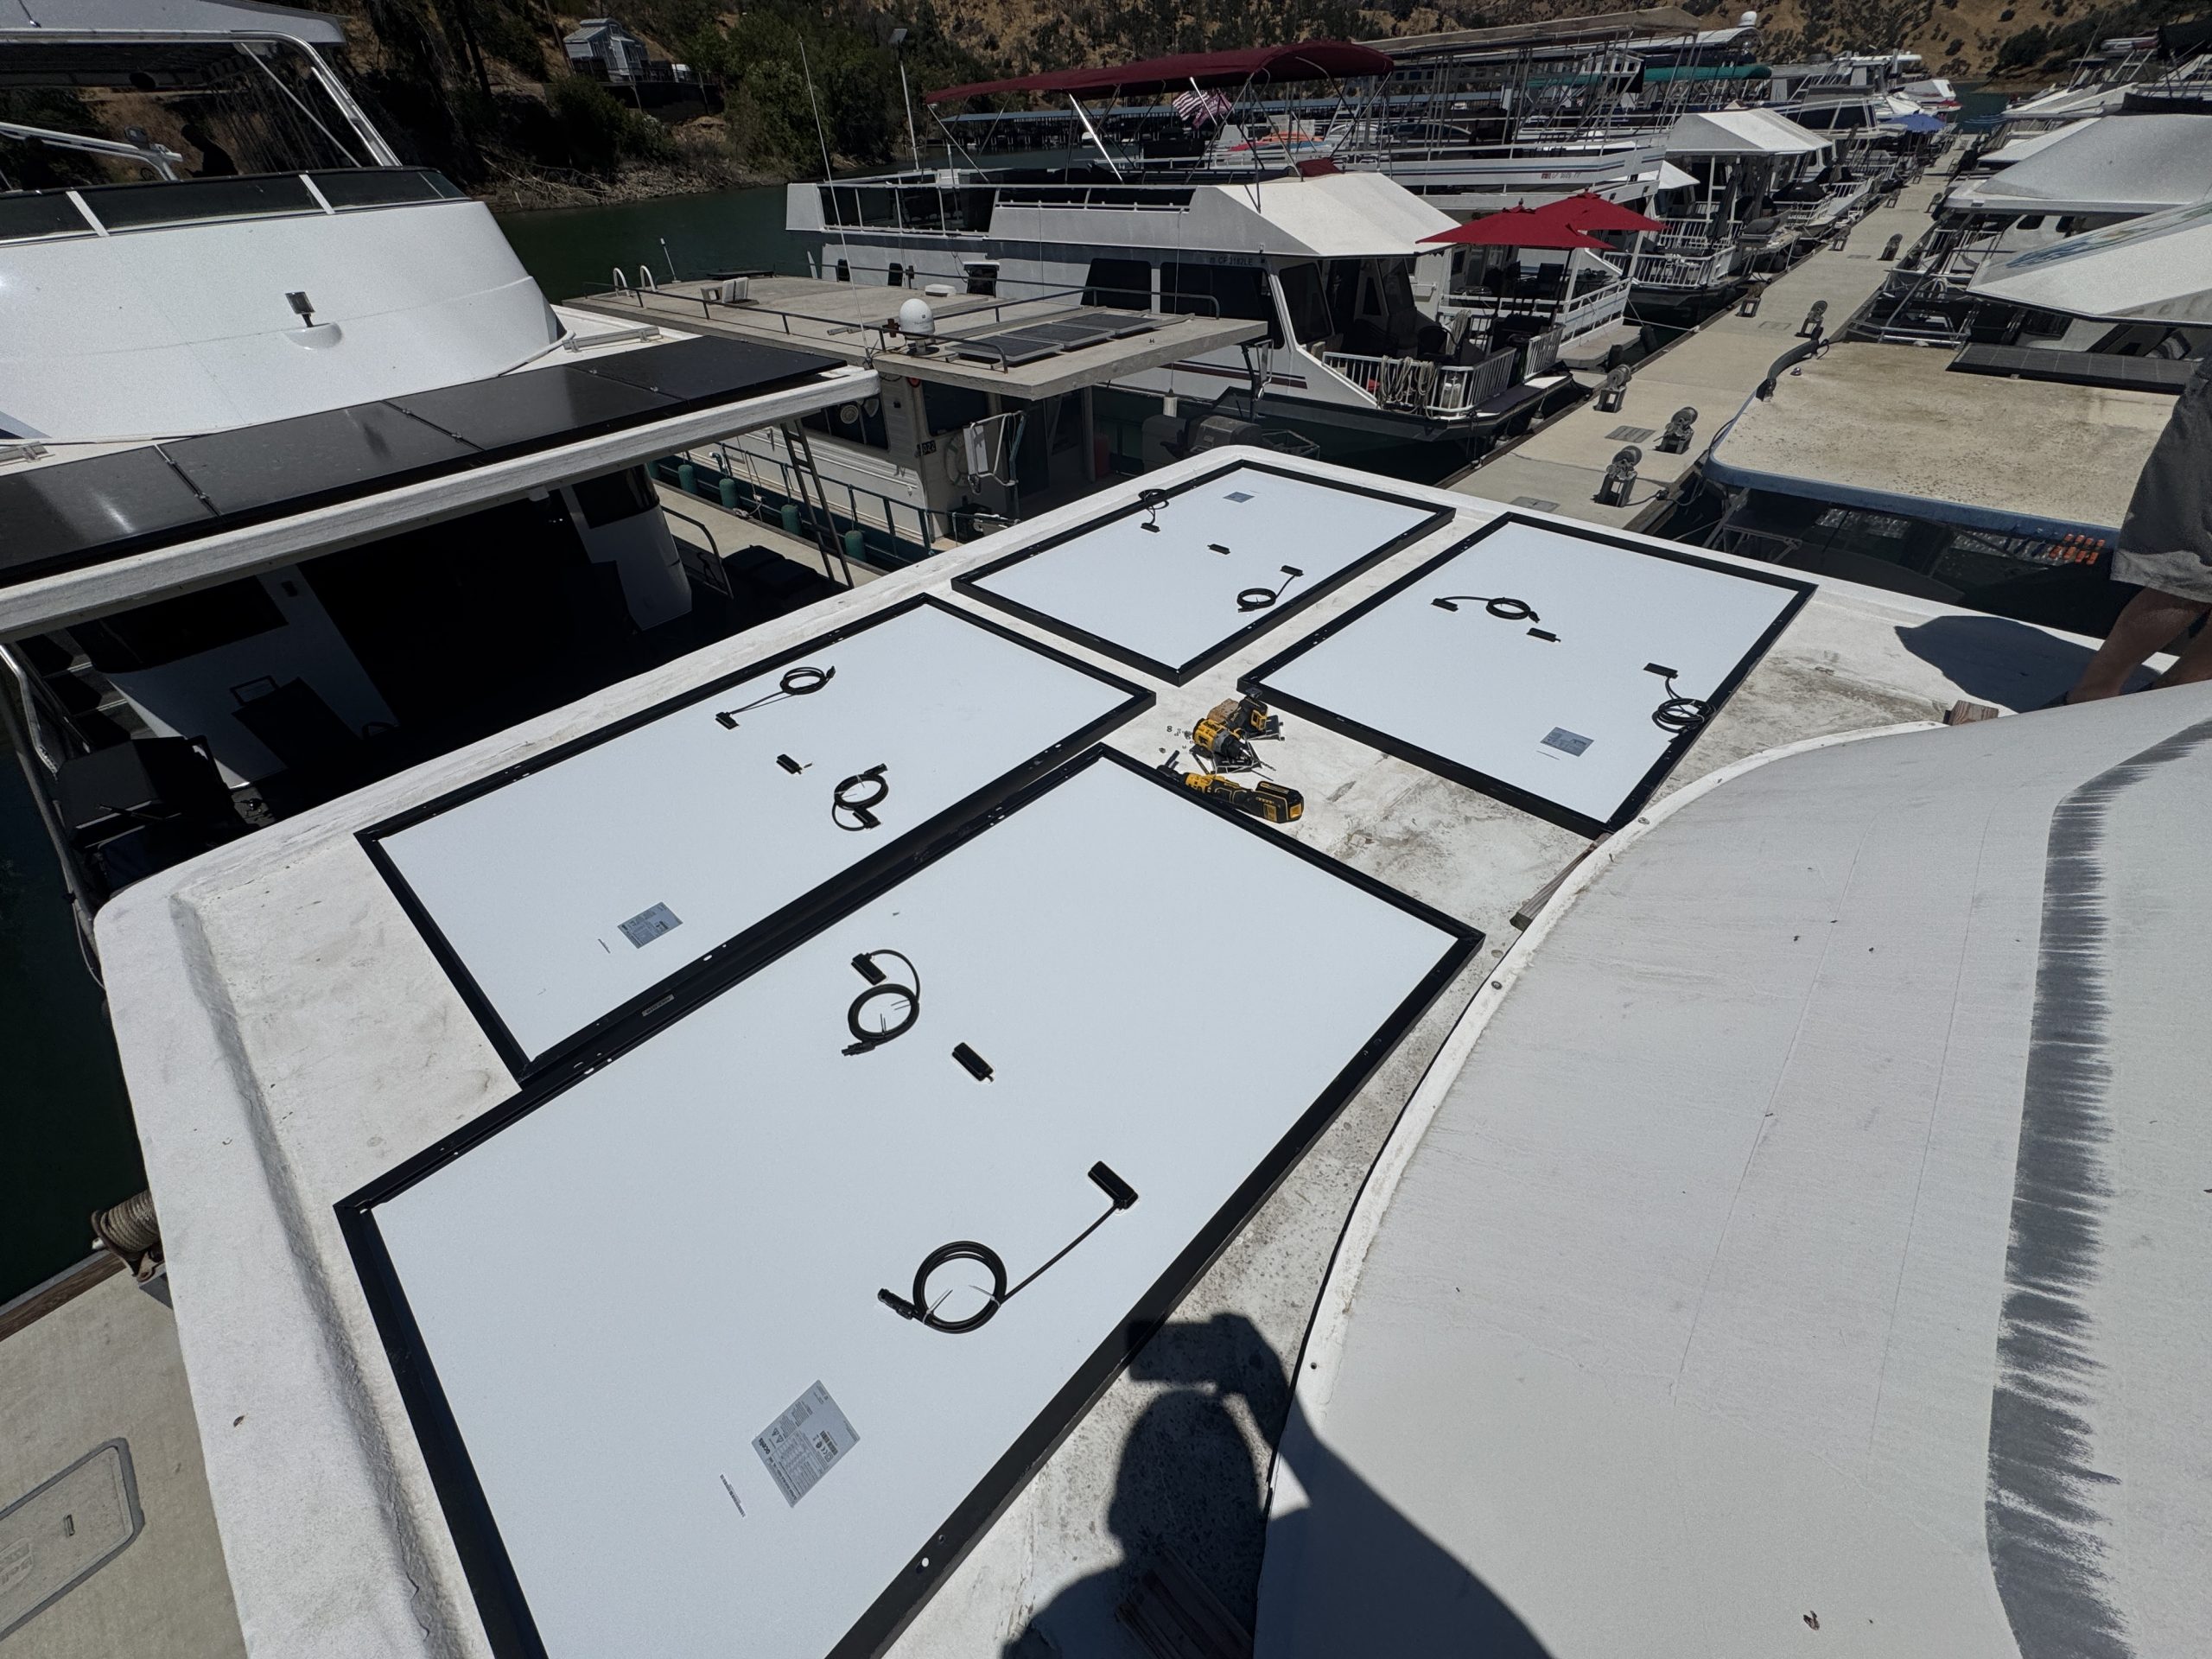
- 12 - QCells 365 watt solar panels (8 existing & 4 added)
- 2 - 30 Amp dual pole solar circuit breakers with all weather enclosures
- 16 - Aluminum Z-Brackets with Stainless Steele hardware
- 45 Feet 10 AWG PV wire - Red
- 45 Feet 10 AWG PV wire - Black
- Various MC4 and MC4 Y Connectors
- 7 Feet of 4/0 Welding Cable – Red
- 6 Feet of 4/0 Welding Cable – Black
- 13 Feet of 2/0 Welding Cable – Red
- 19 Feet of 2/0 Welding Cable – Black
- 9 Feet of 2 AWG Welding Cable – Red
- 9 Feet of 2 AWG Welding Cable – Black
- 3 Feet of 6 AWG Bare Cable
- 20 Feet of 6/3 SOOW Cable
- Red and Black Dual Wall Shrink Tubing
- Various 4/0, 2/0, 2 AWG and 6 AWG Tinned Copper Lugs
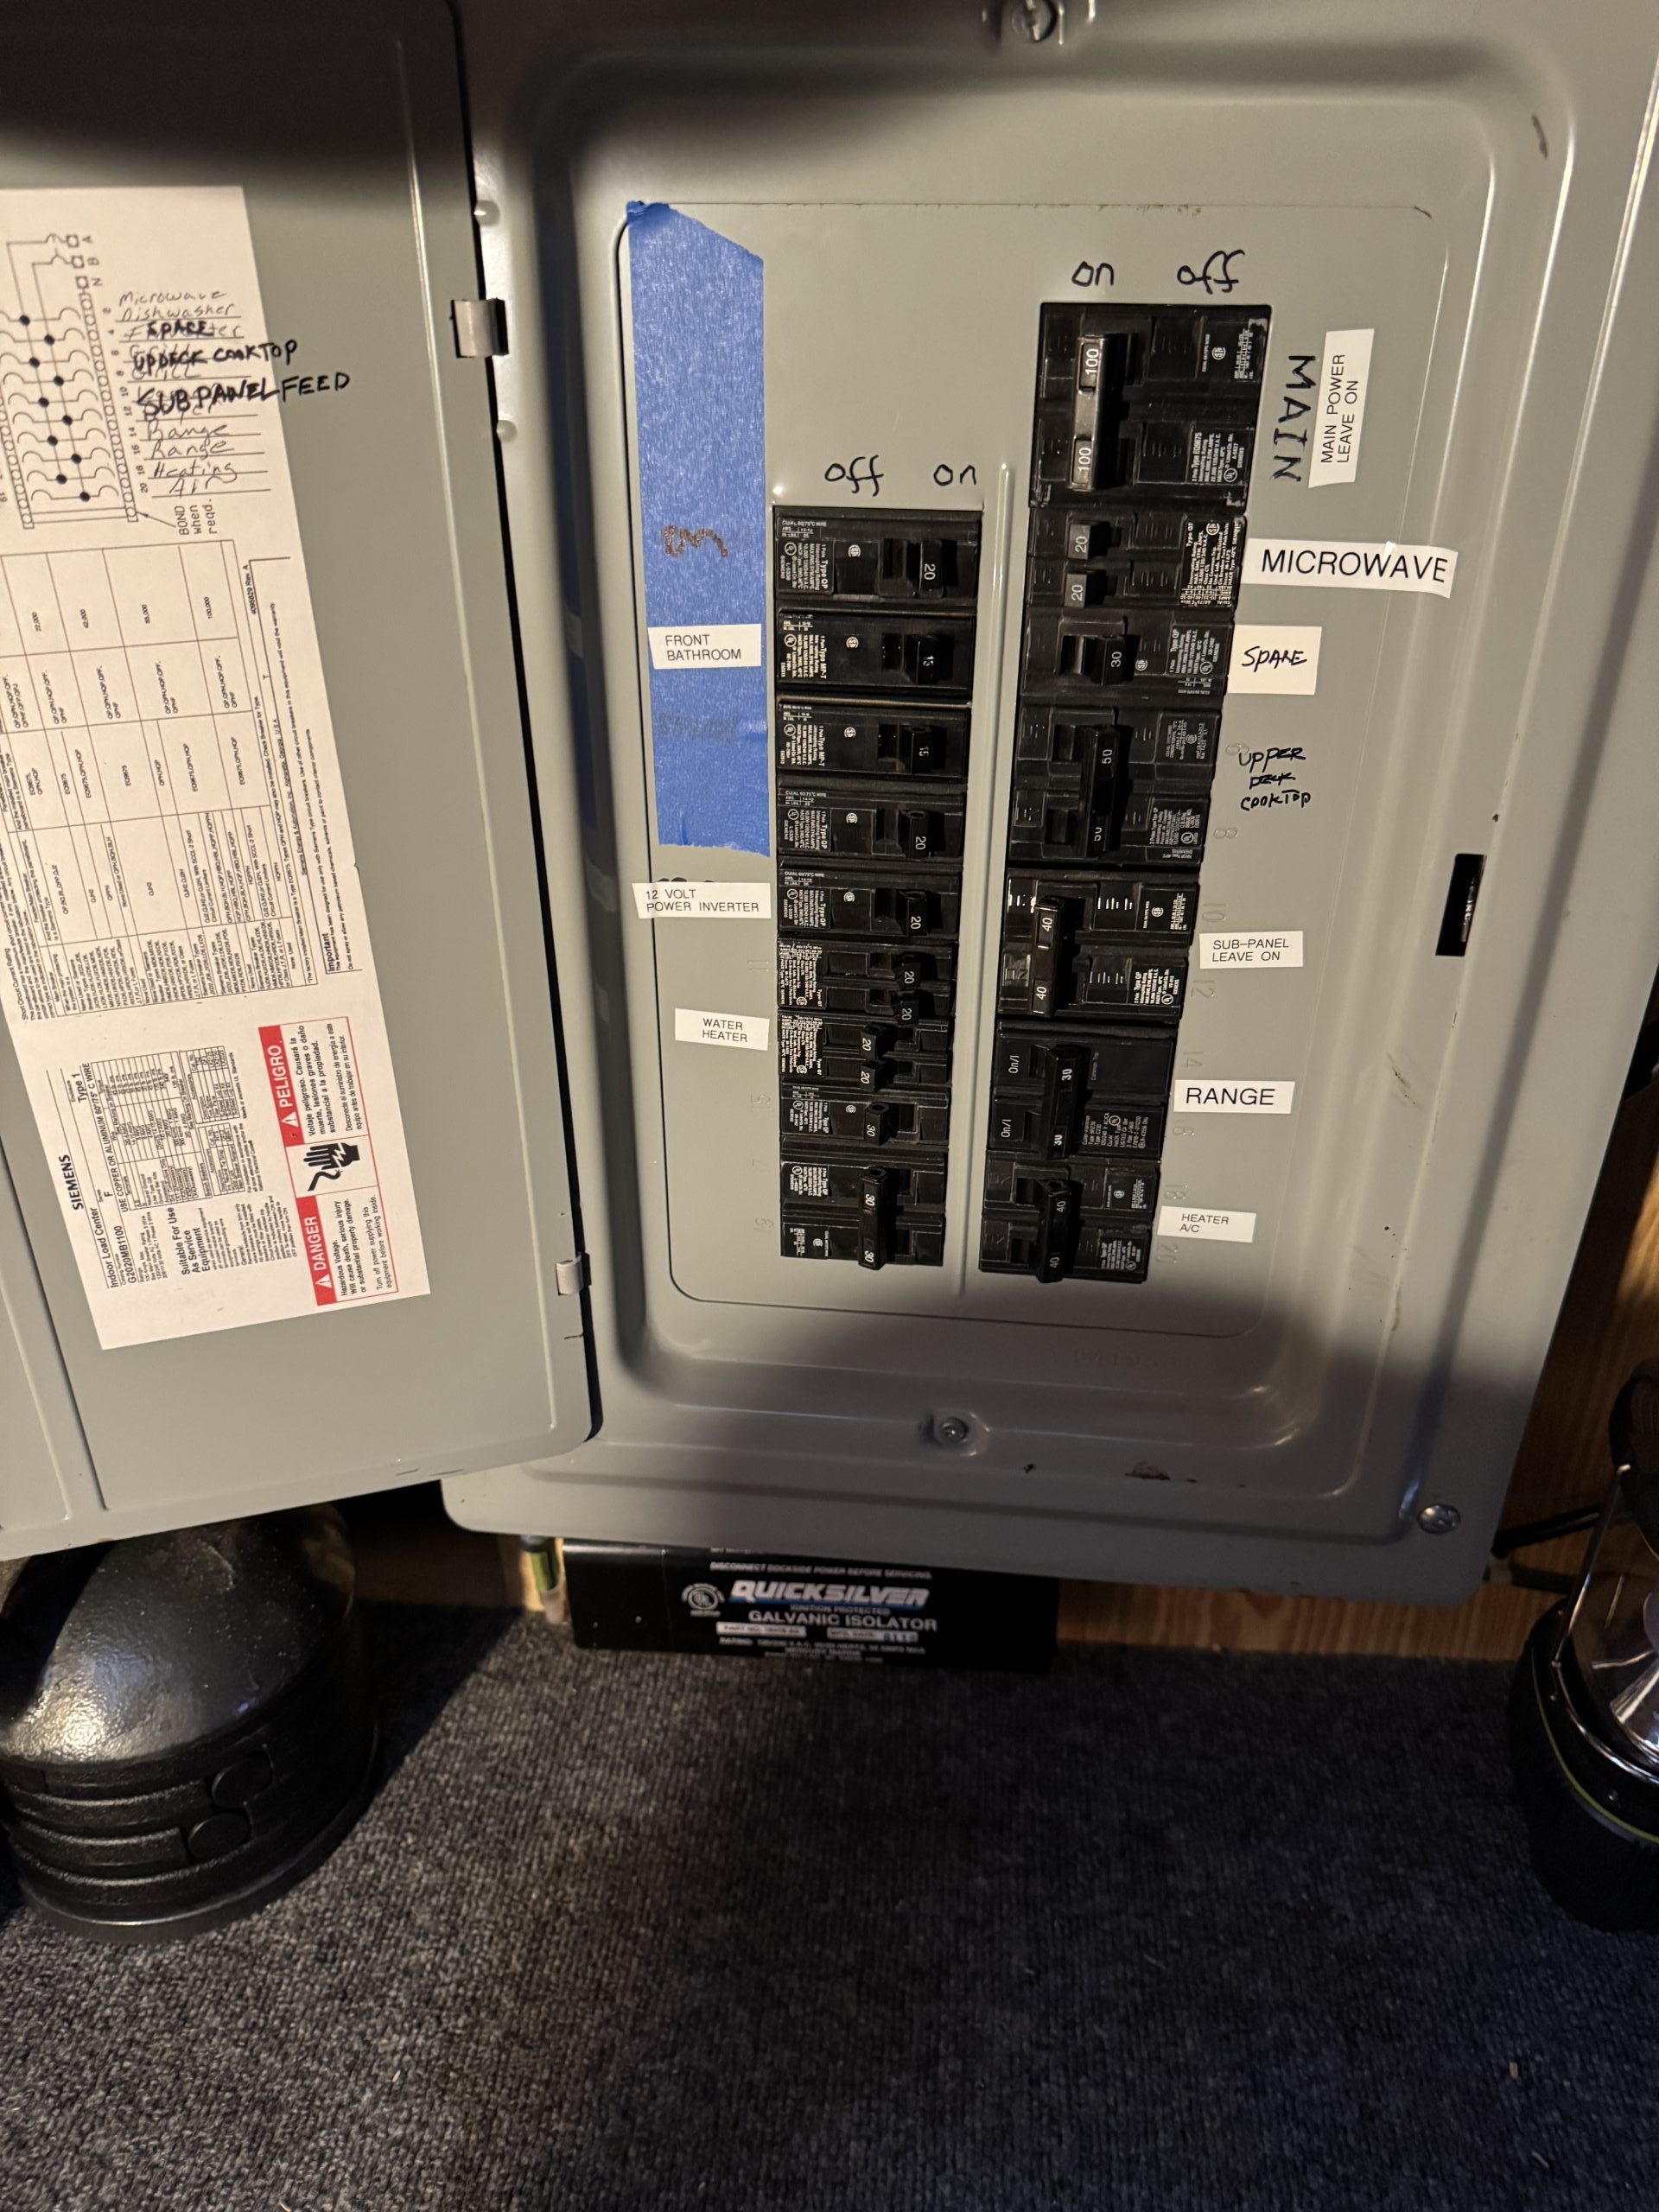
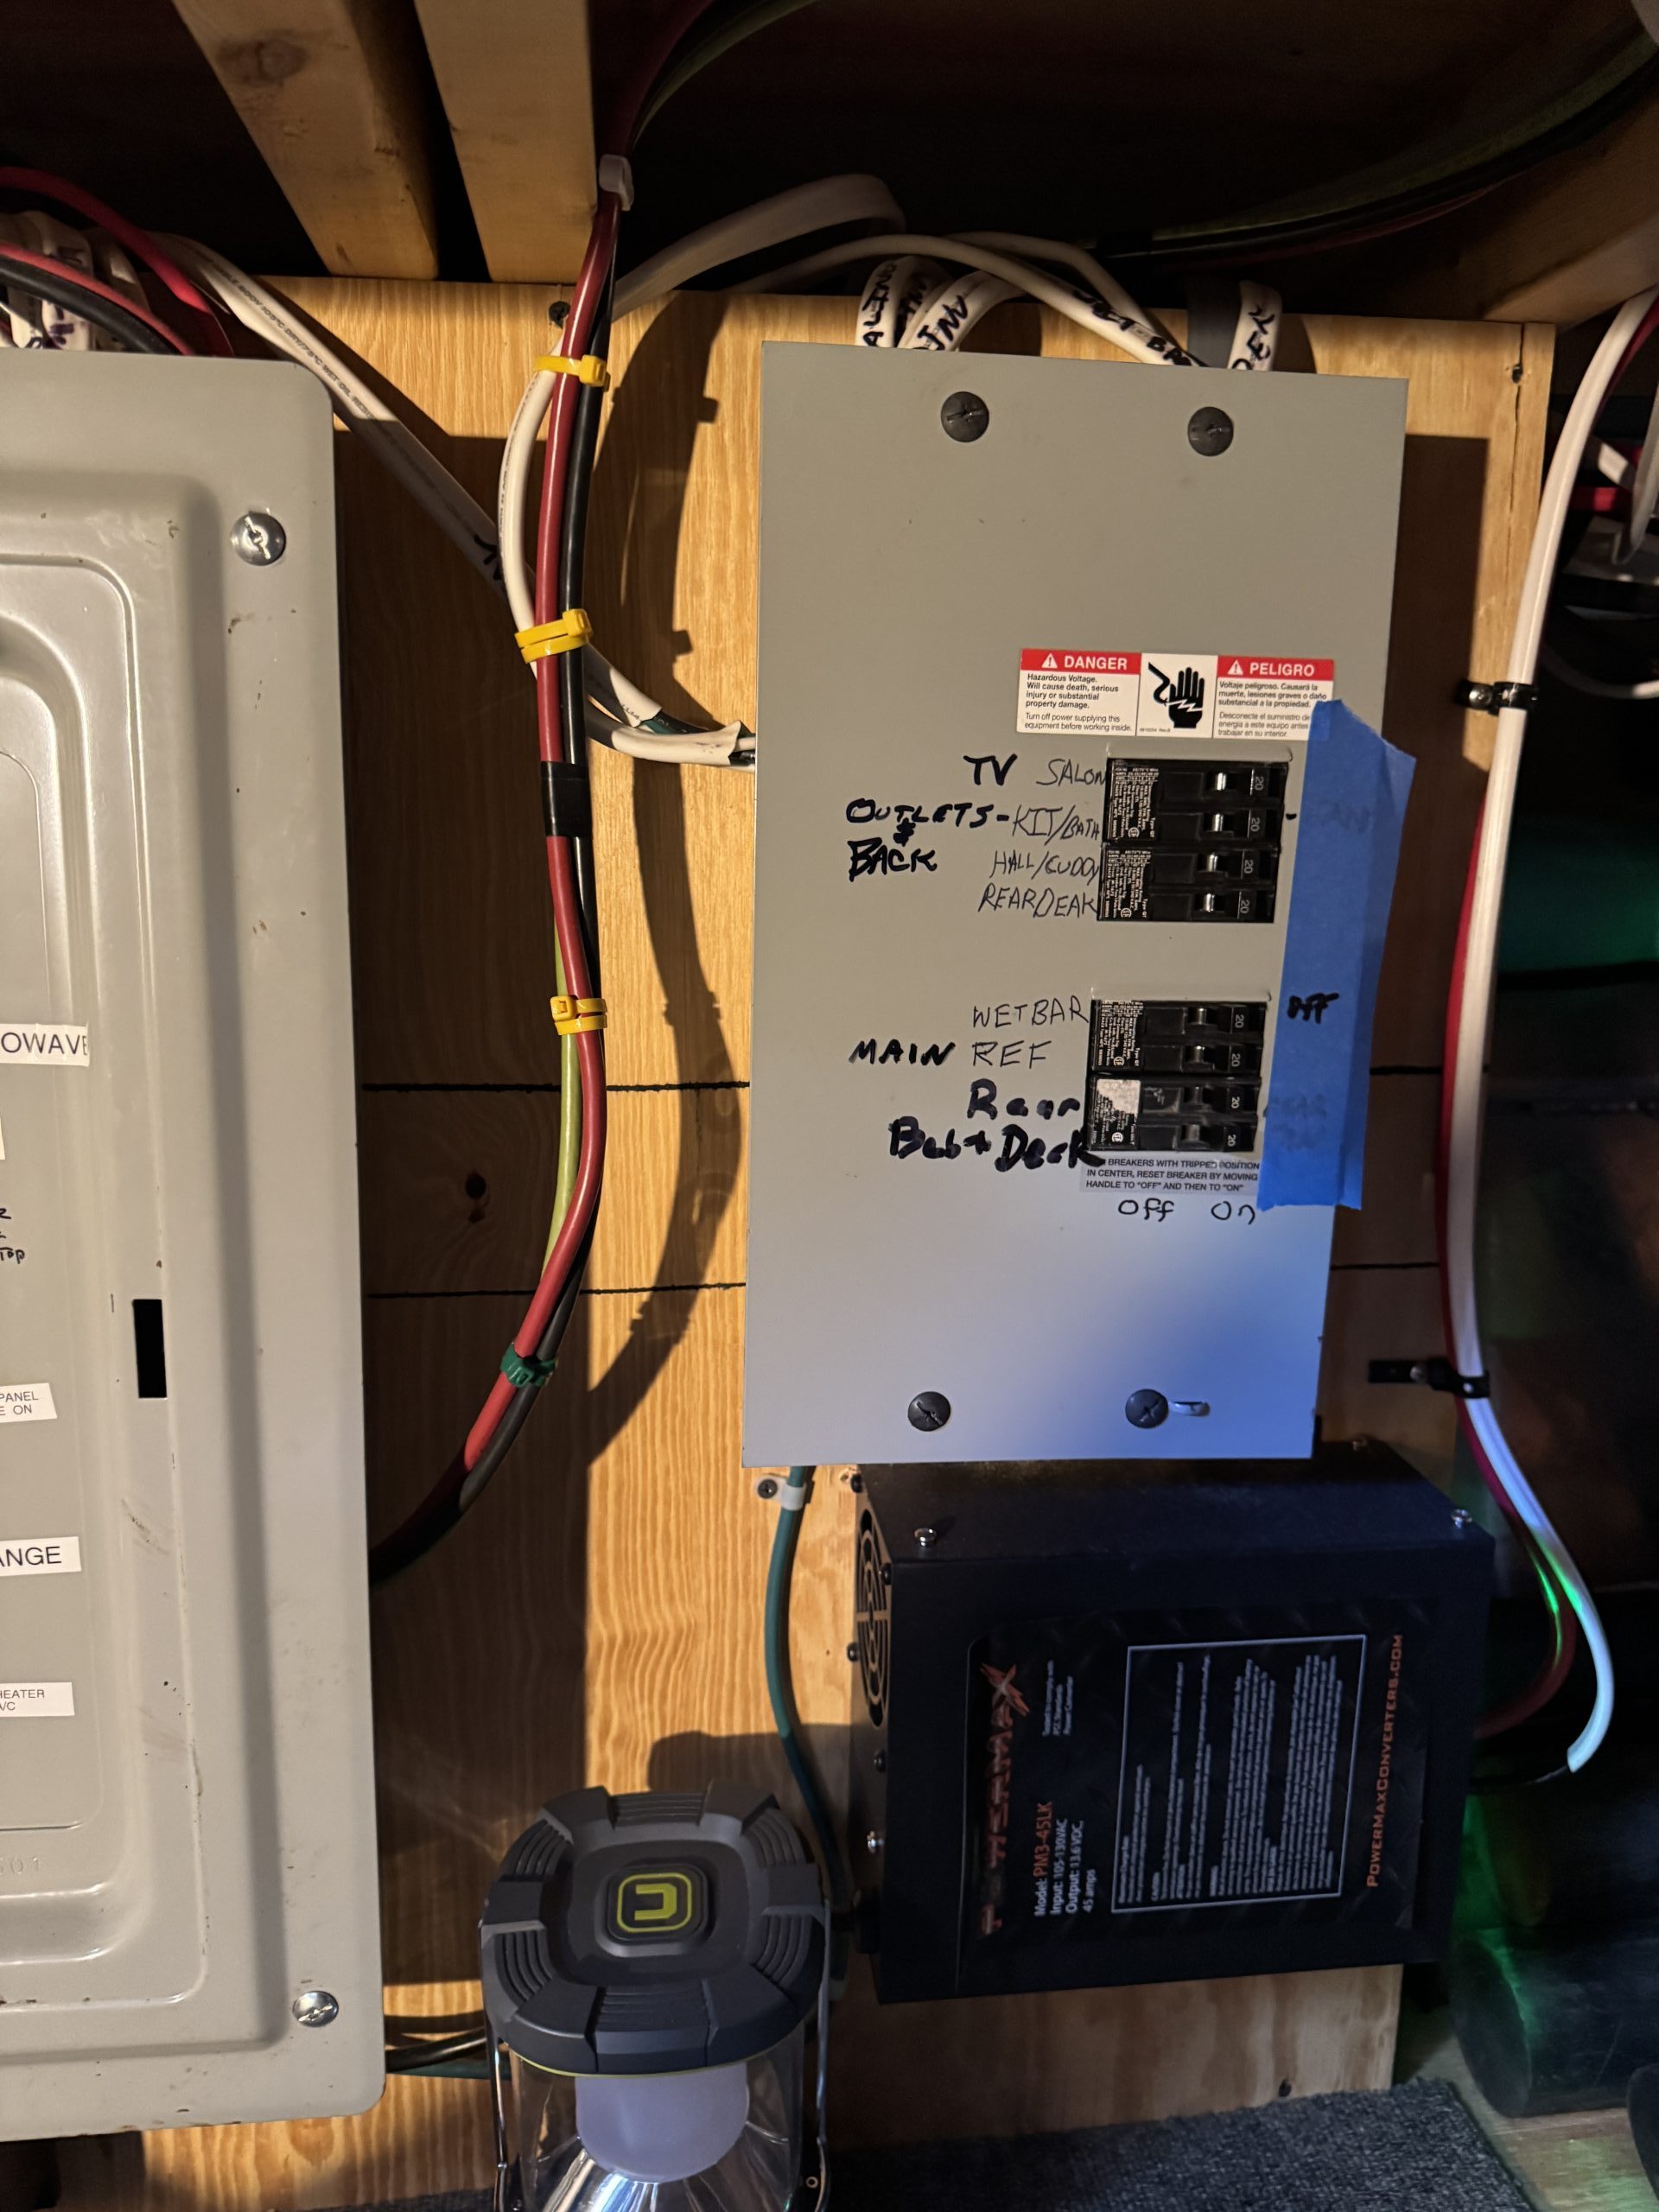
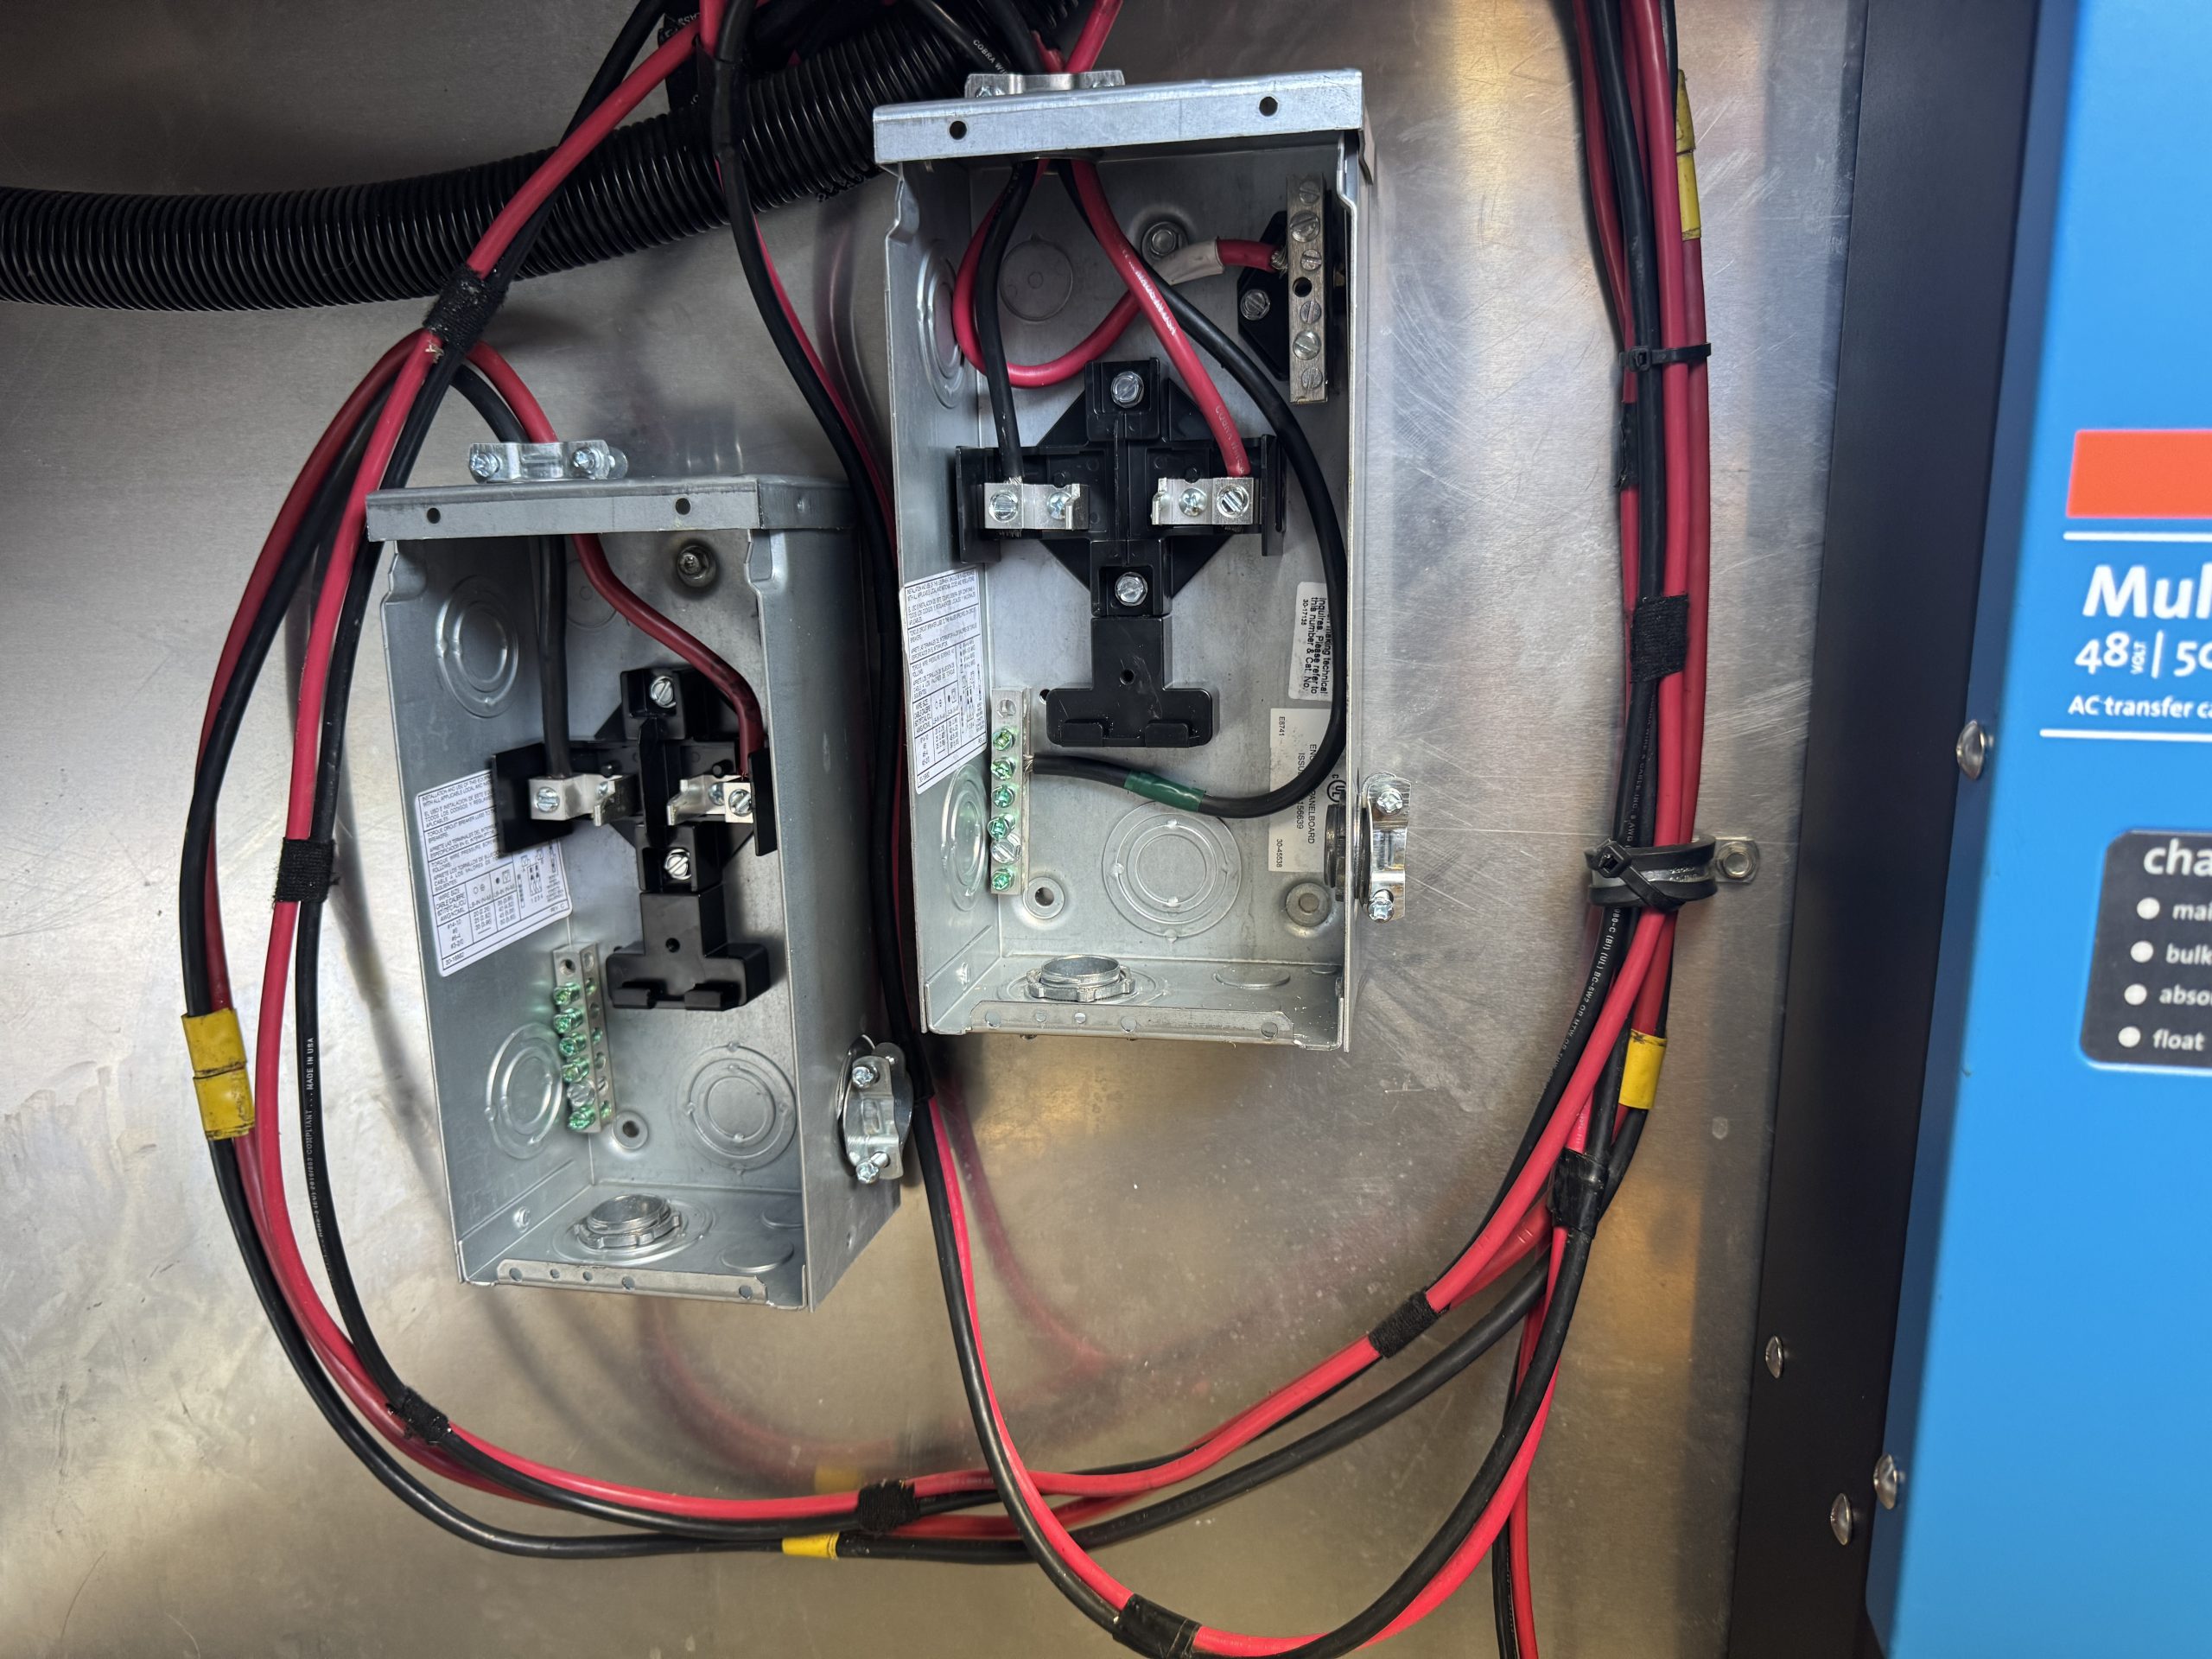
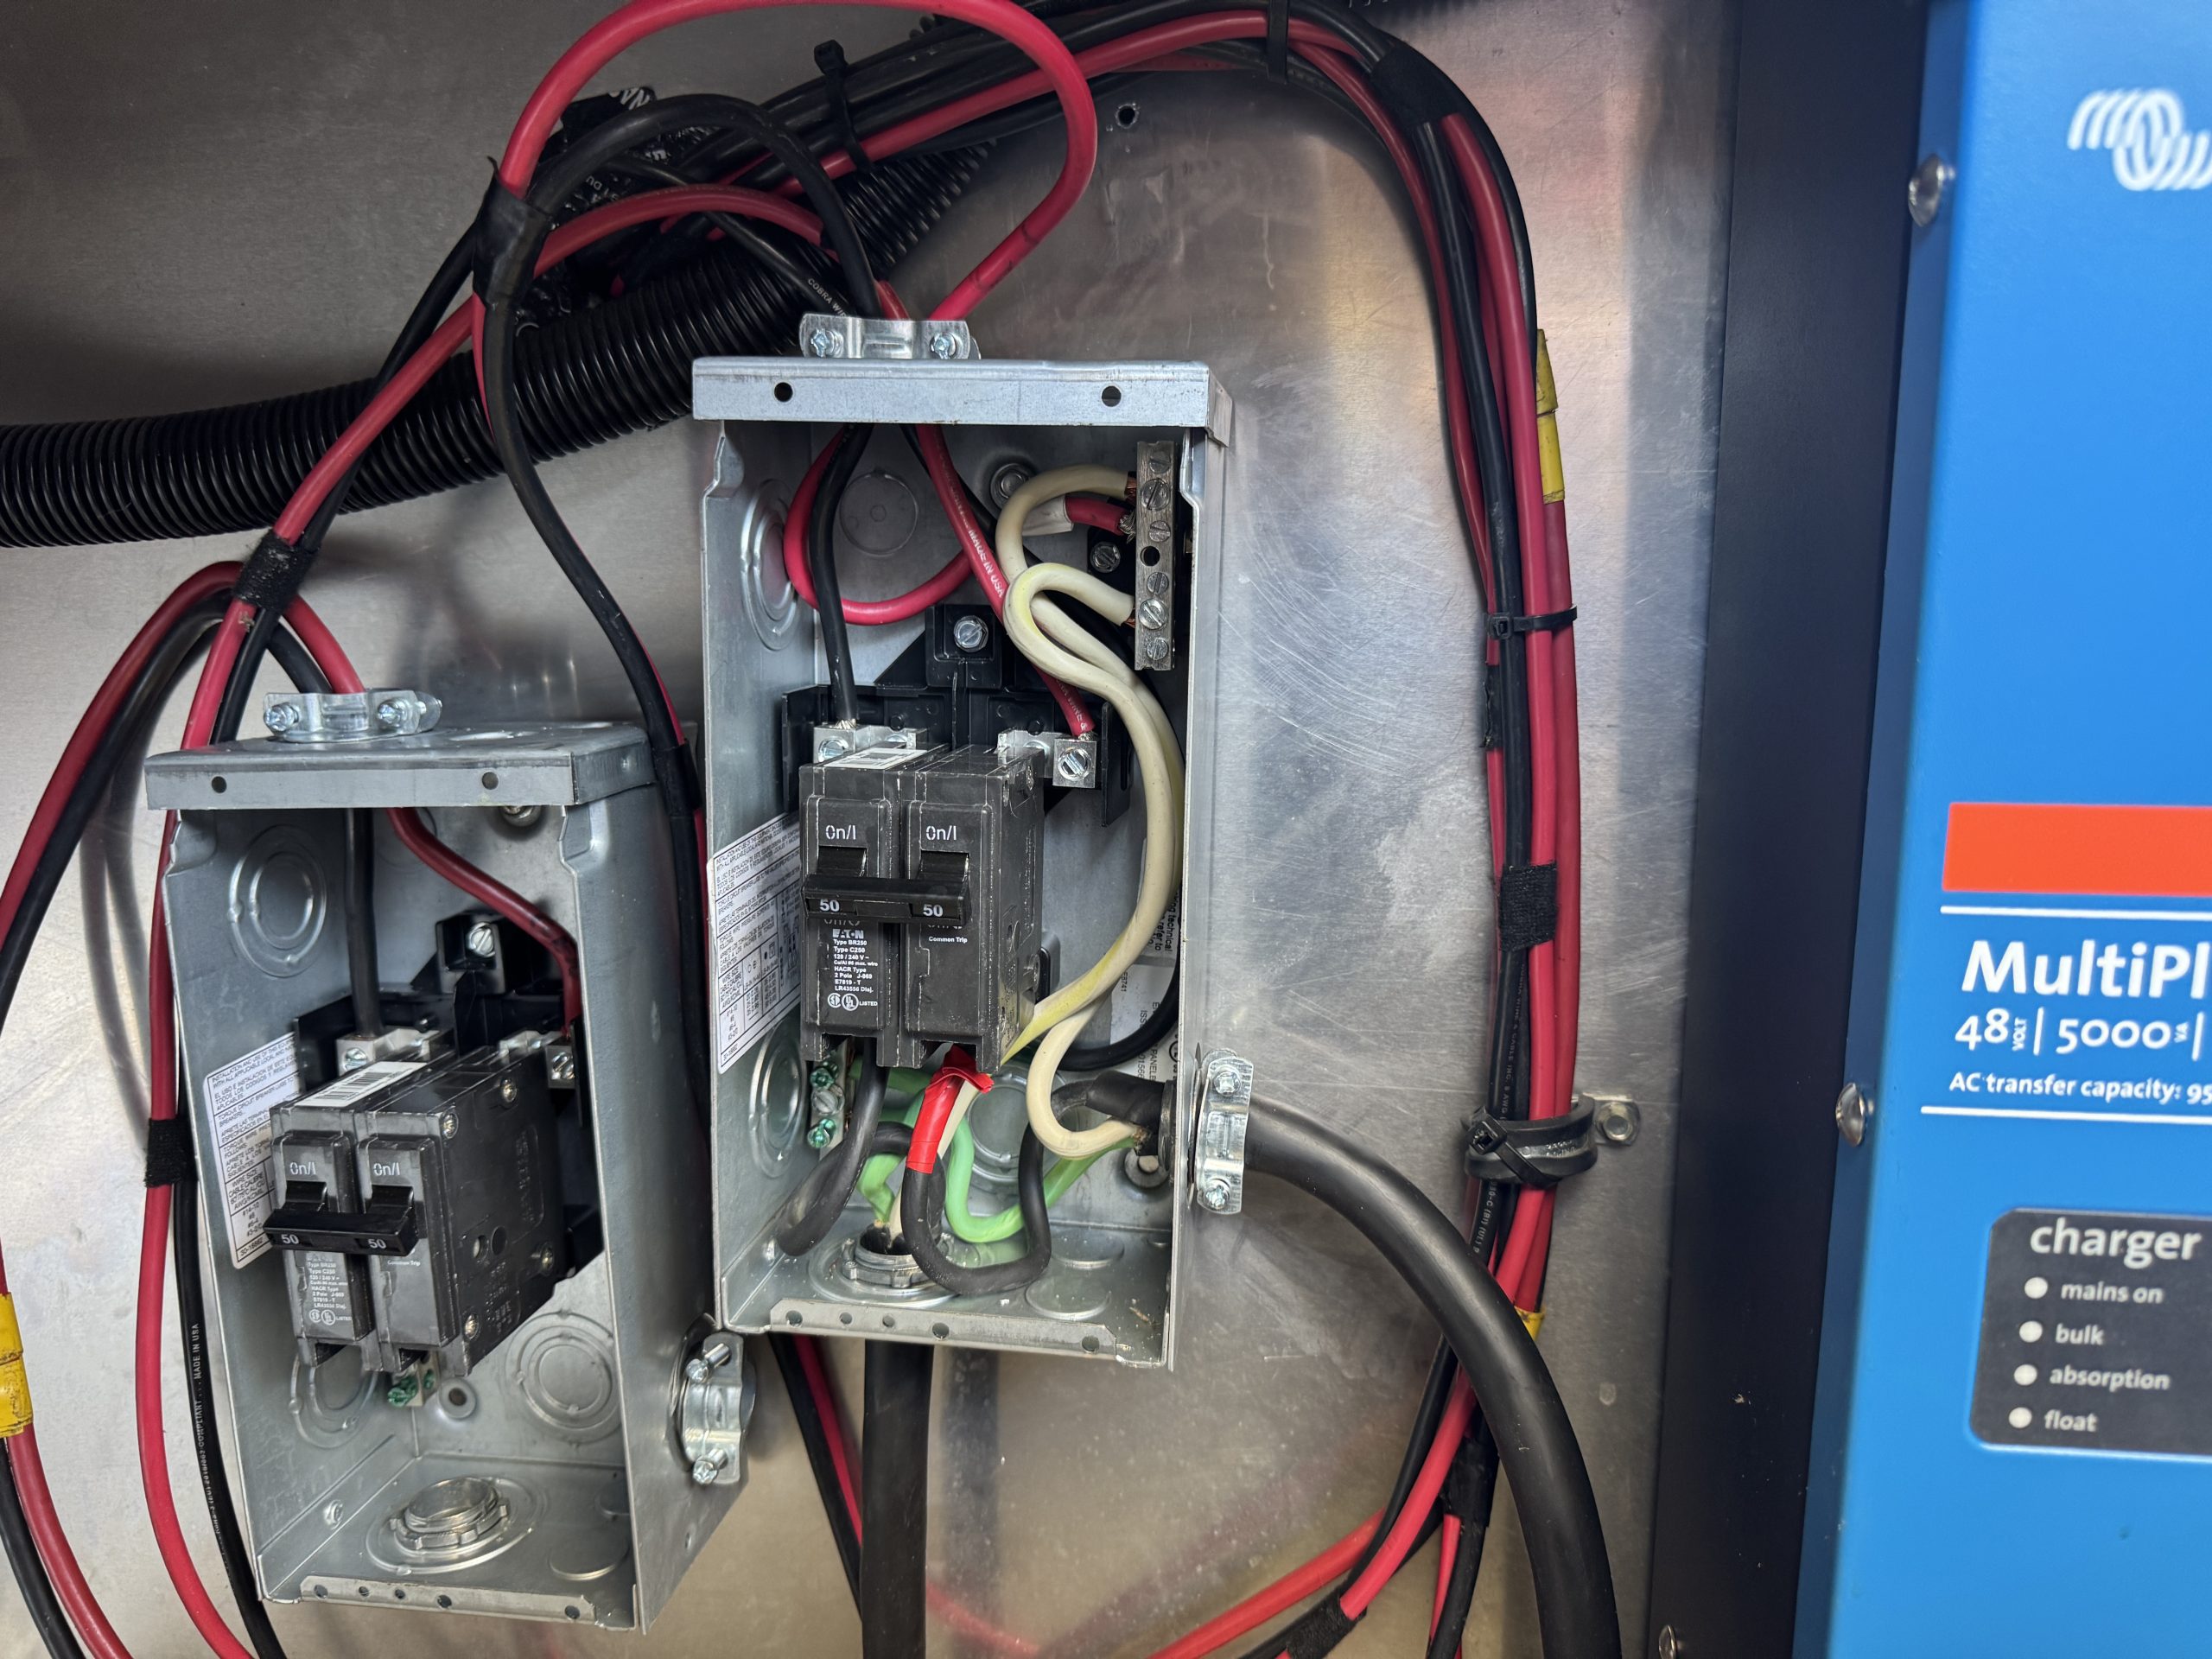
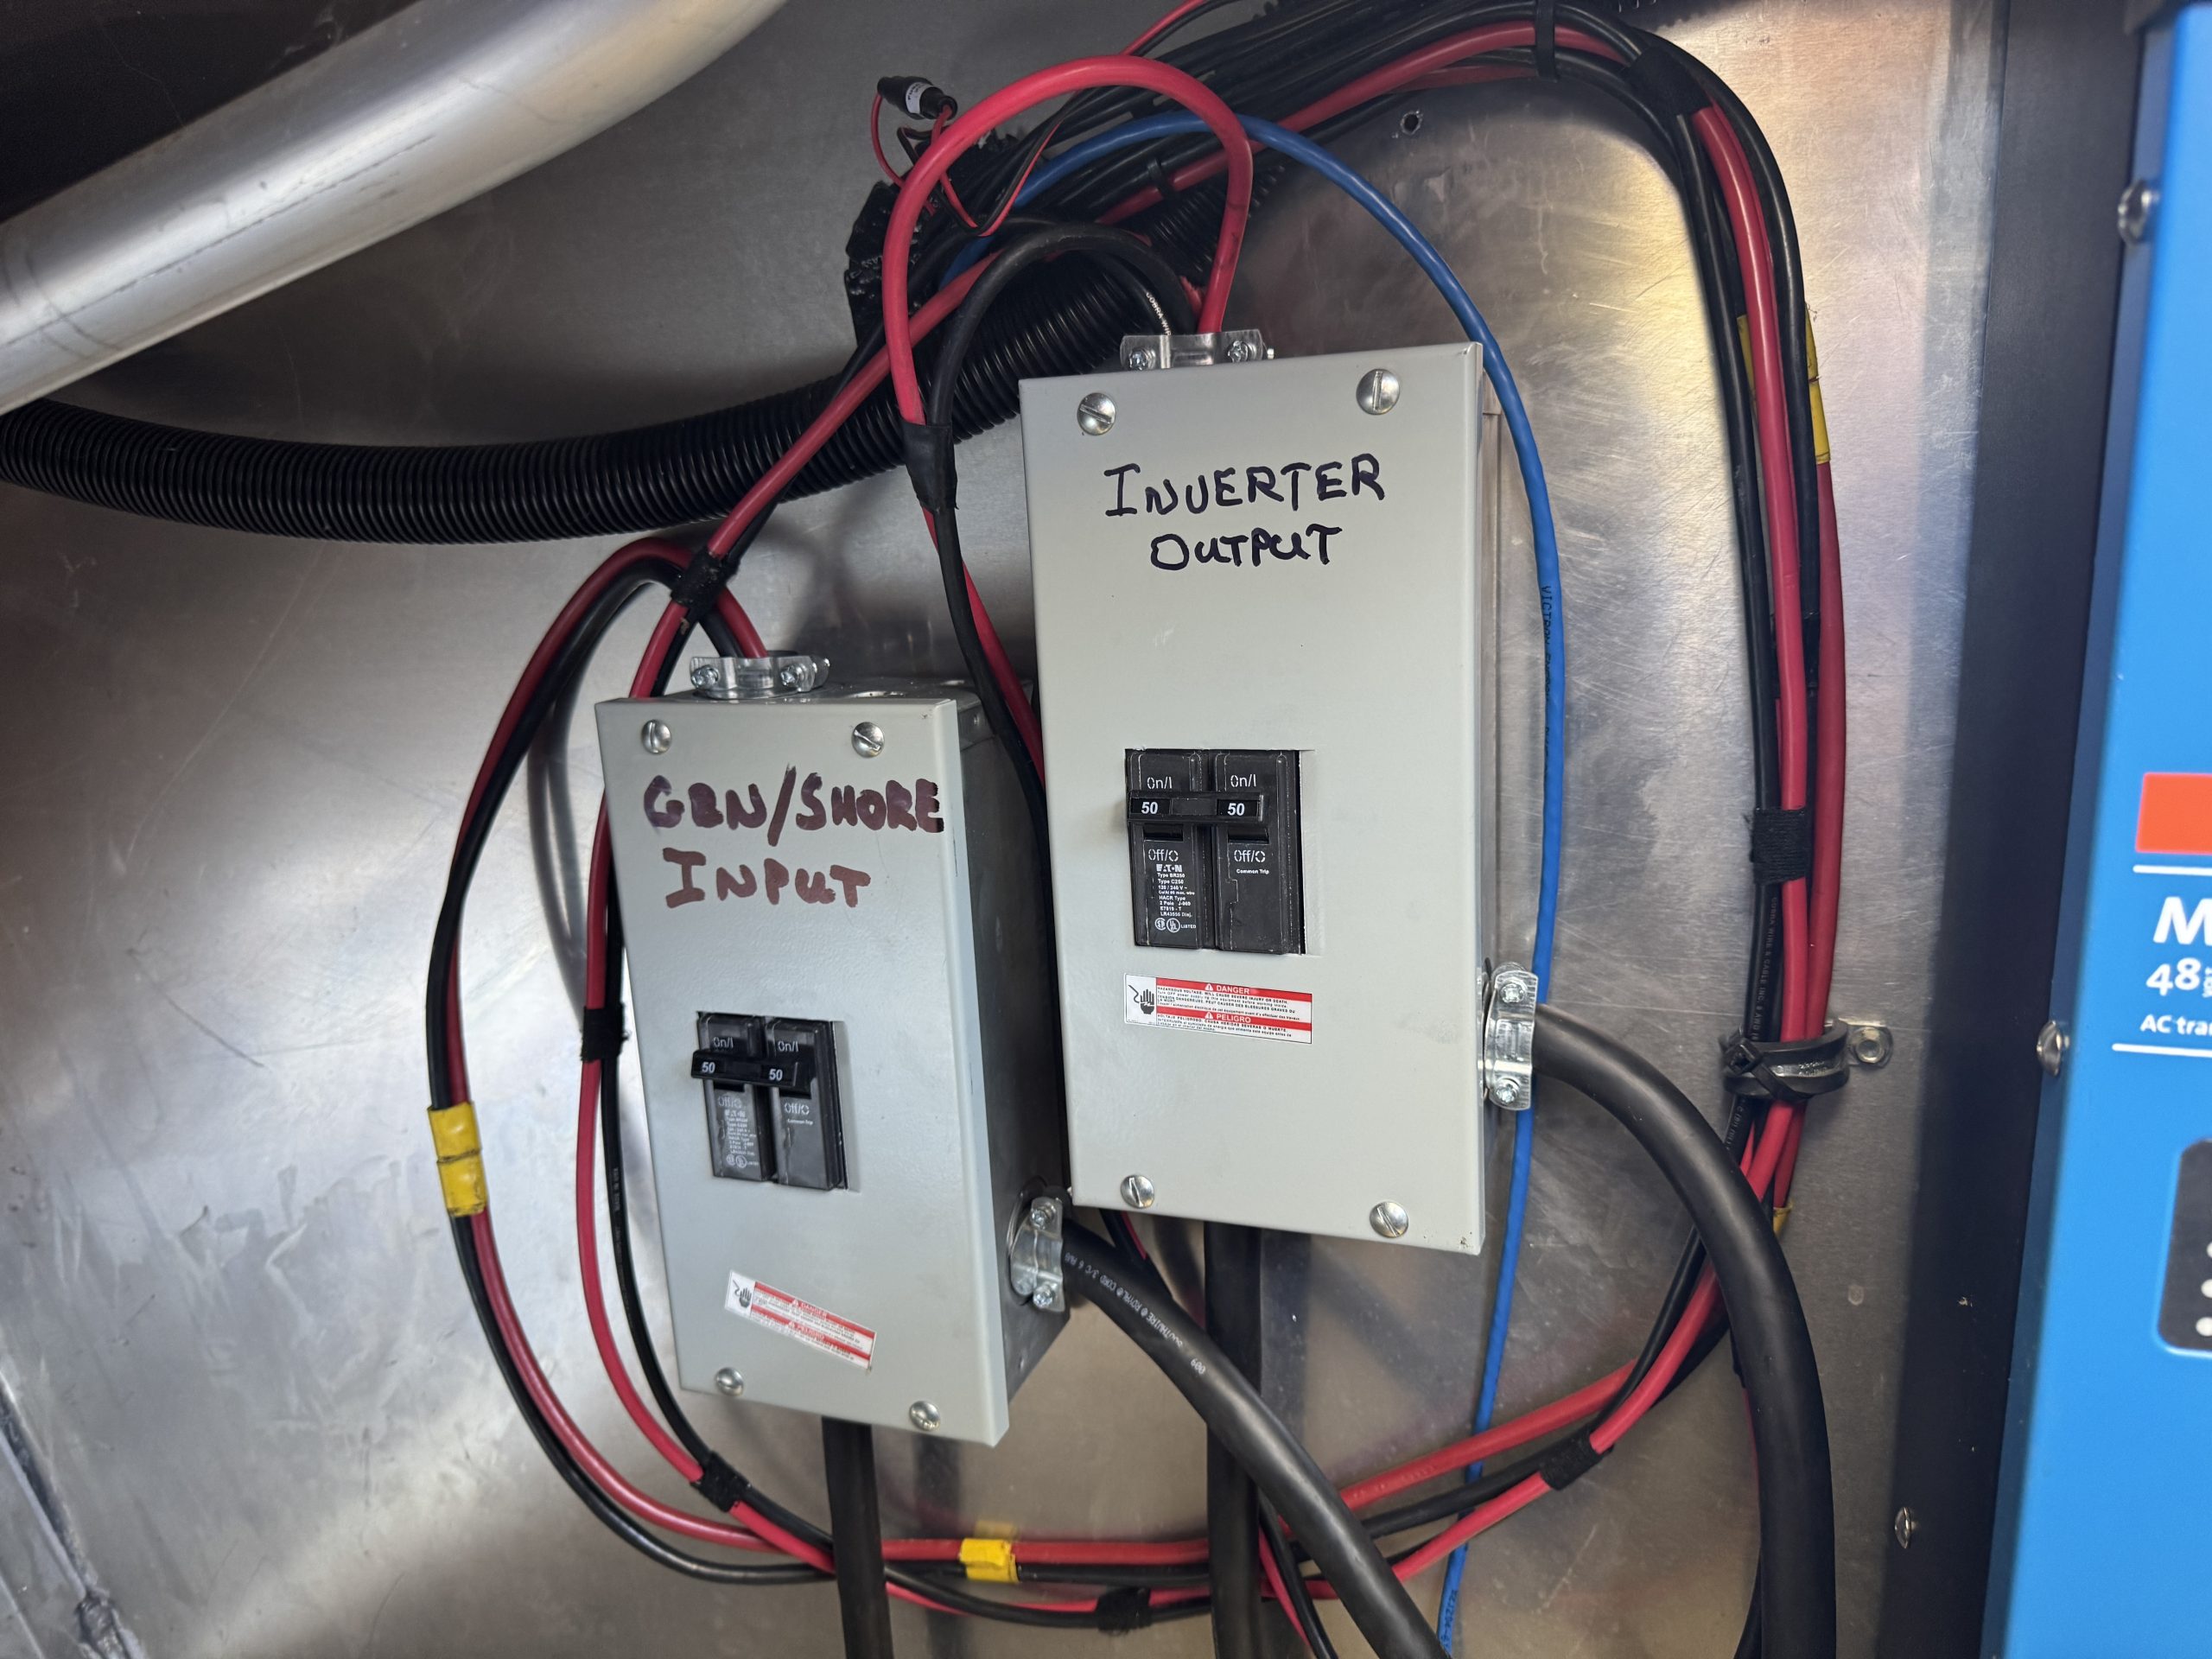
- 2 - Eaton 70 Amp Main Lug Load Centers
- 2 - Eaton 50 Amp Double Pole Circuit Breakers
- 2 - Ruuvi 4 in 1 Bluetooth Wireless Temperature Sensors
- 1 - Ruuvi 3 in 1 Bluetooth Wireless Temperature Sensors
- Miscellaneous parts, sealants, and connectors
Installation Notes
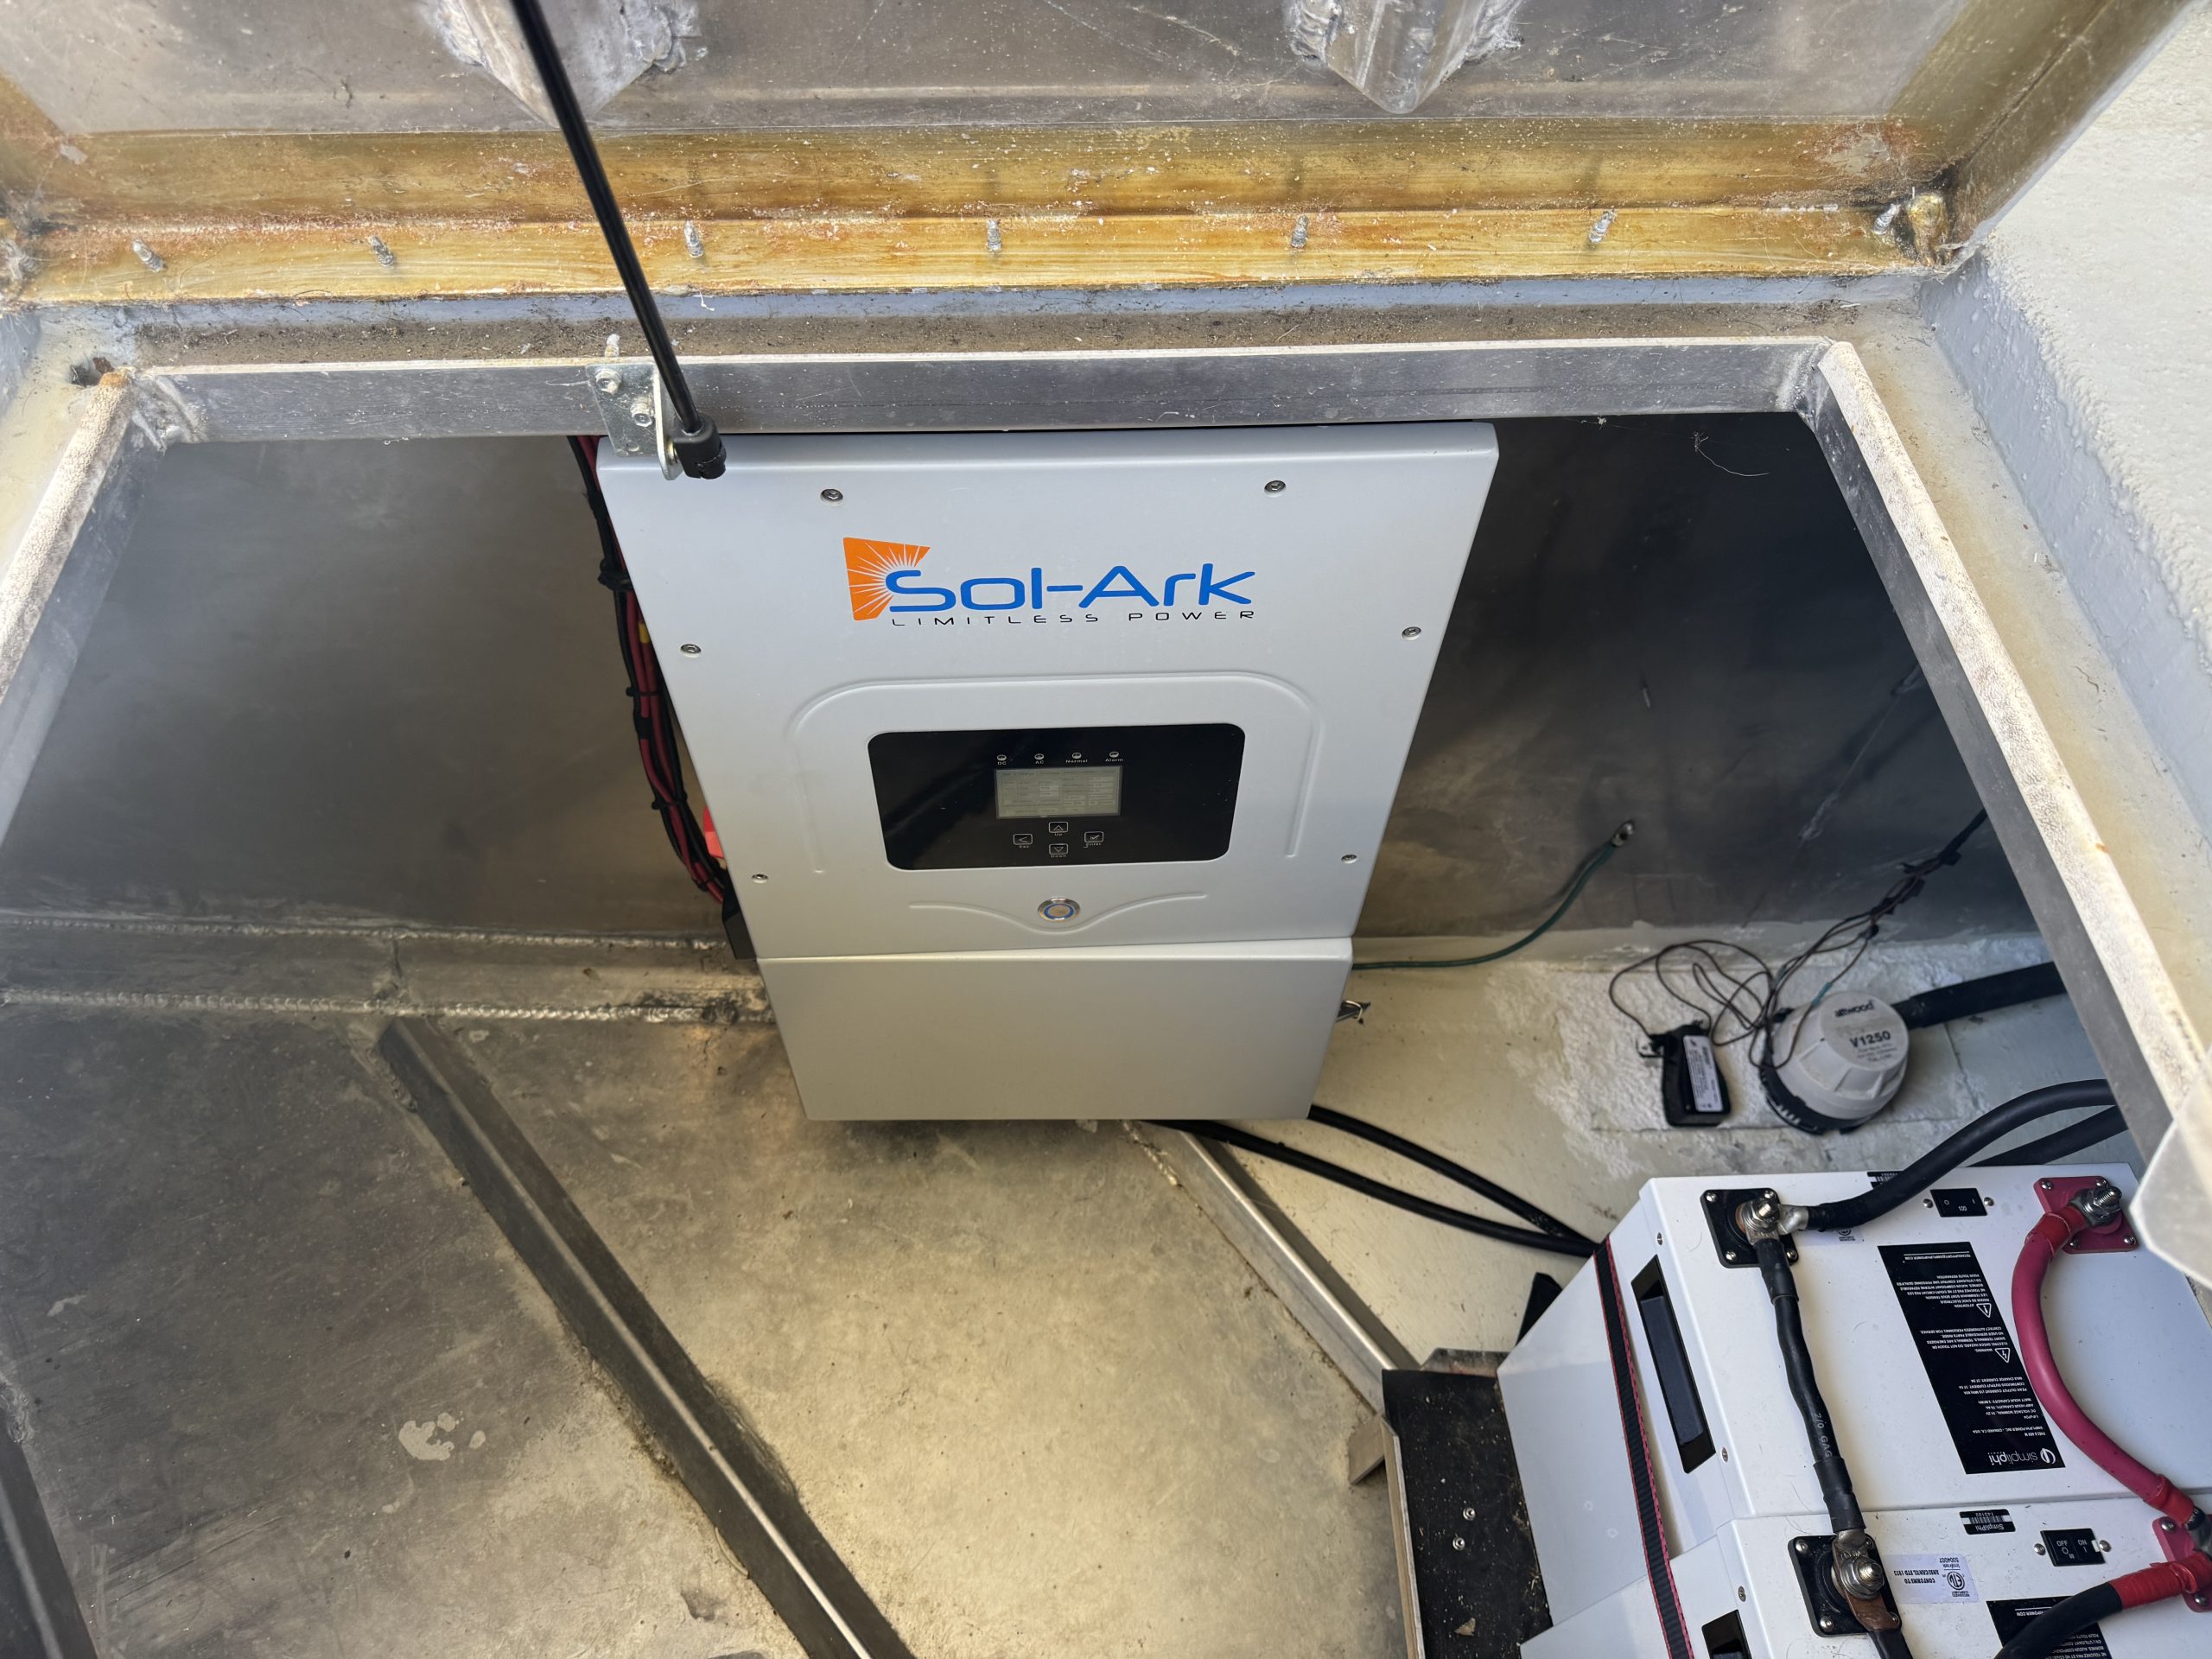
This installation was completed in August of 2025. The owners of this houseboat contacted me regarding upgrading their existing solar system on their houseboat. The existing system consisted of six Simpliphi 48 volt 75 amp hour batteries, a Sol-Ark 6K all in one hybrid inverter and eight QCells 365 watt solar panels. The customer wanted additional power to run the onboard residential style air conditioner and better compatibility with the onboard Westerbeke generator. The customer could not get the generator power to pass through the Sol-Ark inverter (even after consulting with Sol-Ark directly). We had discussions about different possibilities. The customer wanted to utilize the existing 48 volt battery bank and solar panels. The customer also had four additional solar panels he wanted to add top the system. I put together a system proposal based on our conversations and the customer accepted it.
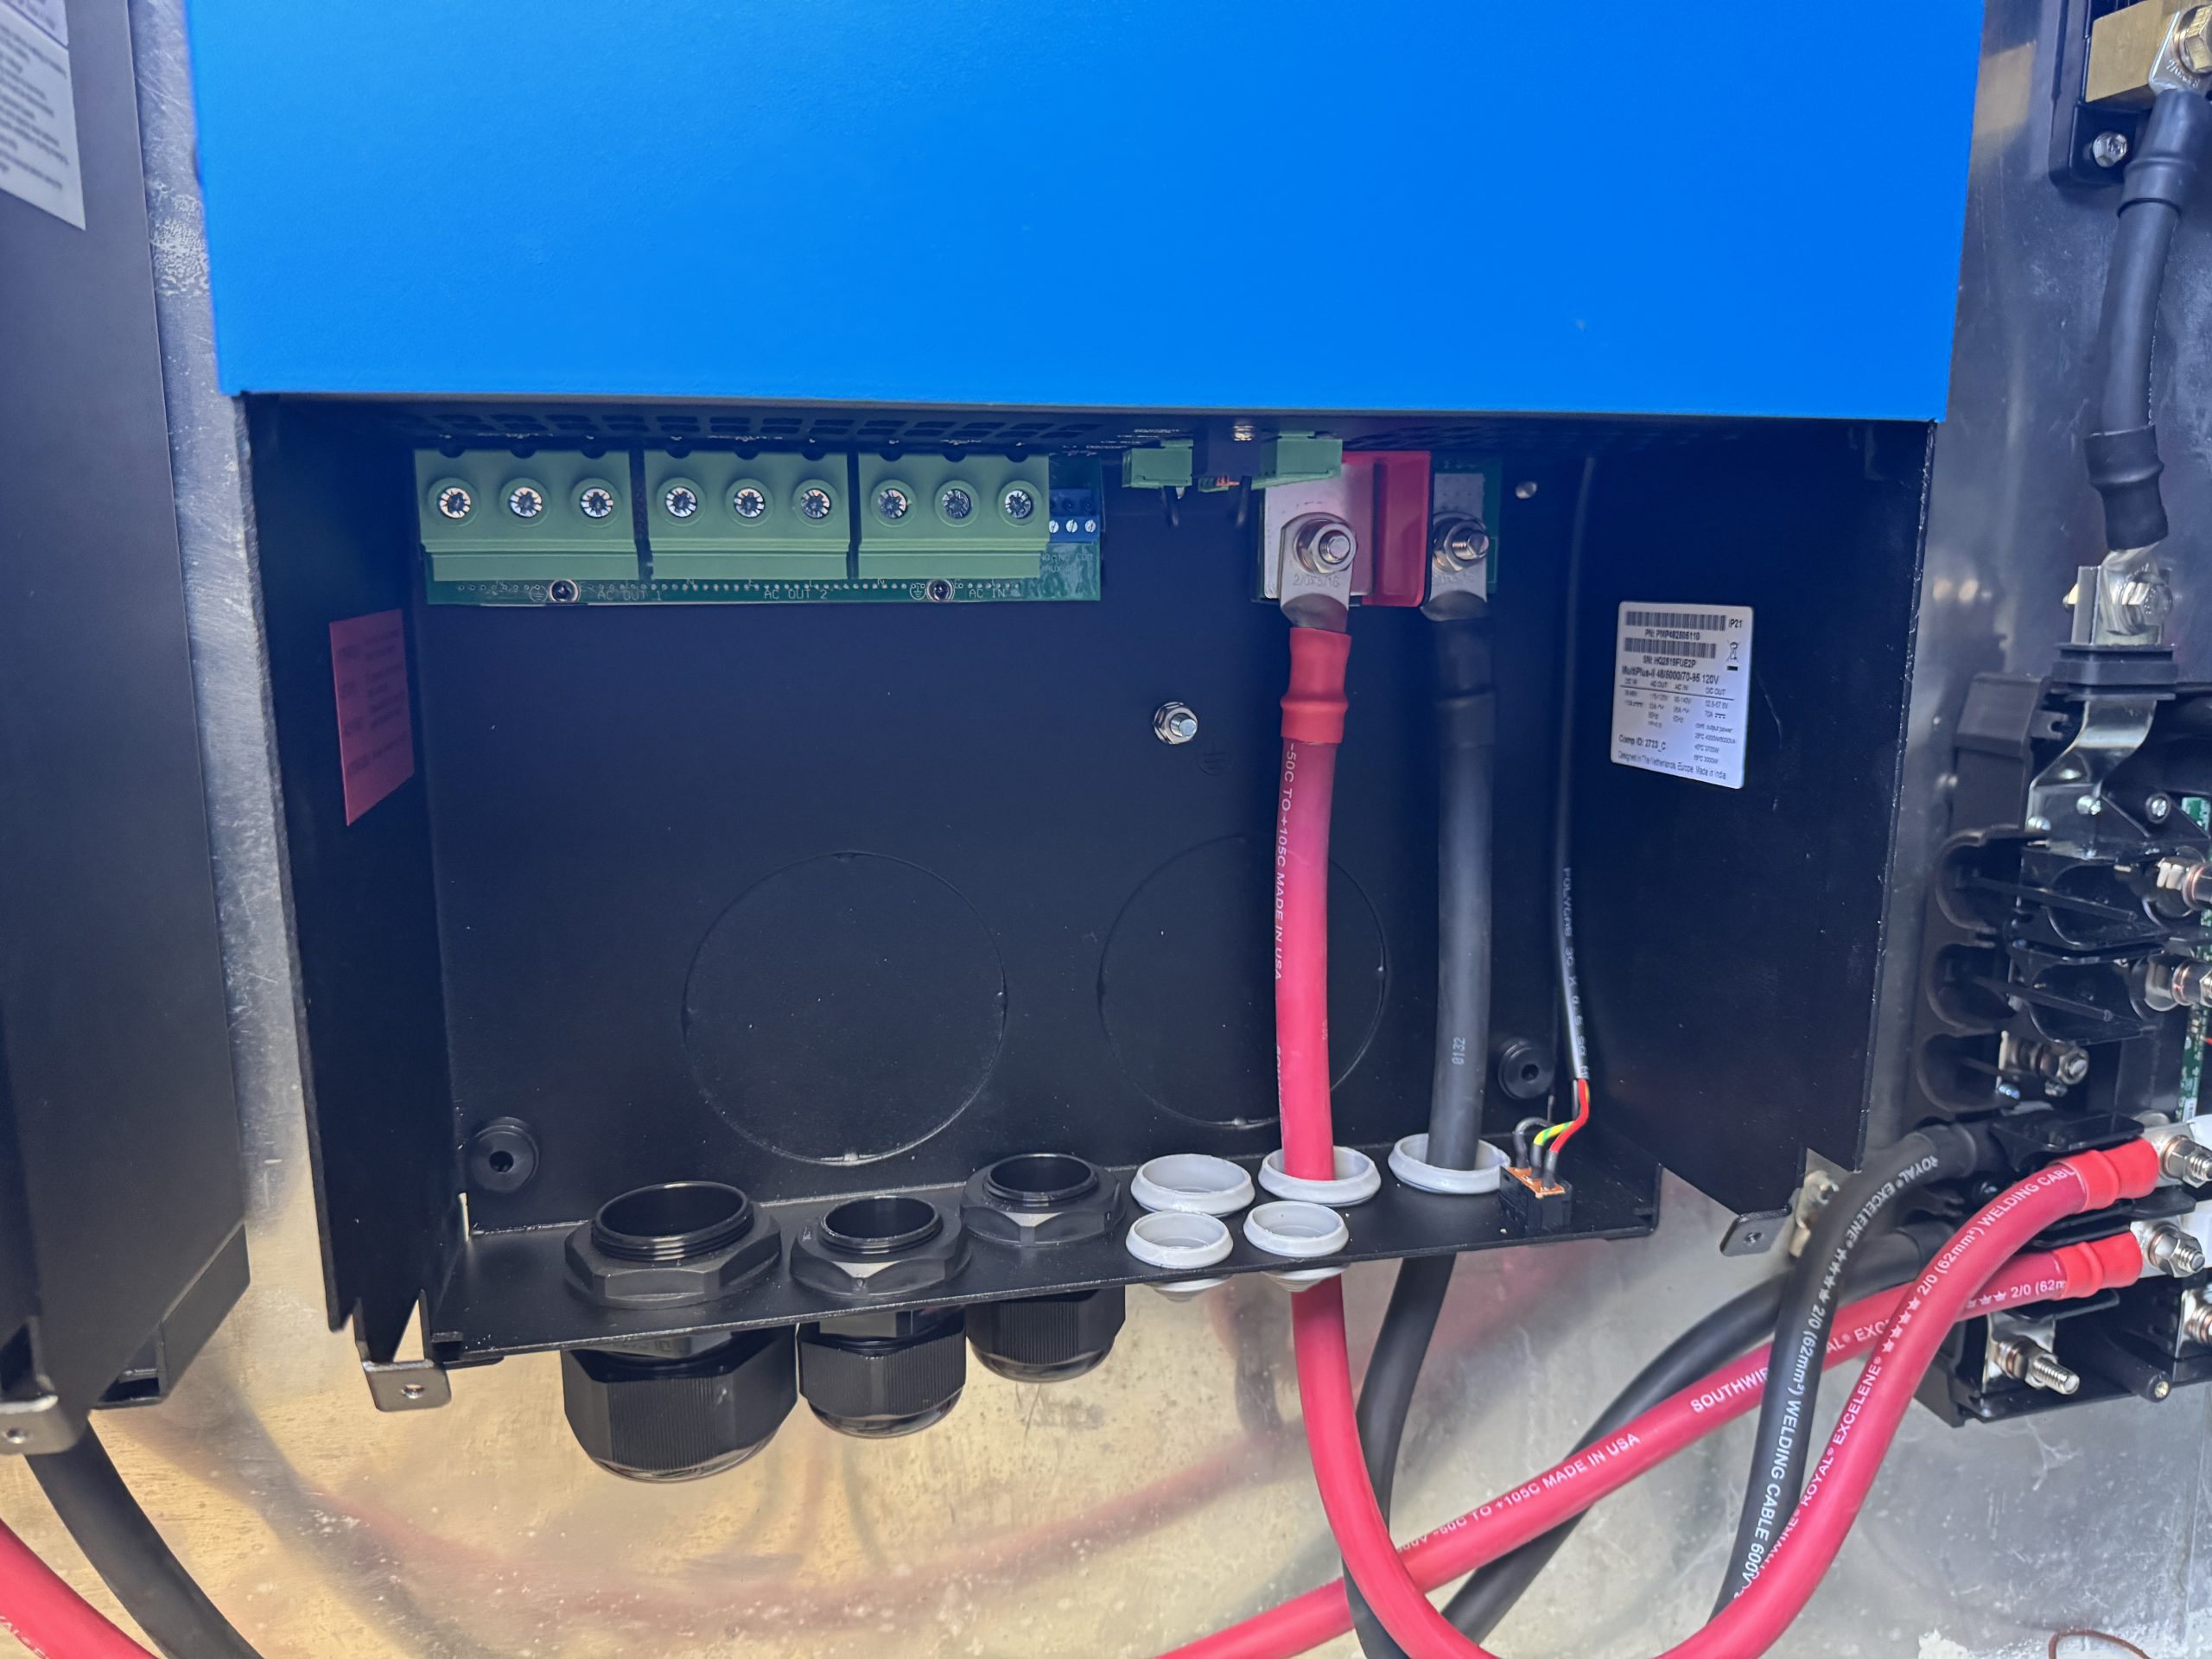
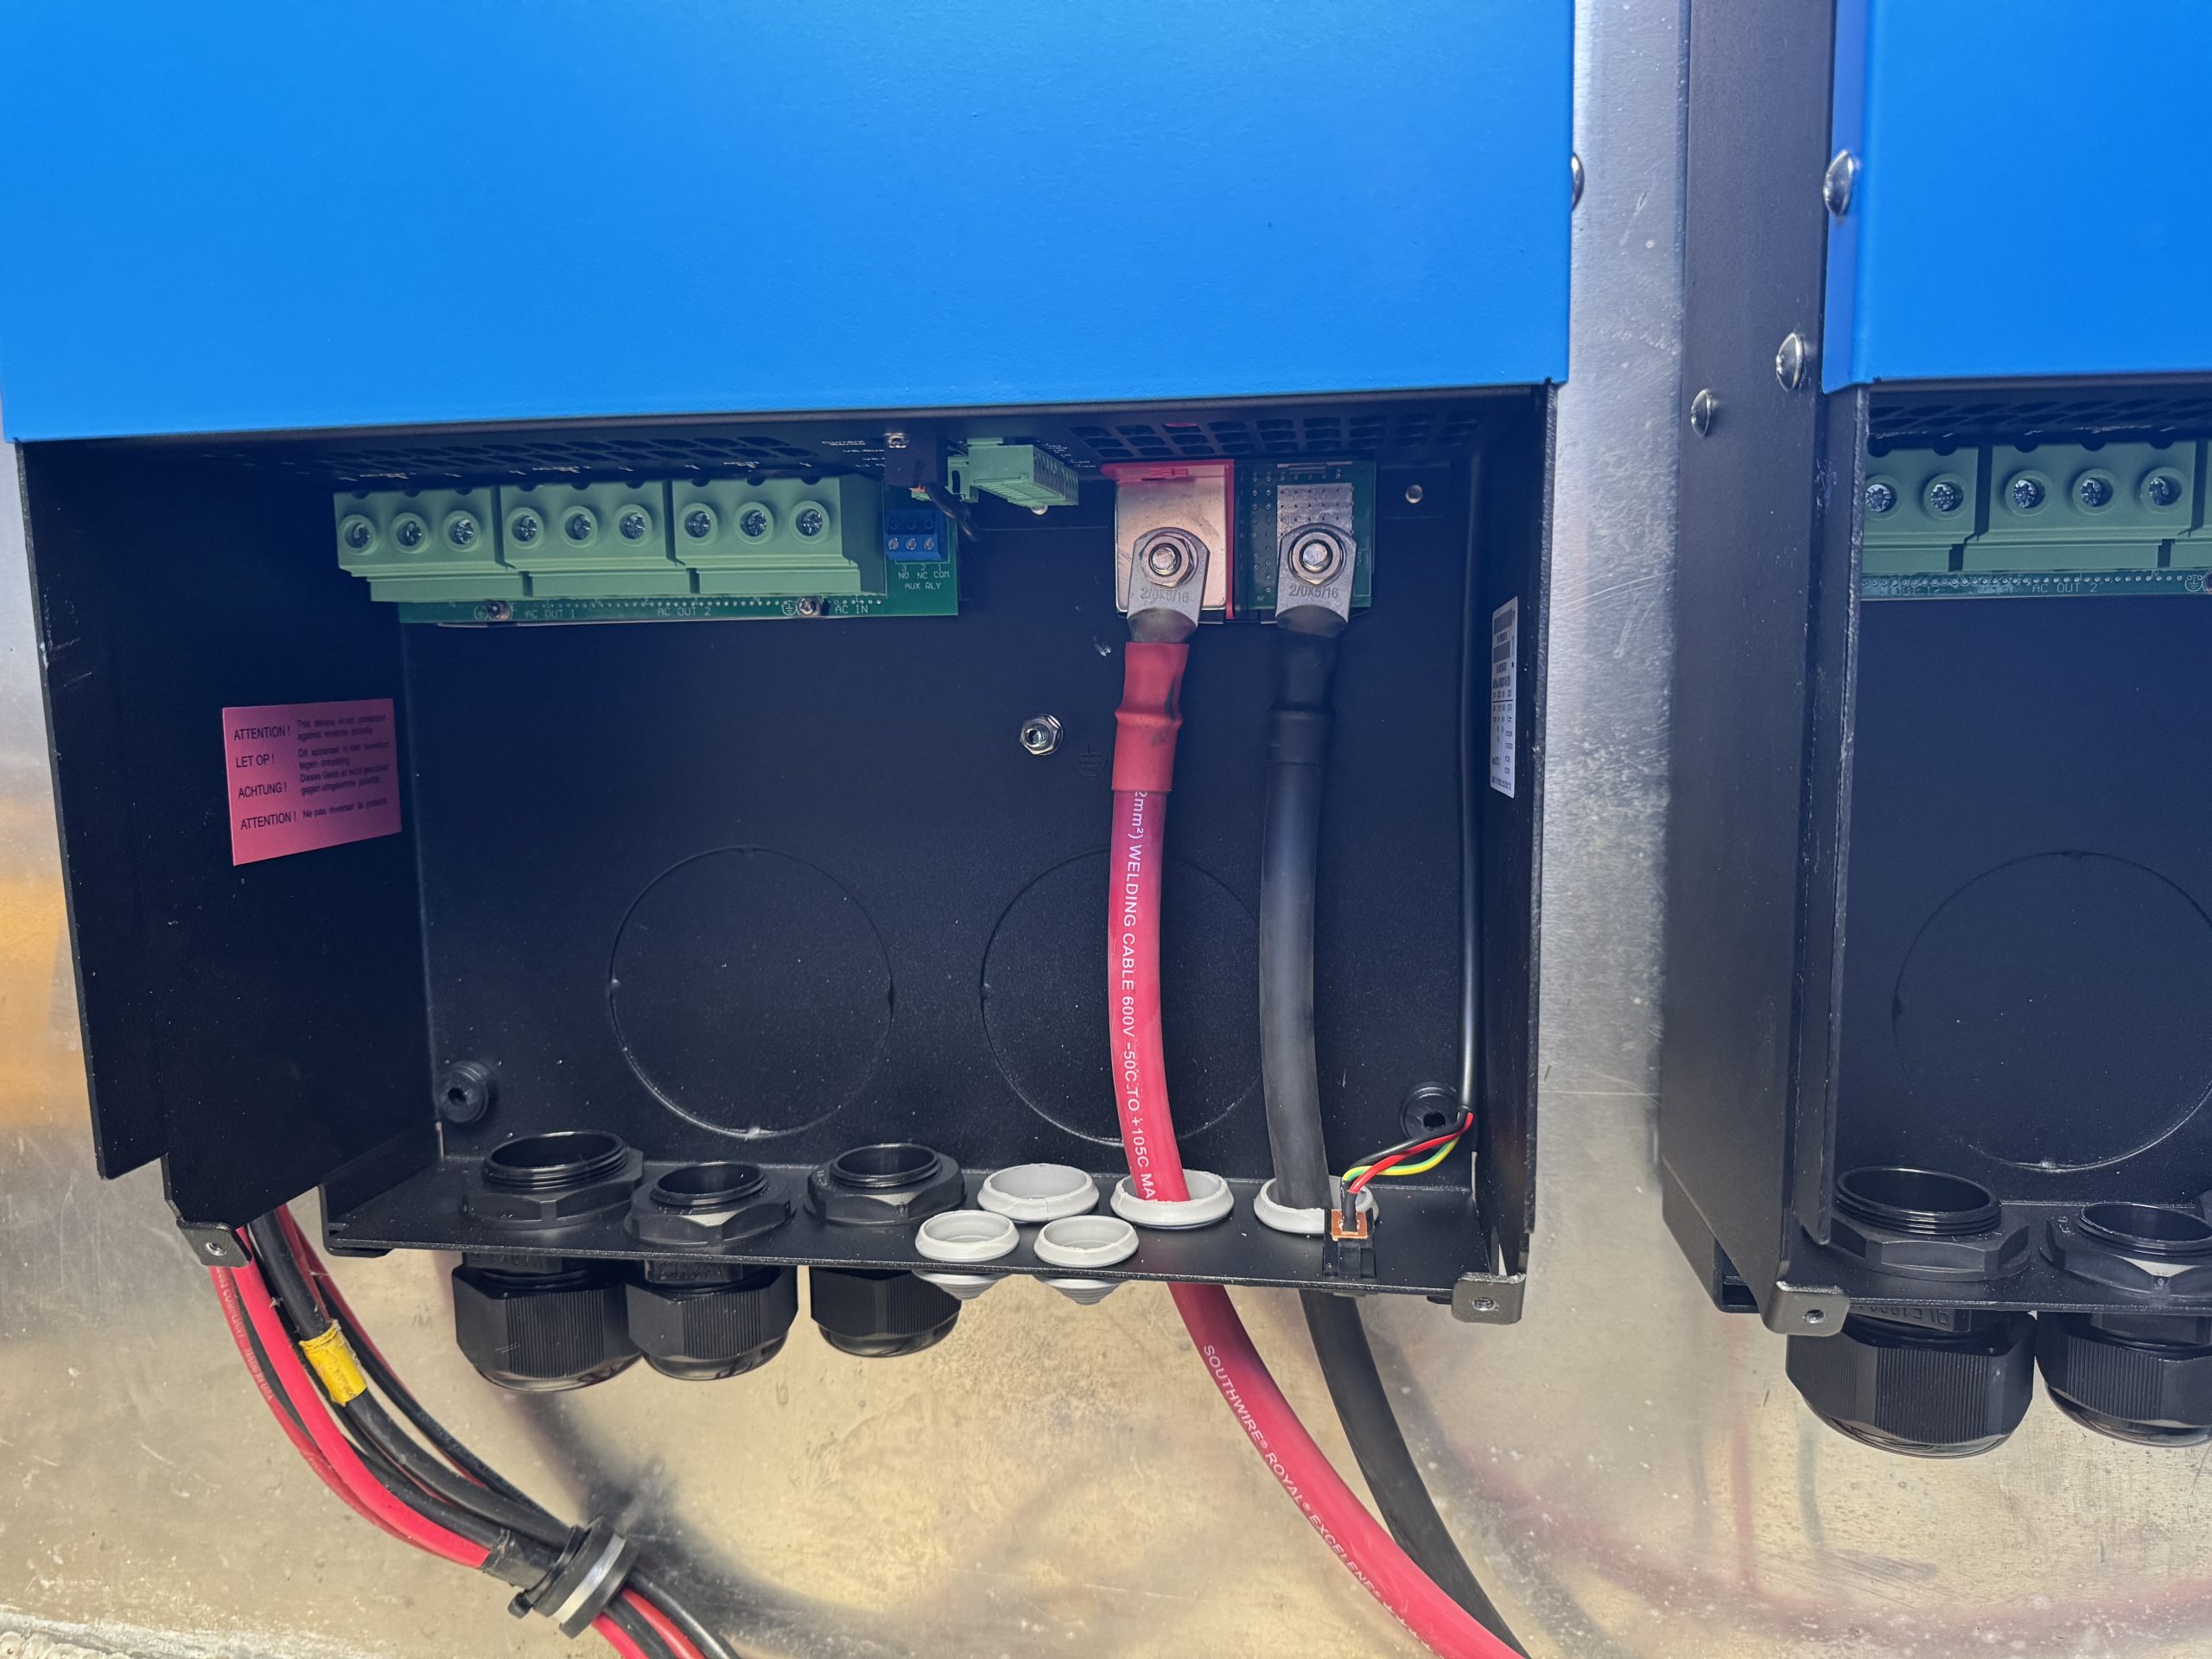
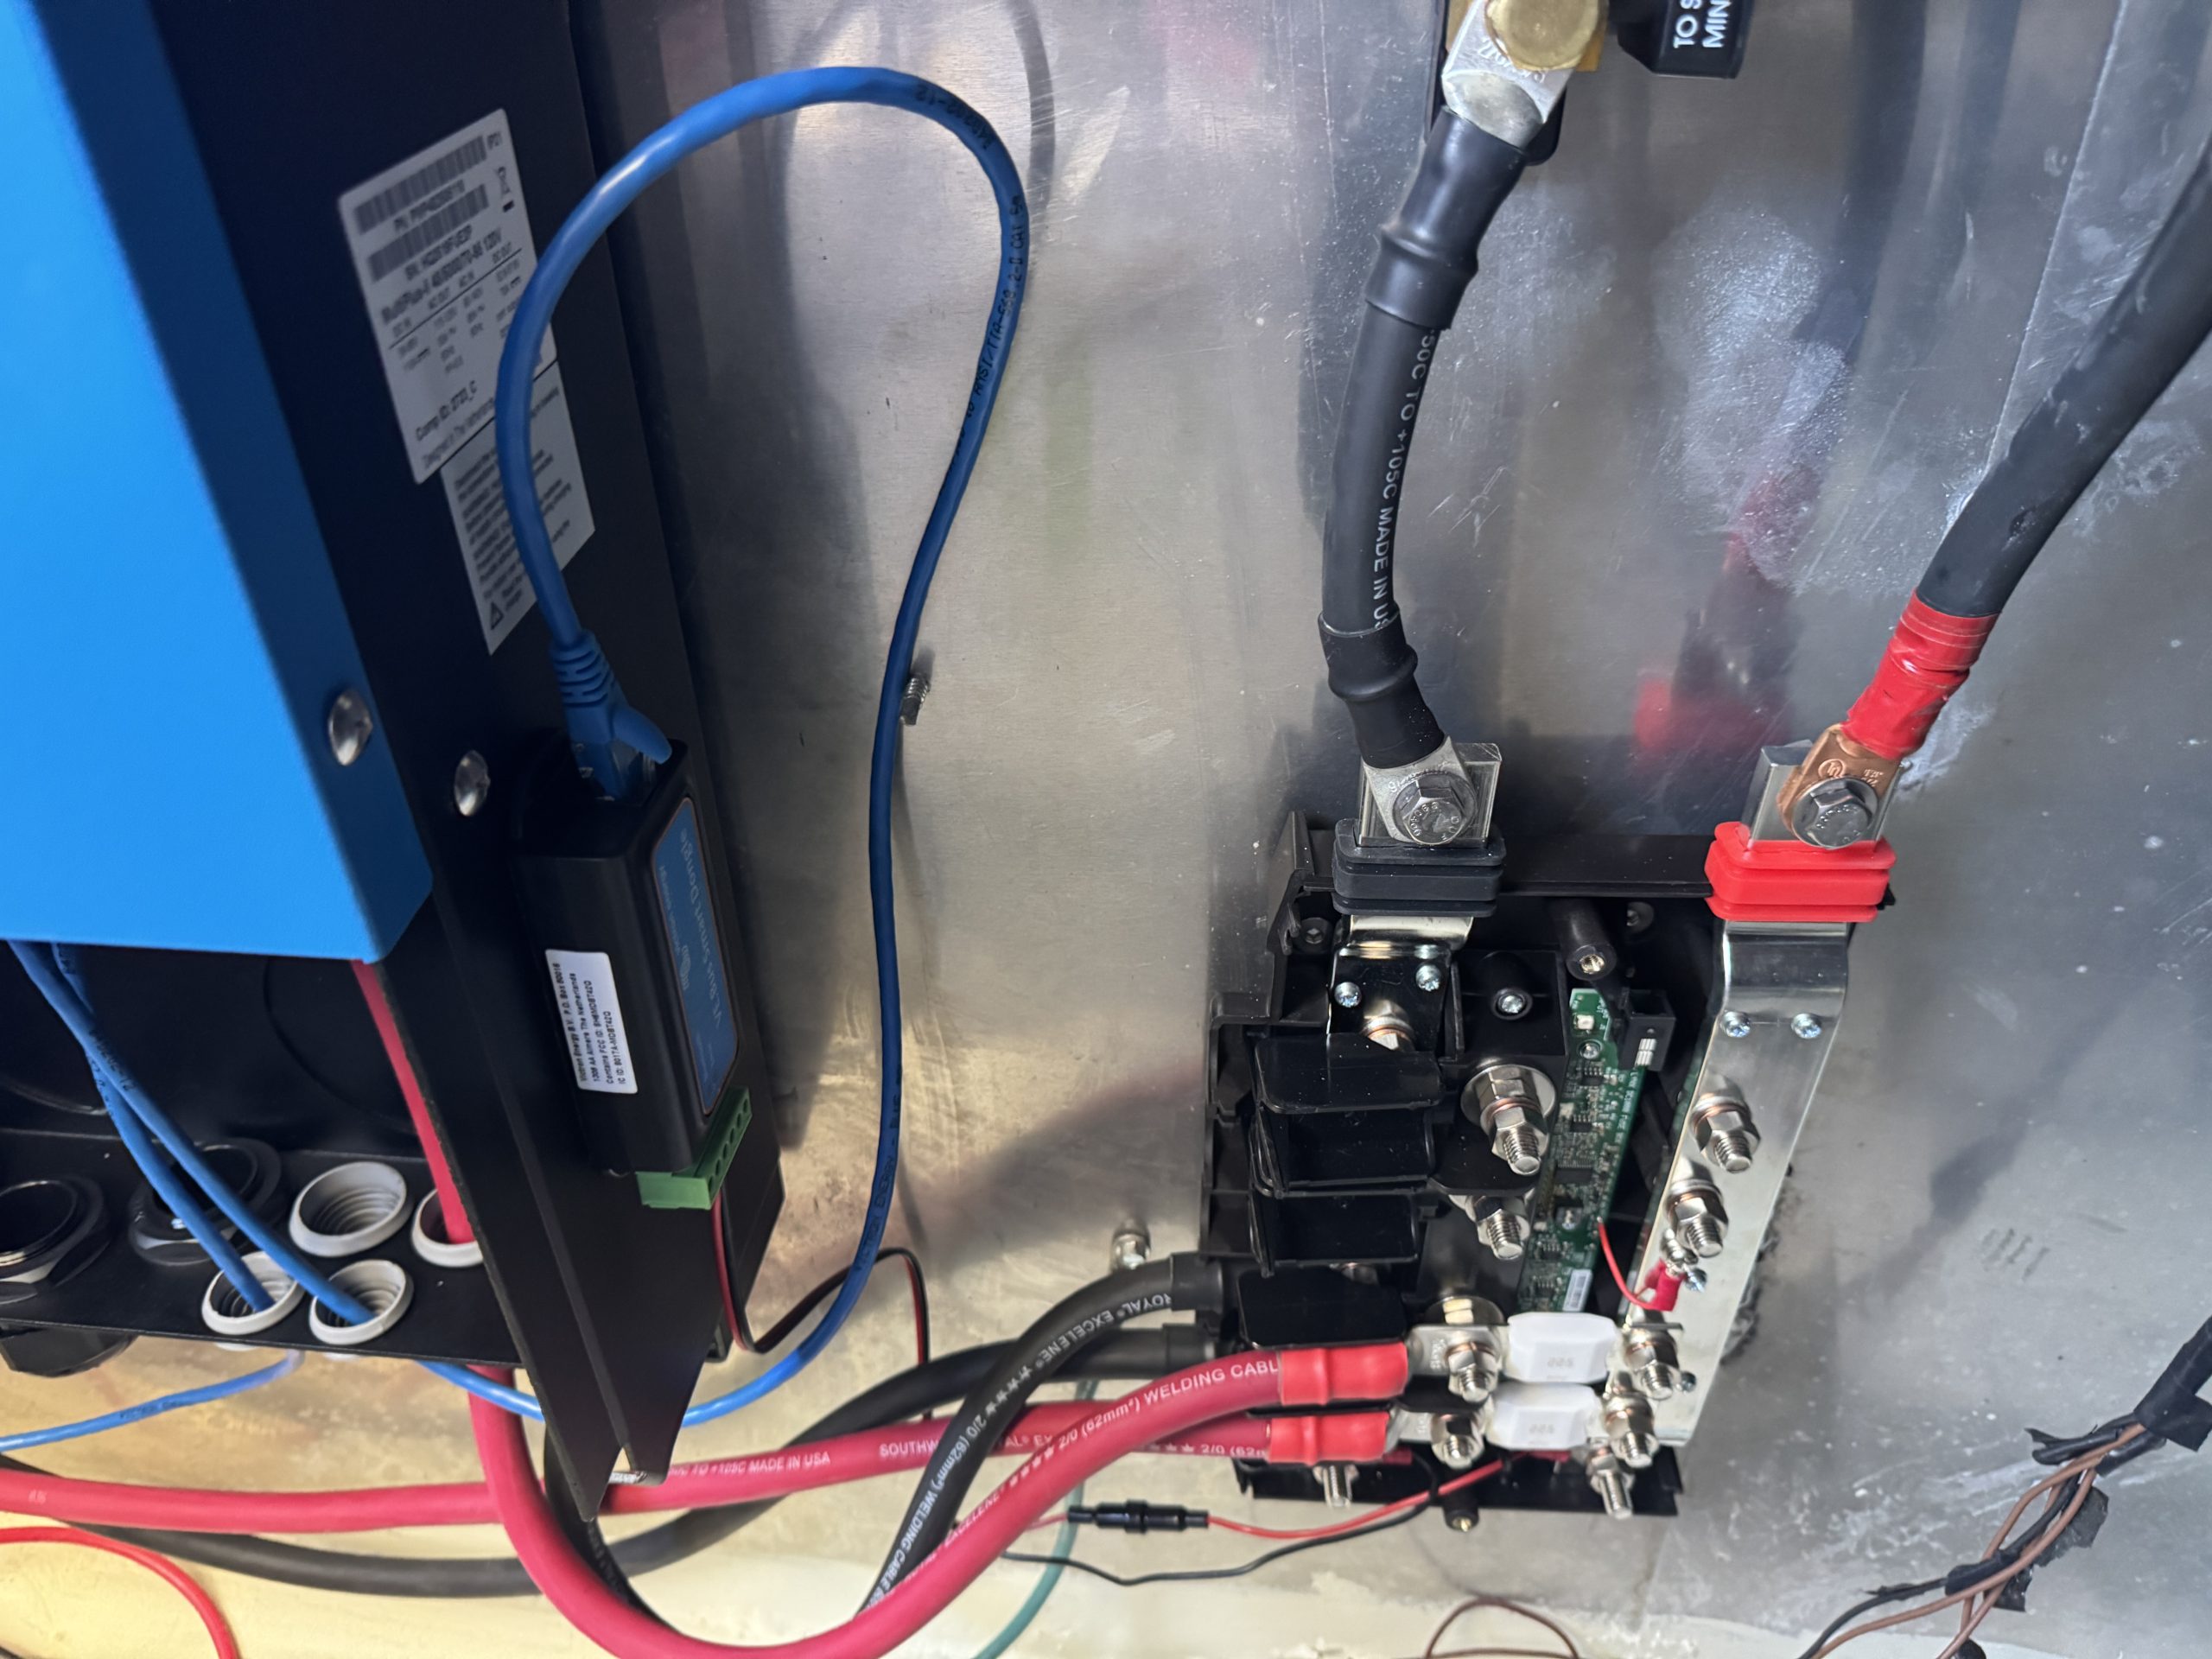
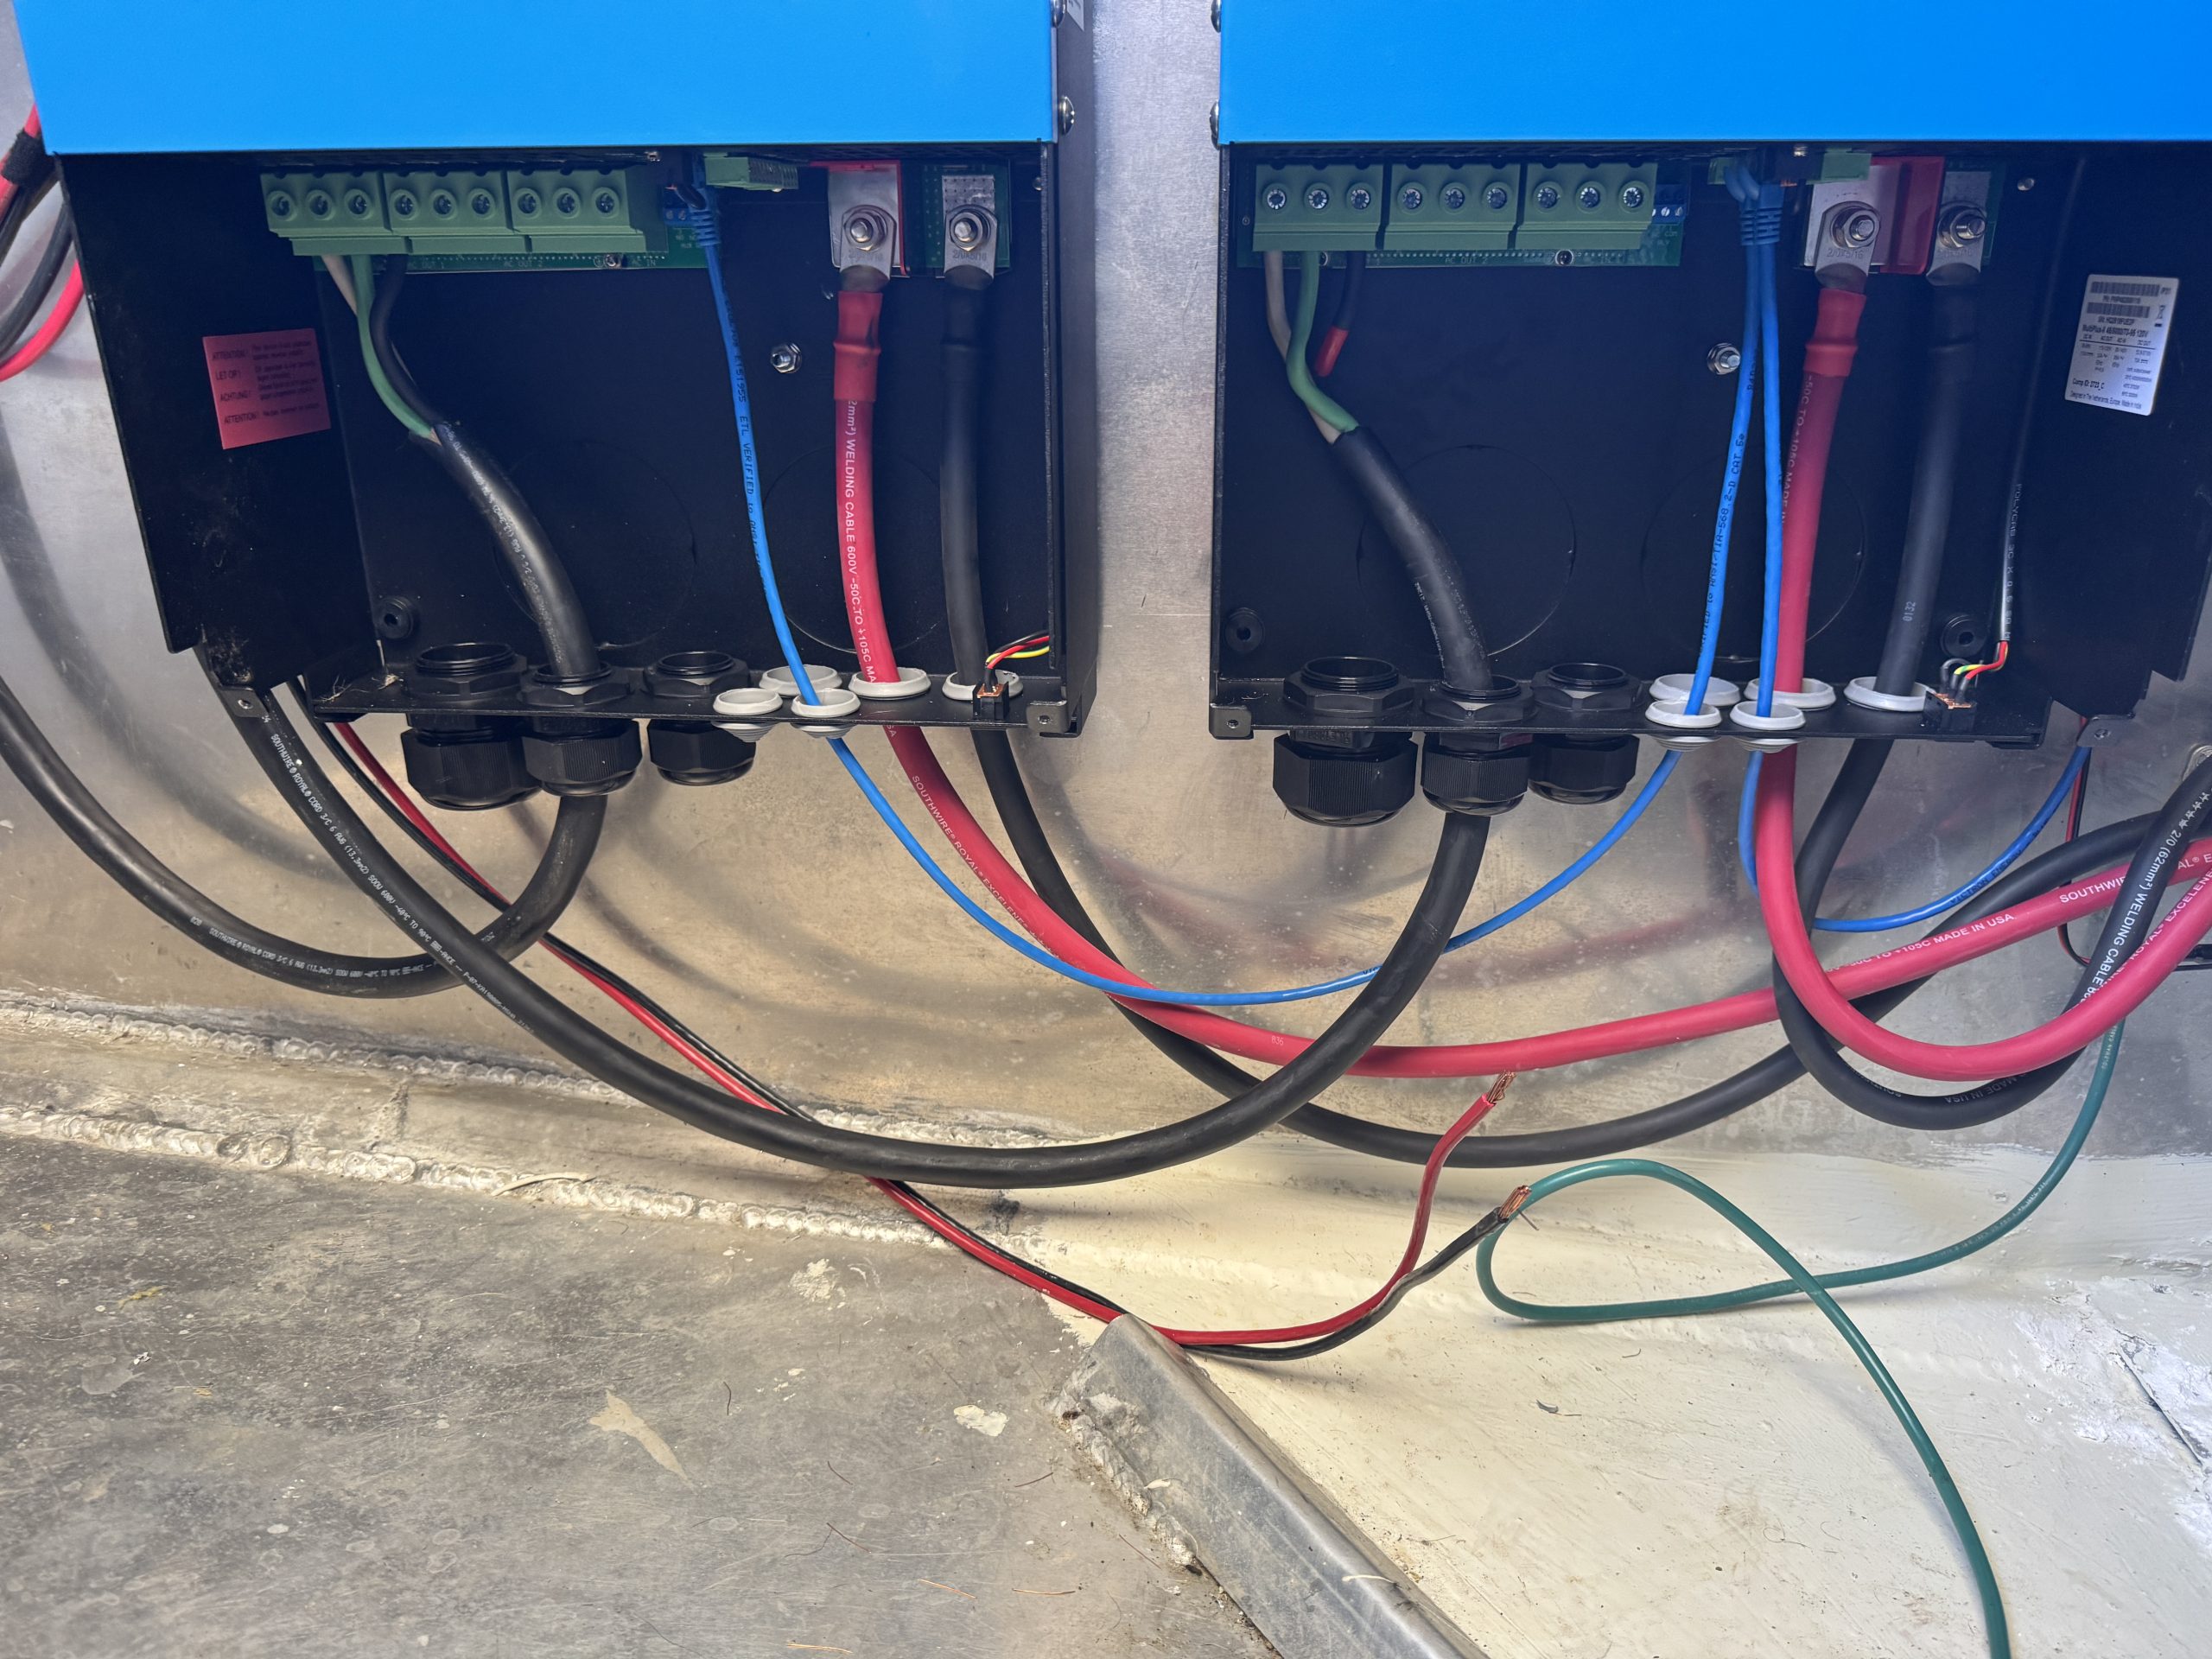
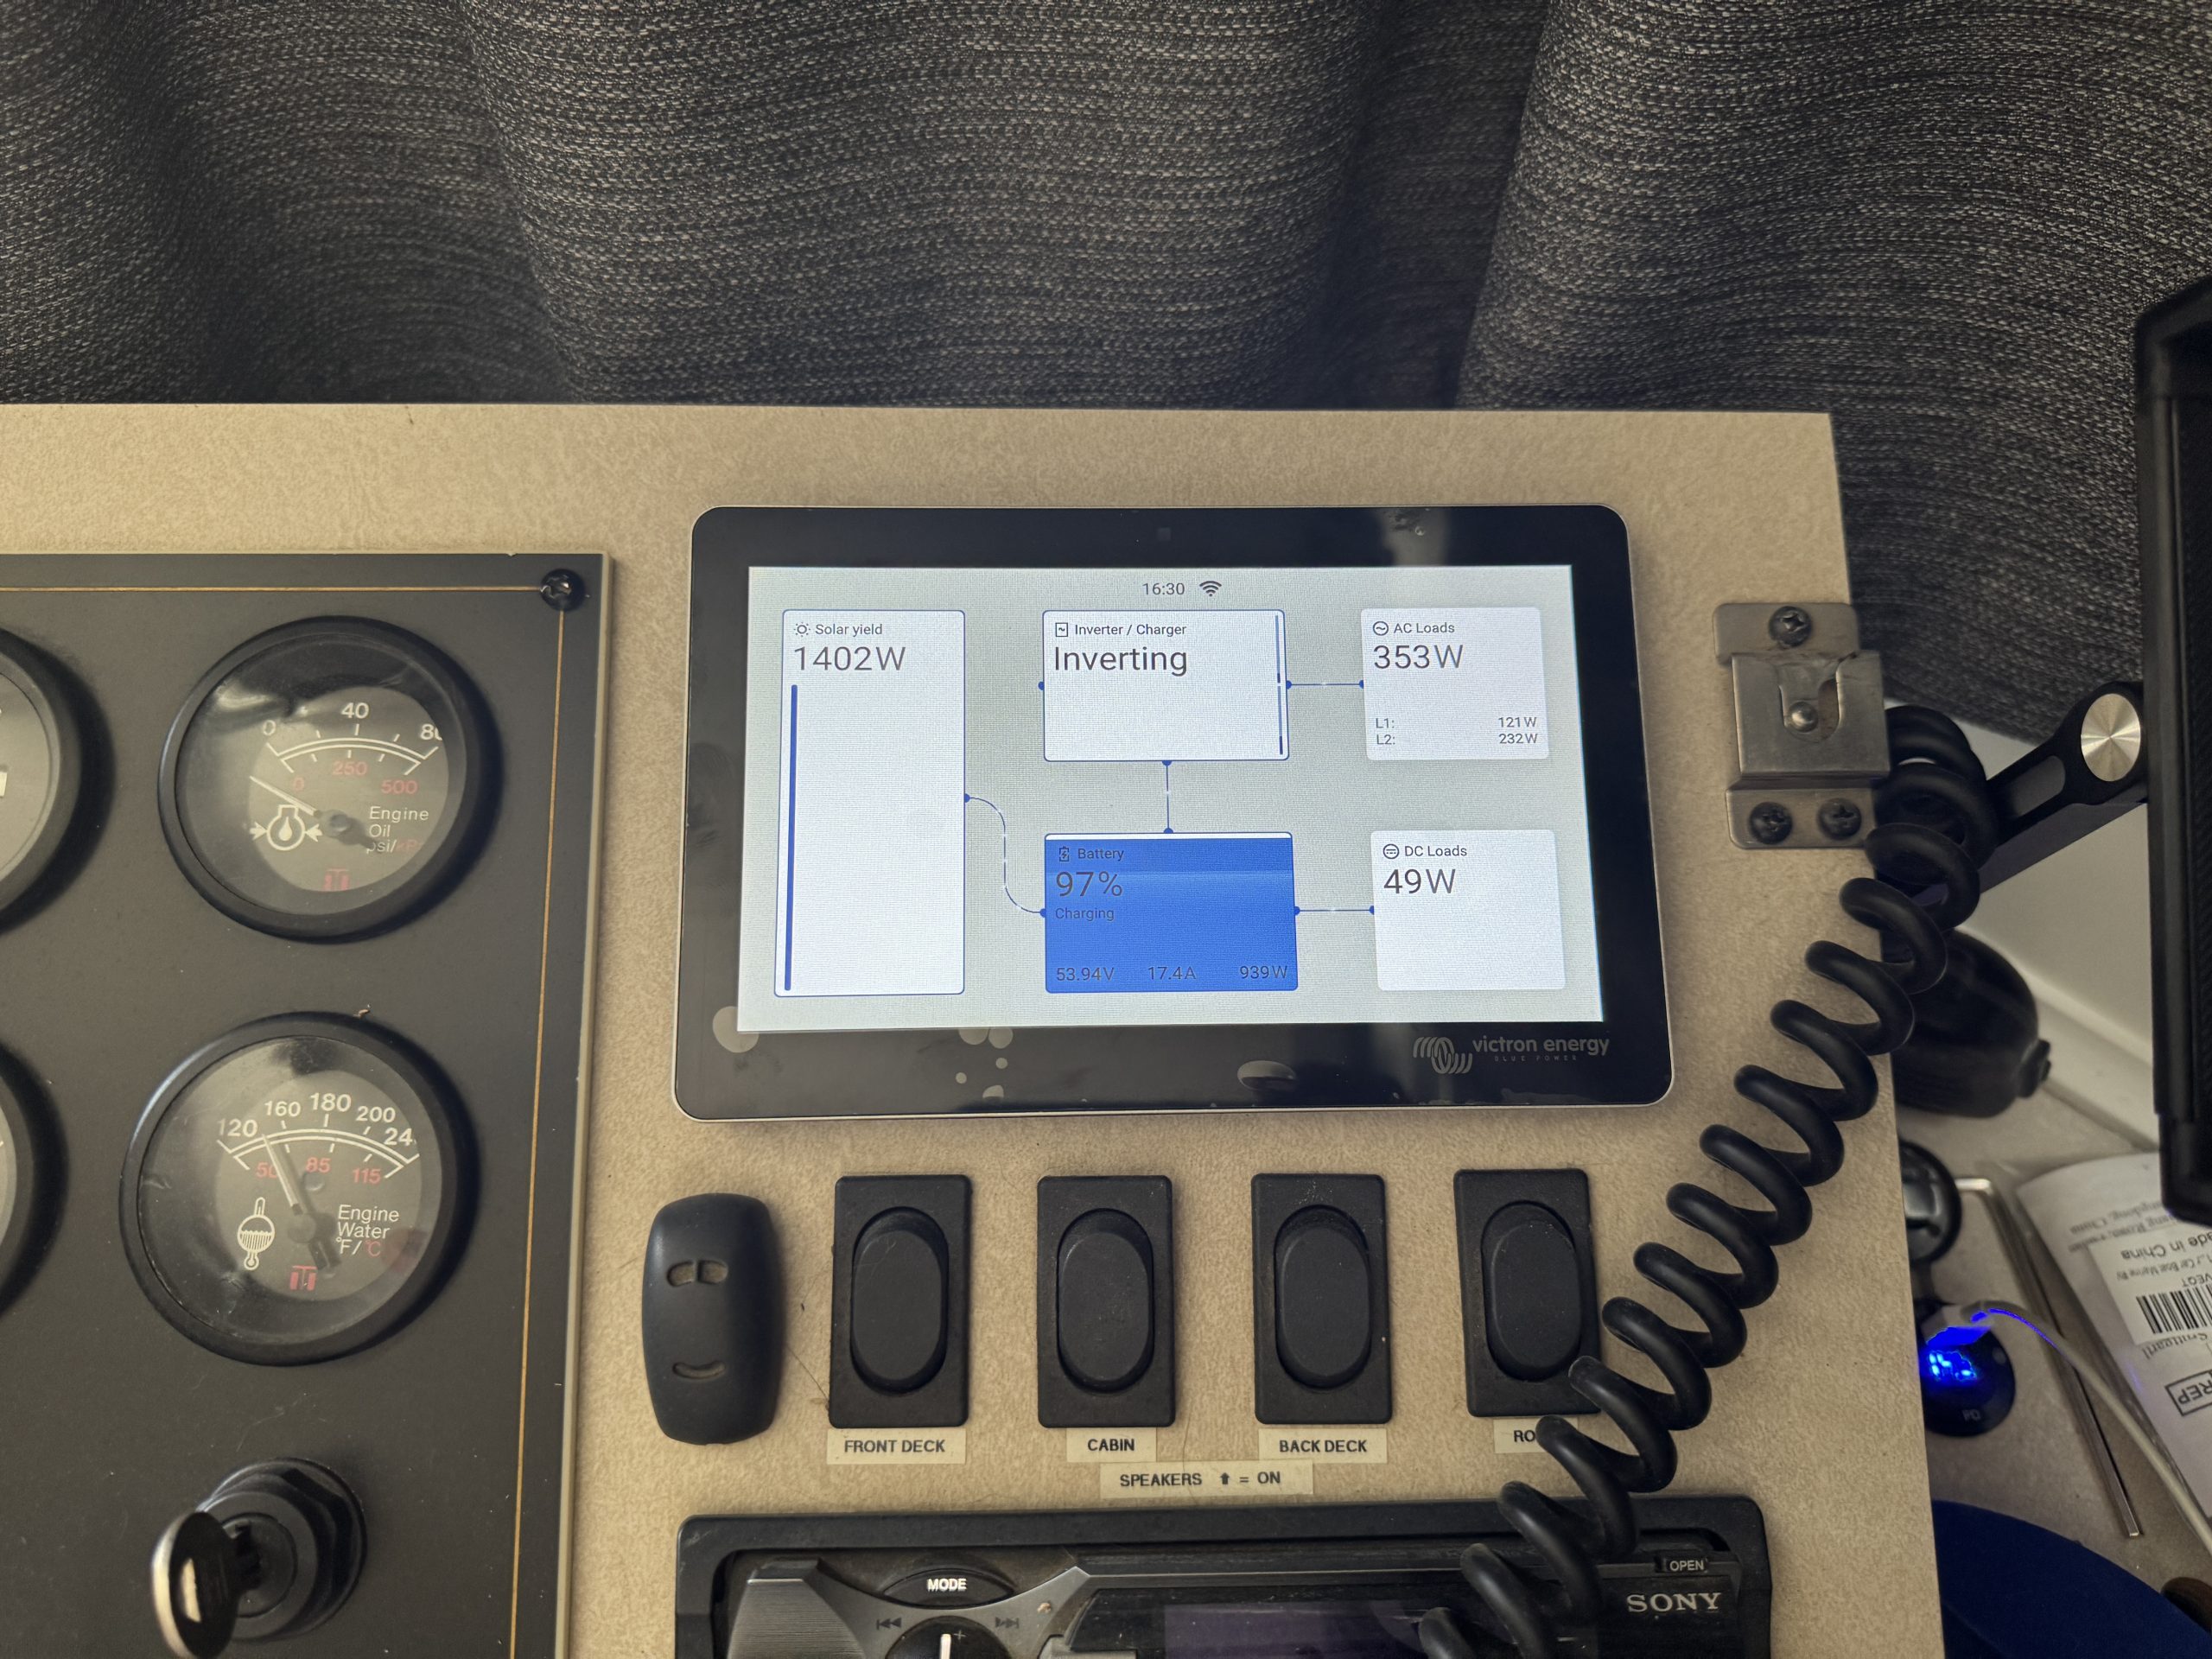
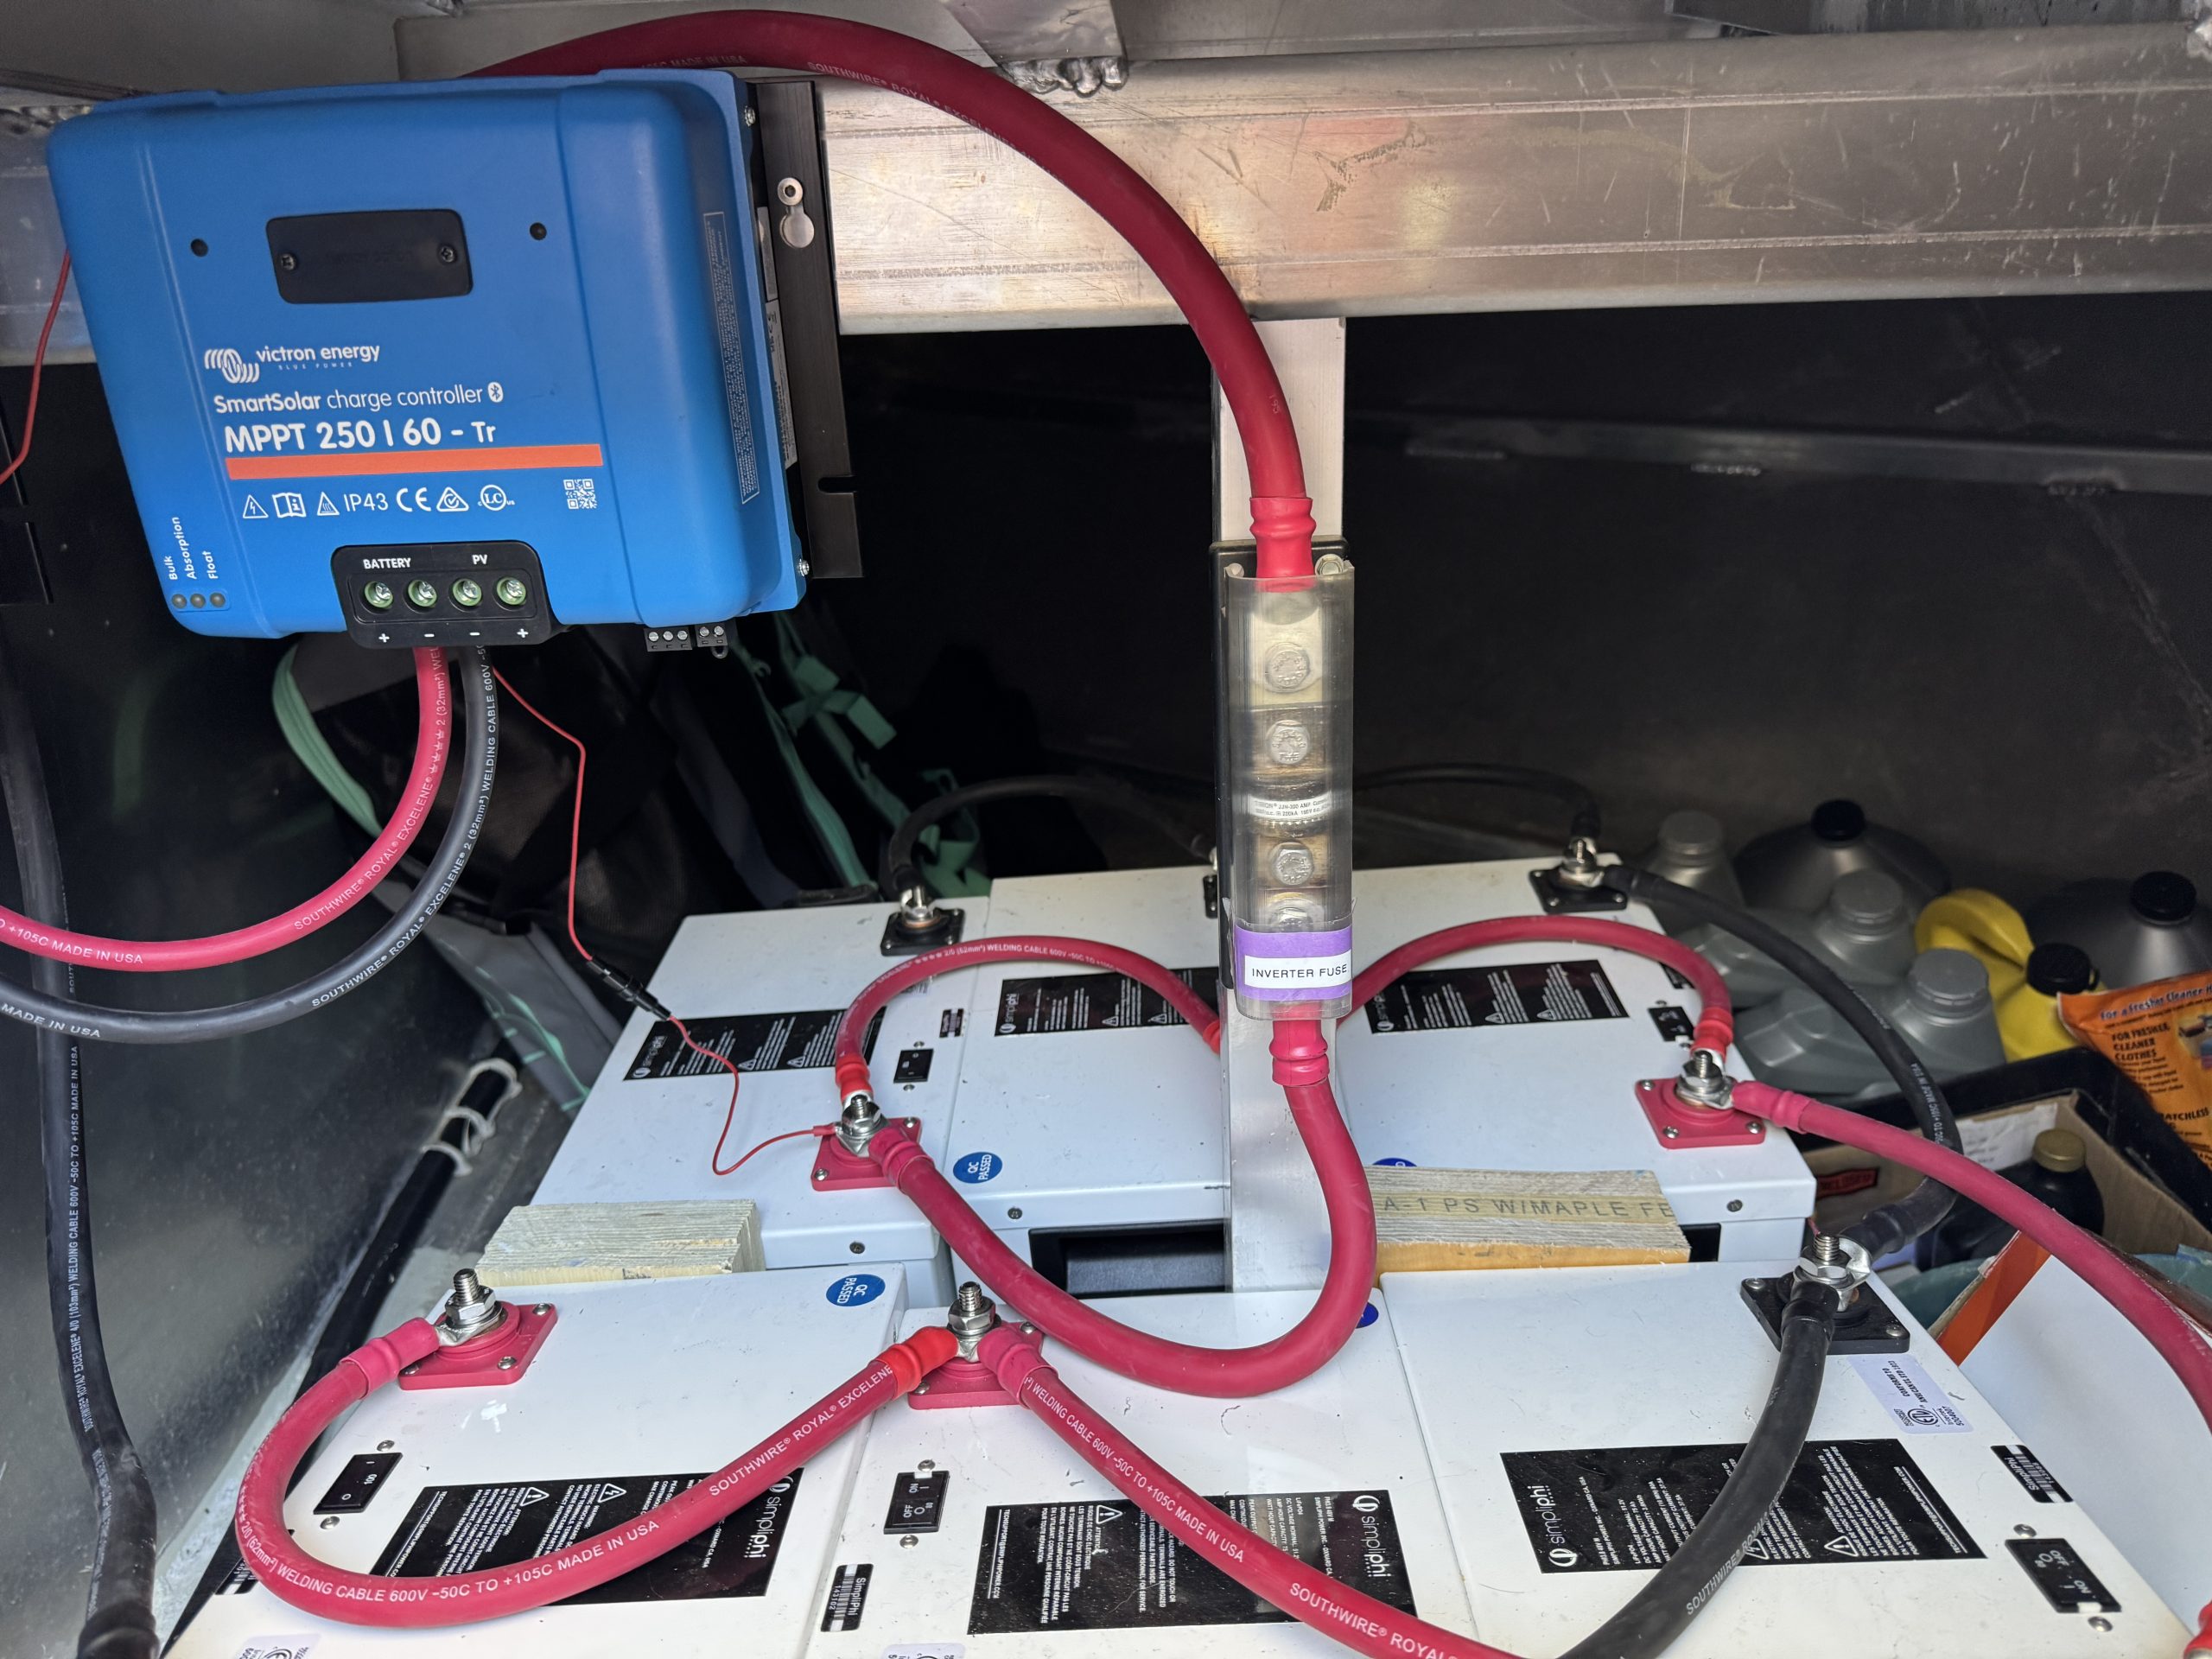
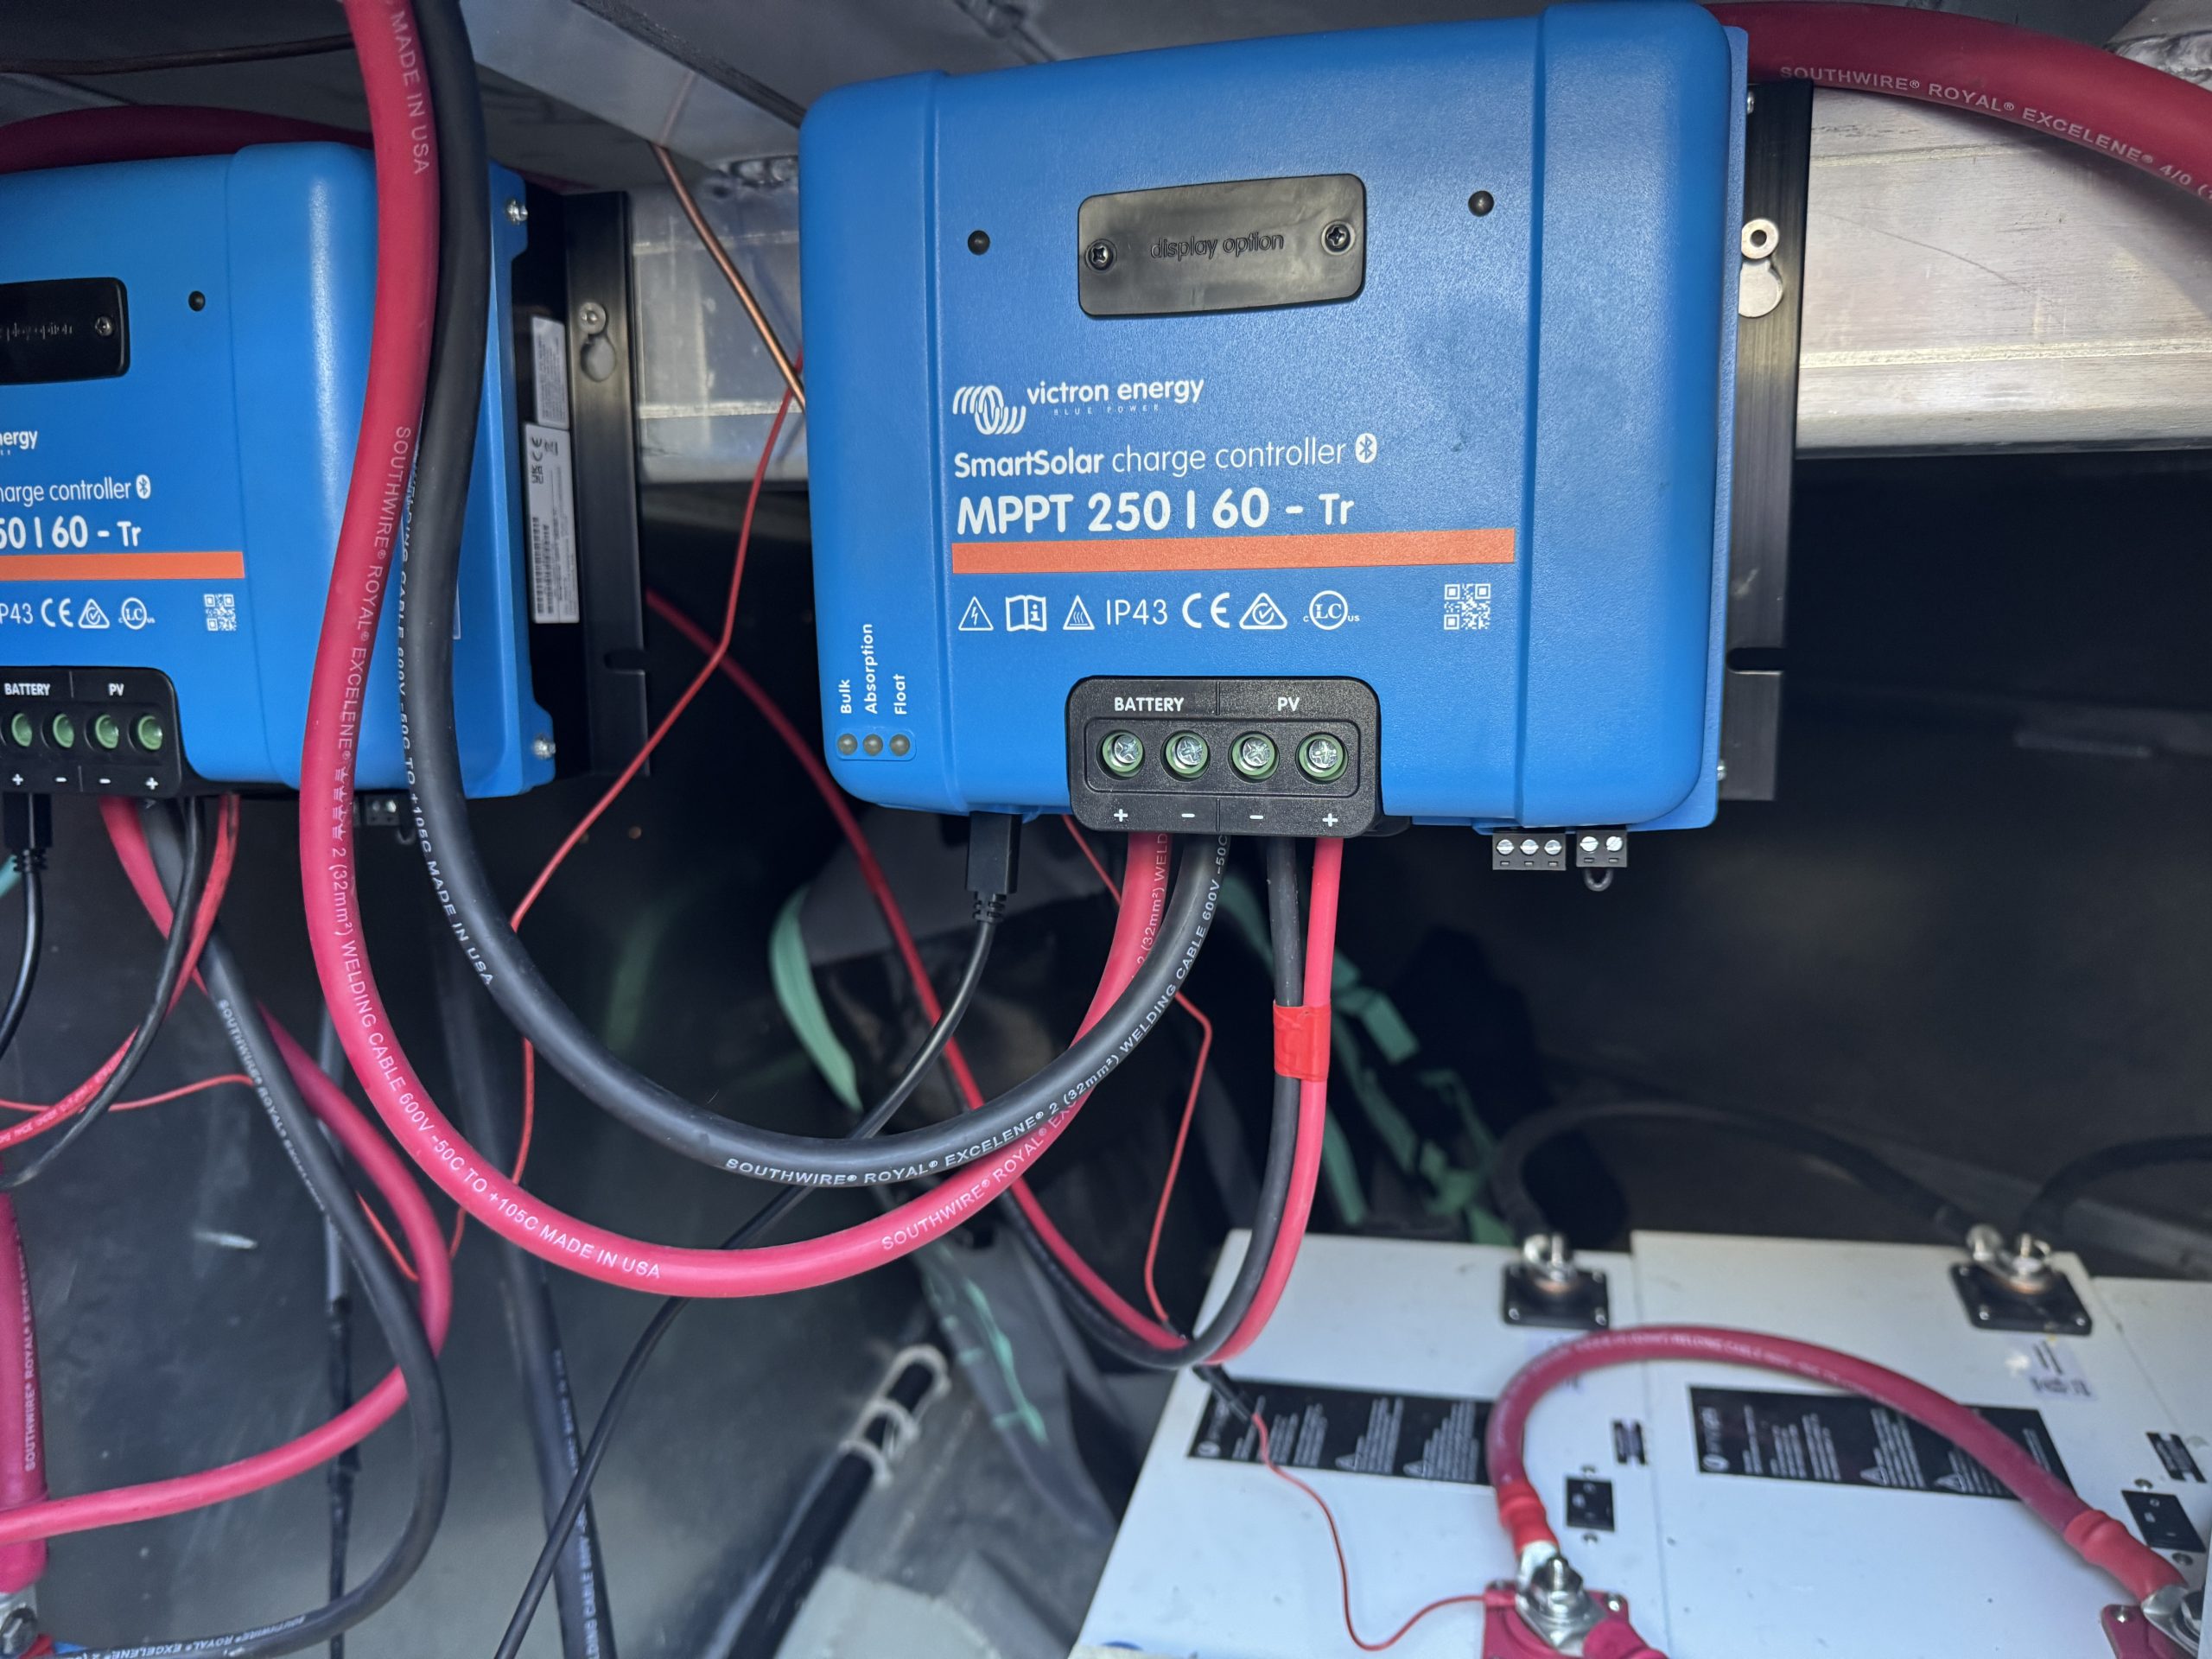
The new system incorporated dual Multiplus II 48/5000/70-95 120 volt inverter chargers programmed in split phase. The solar power would be handled by two SmartSolar 250/60 MPPT’s. We also added a Cerbo GX MKII with a GX Touch 70 screen for system control and monitoring. We used a 500 amp SmartShunt for battery monitoring and a Lynx Distributor for component interconnection and circuit protection.
The installation took three days to complete. The first day consisted of removing the Sol-Ark unit and installing the dual Multiplus units. I wired in and programmed the Multiplus inverter chargers and tested their functionality. This included adding the Lynx Distributor and the SmartShunt in line after the existing battery bank and programming the SmartShunt for the battery bank.
The second day focused on replacing the existing battery cabling with new custom built 2/0 cables for battery interconnects and 4/0 cables for the main leads going to the Lynx Distributor. I also rewired the existing eight solar panels from an 8S1P configuration to a 4S2P configuration. This lowered the voltage of the array to an acceptable level for the new Victron 250/60 MPPT SmartSolar controller. I replaced an existing improperly sized solar circuit breaker with a new properly sized one for the array wiring and output. I wired in the new solar controller and programmed it for the battery bank. I also wired in the second solar controller and prepped it for the additional solar panels. I then installed the Cerbo GX and and GX Touch 70. I ran communication cables from all the Victron components to the Cerbo and connected the Cerbo to VRM. I spent some time with the customer at the end of day two getting him set up with the Victron Connect and VRM apps and teaching him how to use them to interact with the new Victron components.
We also conducted a test with the onboard generator to see how it would interact with the new Victron Multiplus inverter chargers. We ran into a bit of a snag here. The Victron units wouldn’t pass the generator power through either (the same issue the customer was having with the Sol-Ark unit). I made several programming changes to the Multplus inverter chargers, but nothing I did would allow the incoming generator power to pass through. What the Victron system had that the Sol-Ark system didn’t was the ability to view and analyze the incoming generator power. The Victron system showed the incoming power to be running in the low 50 hertz range. This is much too low for standard 120/240 volt 60 hertz North American standard power. This indicated the generator needed to be adjusted to produce the proper hertz range. The customer said he would look into adjusting the generator and later that evening (after I had left), he was able to get the generator adjusted to produce the proper hertz range. This “clean” power was then able to pass through the Victron equipment with no issue and was much better overall for all the onboard AC appliances.
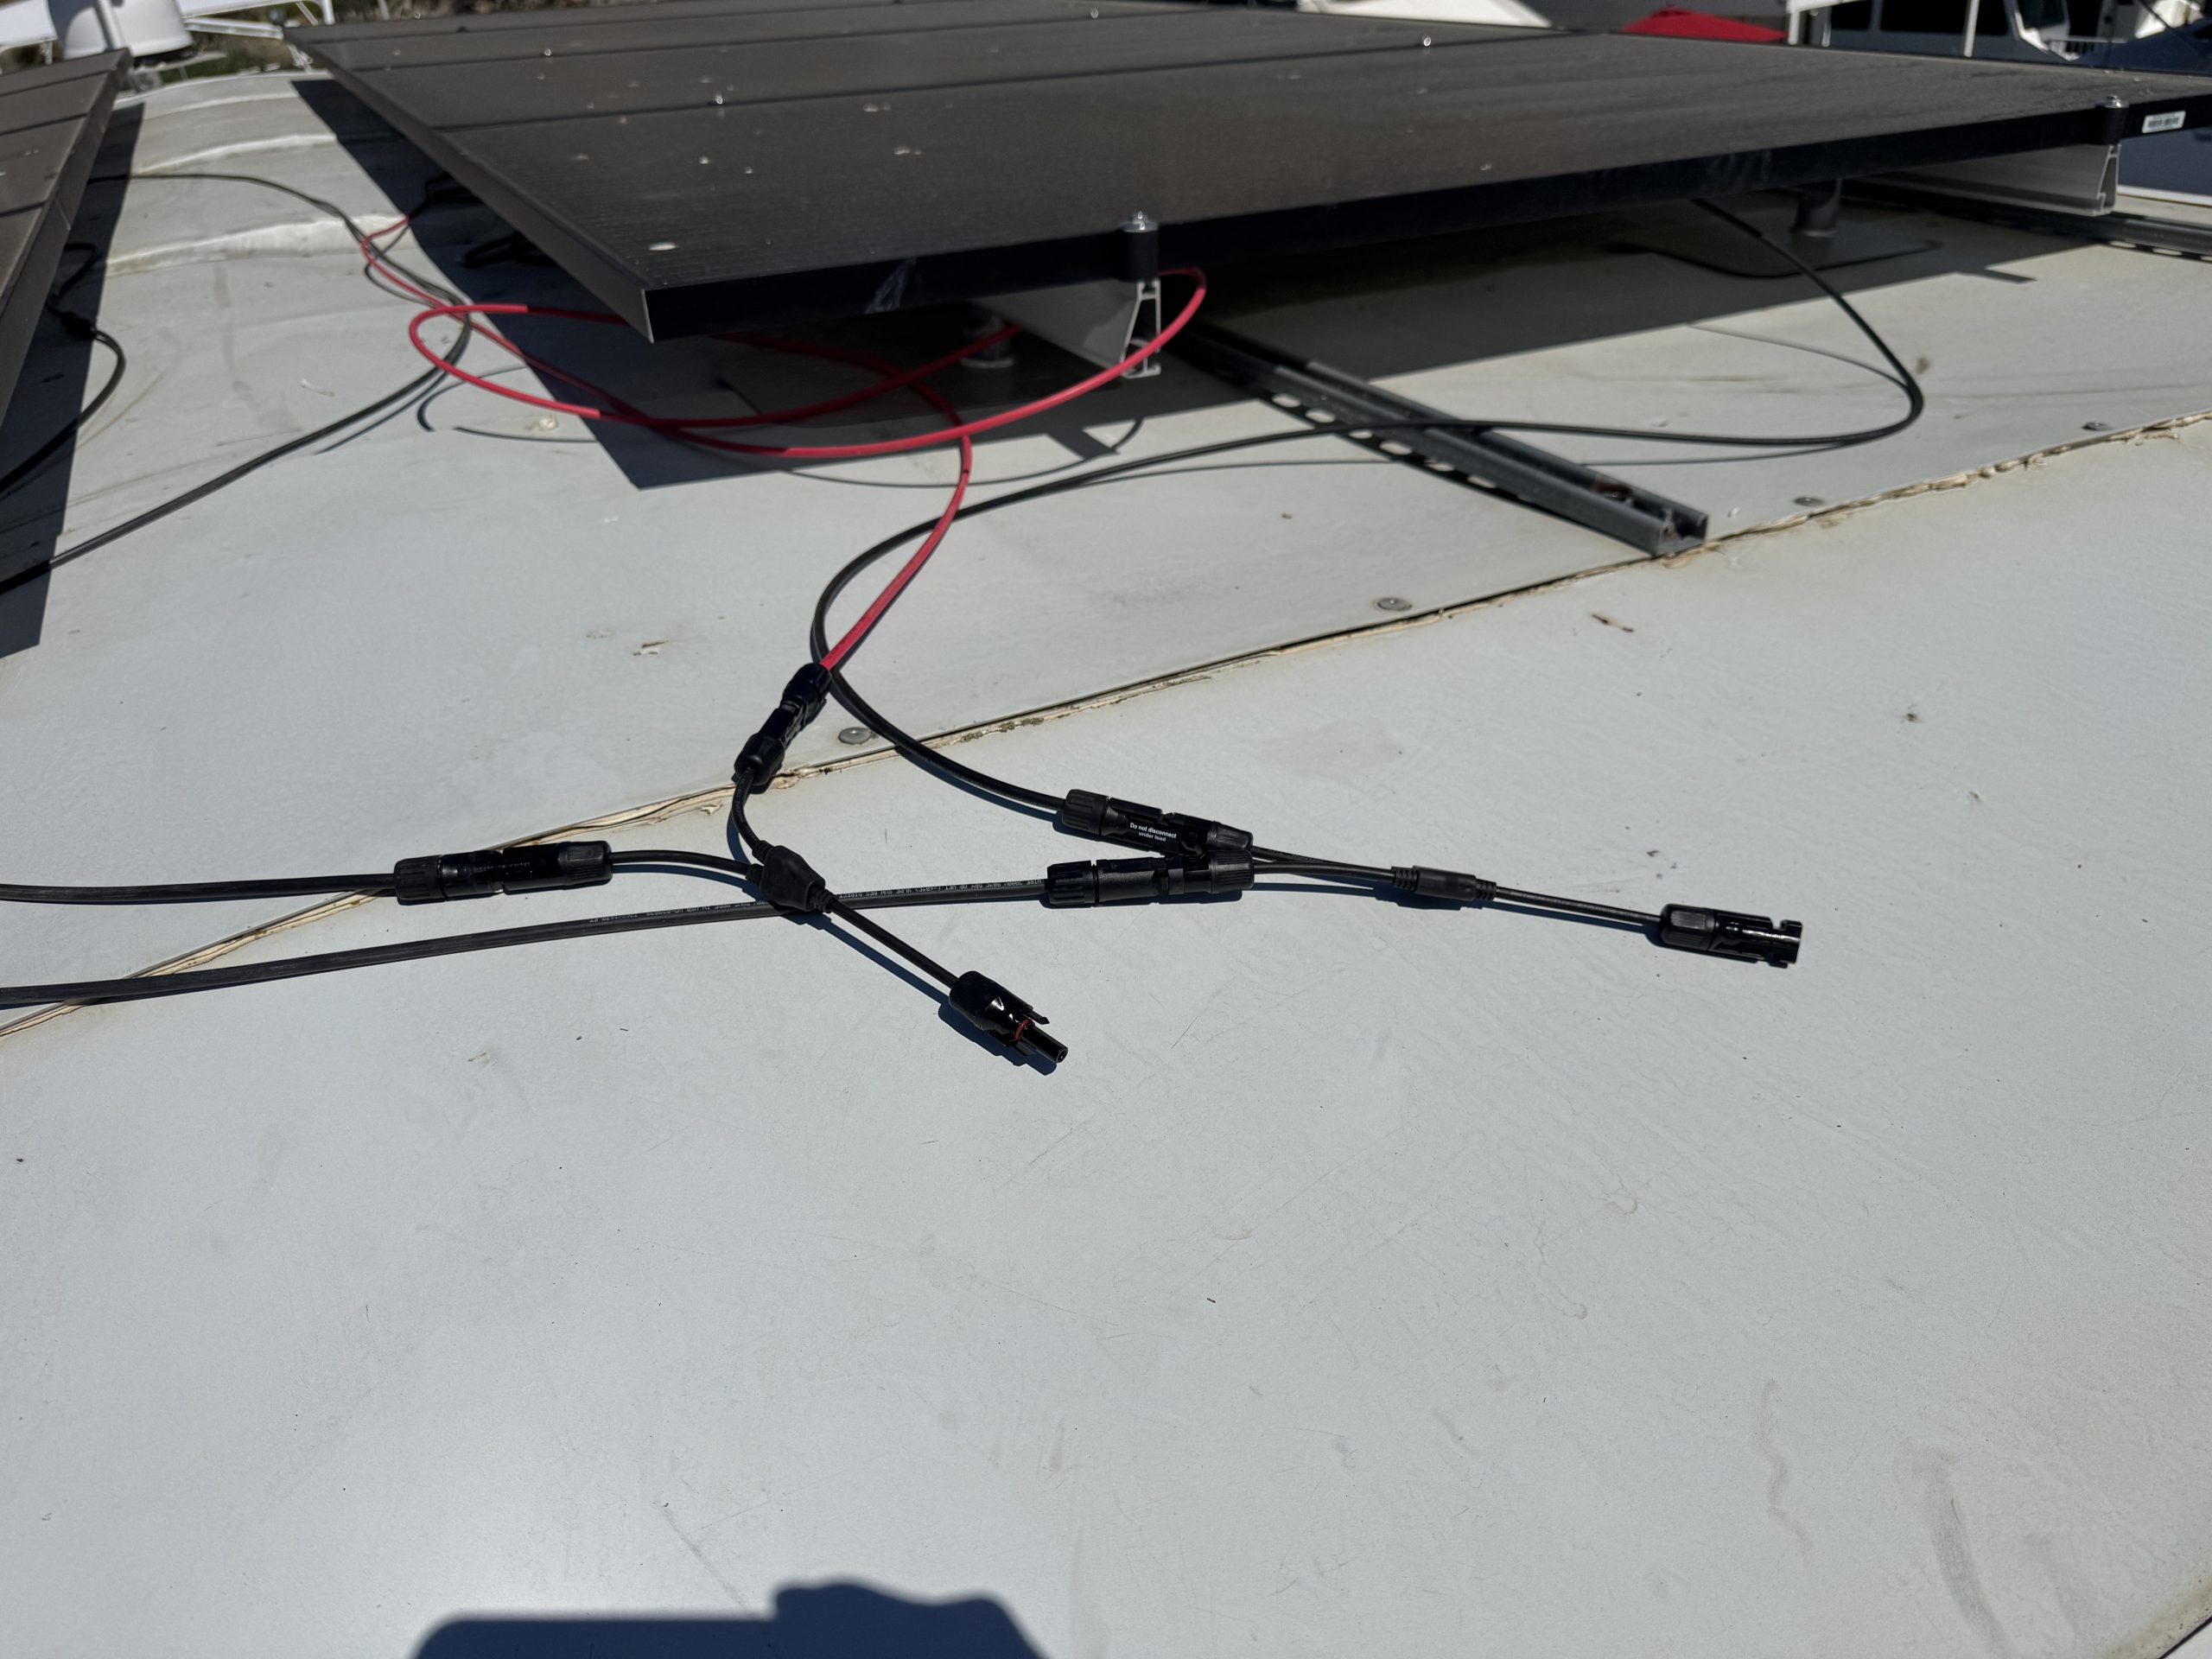
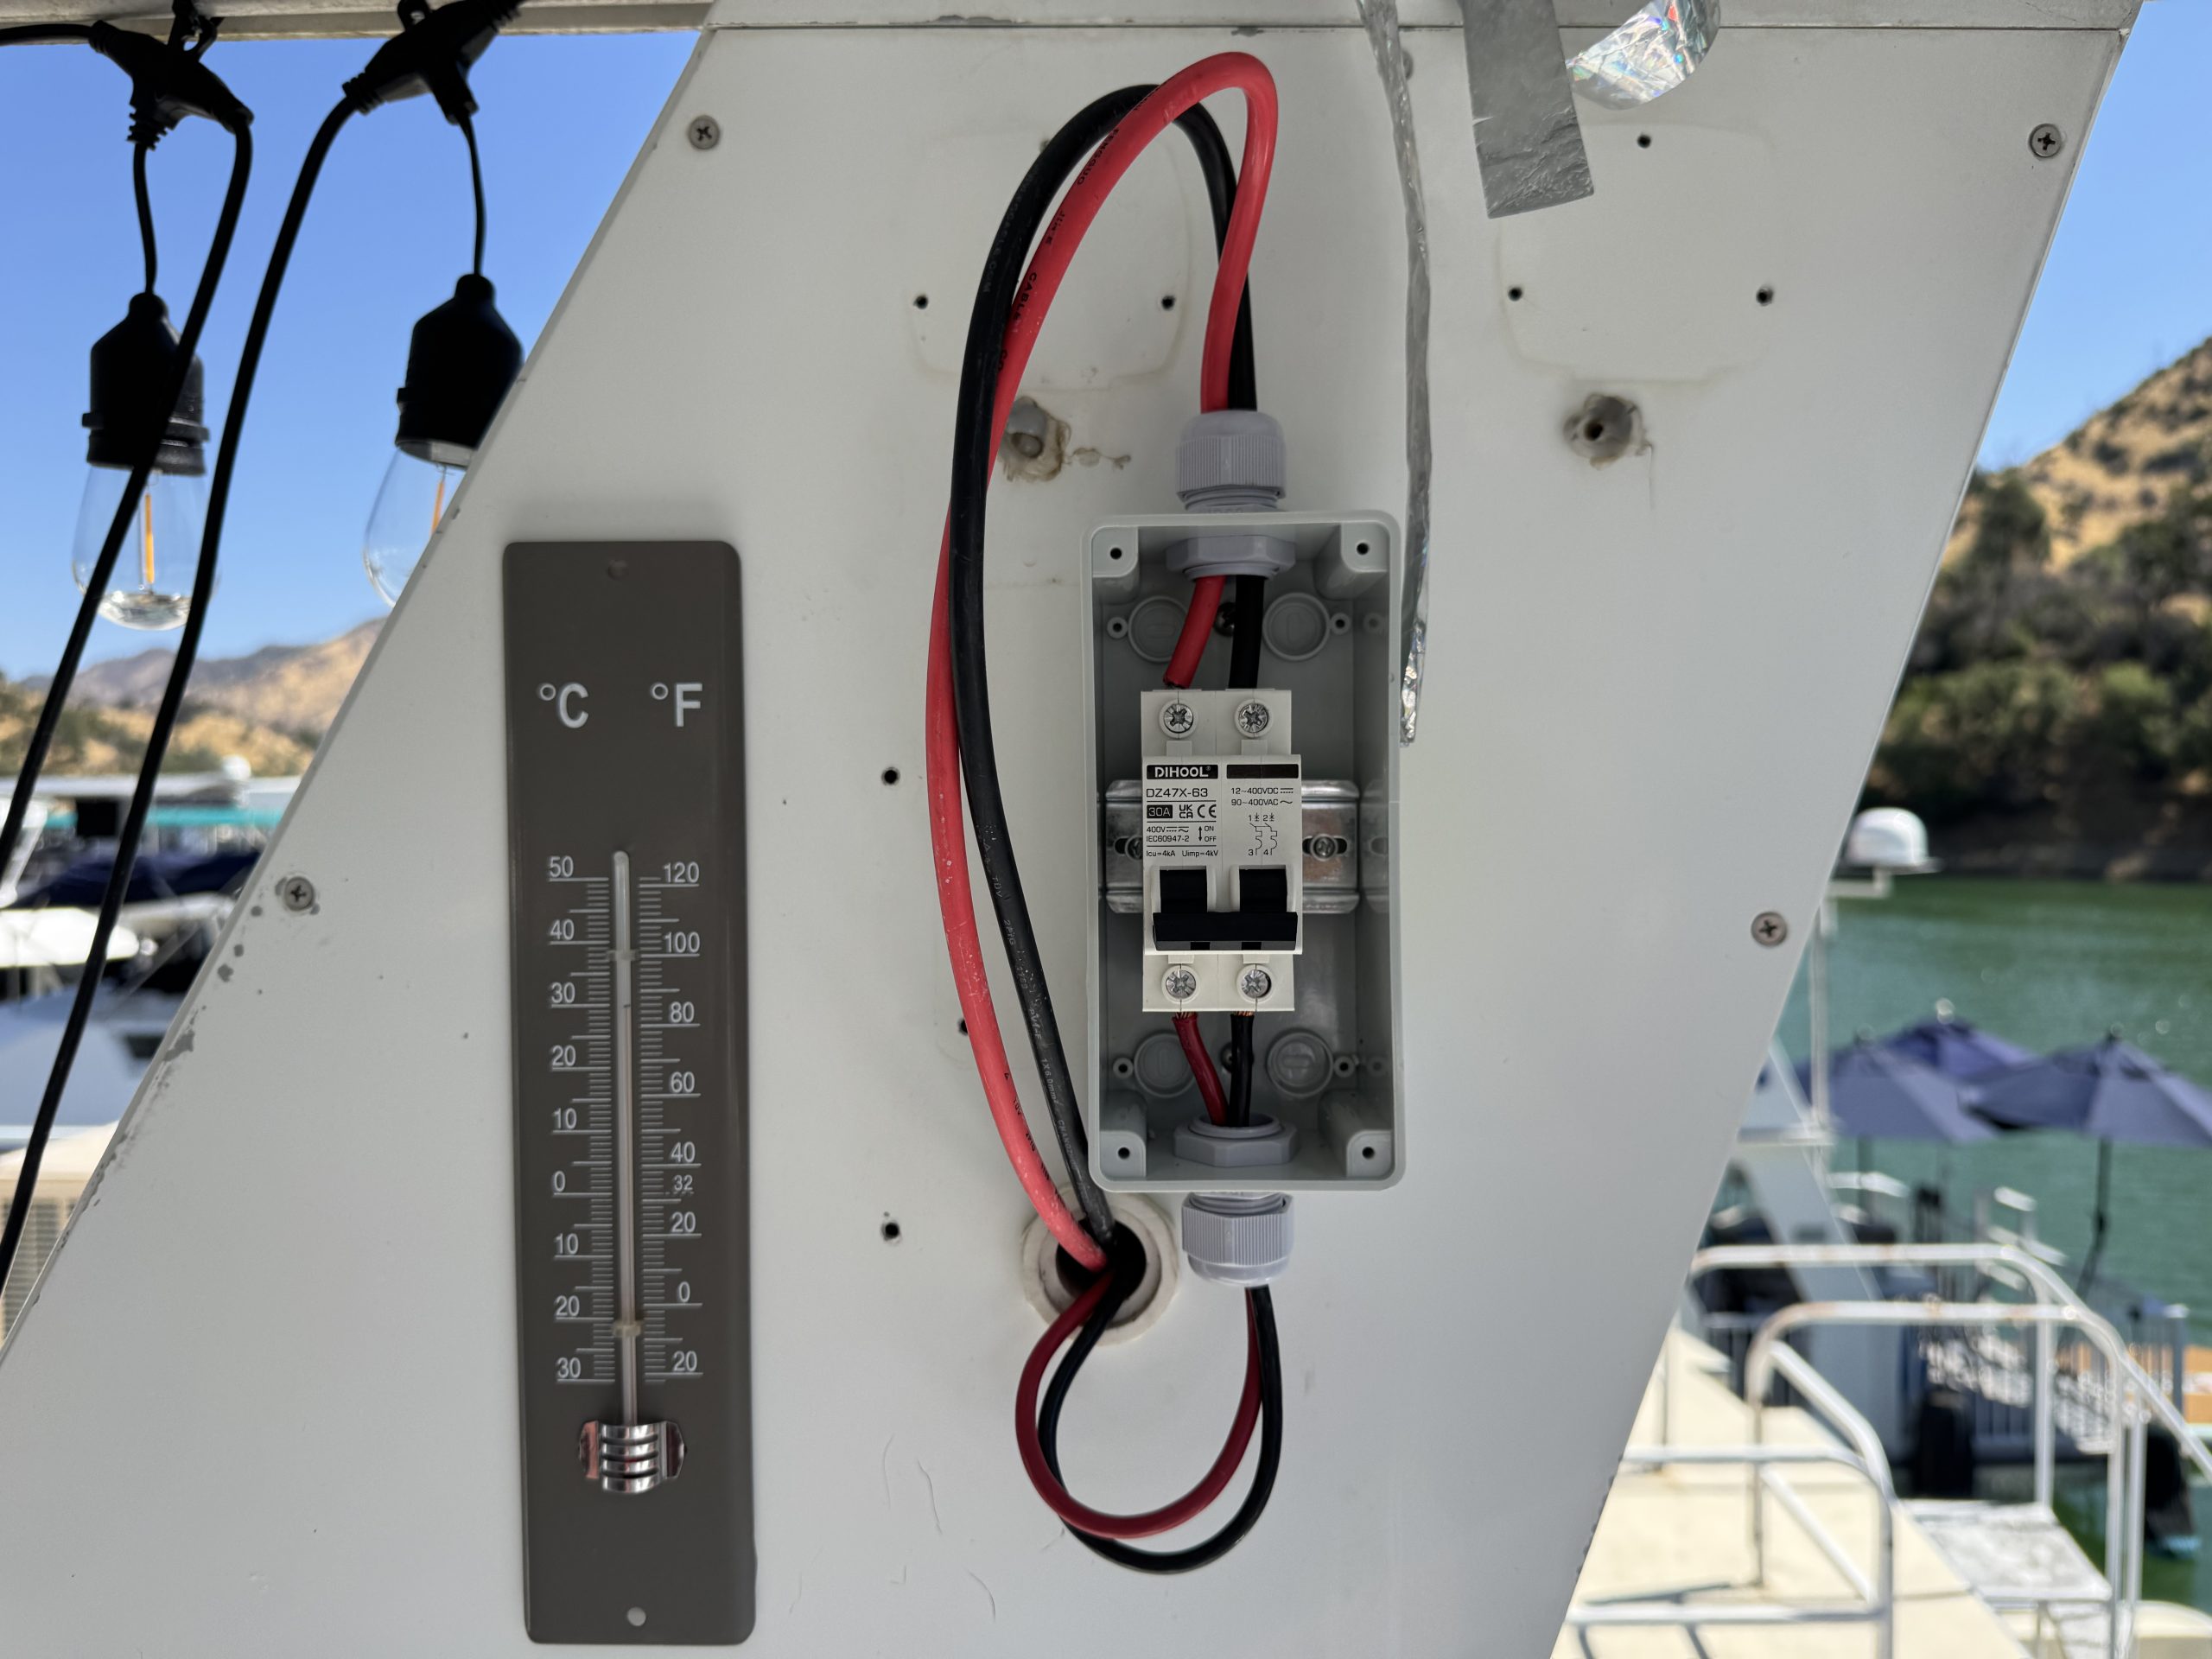
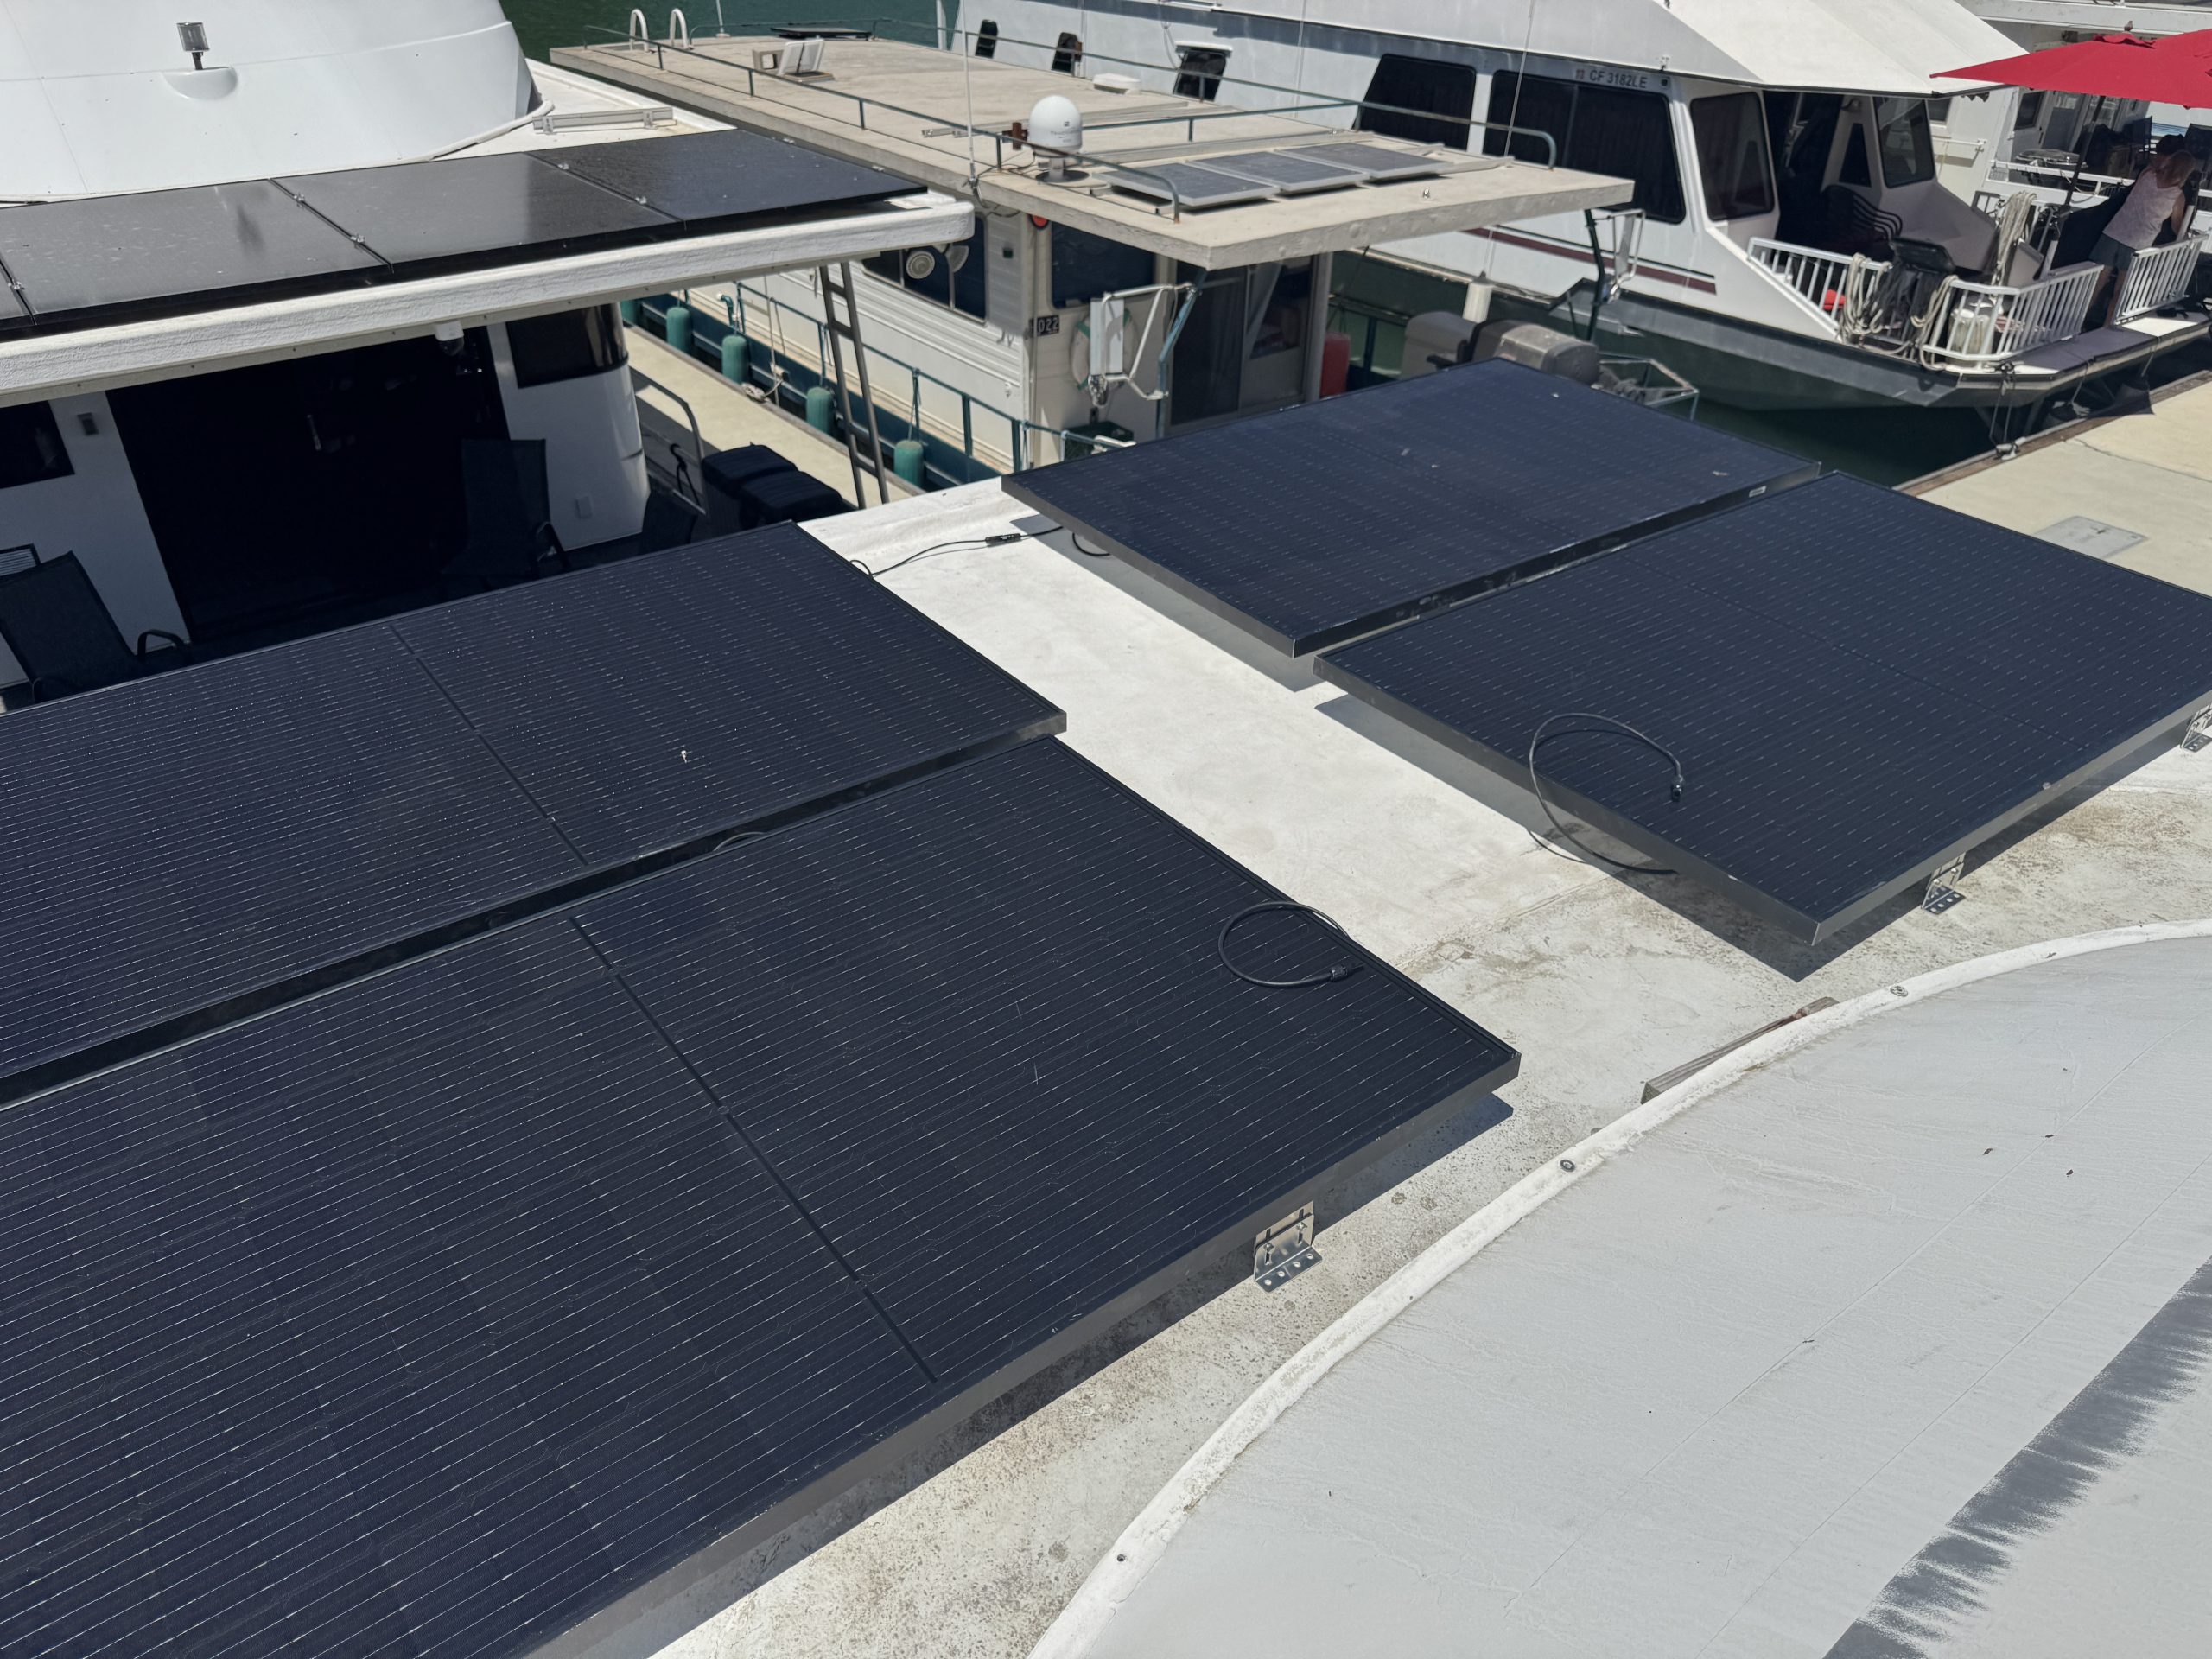
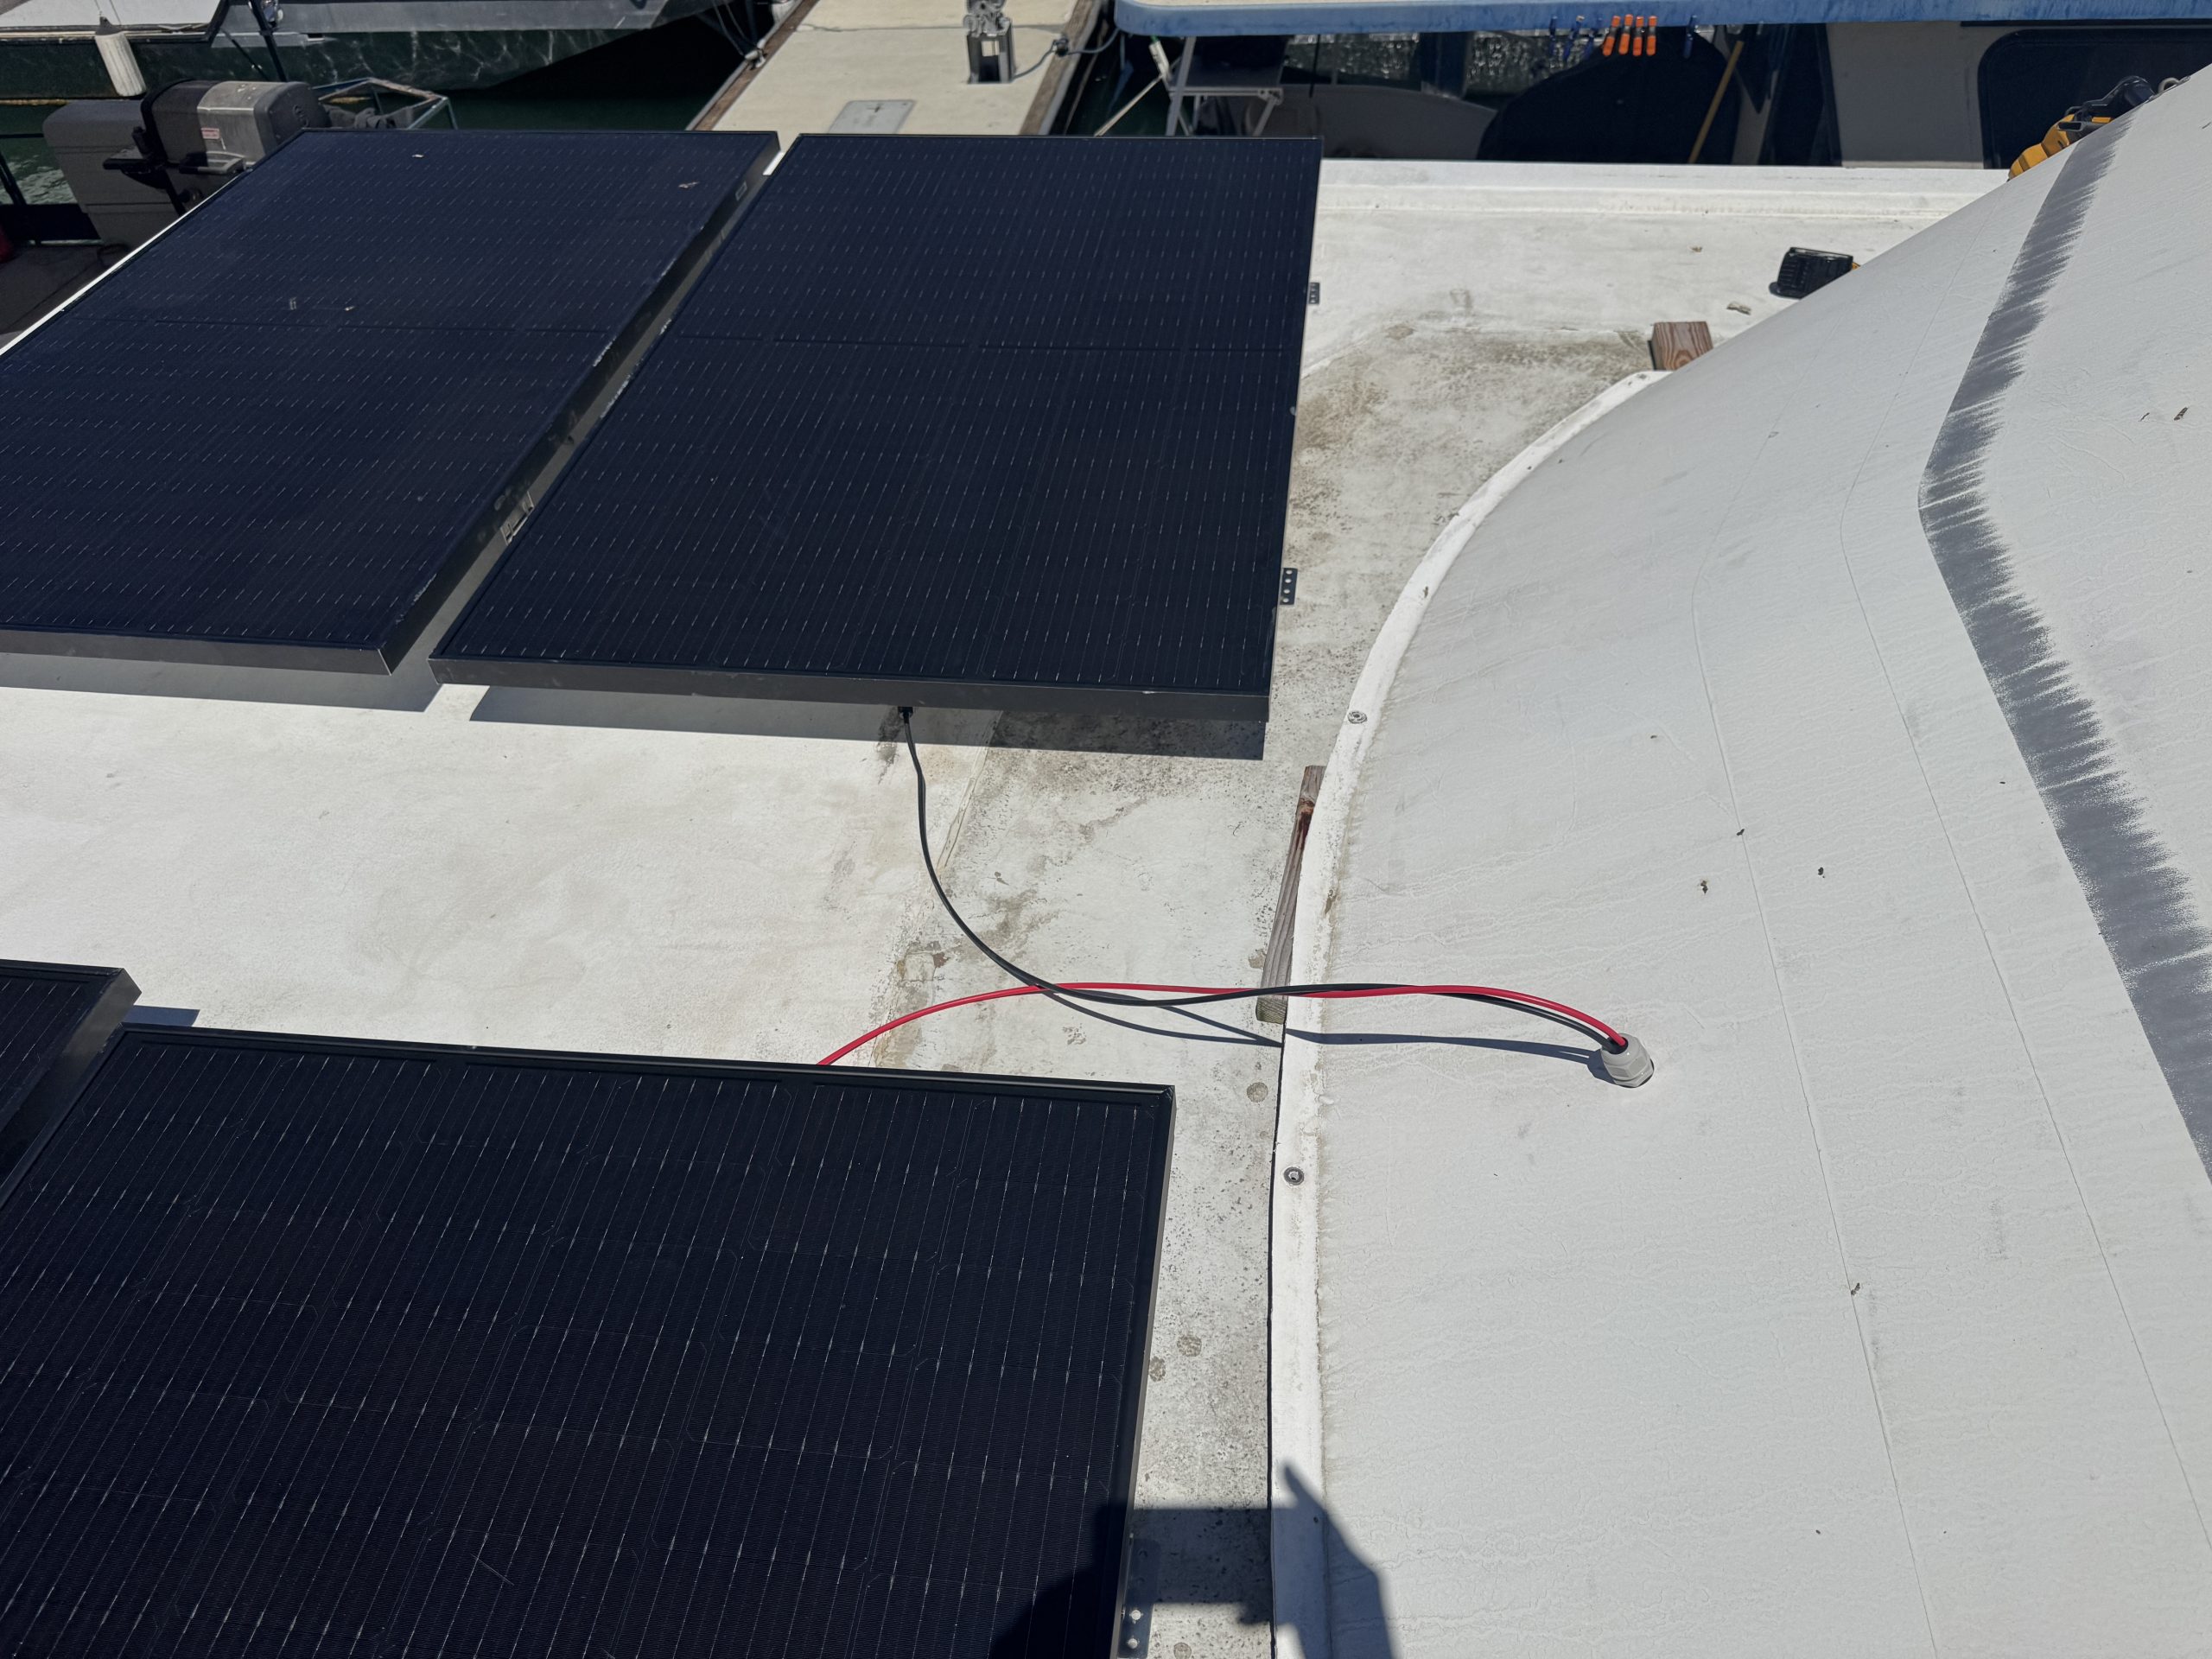
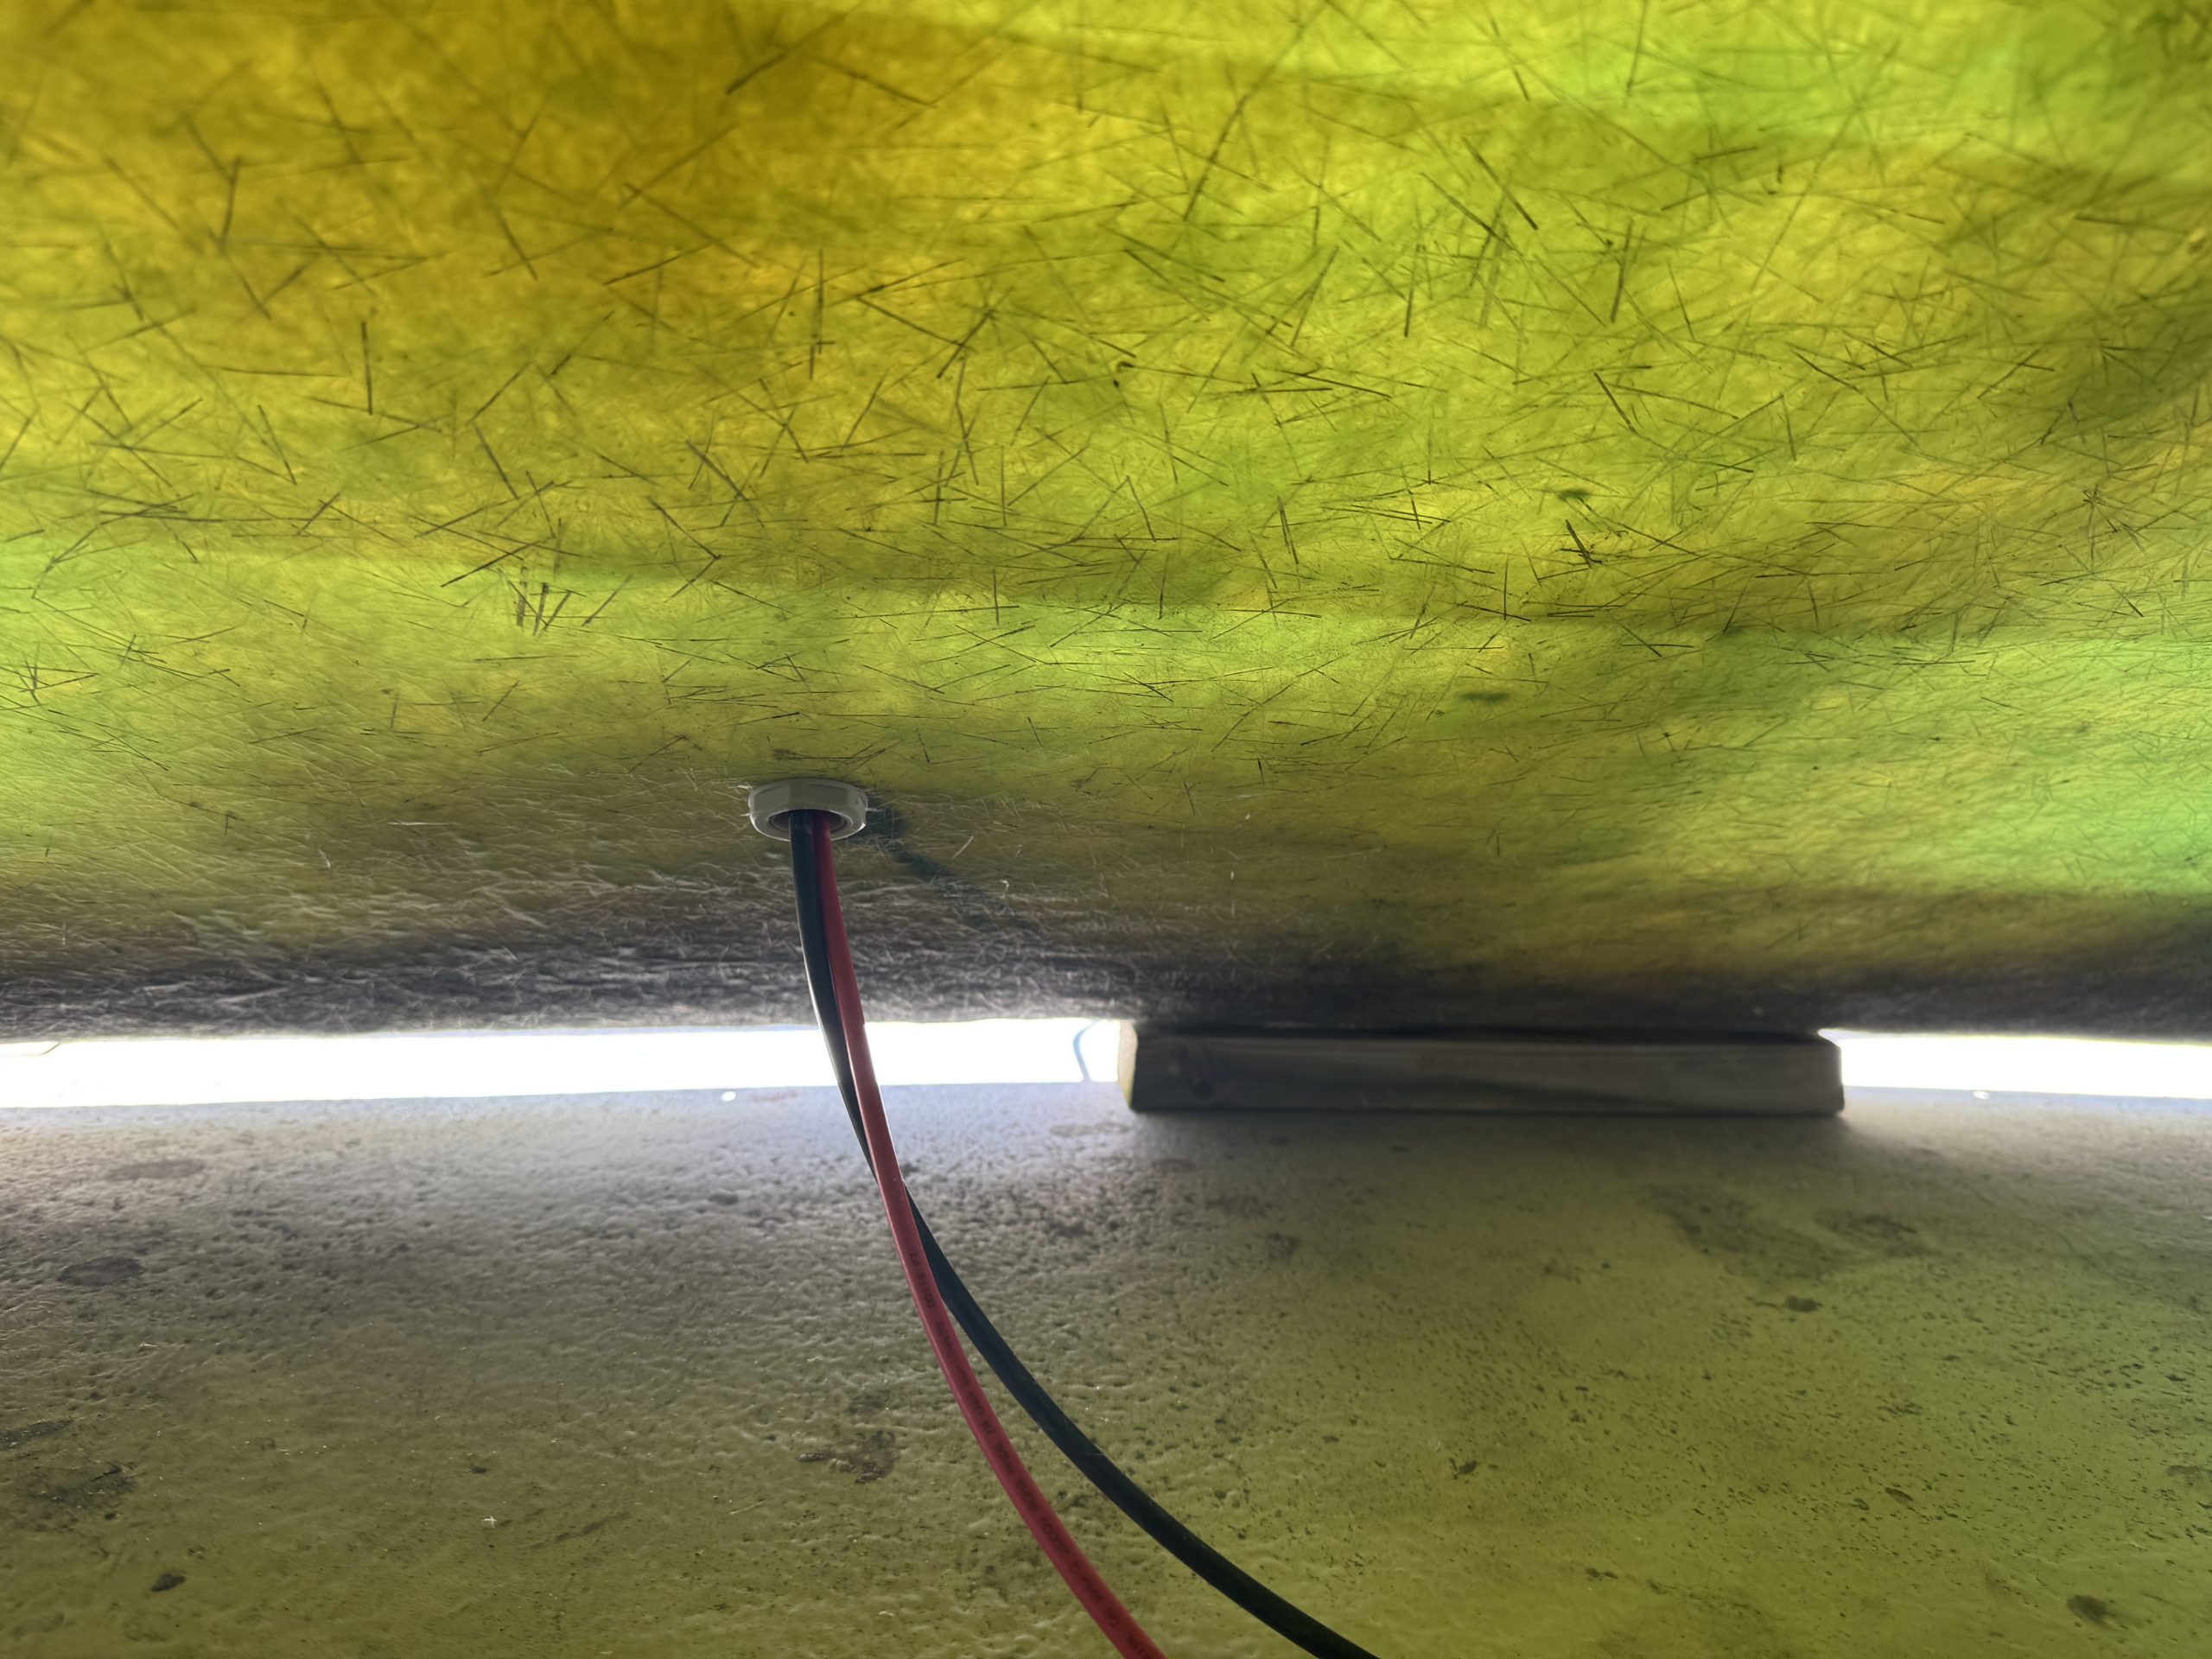
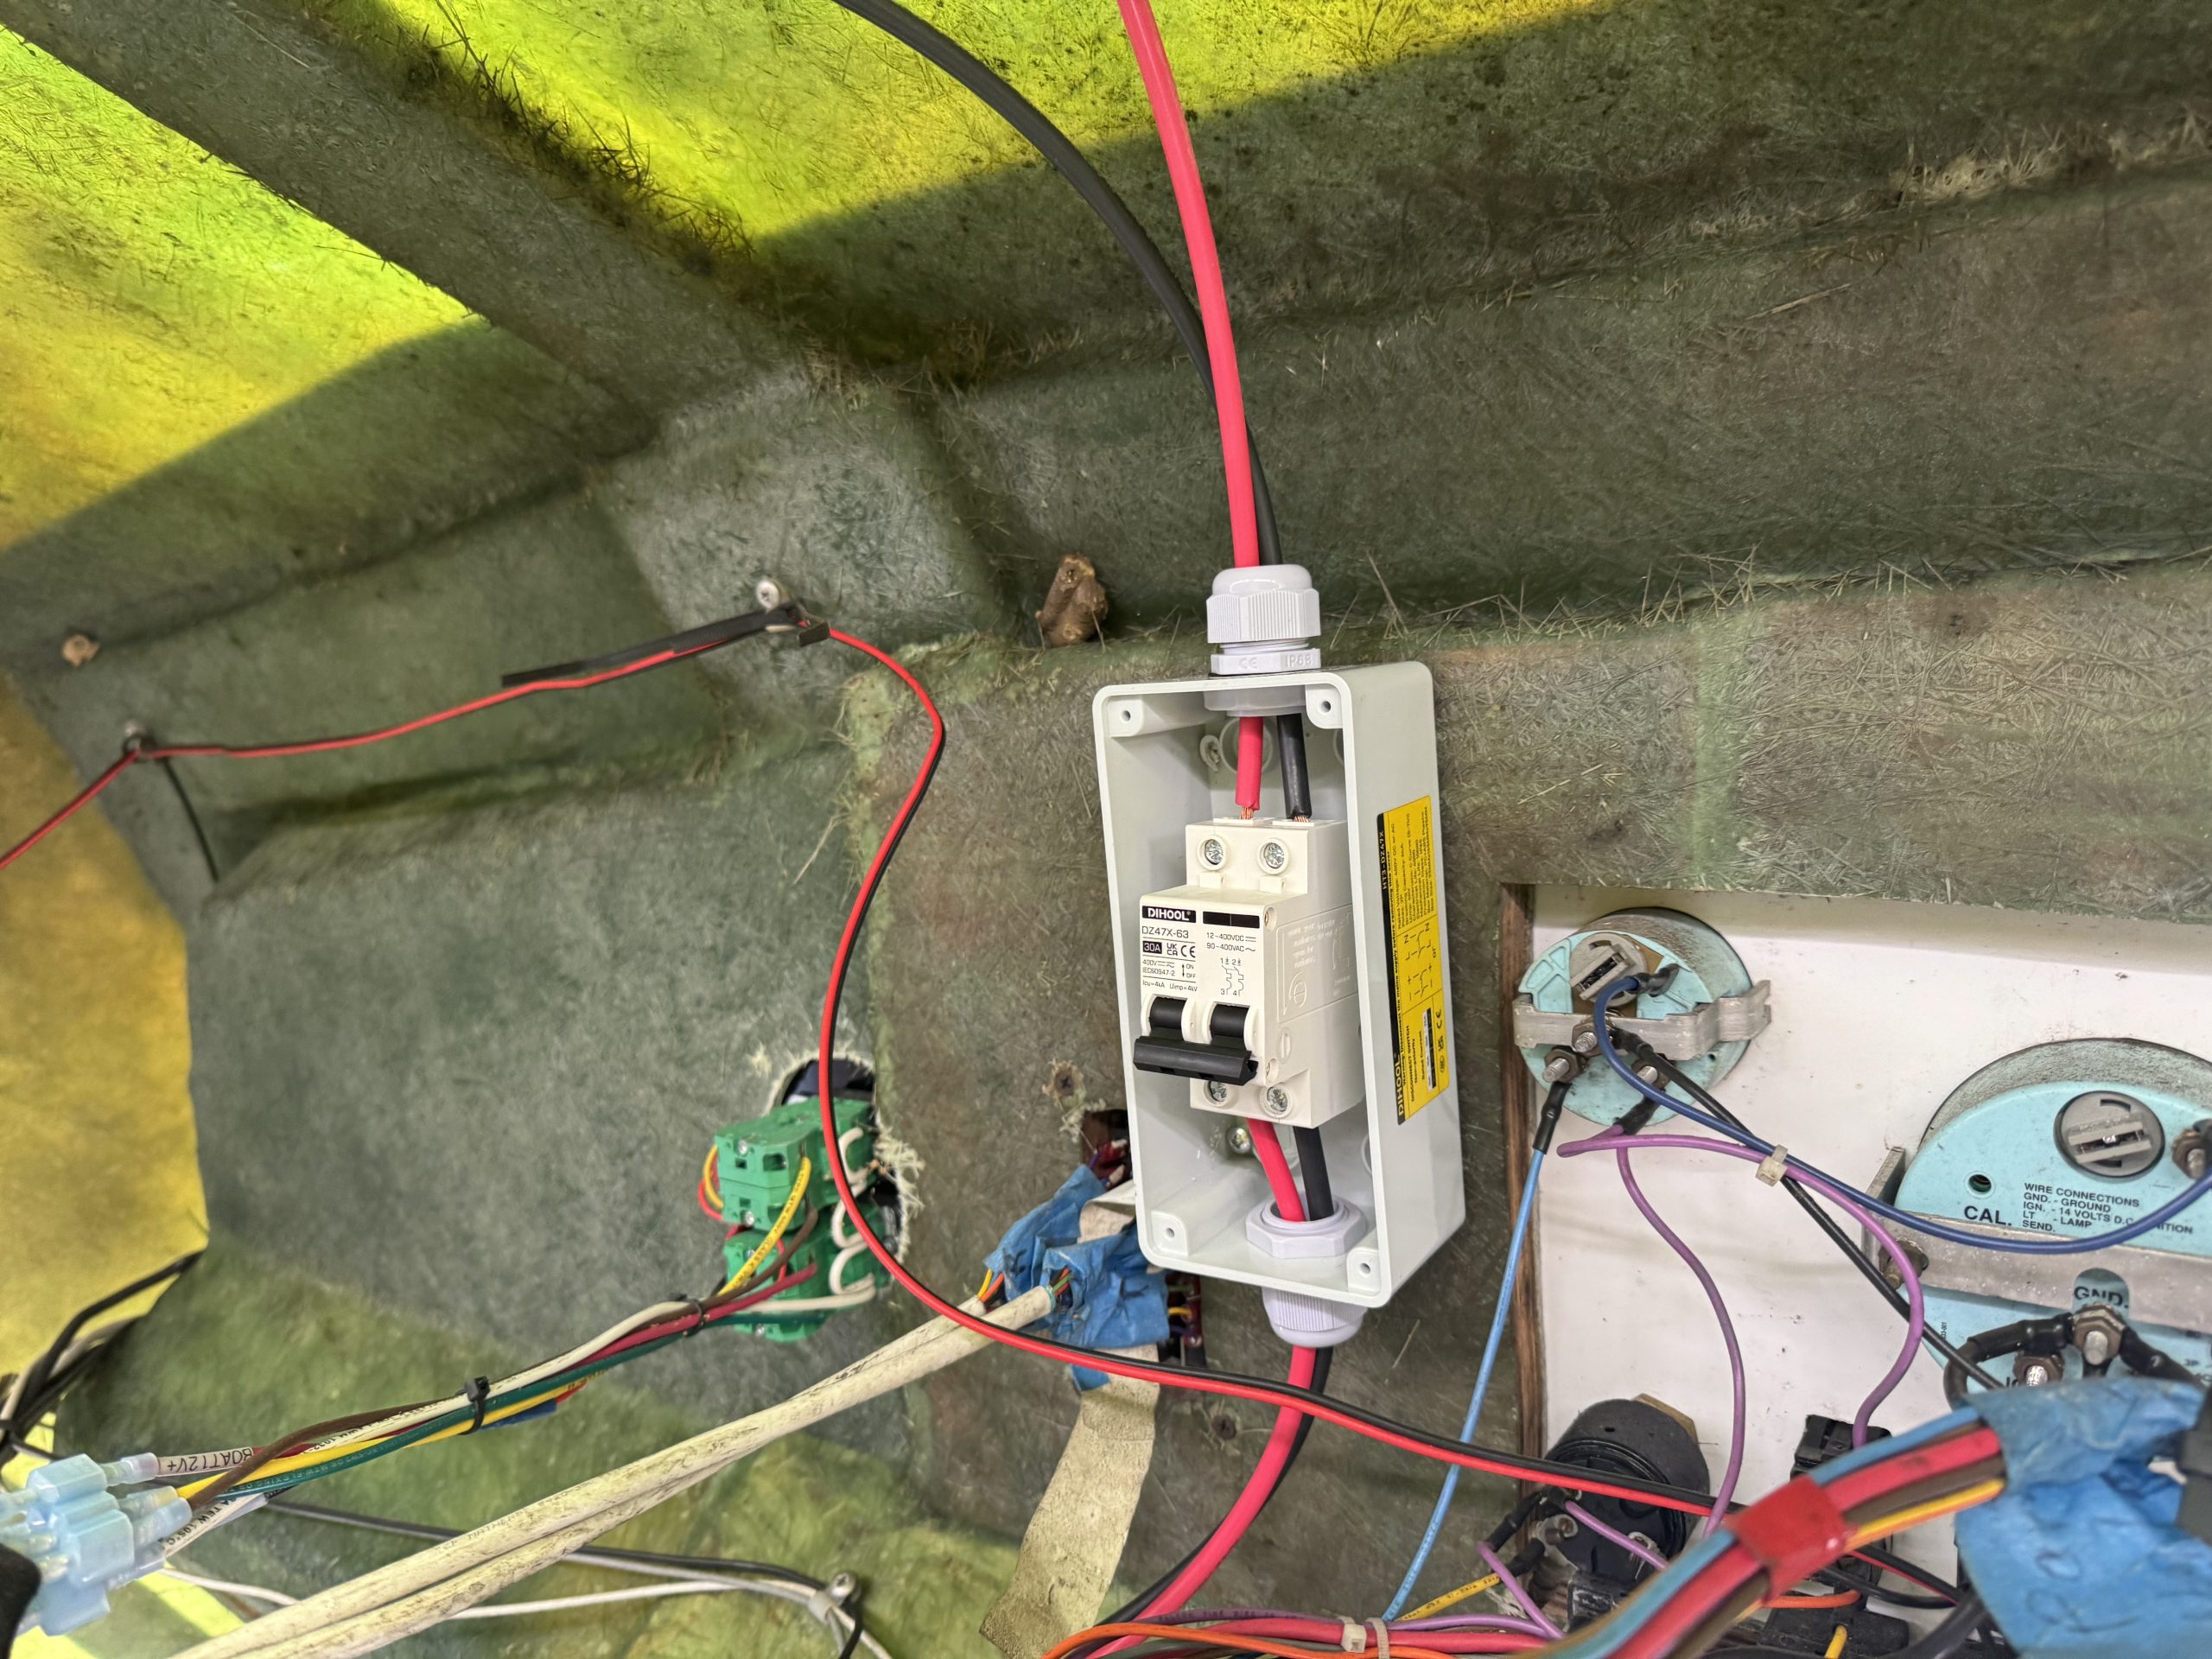
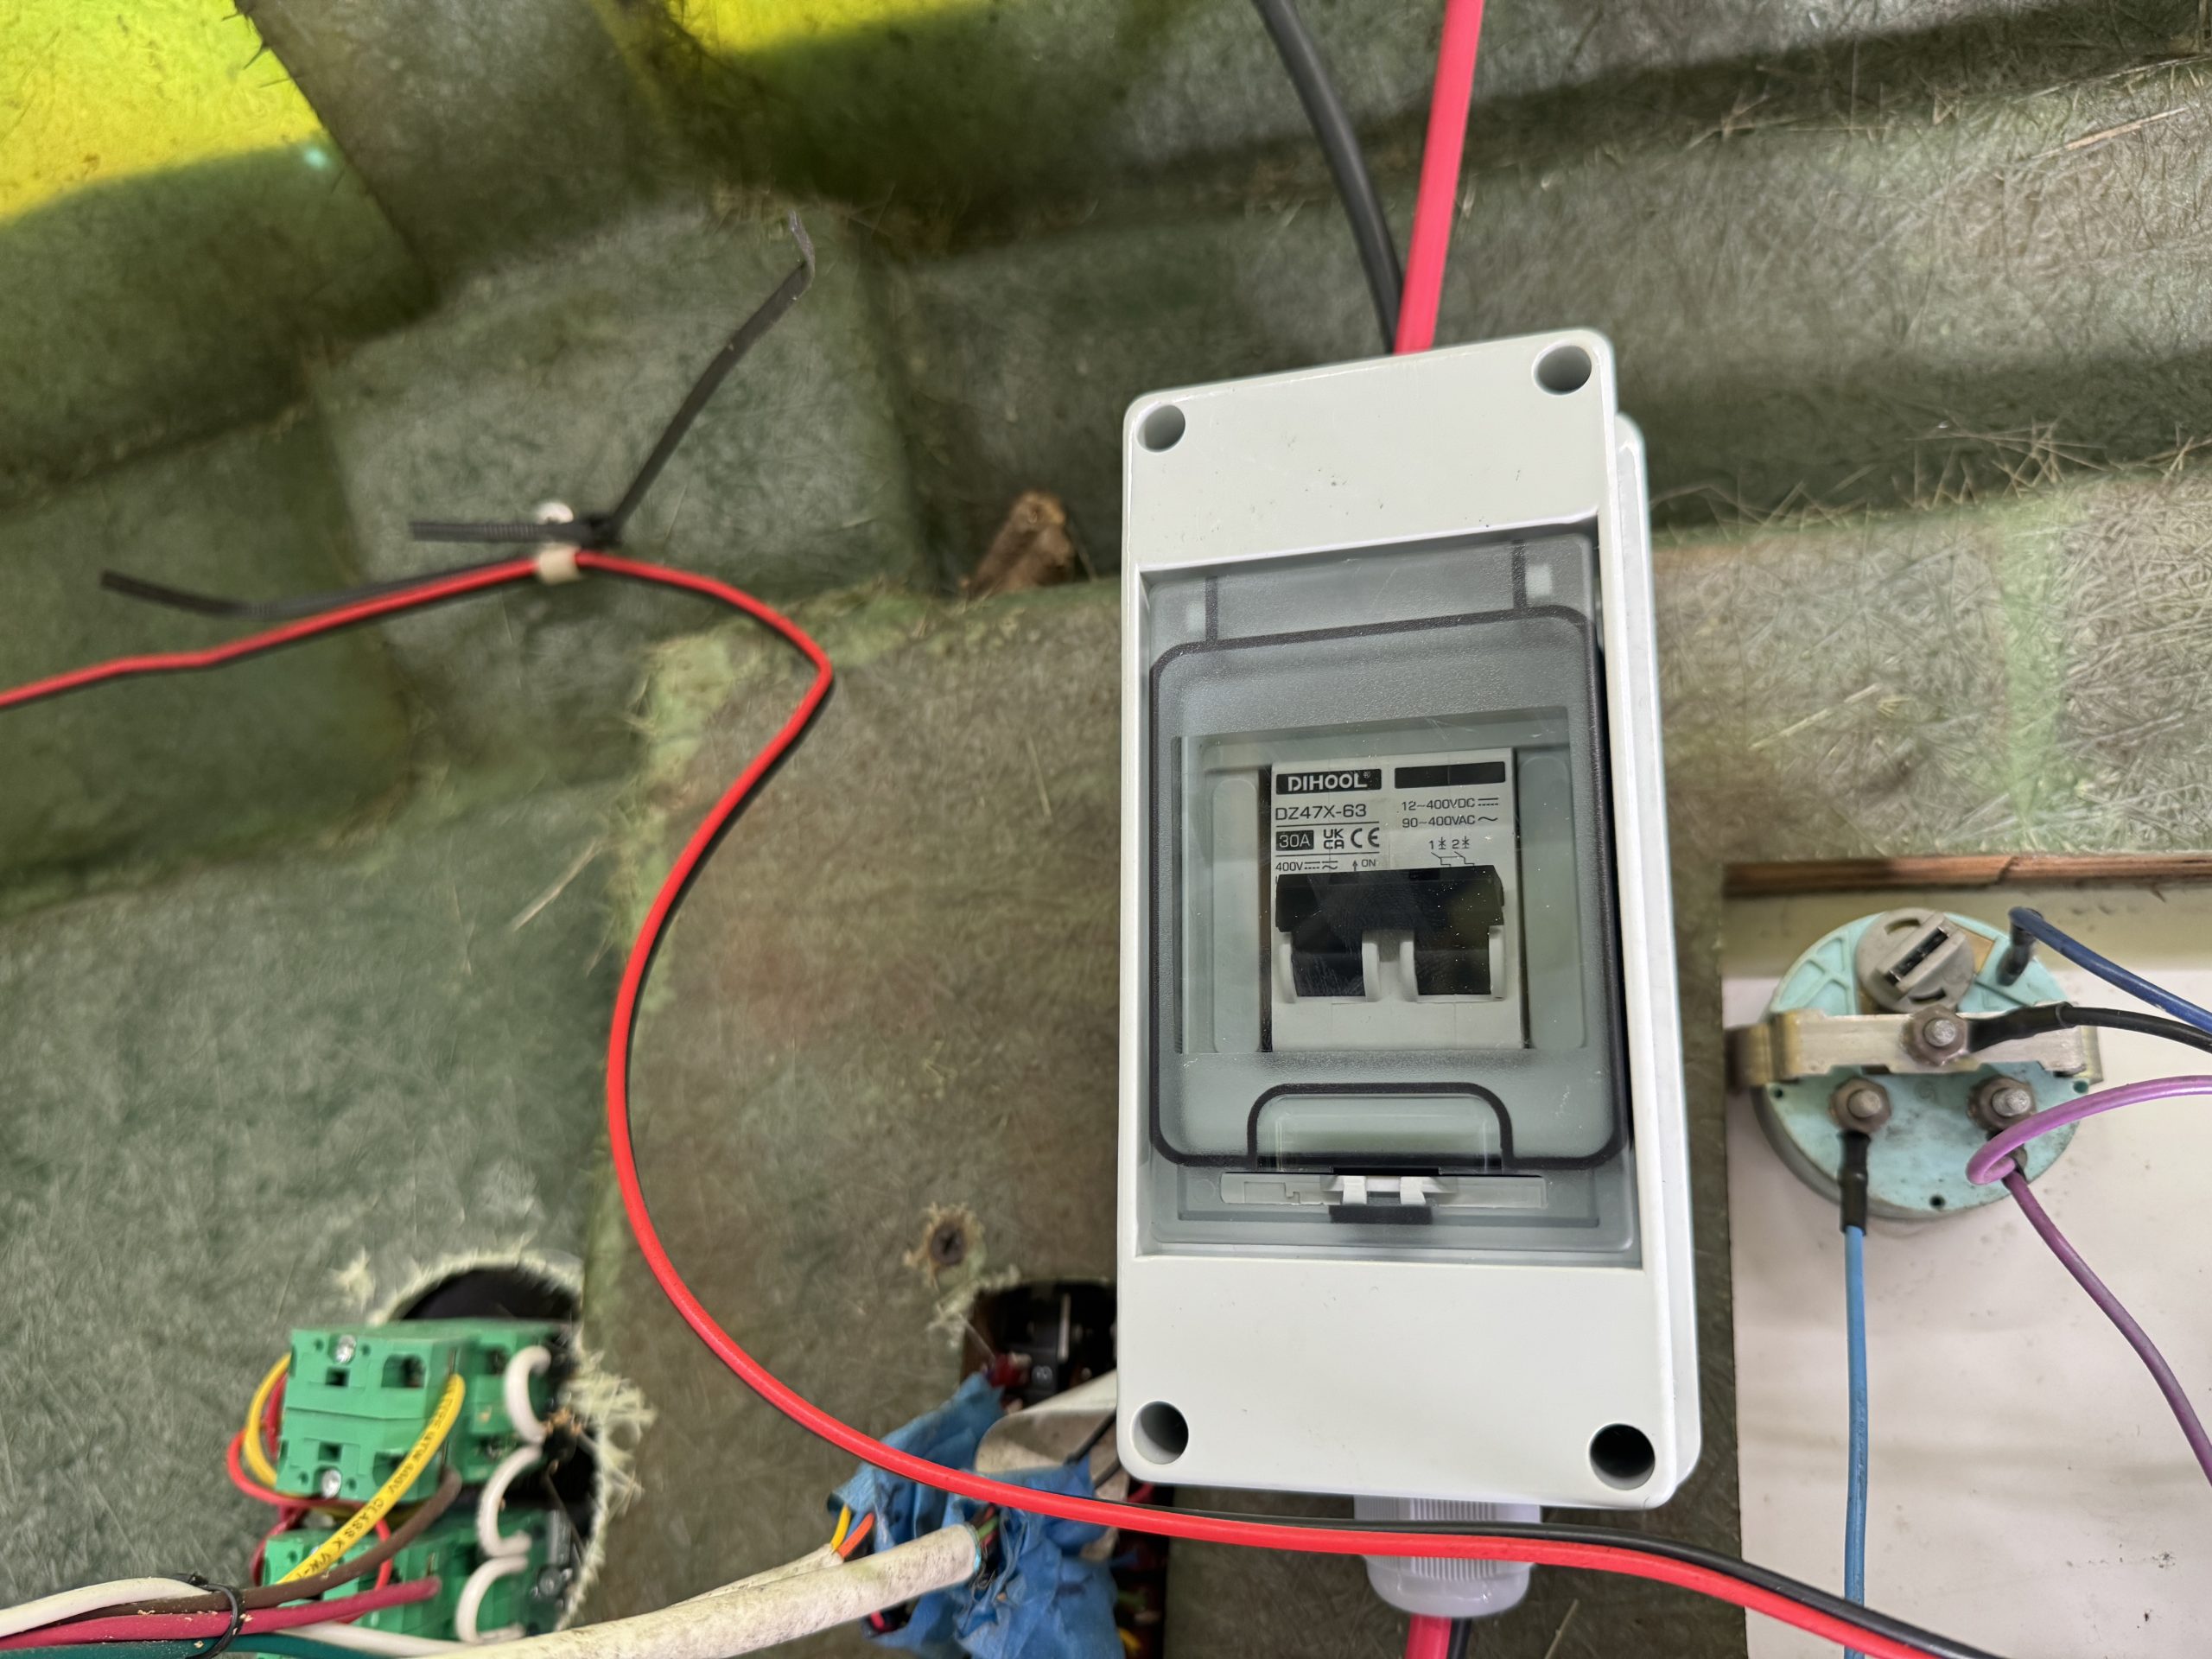
The third day of the installation focused on adding equipment grounding connections, cable management, installing the four new solar panels and running new wire and circuit protection for those panels. I completed the equipment grounding wiring first and had some discussions with the customer about cable management. The customer was particular about how he wanted the cable management done and said he would probably redo some of the work I was going to do. As a result, we agreed that I would leave all the cables with the basic runs and let him finalize how he wanted them secured. I ran new solar PV wire from the roof of the houseboat down into the hull where the solar controllers were located. This was relatively easy because there was an existing wire chase close by. I installed an in line dual pole solar breaker for the wiring as well. The customer and I then prepared the solar panels for mounting by drilling mounting holes in the panel frames and mounting Z-brackets to all the panels. We laid the panels out in the best configuration for the space and secured the panels to the roof deck with 3M 5200 Marine adhesive. I wired the panels in 4S1P configuration and connected them to the second solar controller. This completed the installation and we did some final tests with the system, including running the onboard residential air conditioner. The customer was happy with the system performance and we had some discussions about the system capacities.