DRV Full House MX450
System Schematic
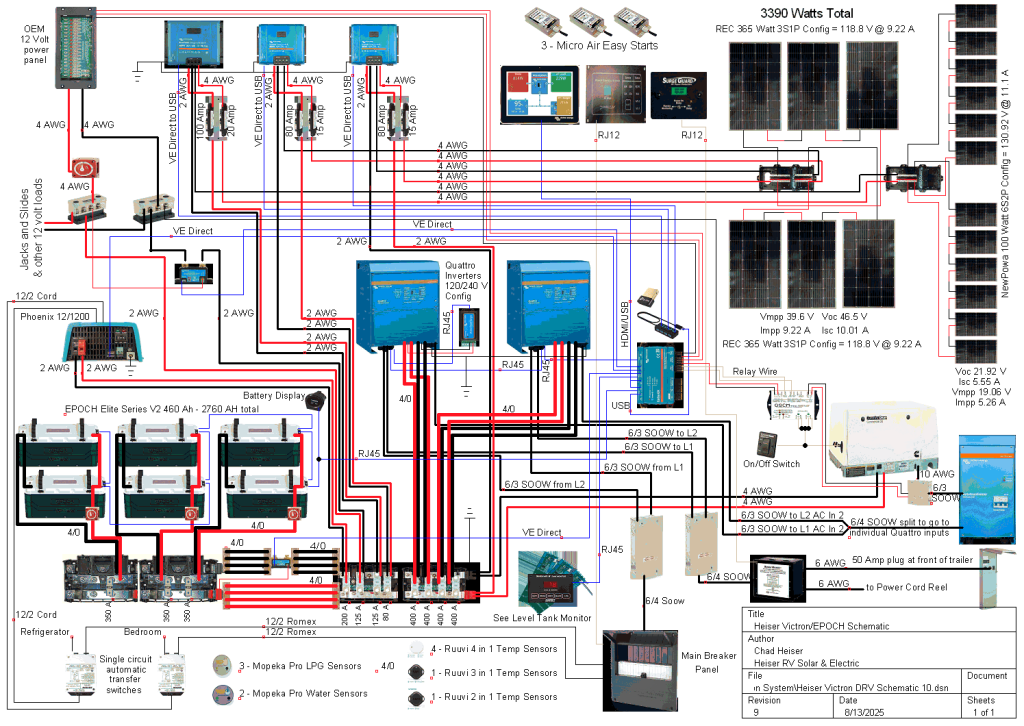
Basic Parts List
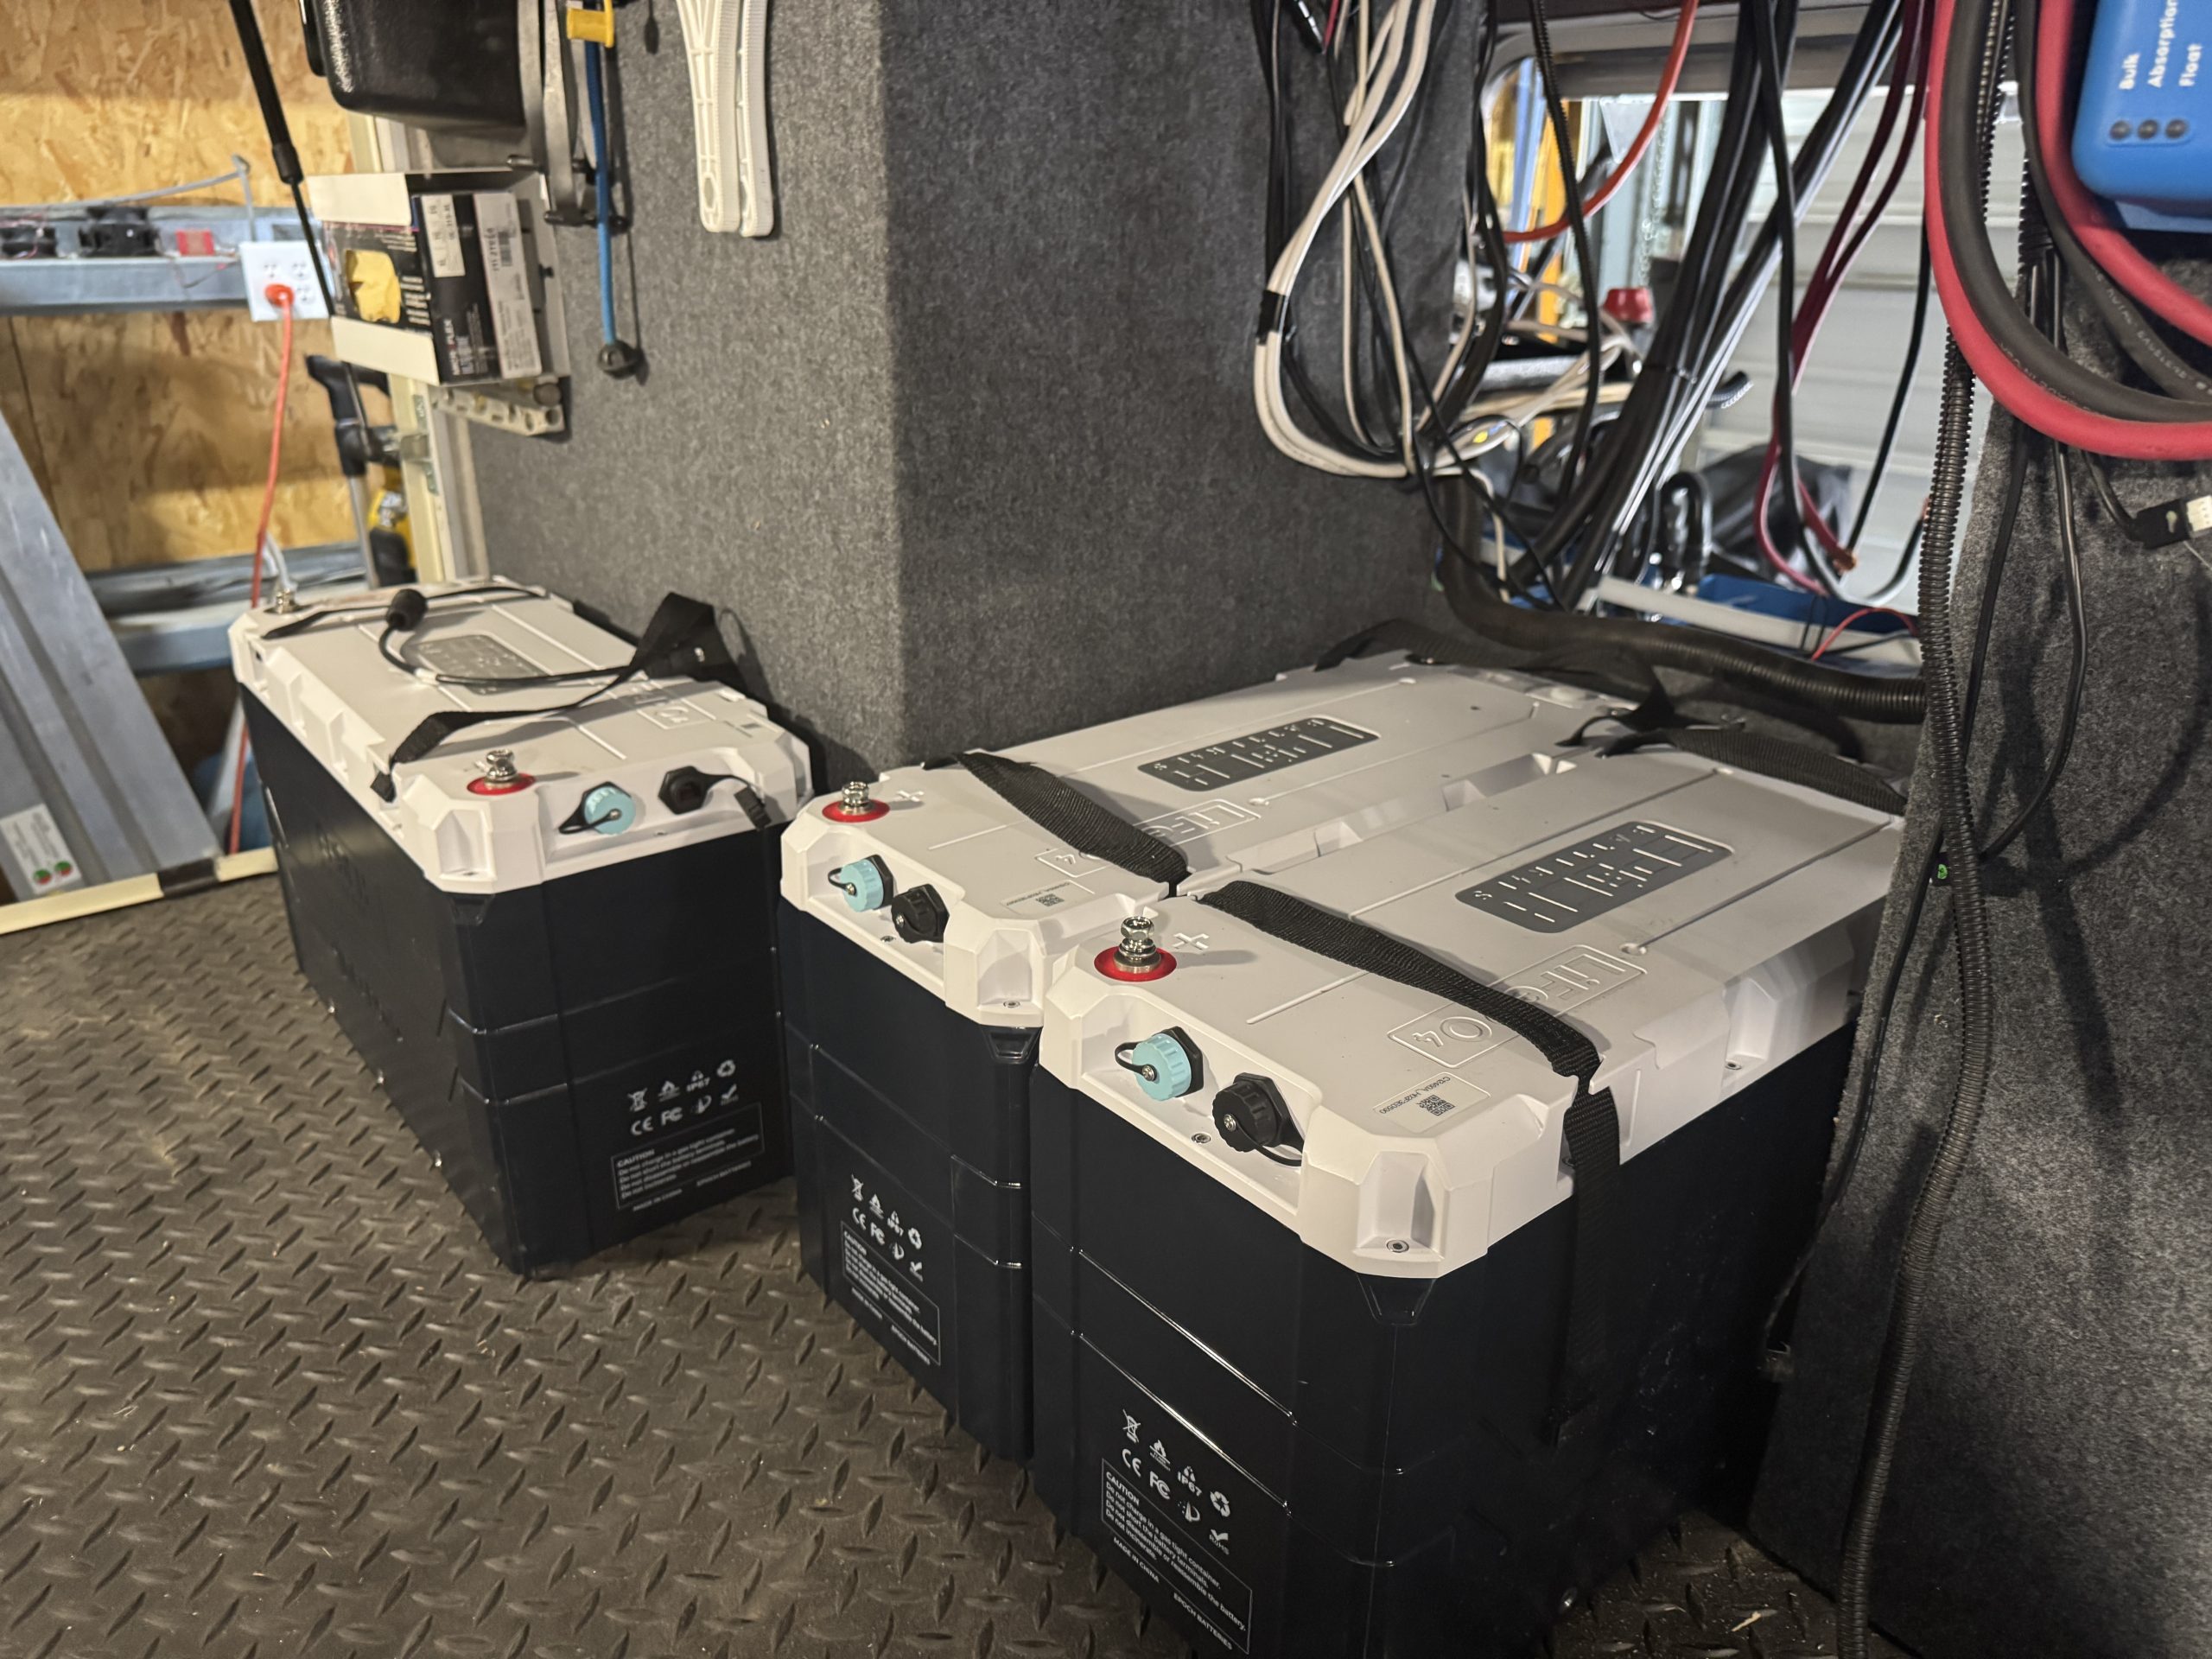
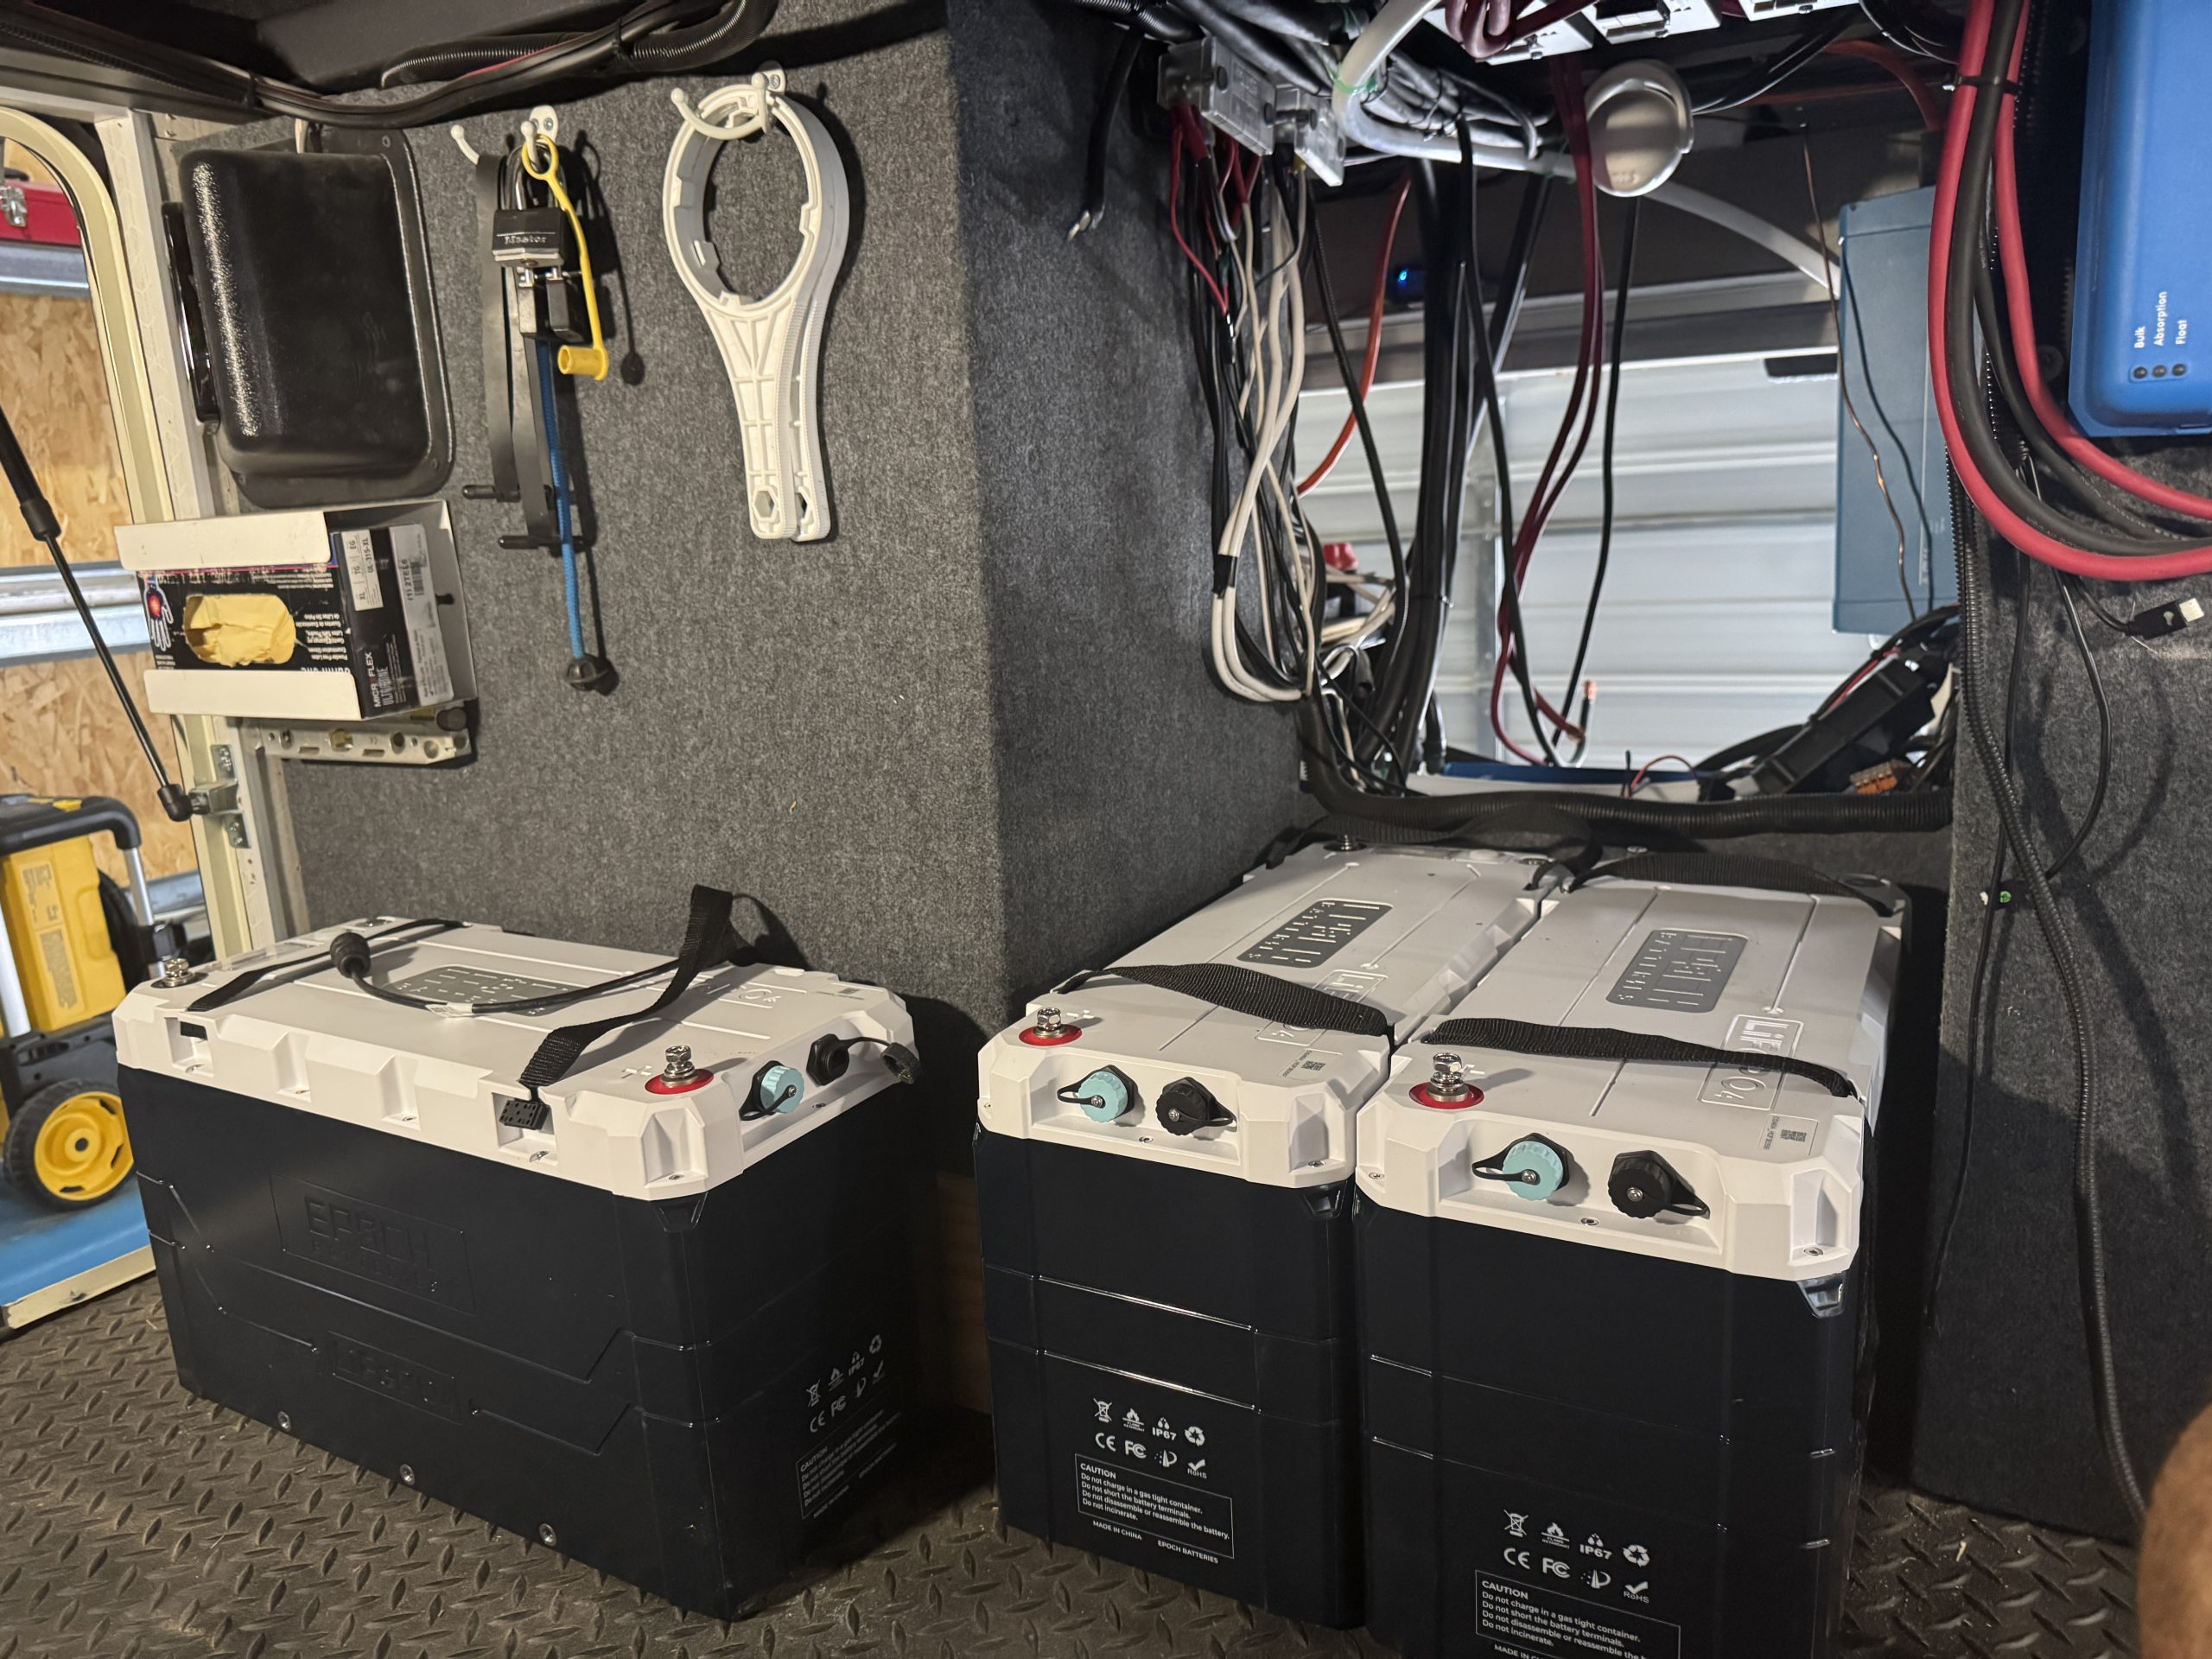
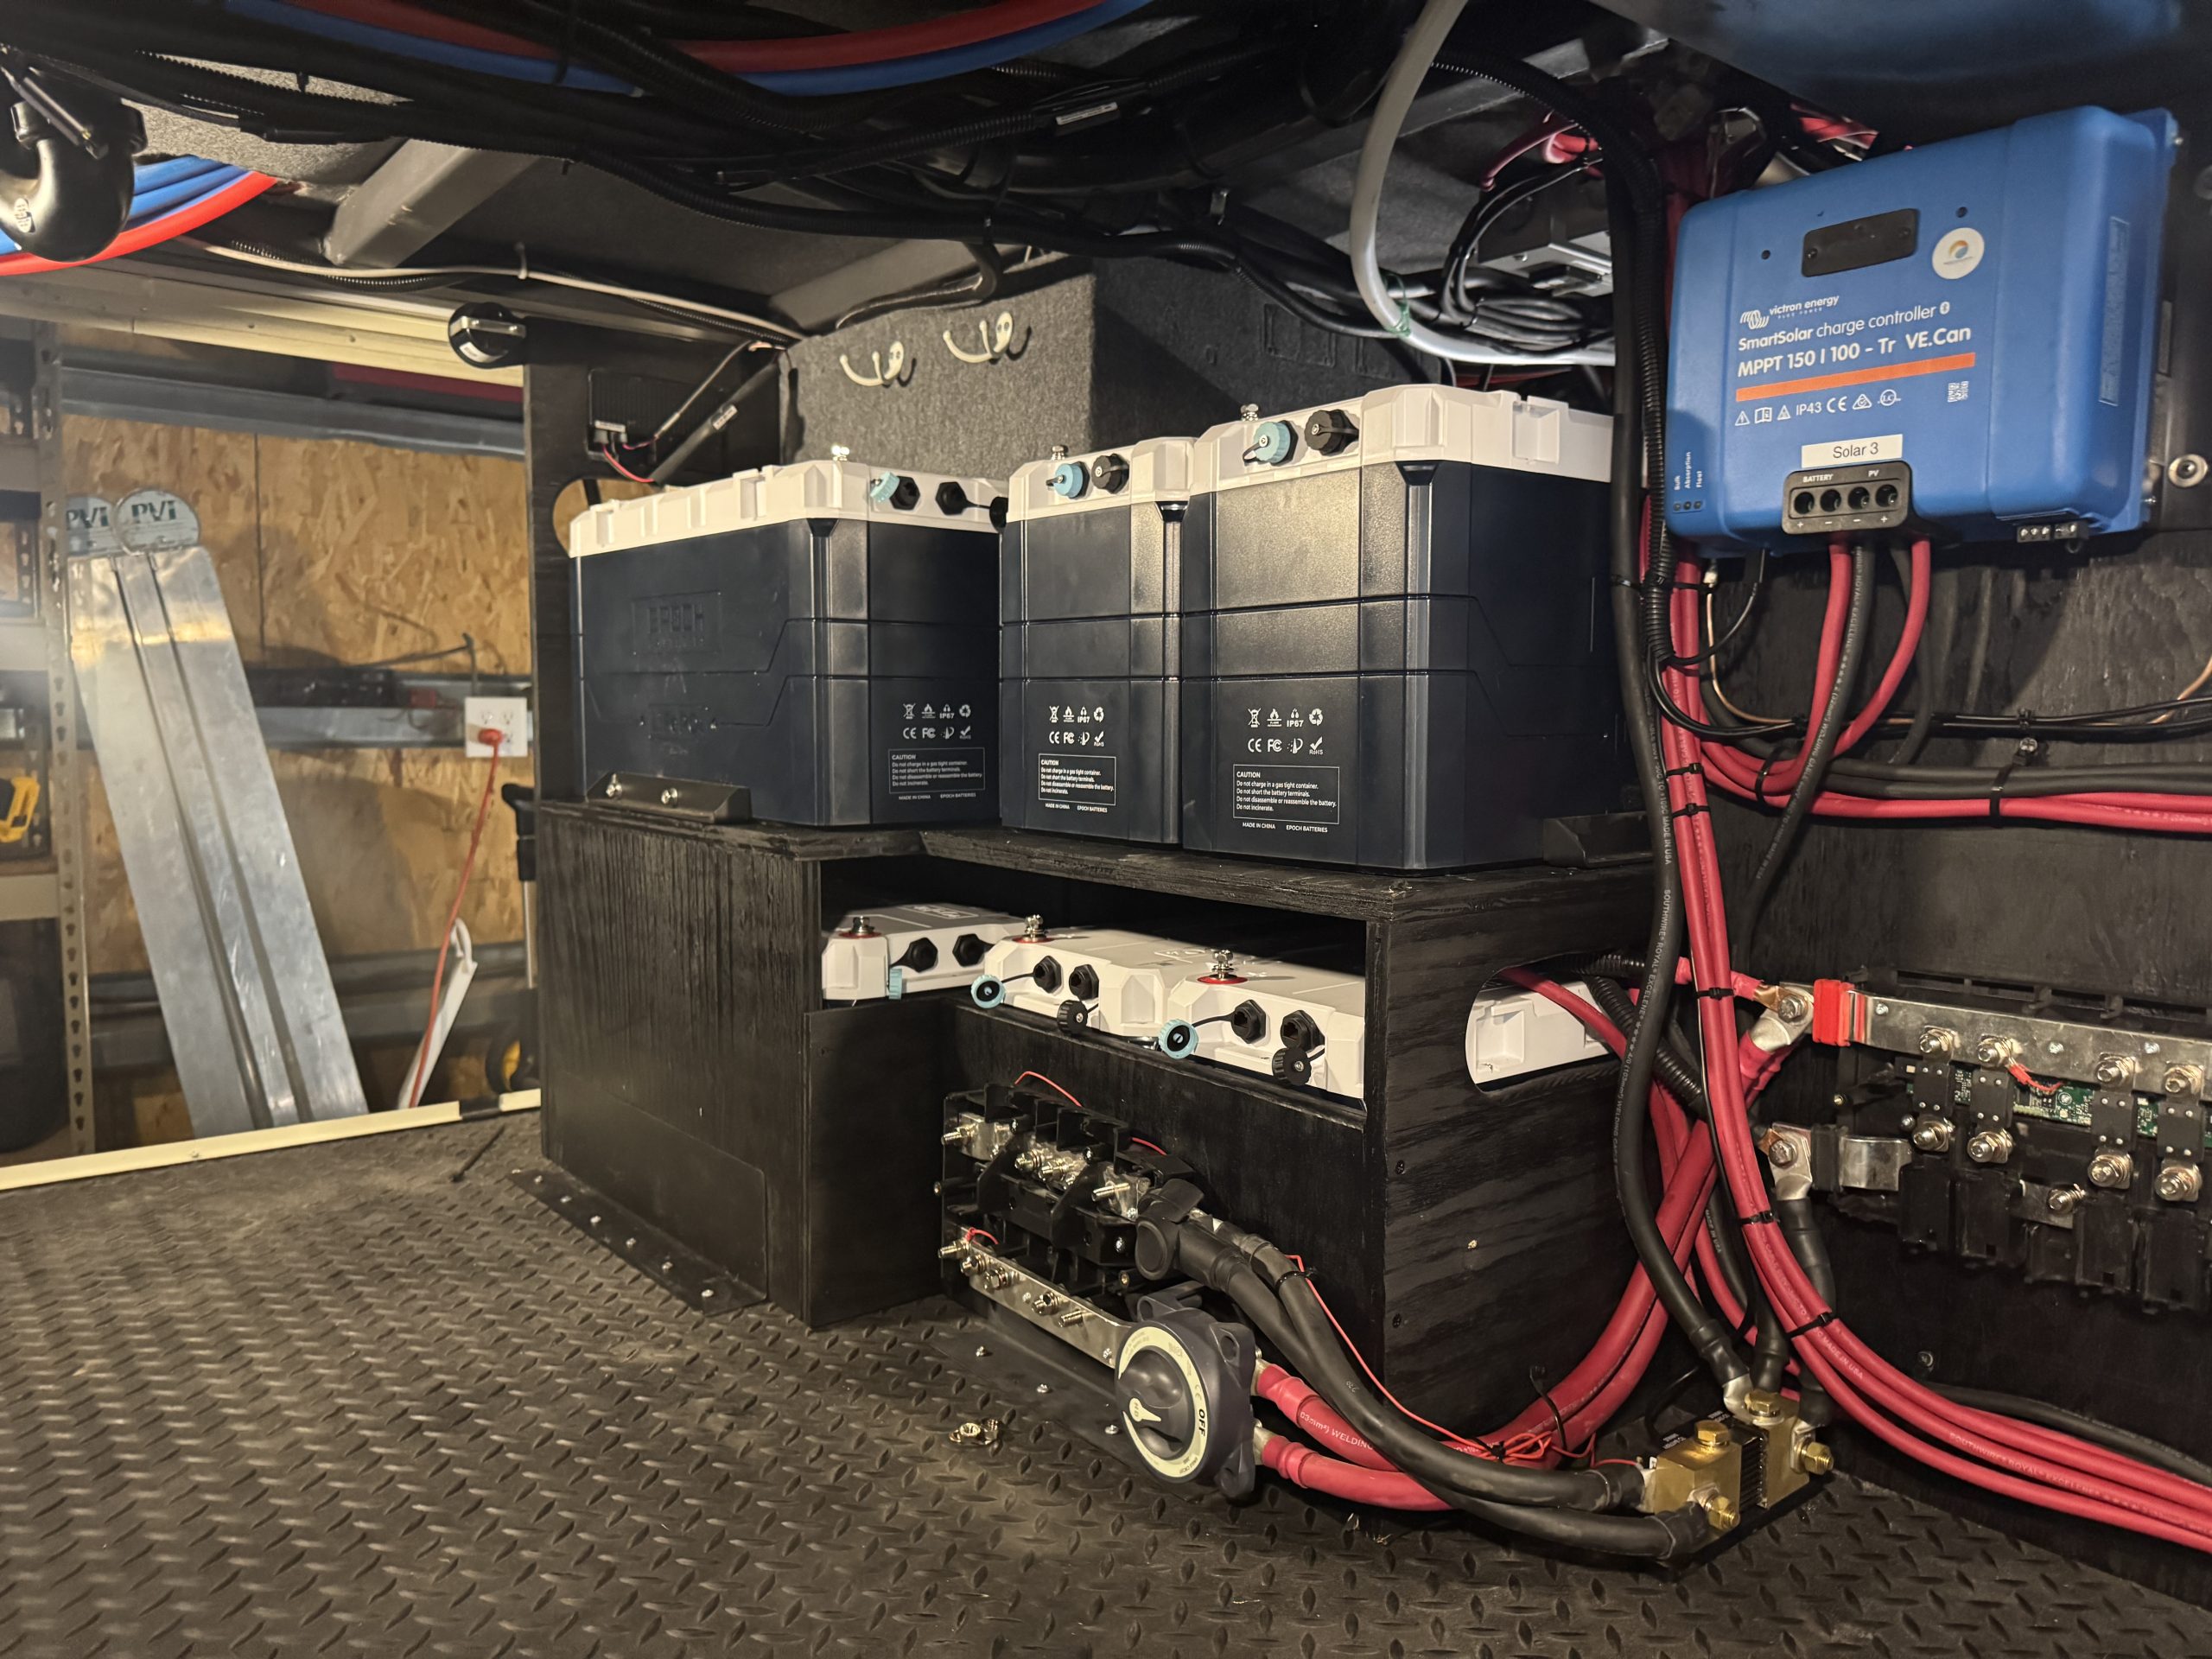
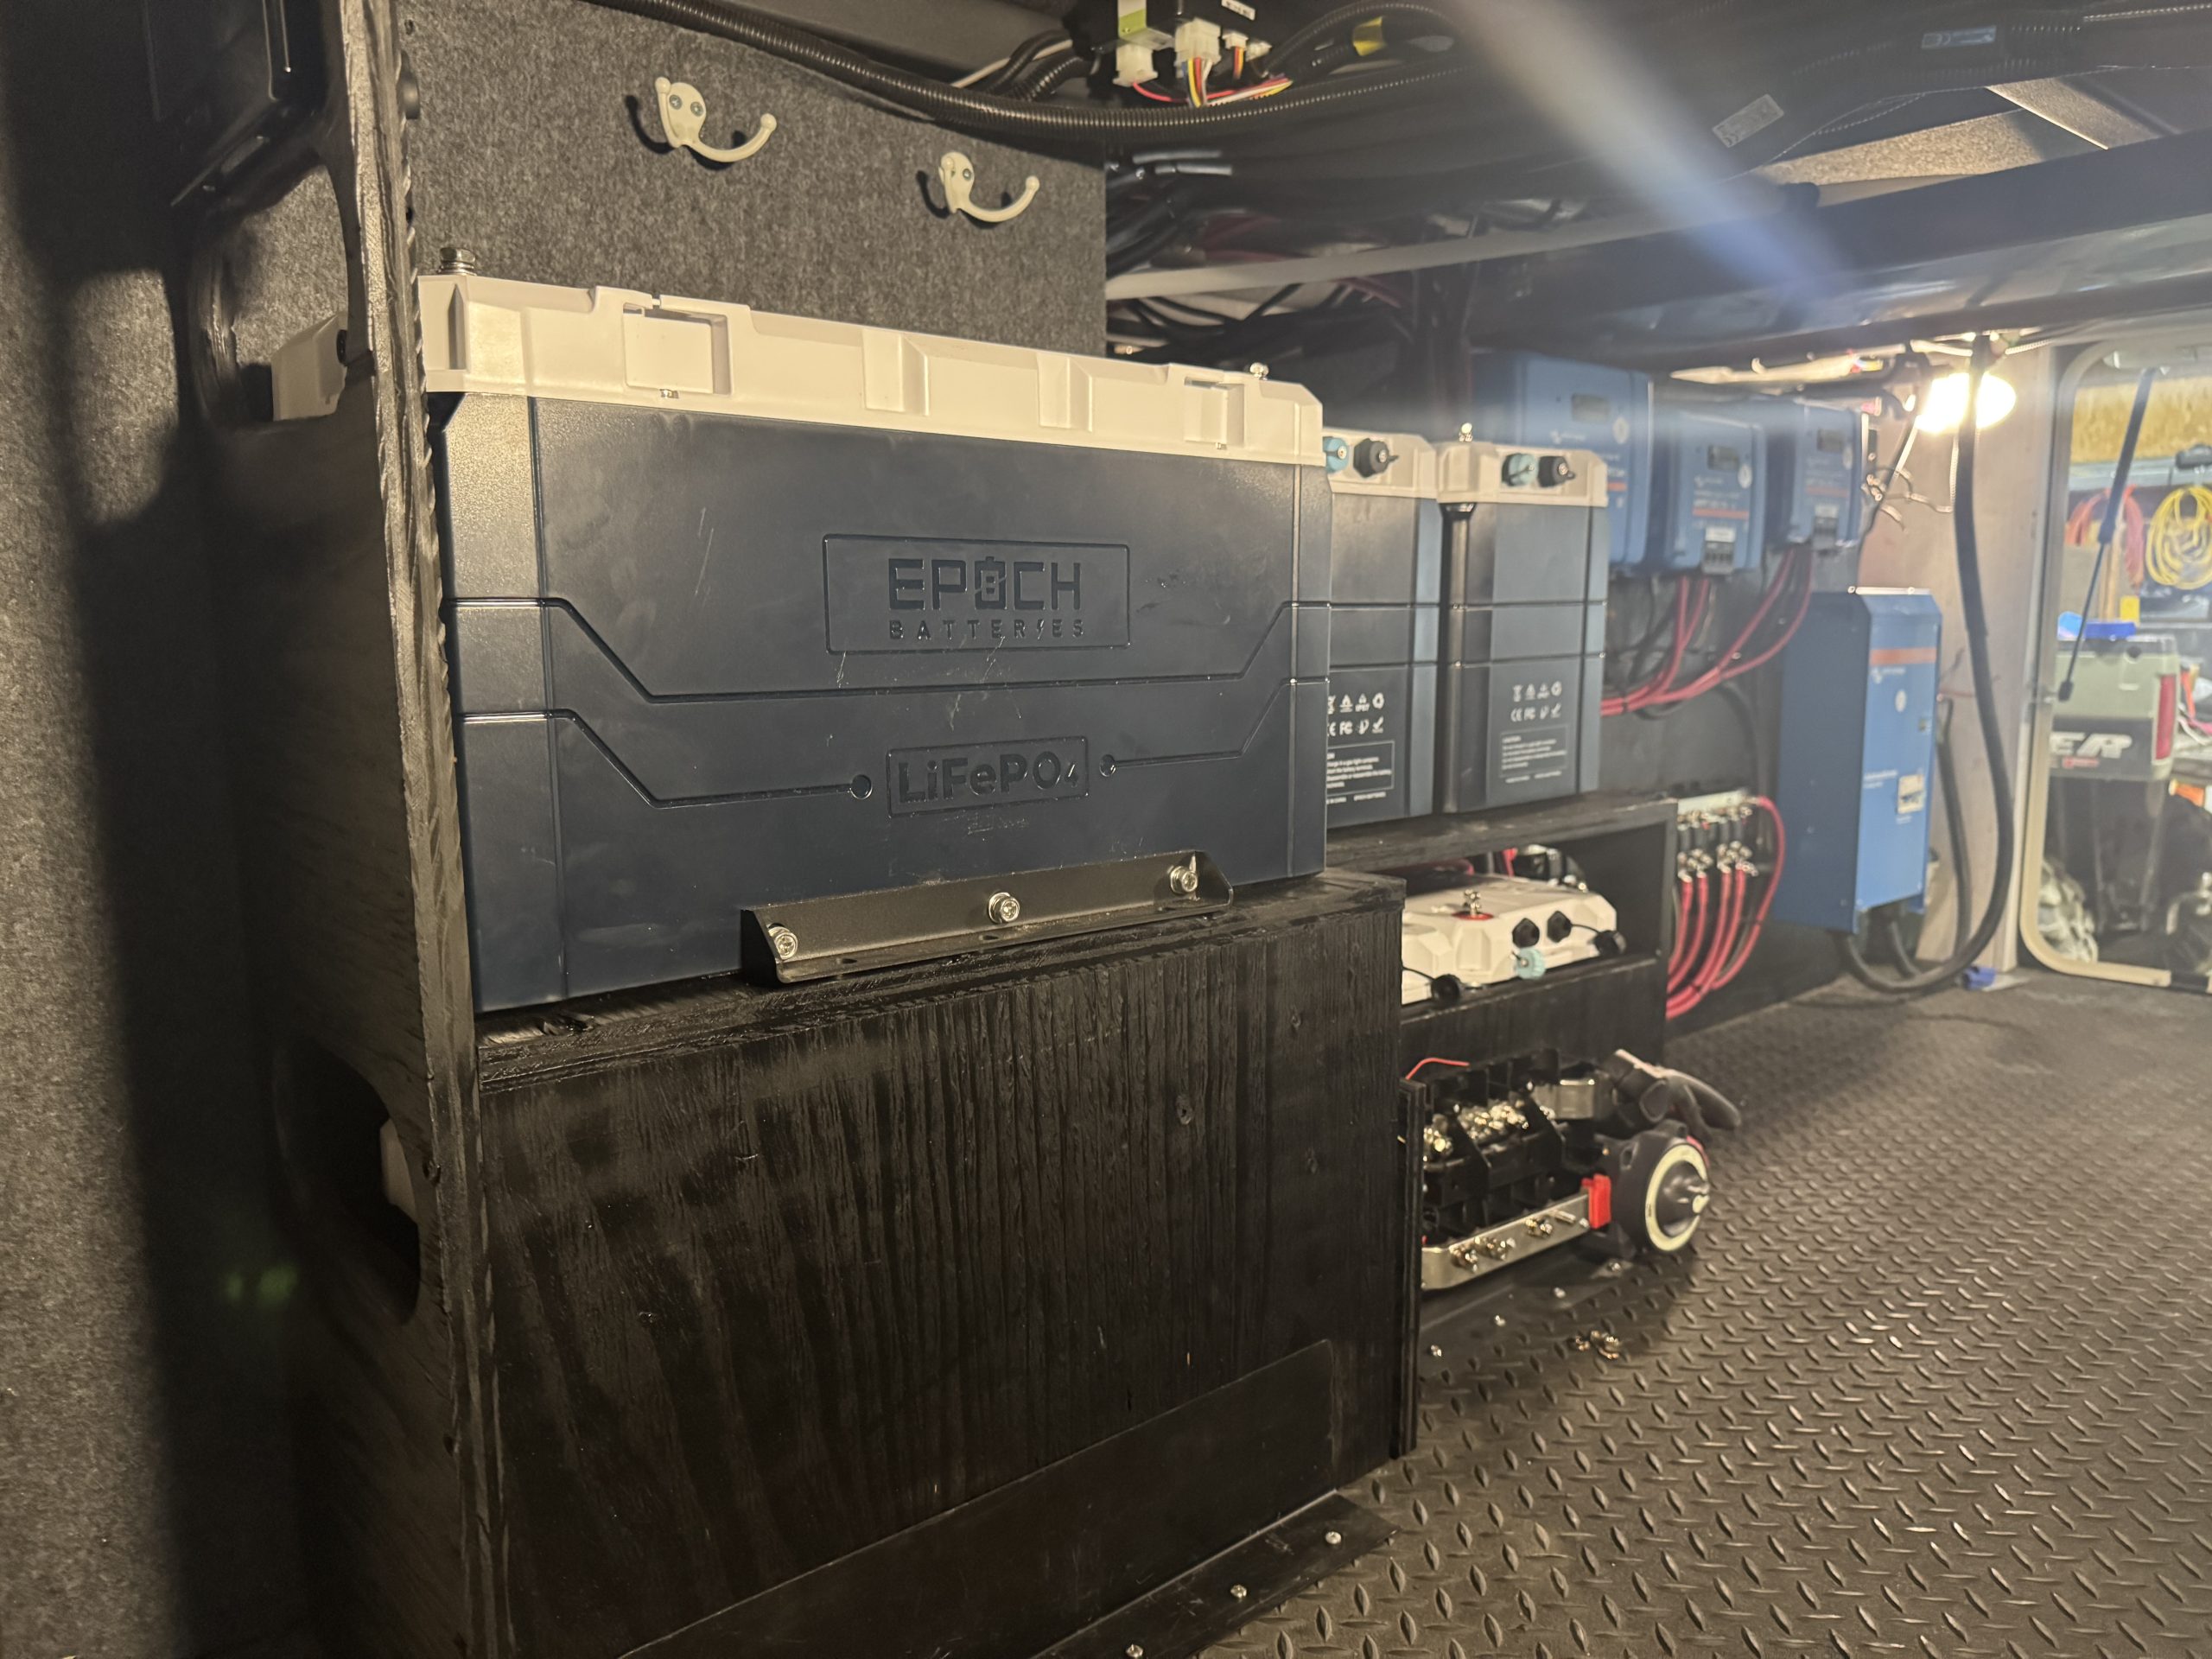
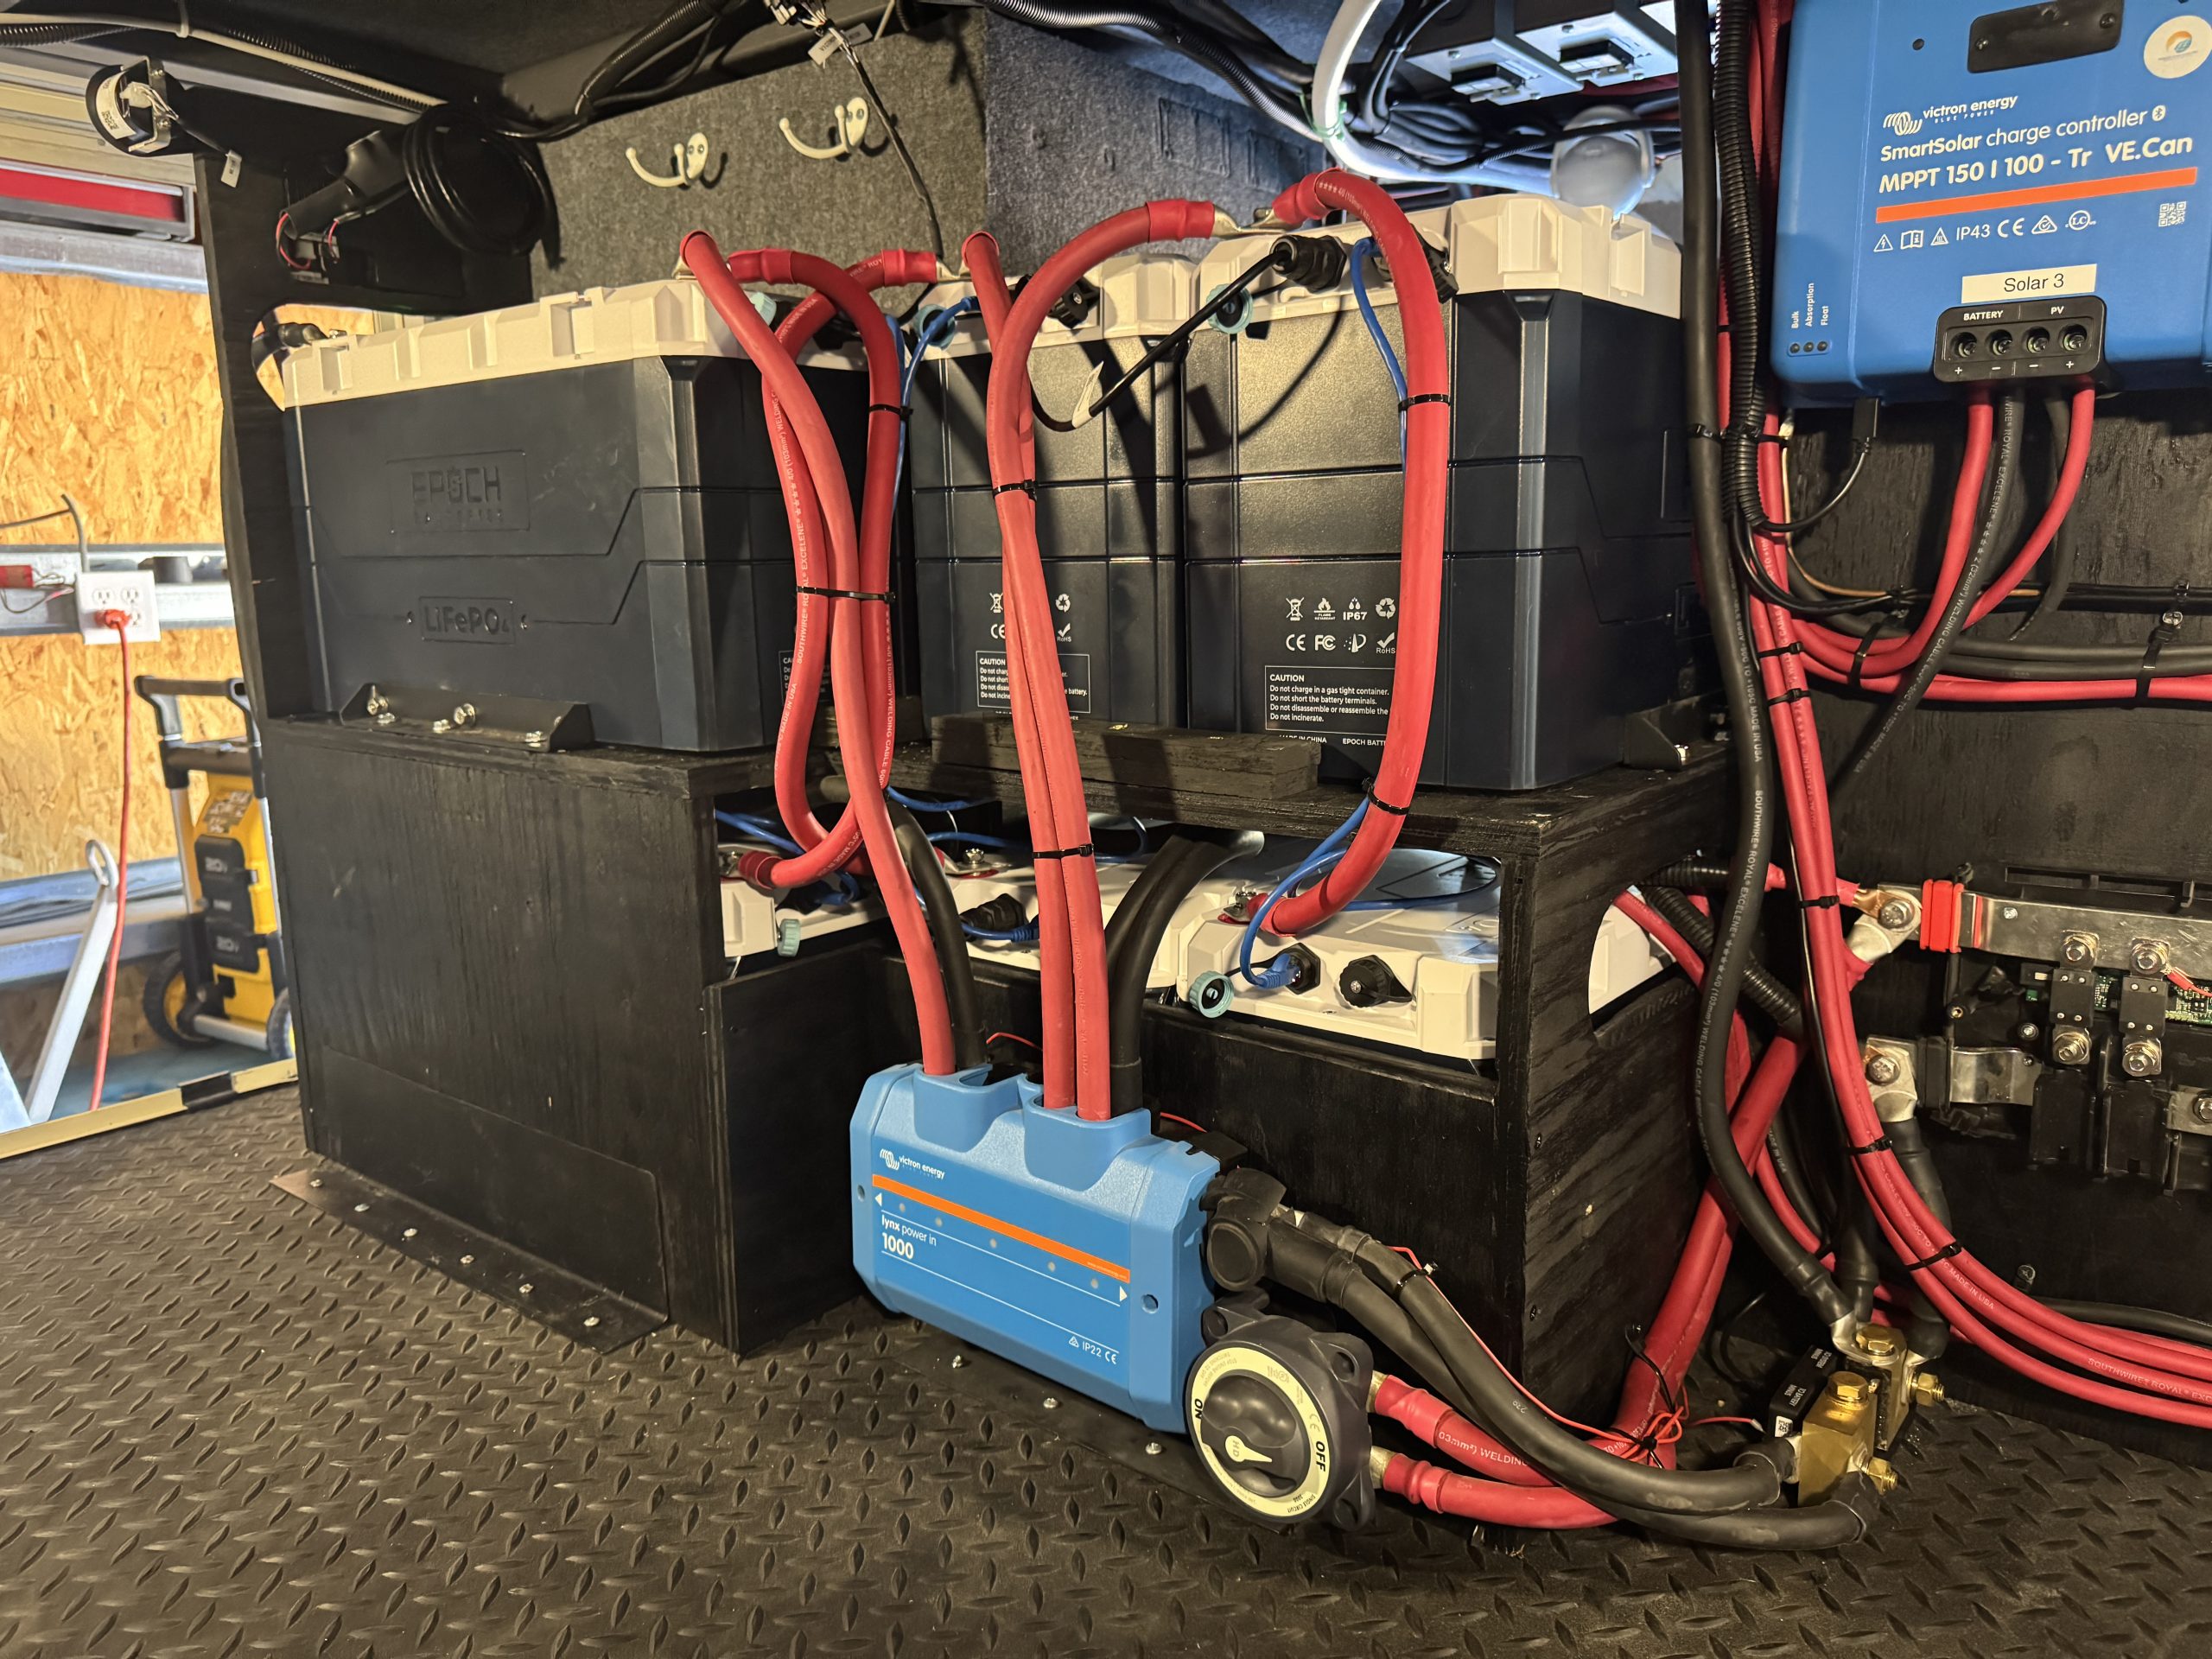
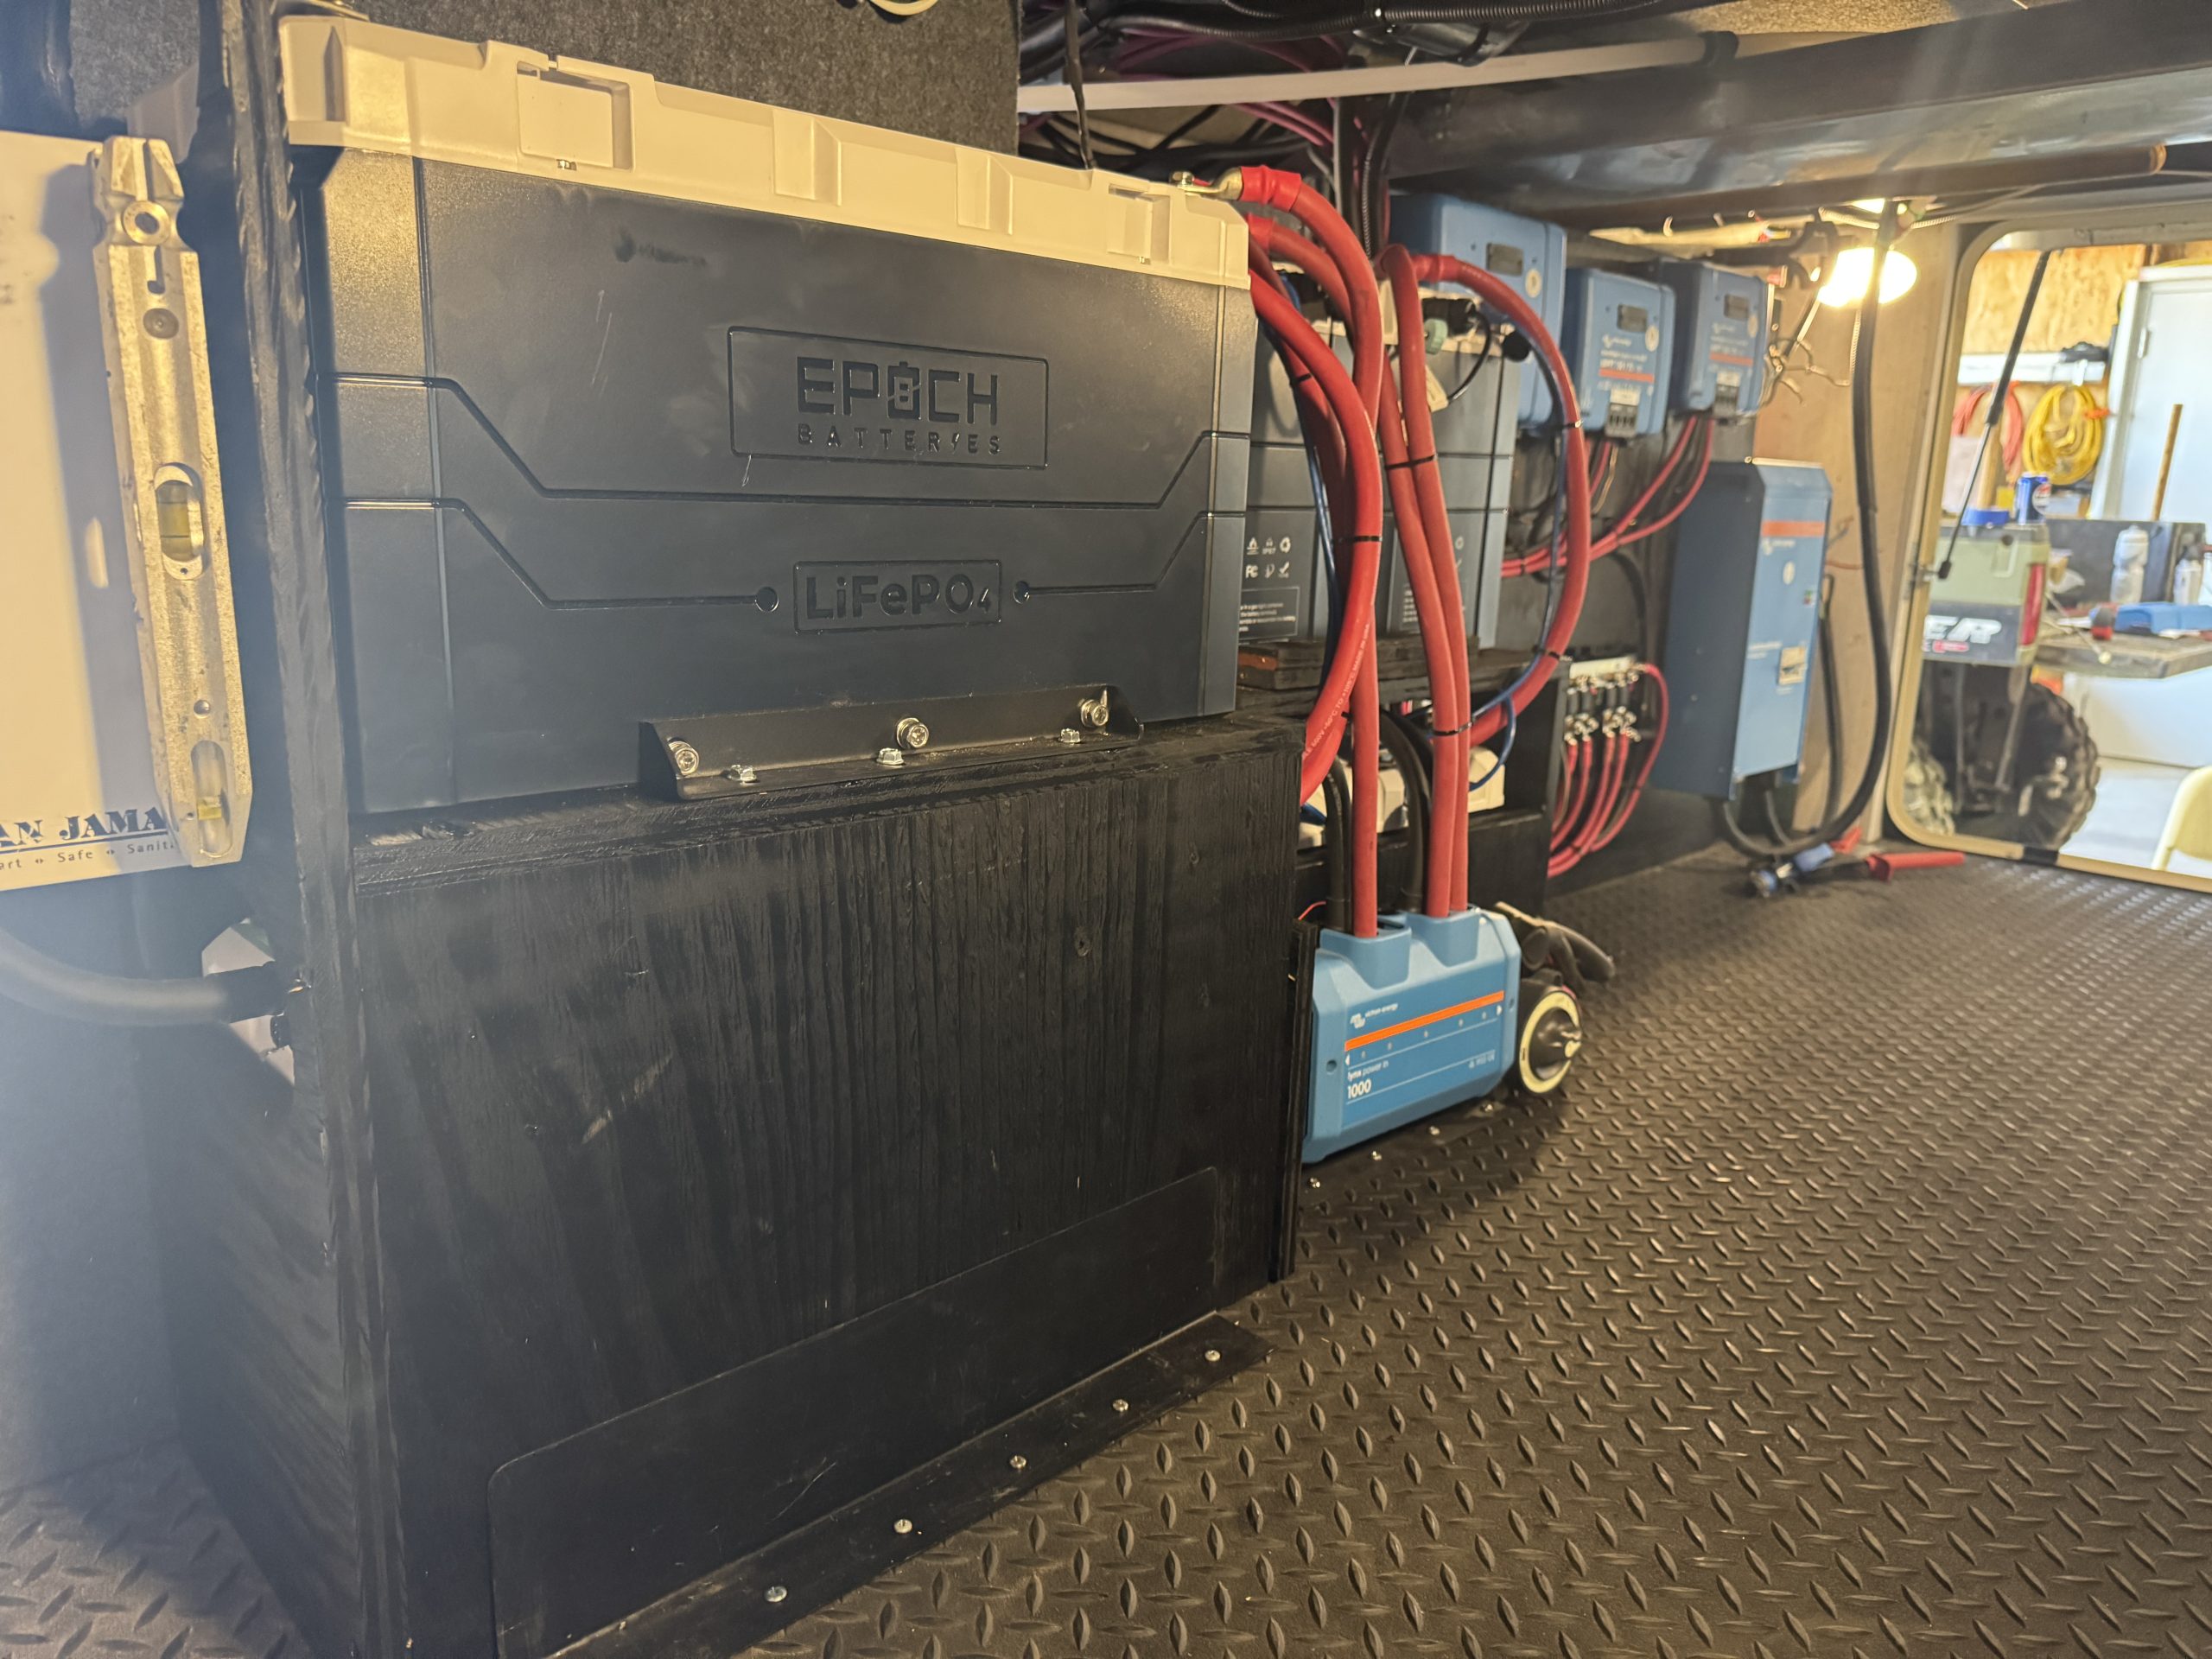
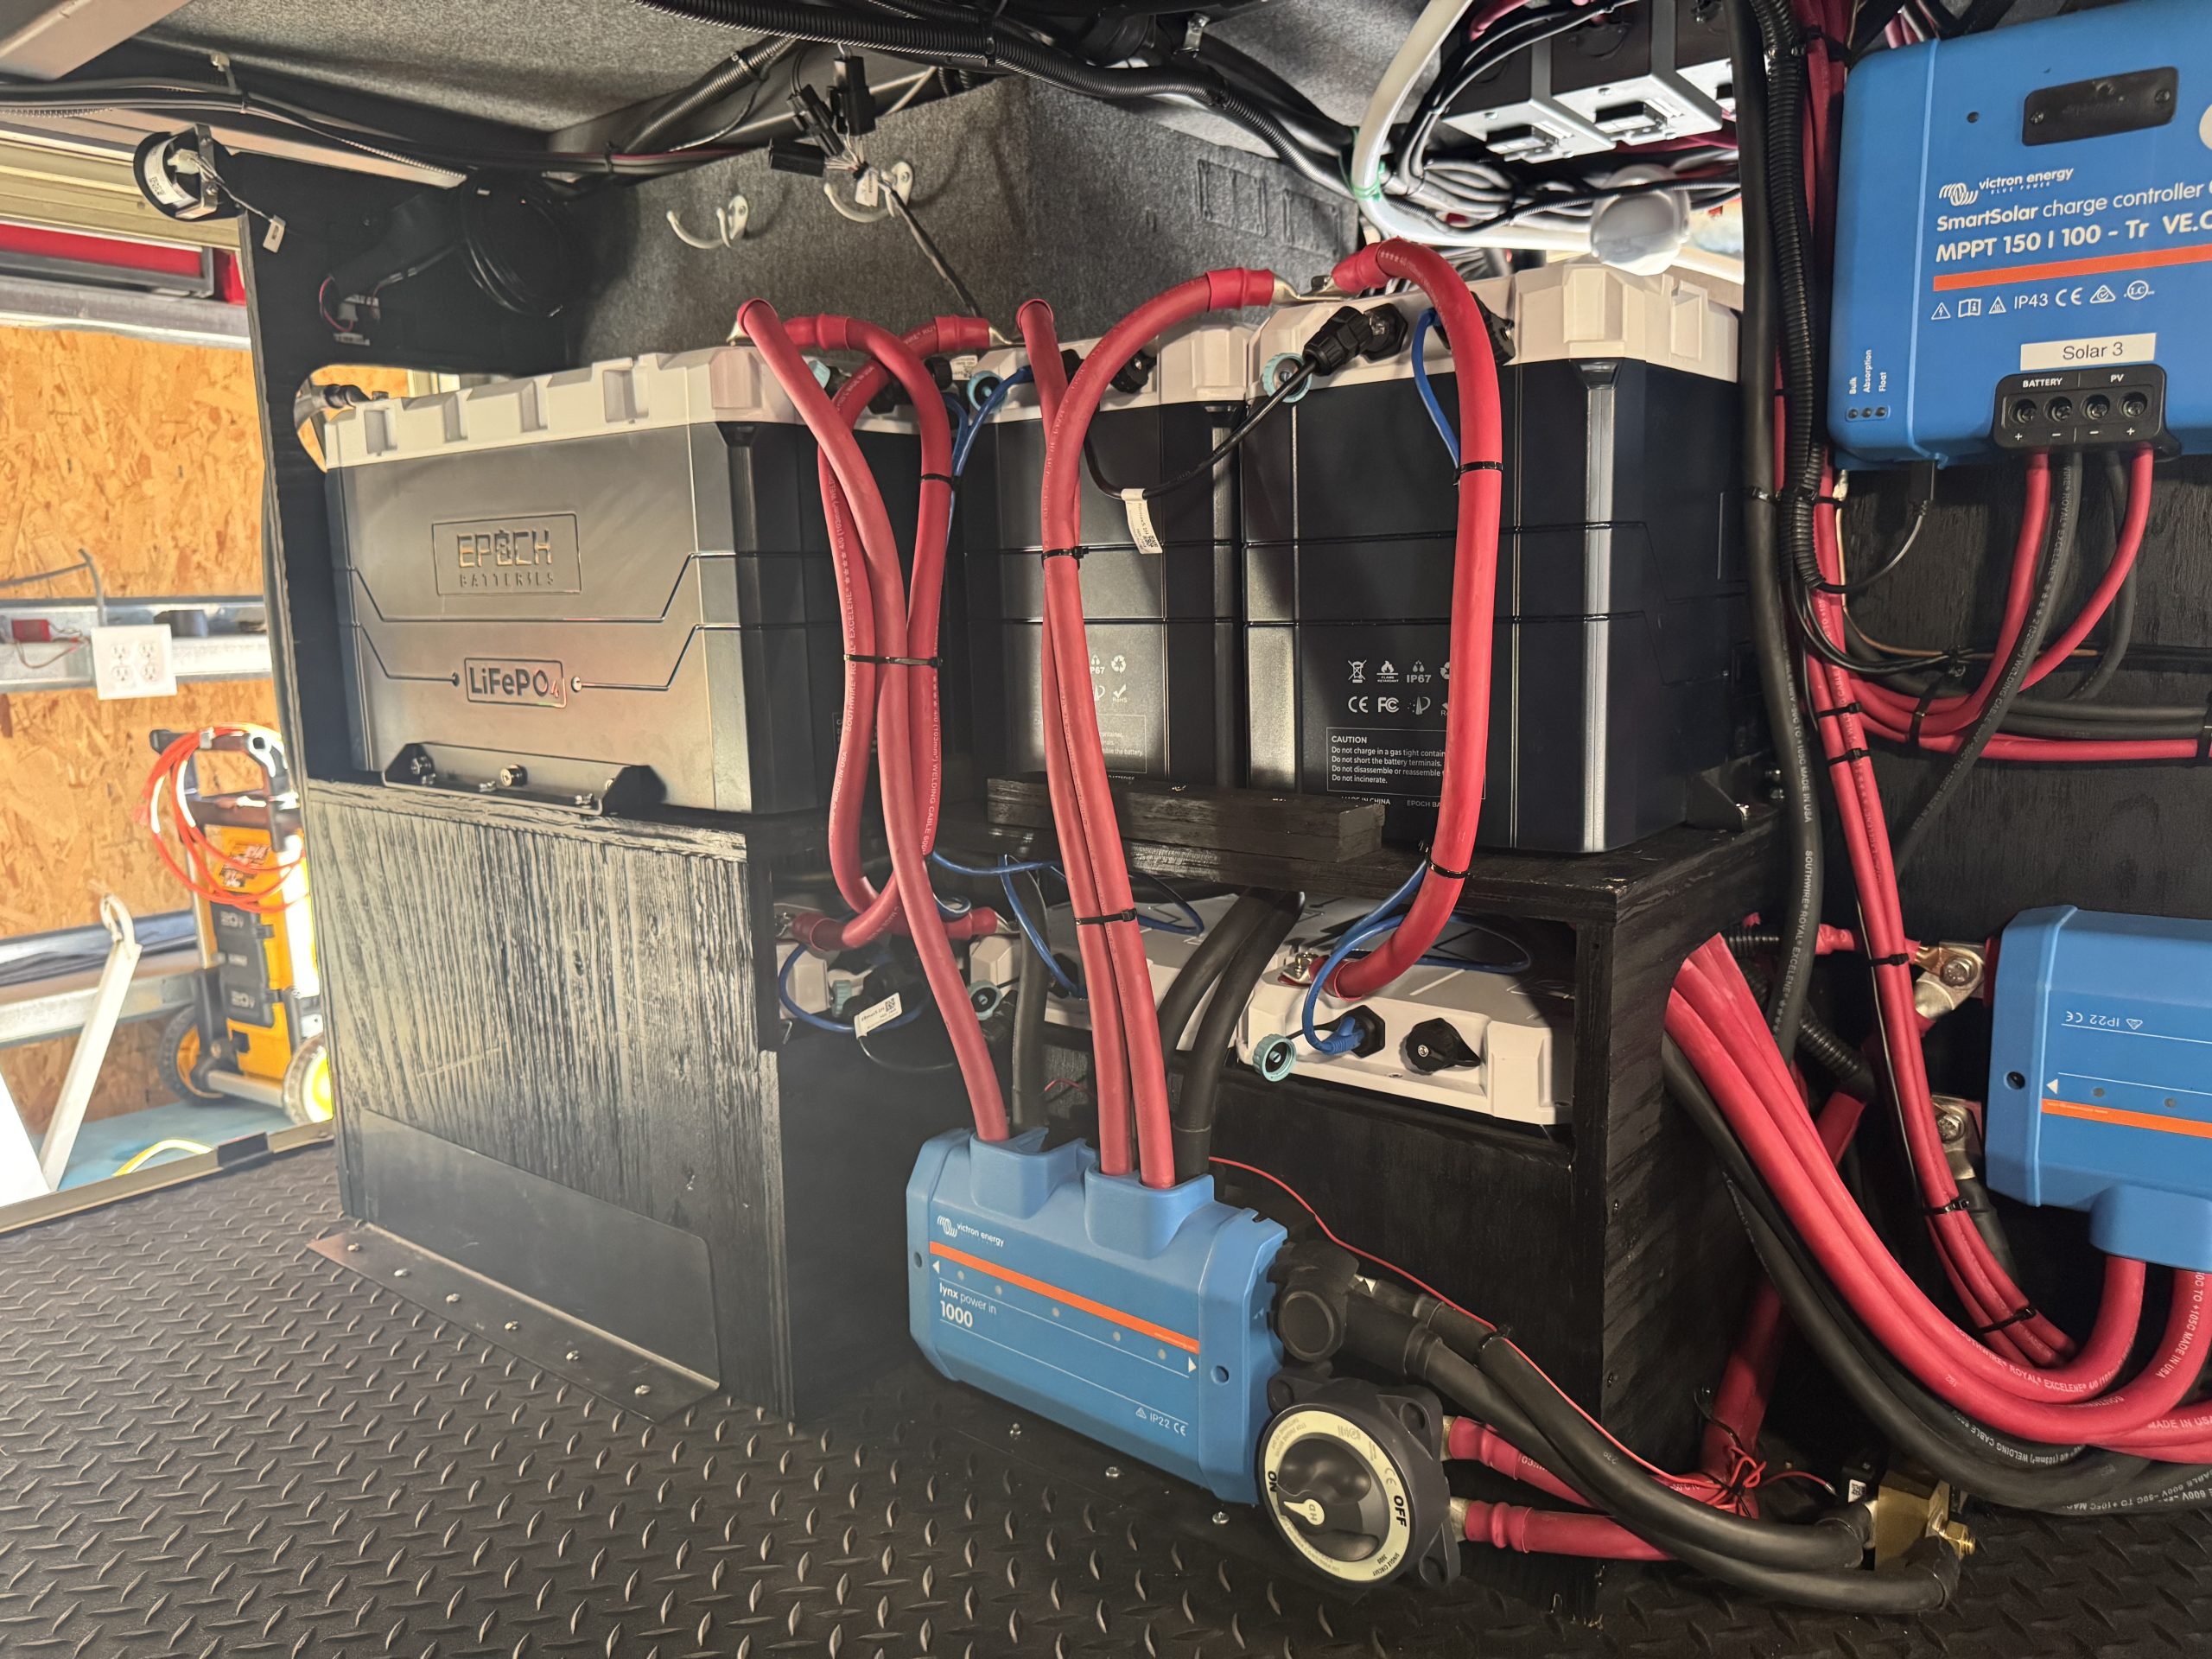
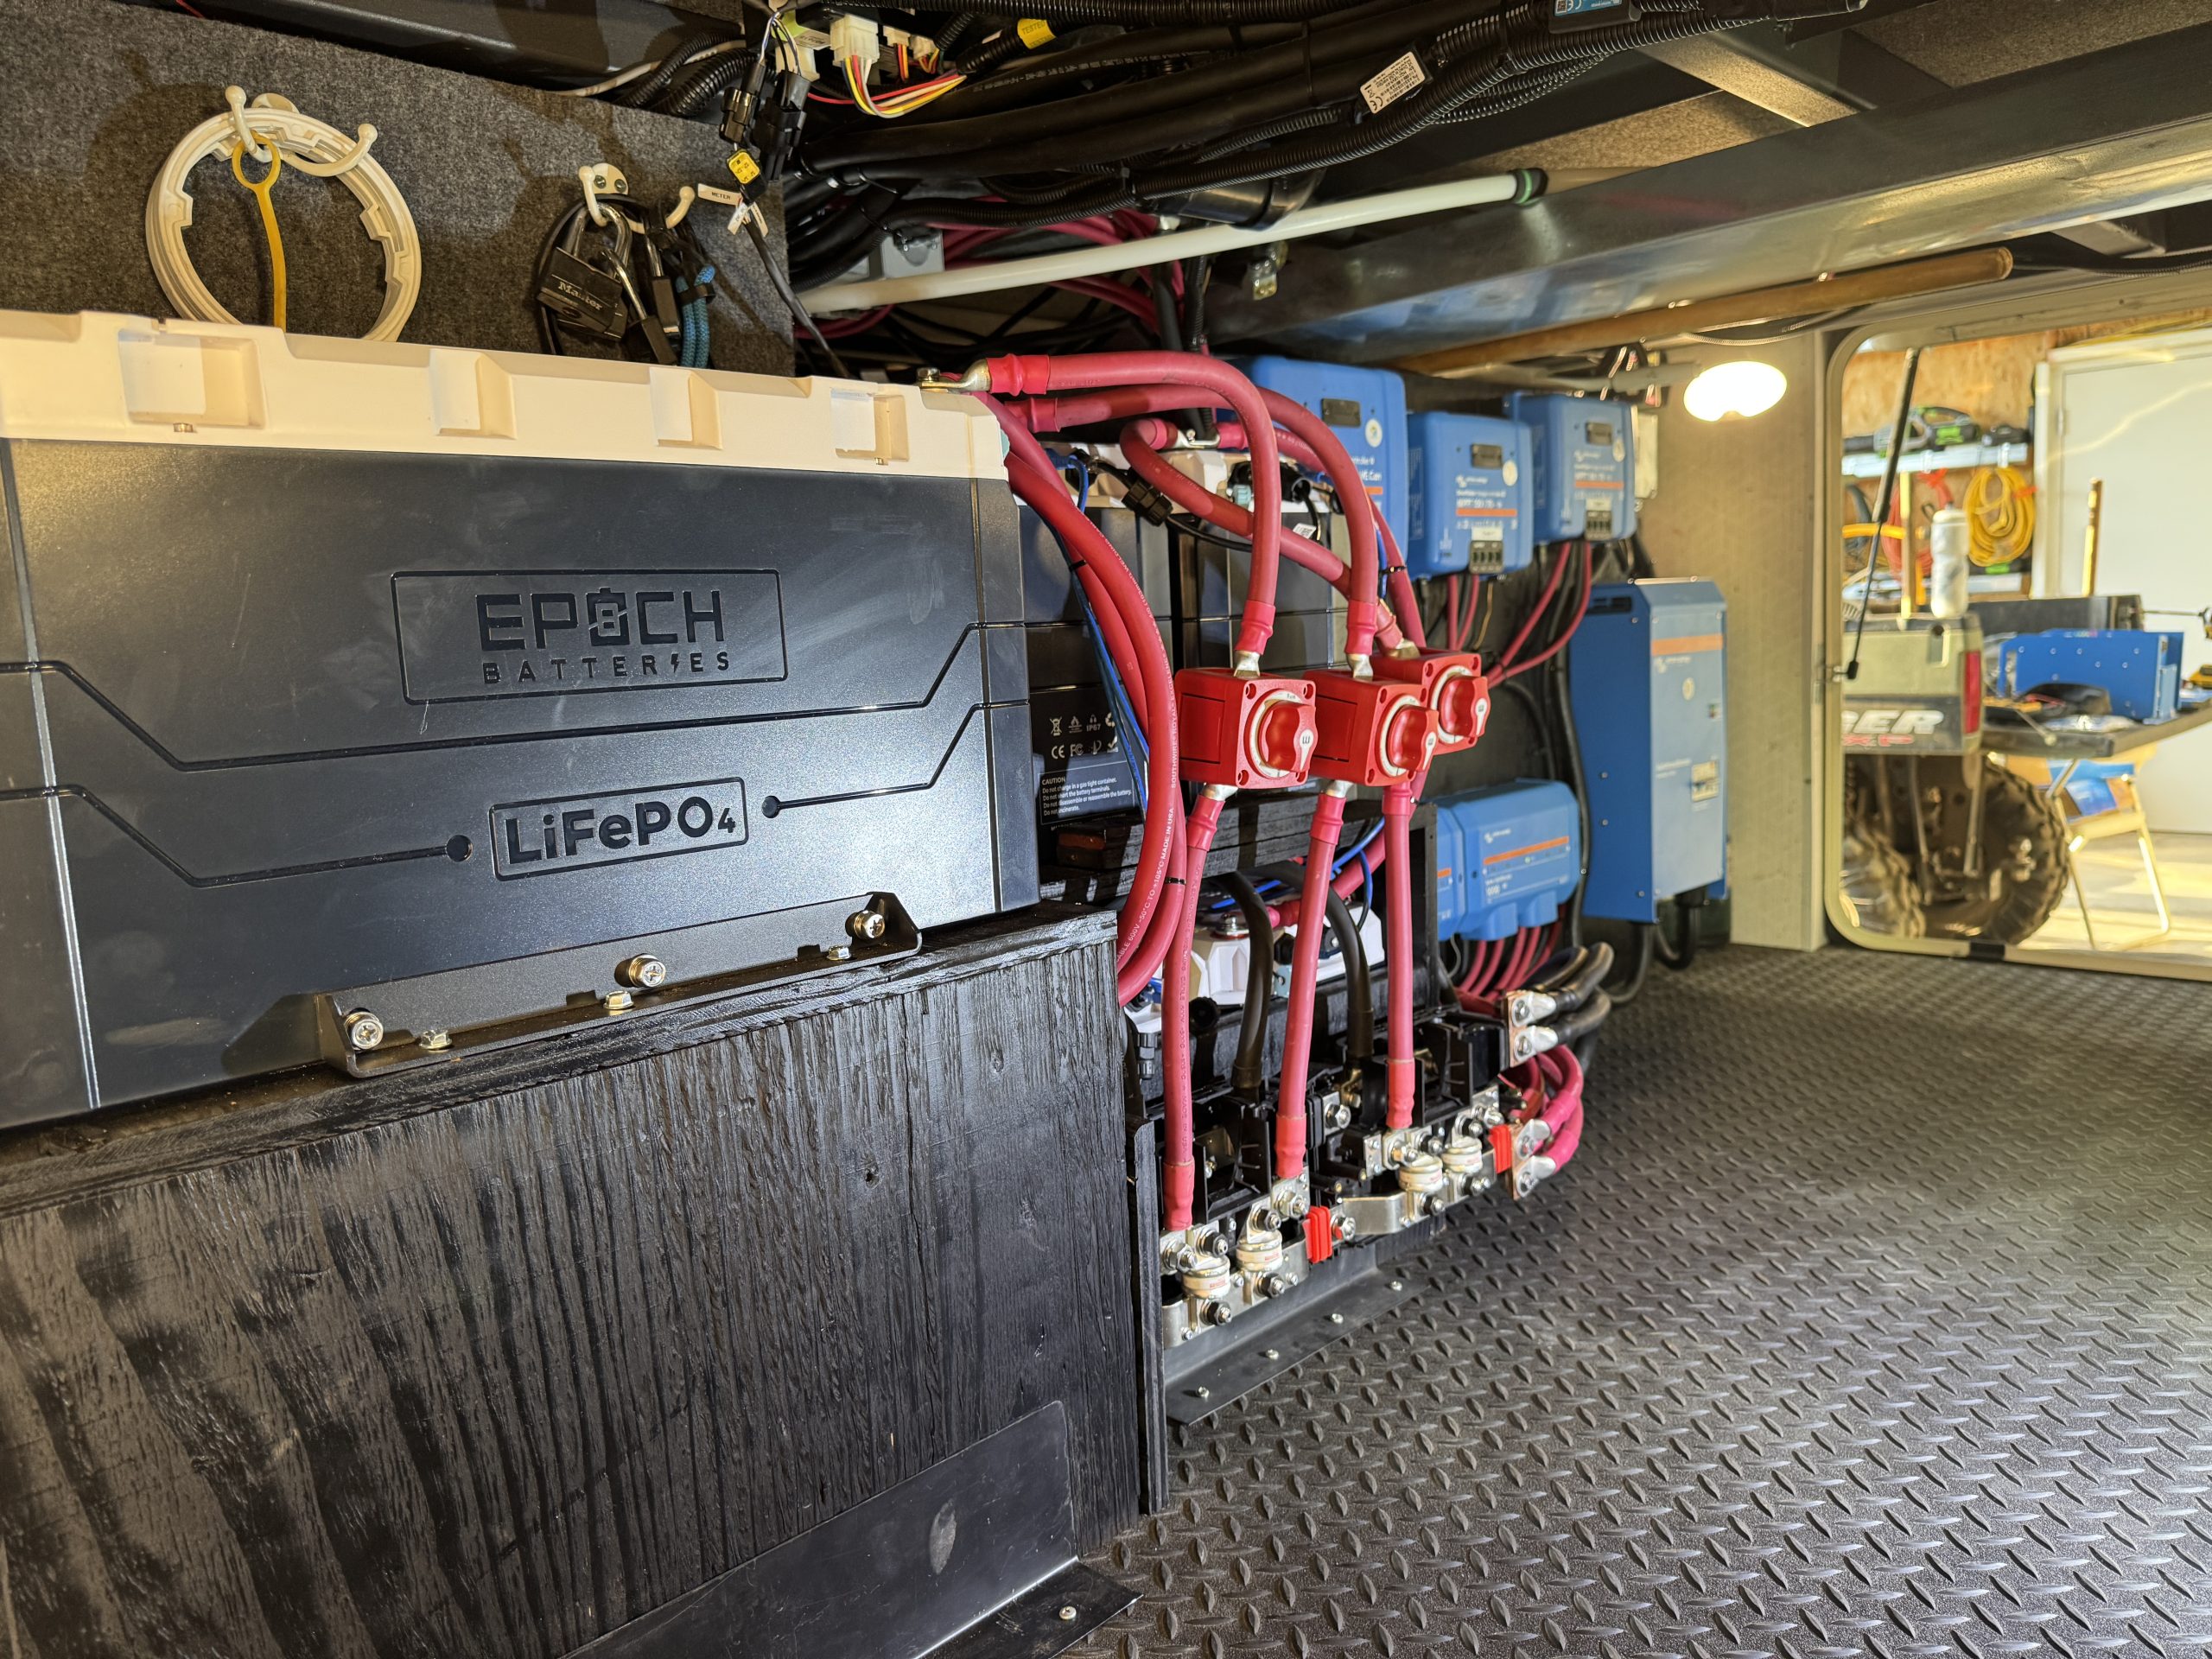
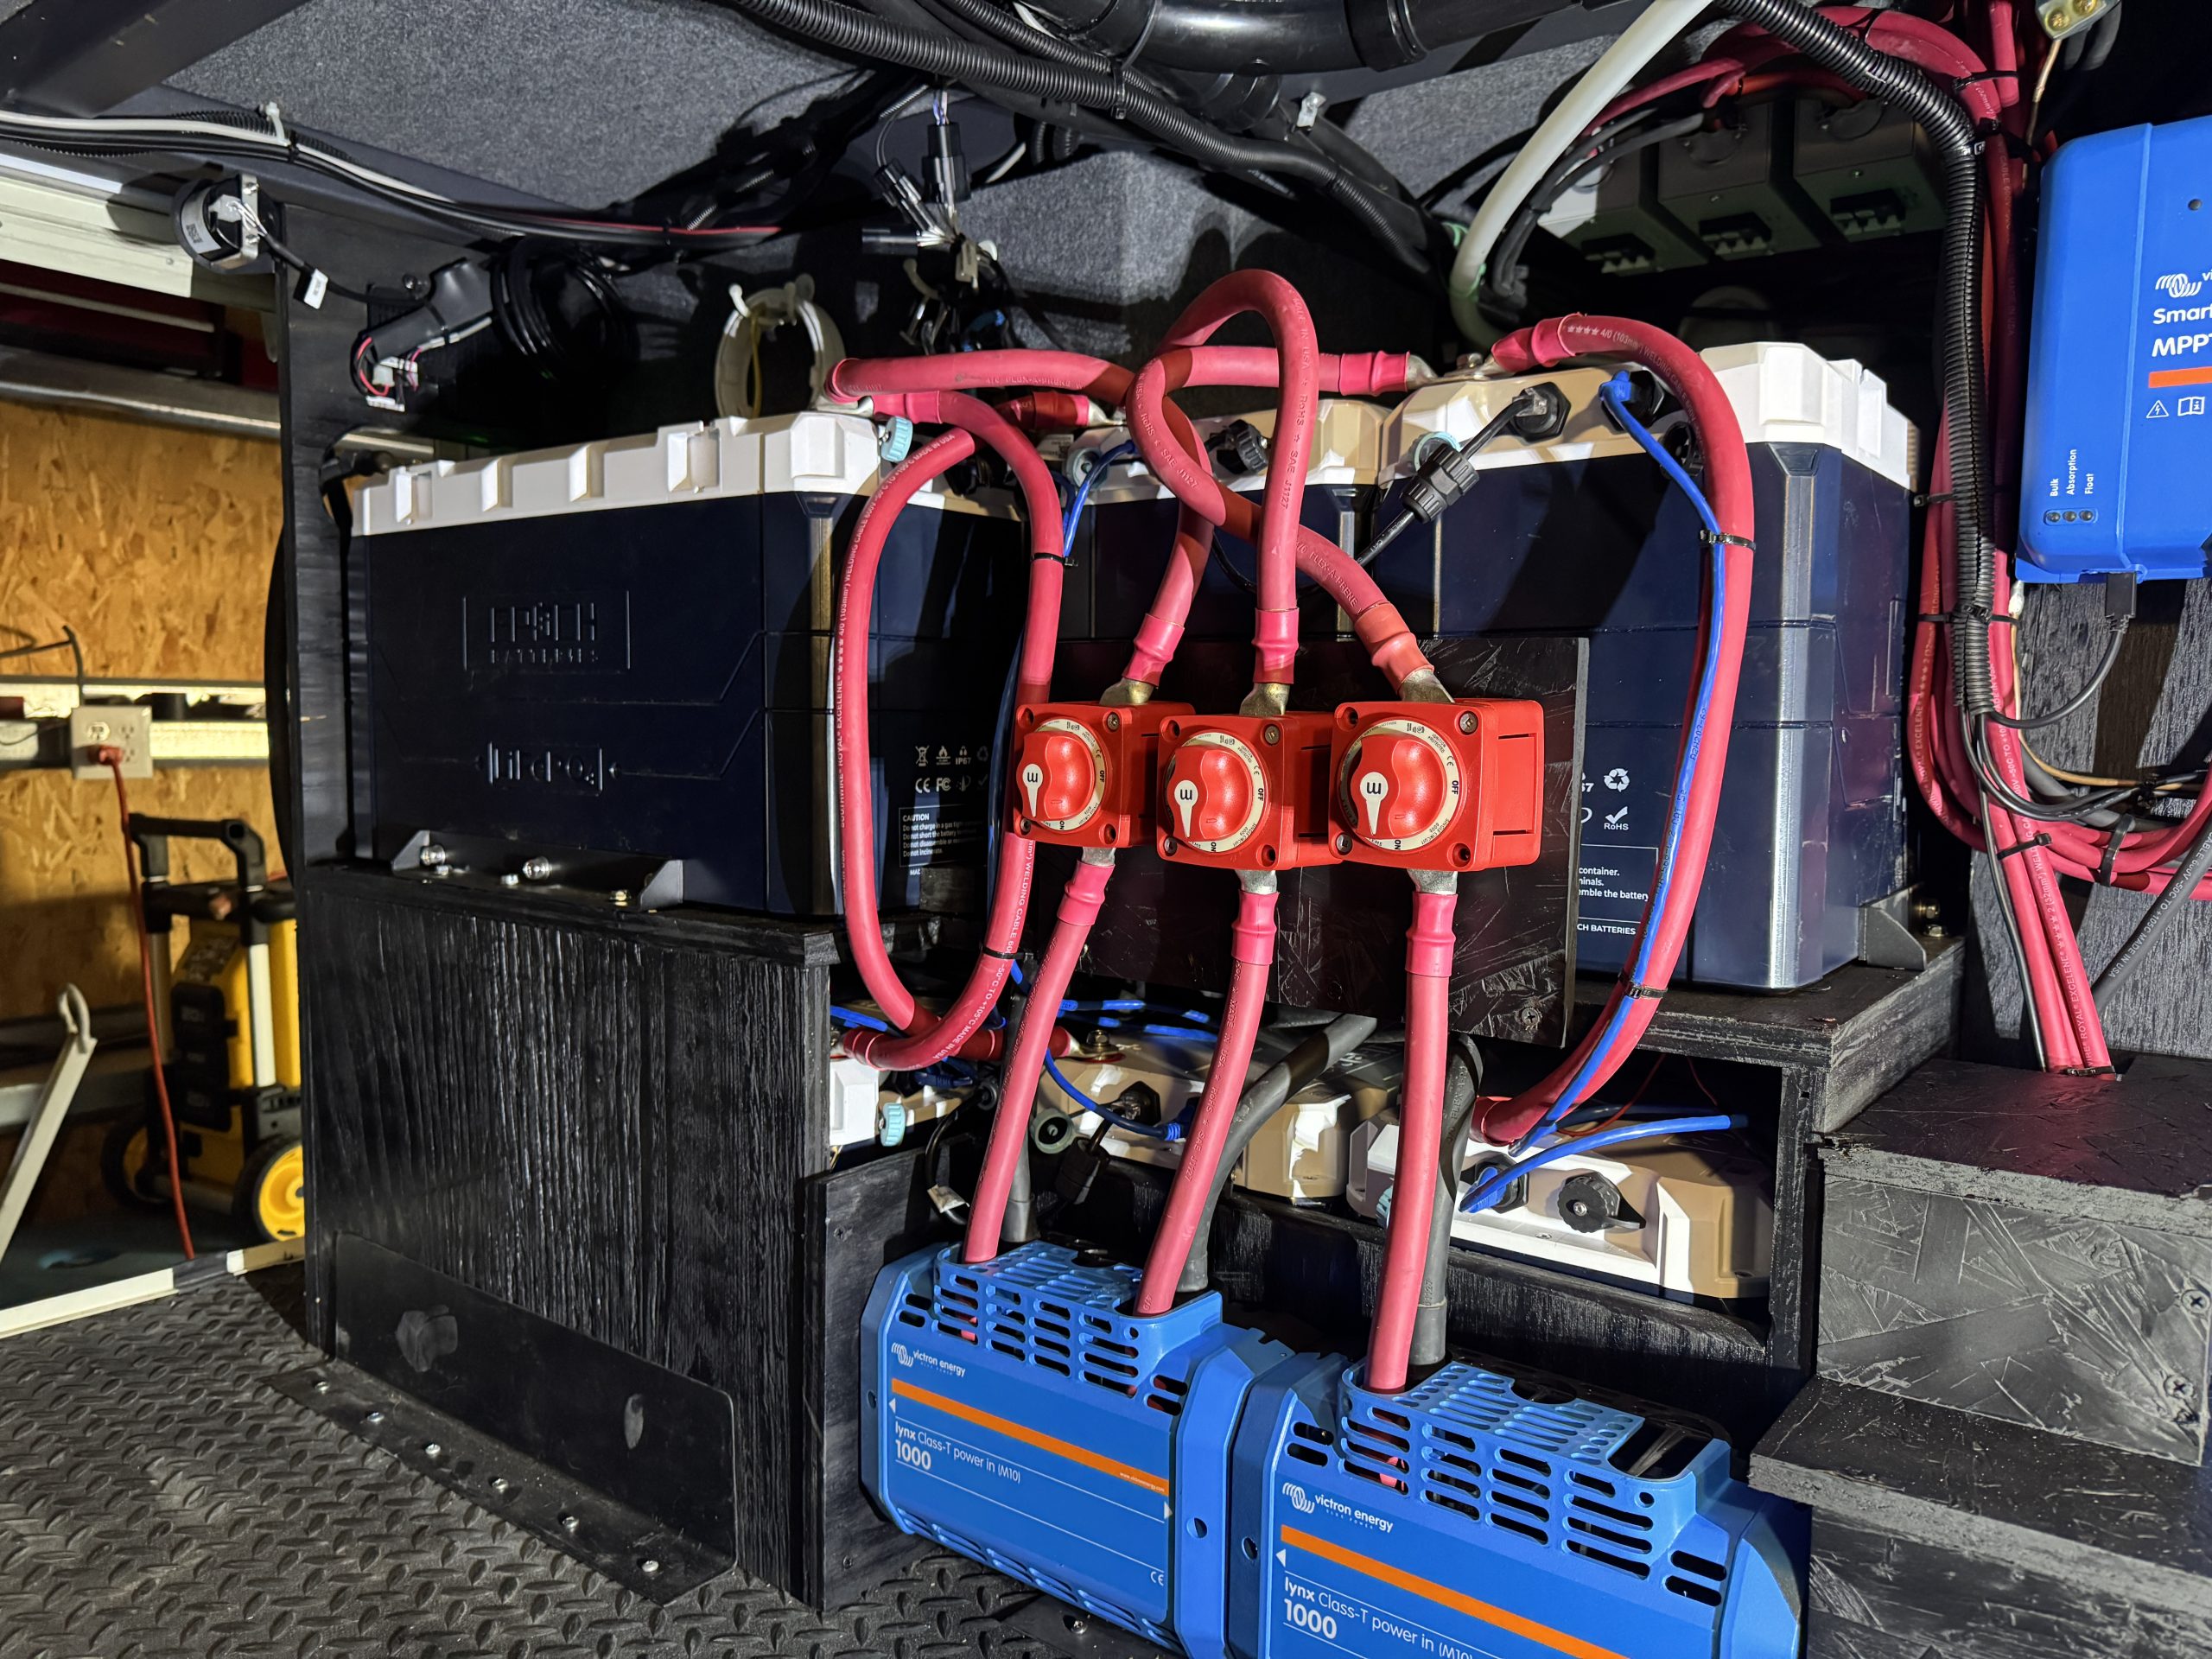
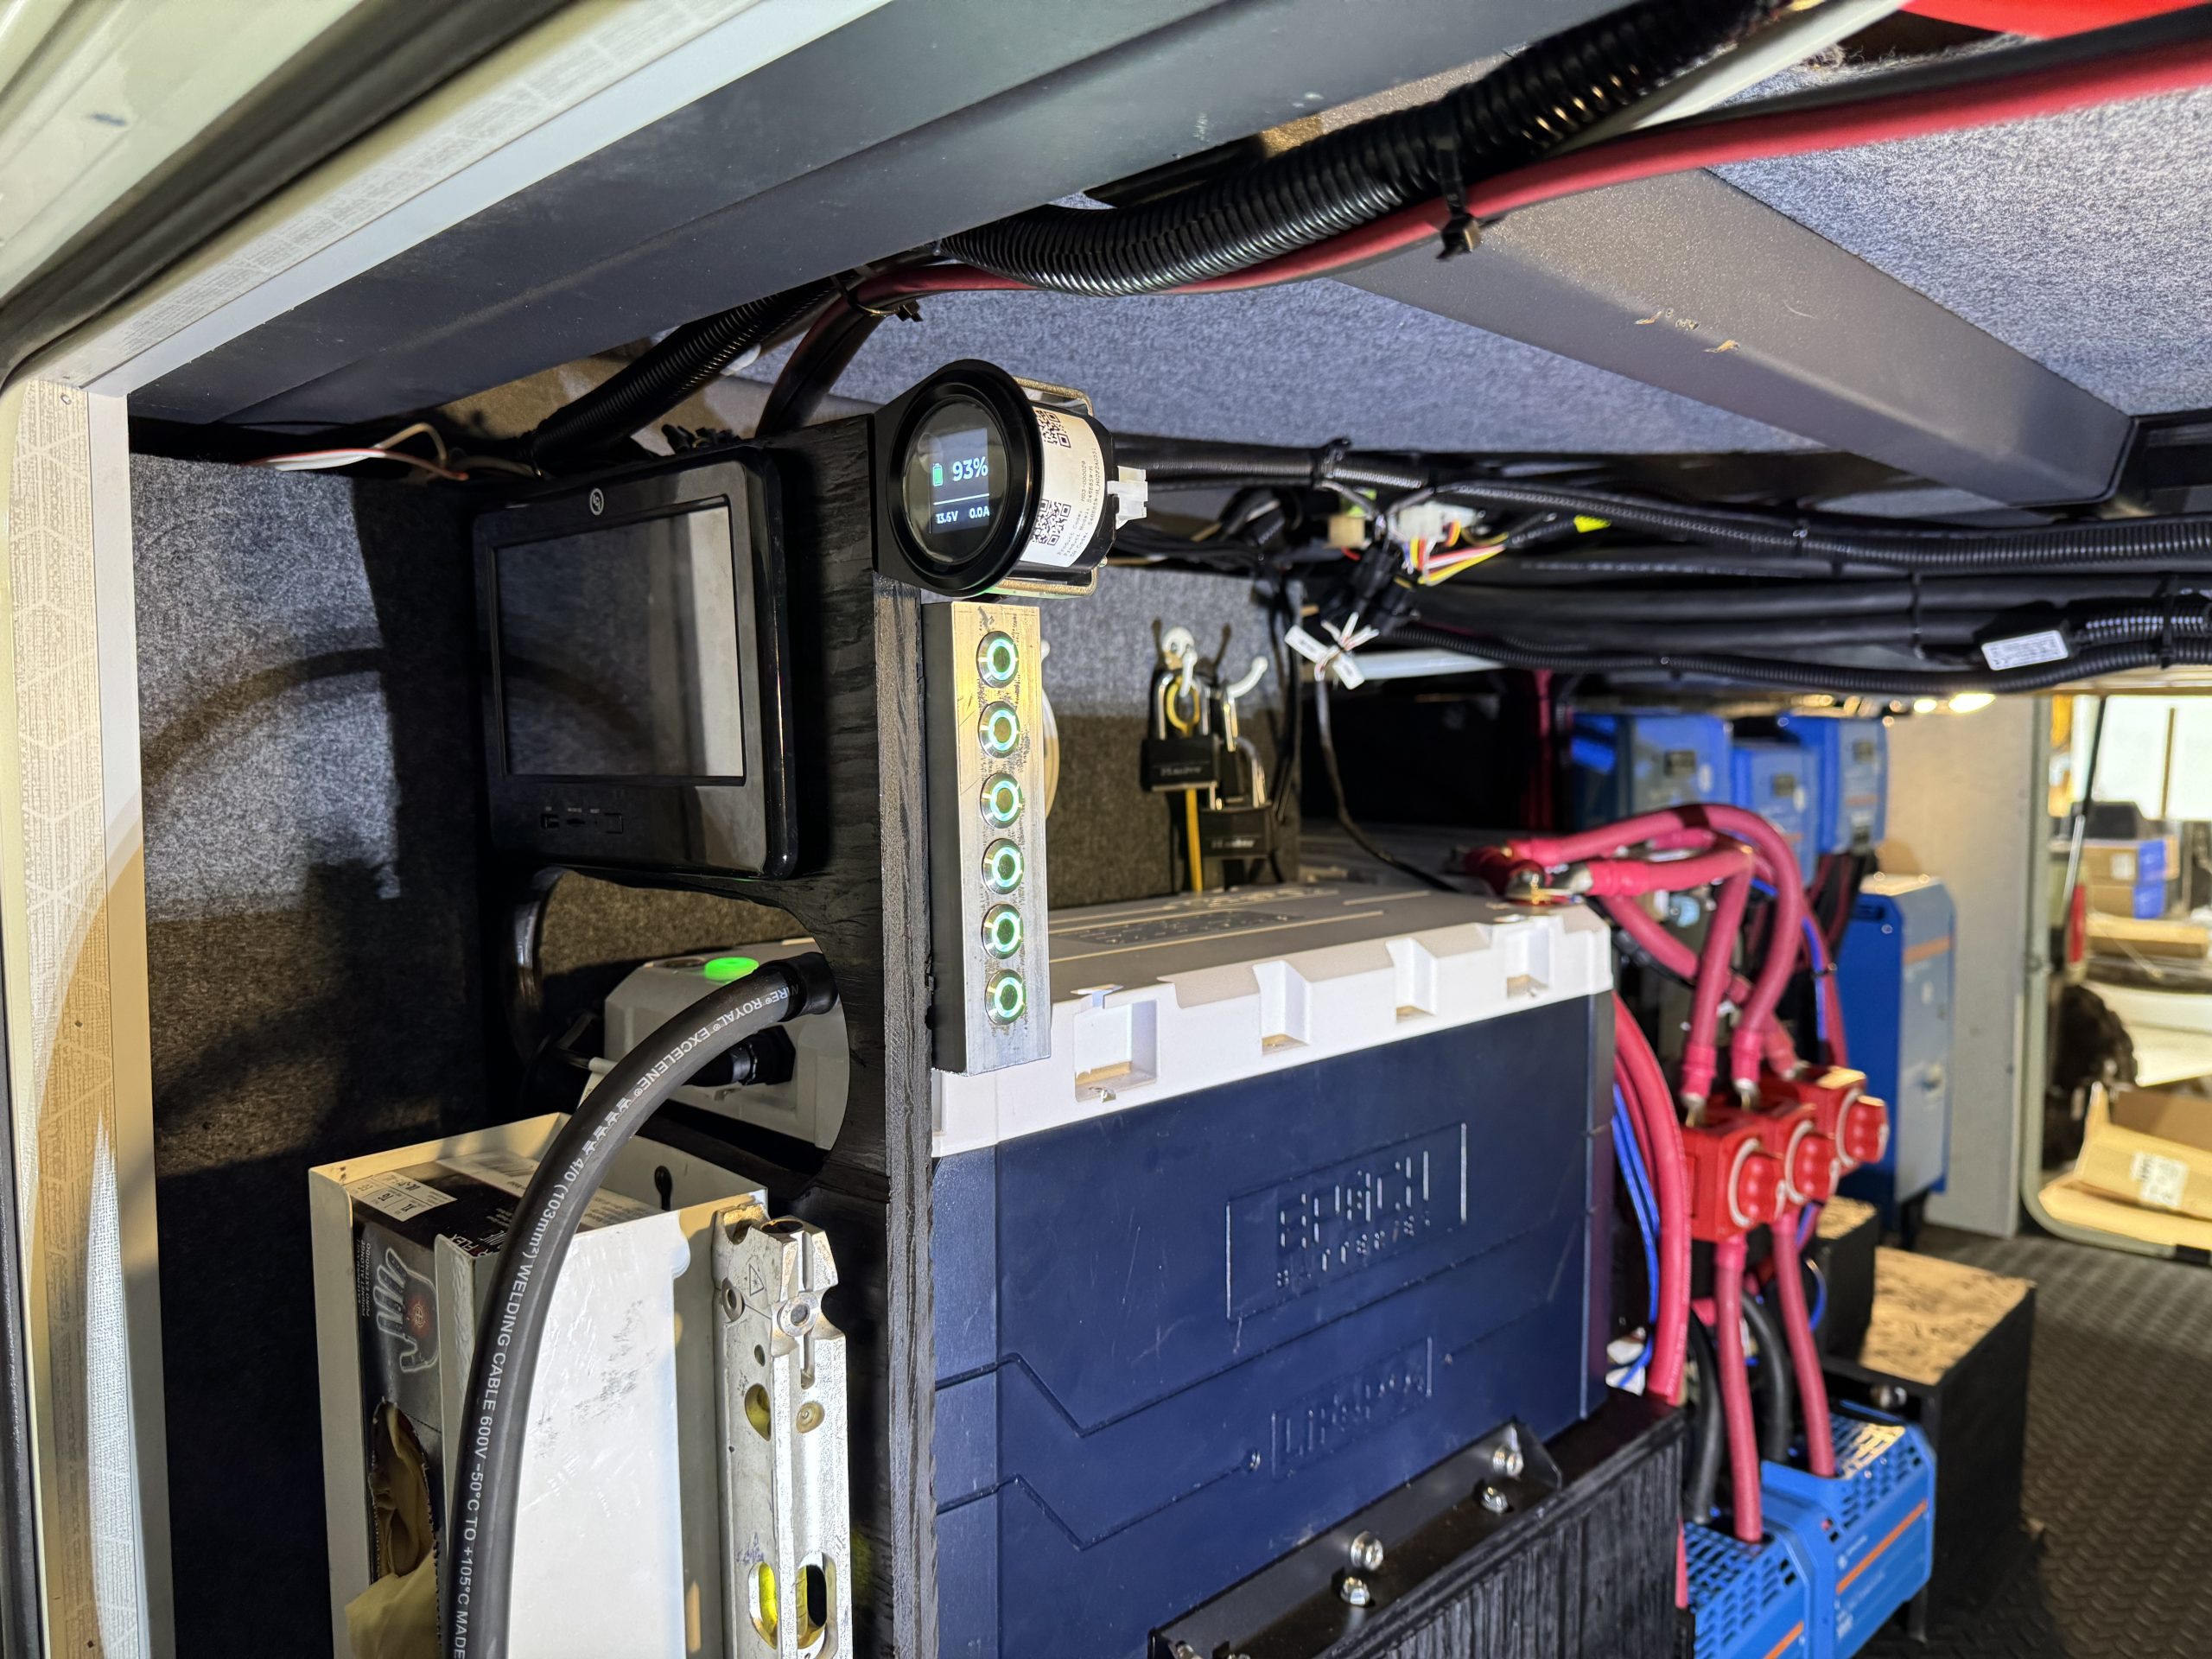
- 6 - EPOCH Elite Series V2 460 amp hour batteries
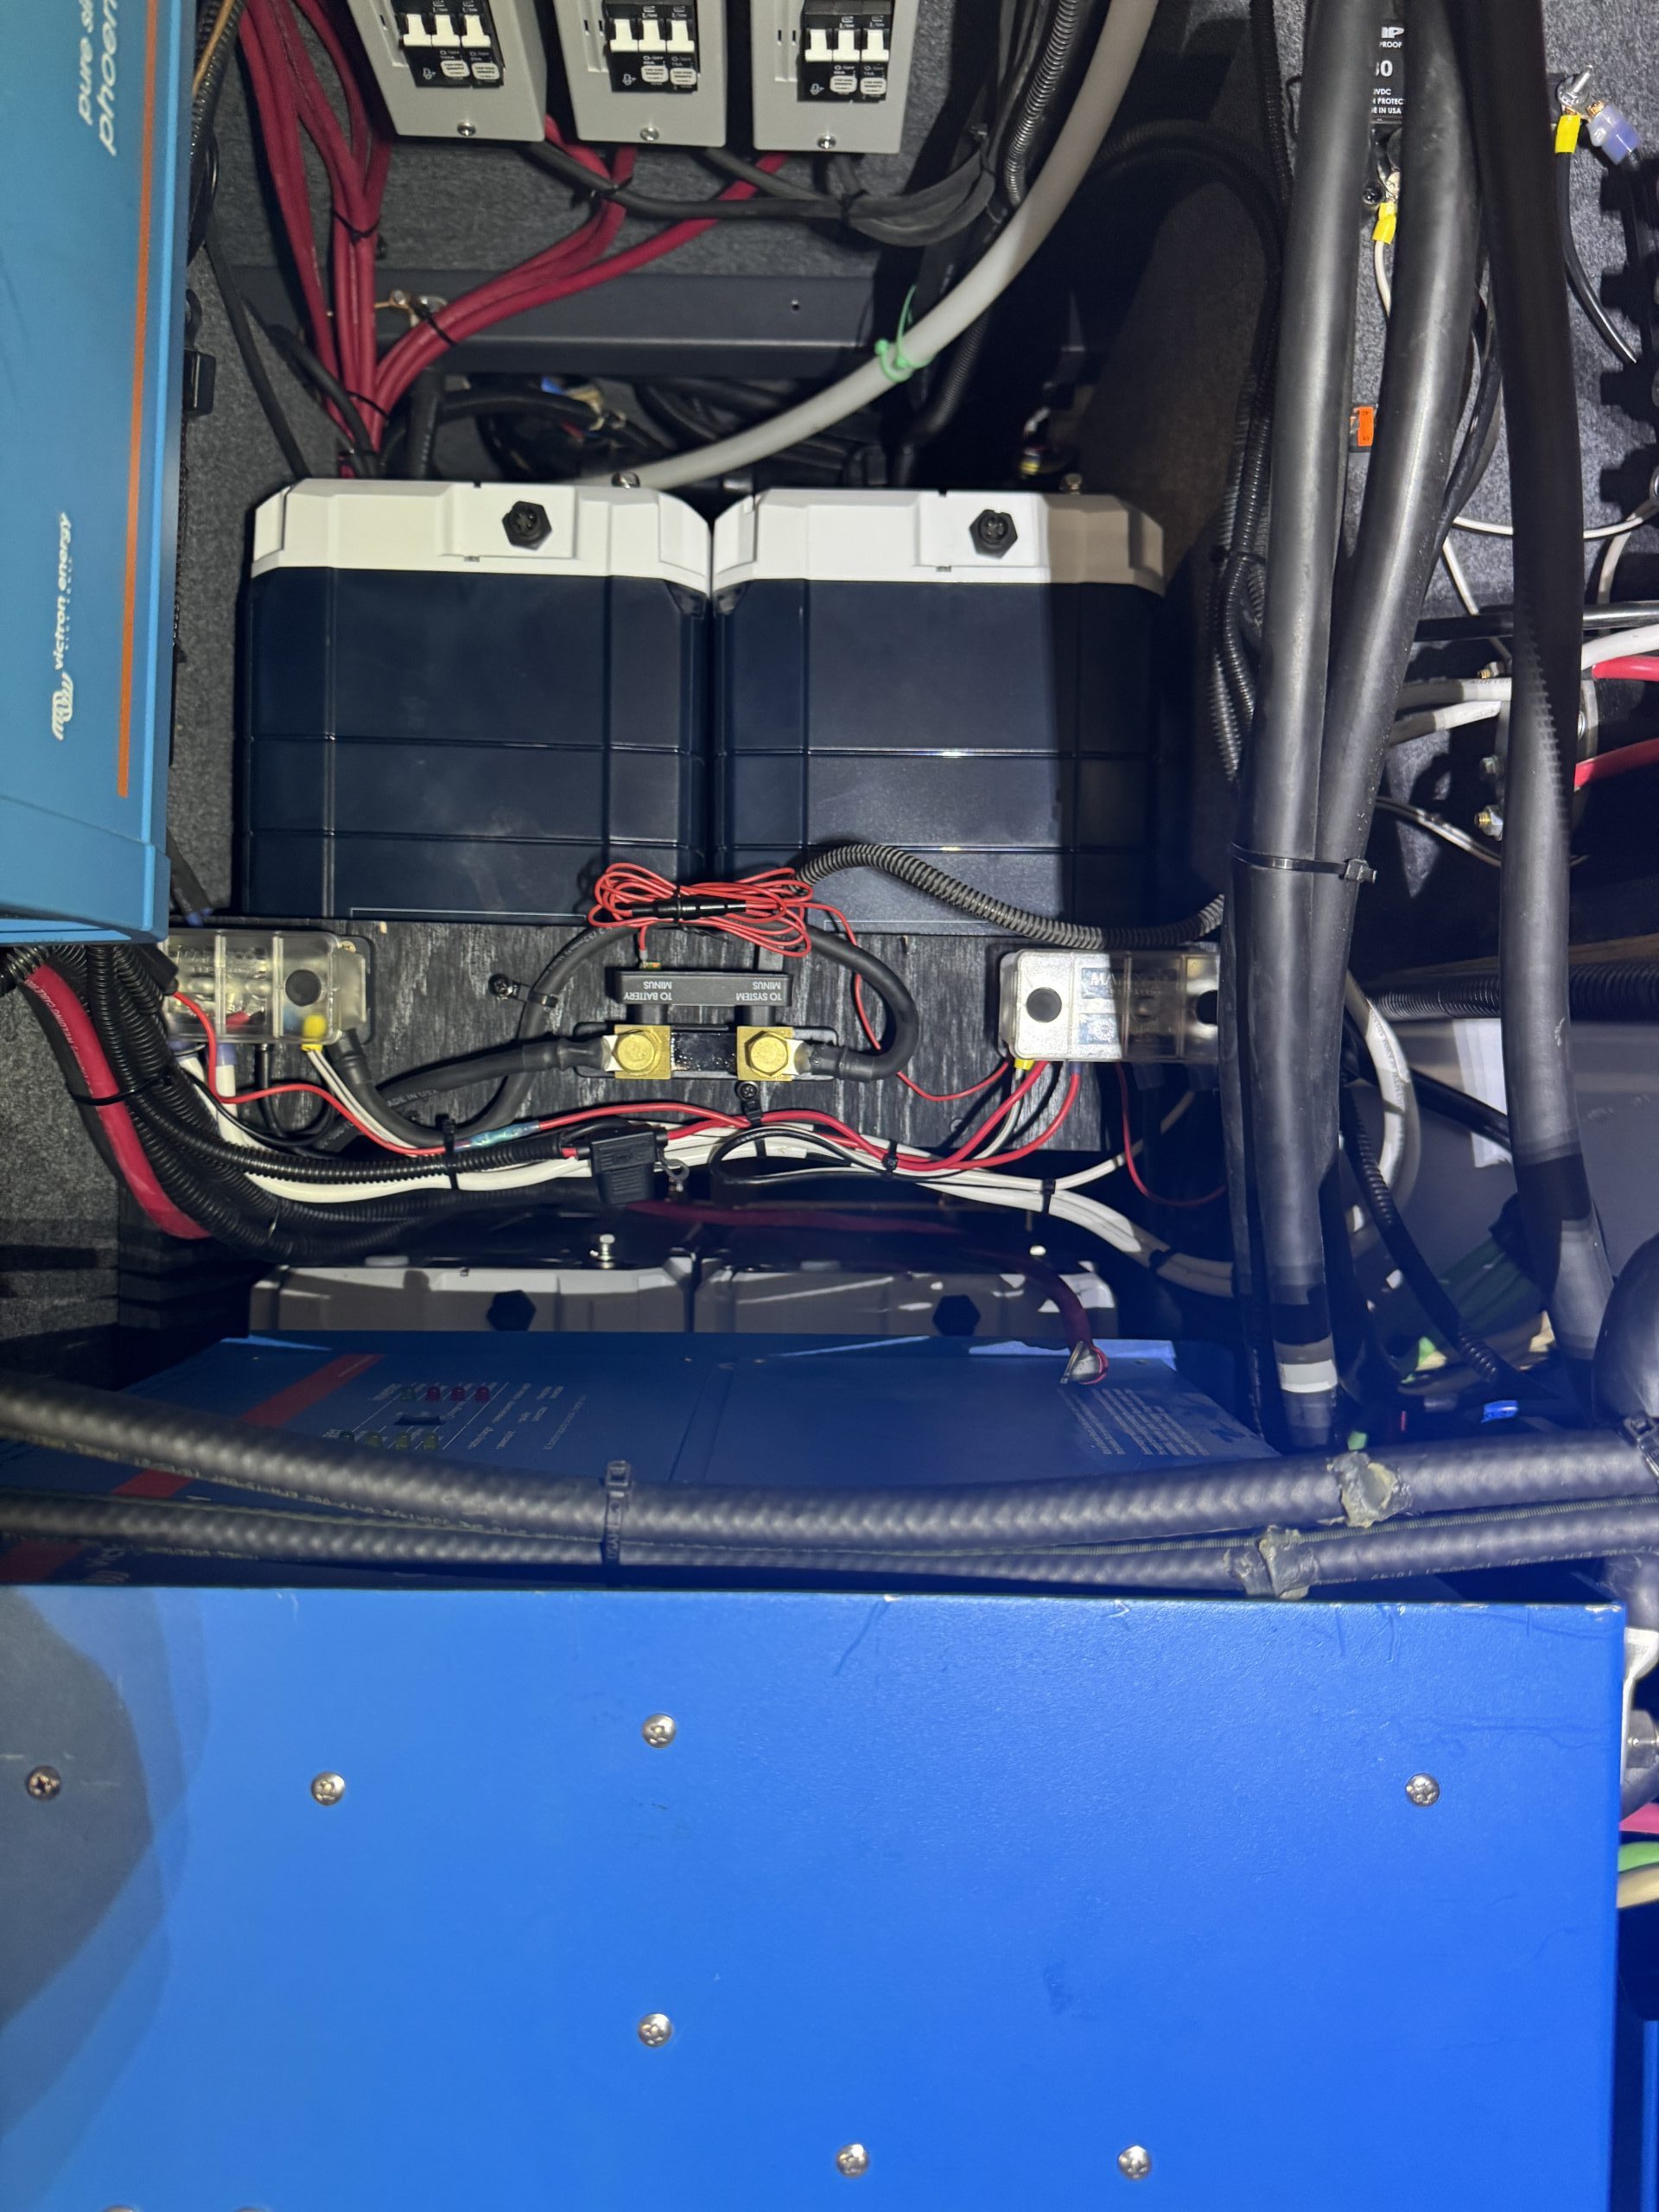
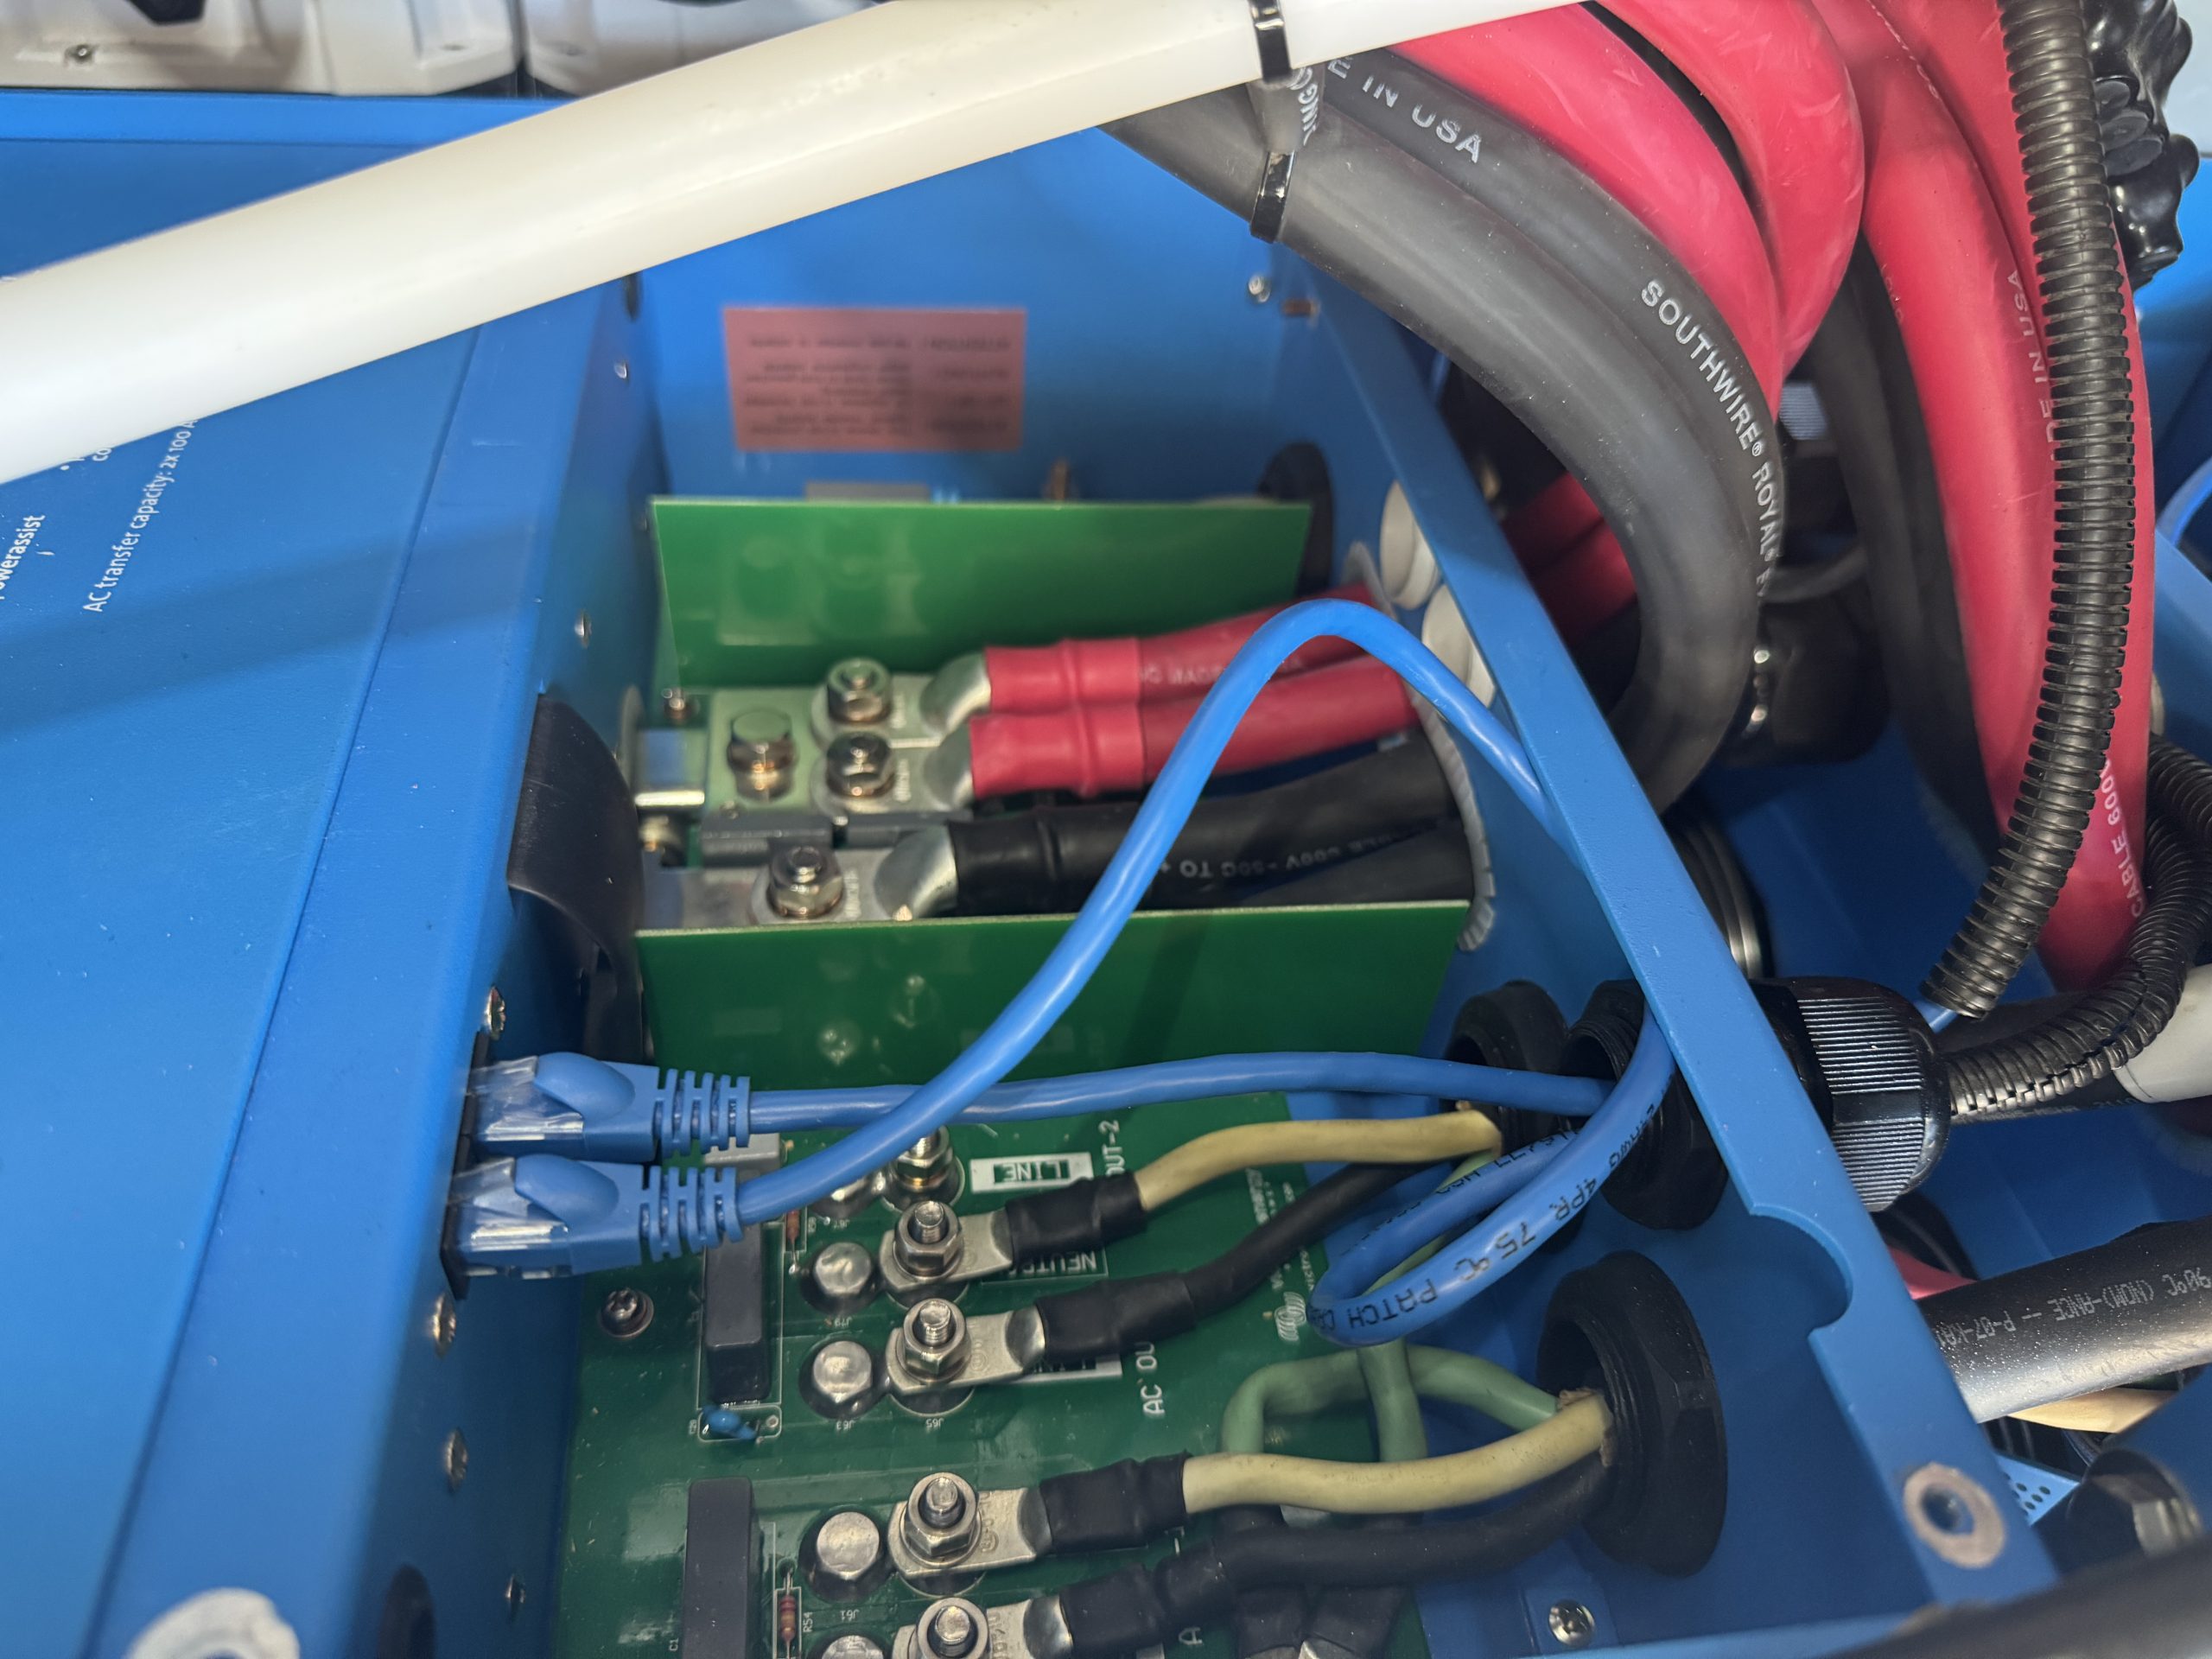
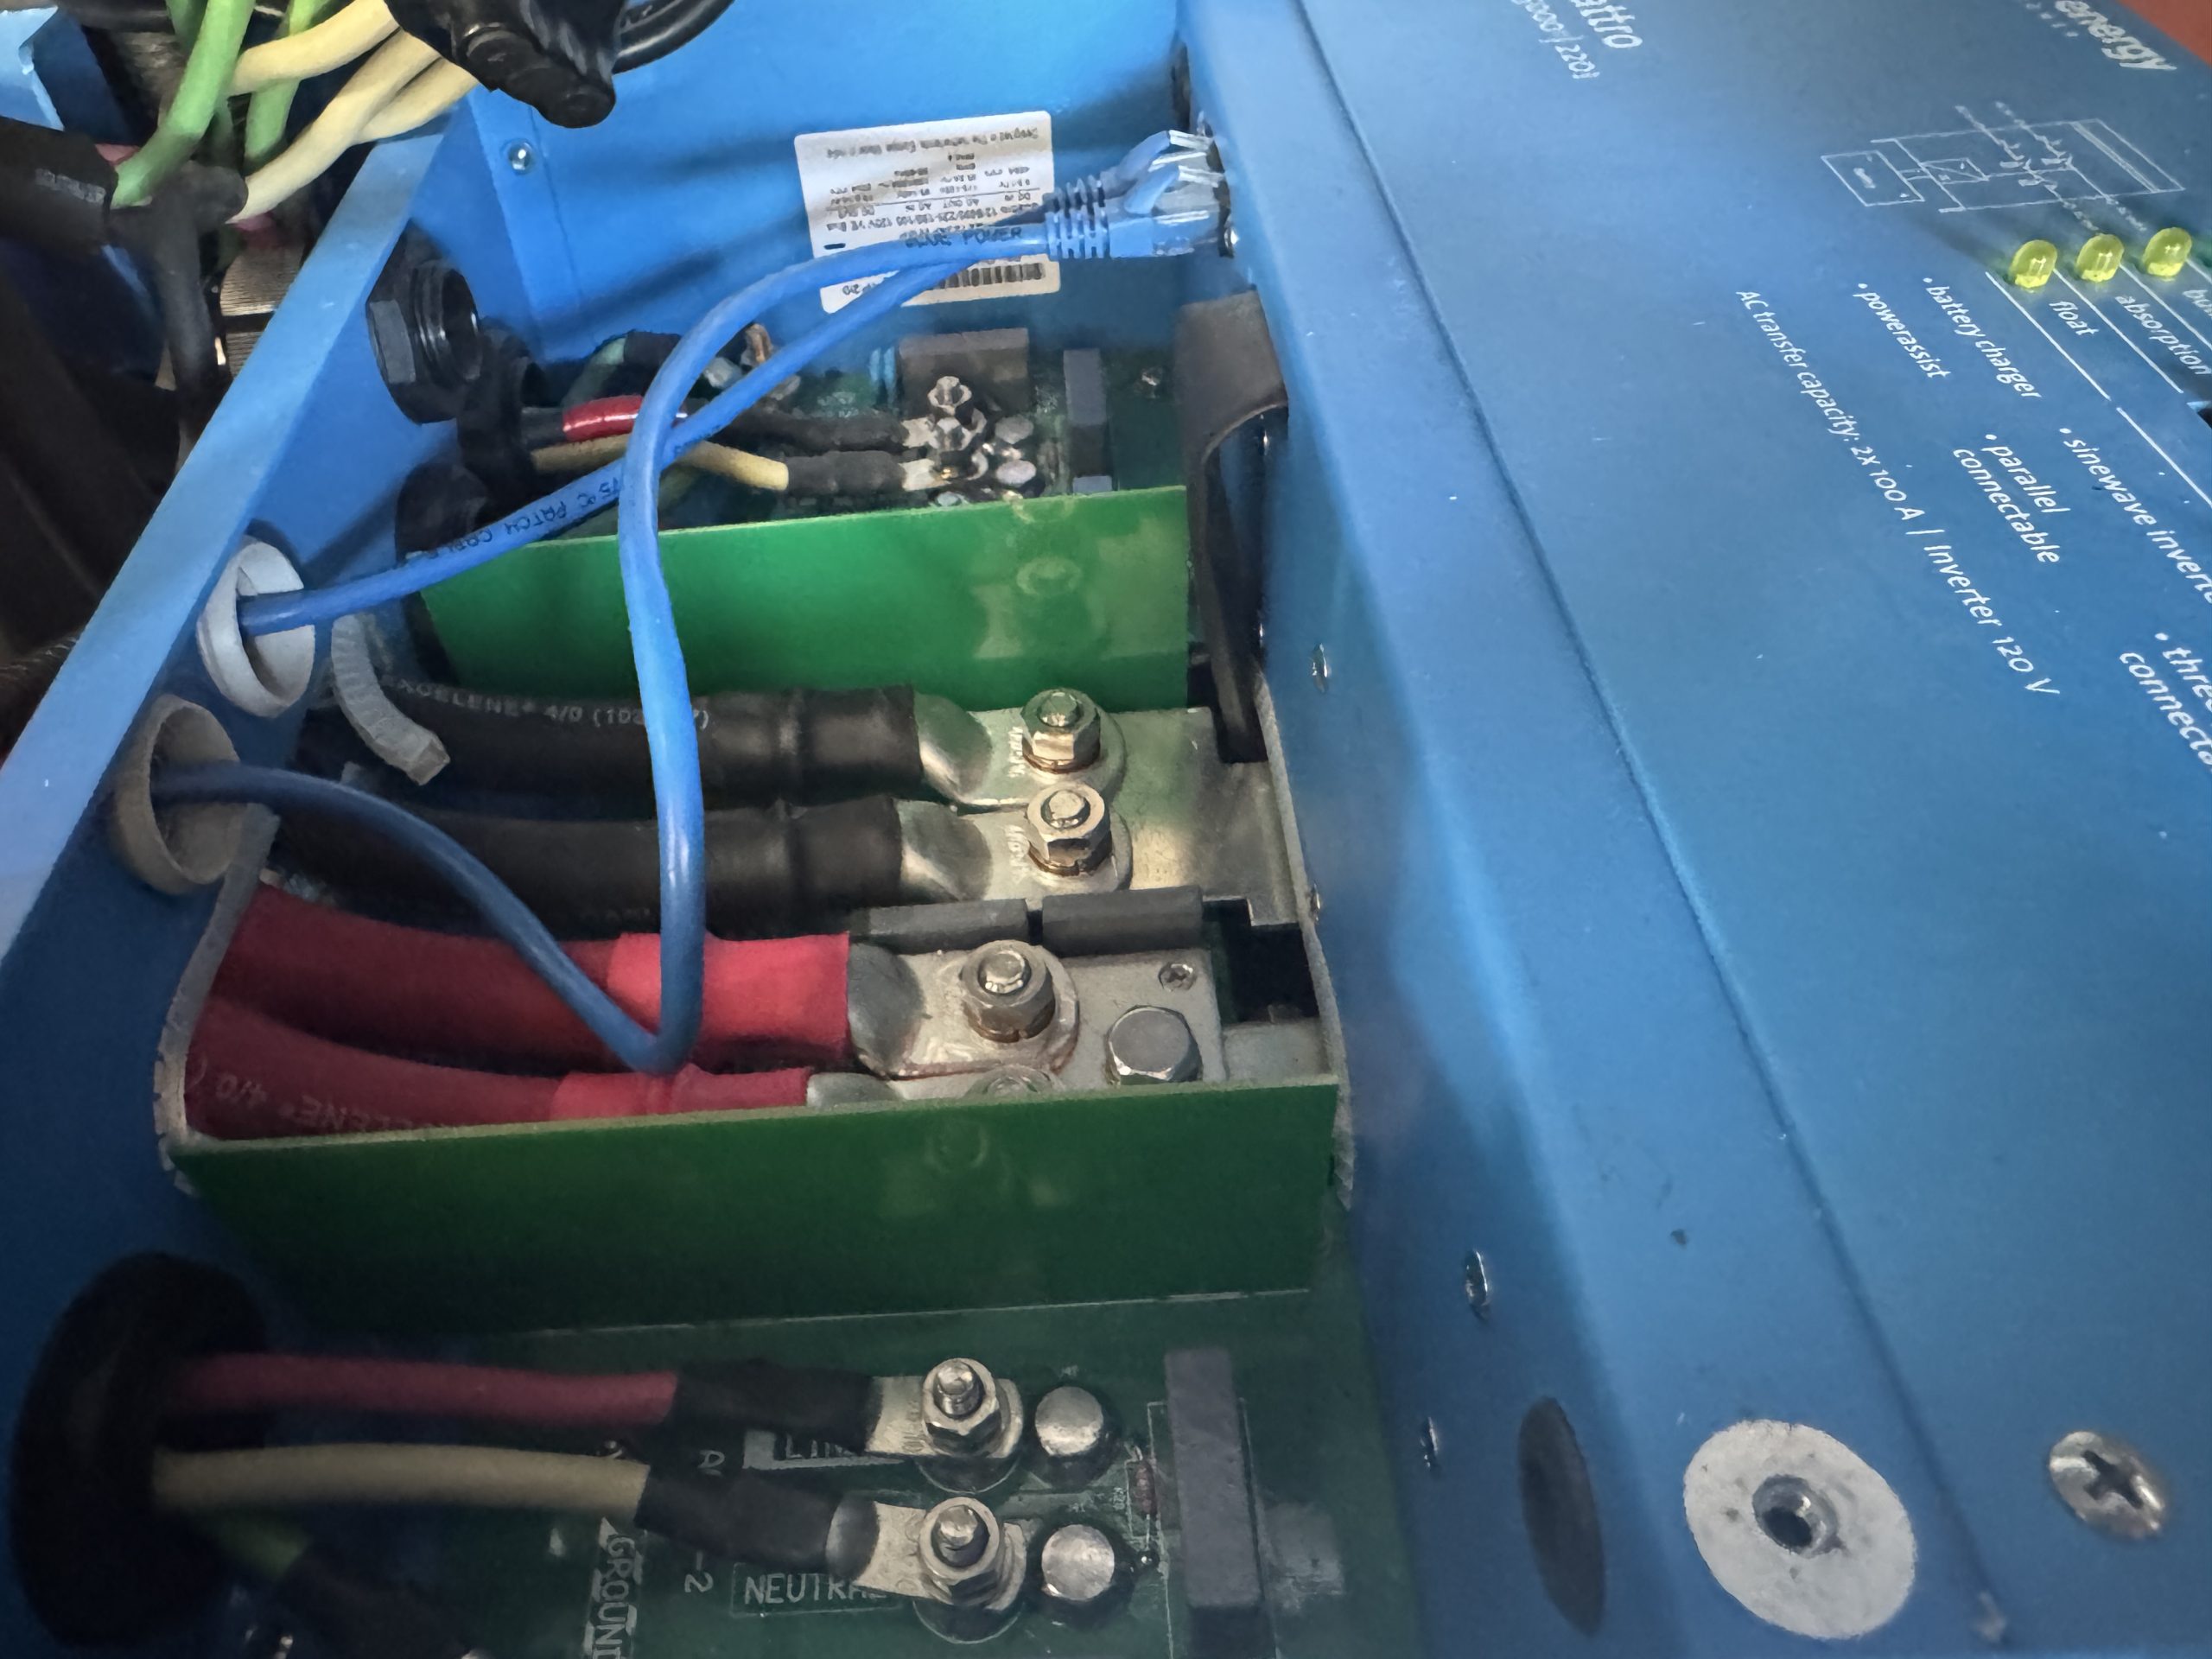
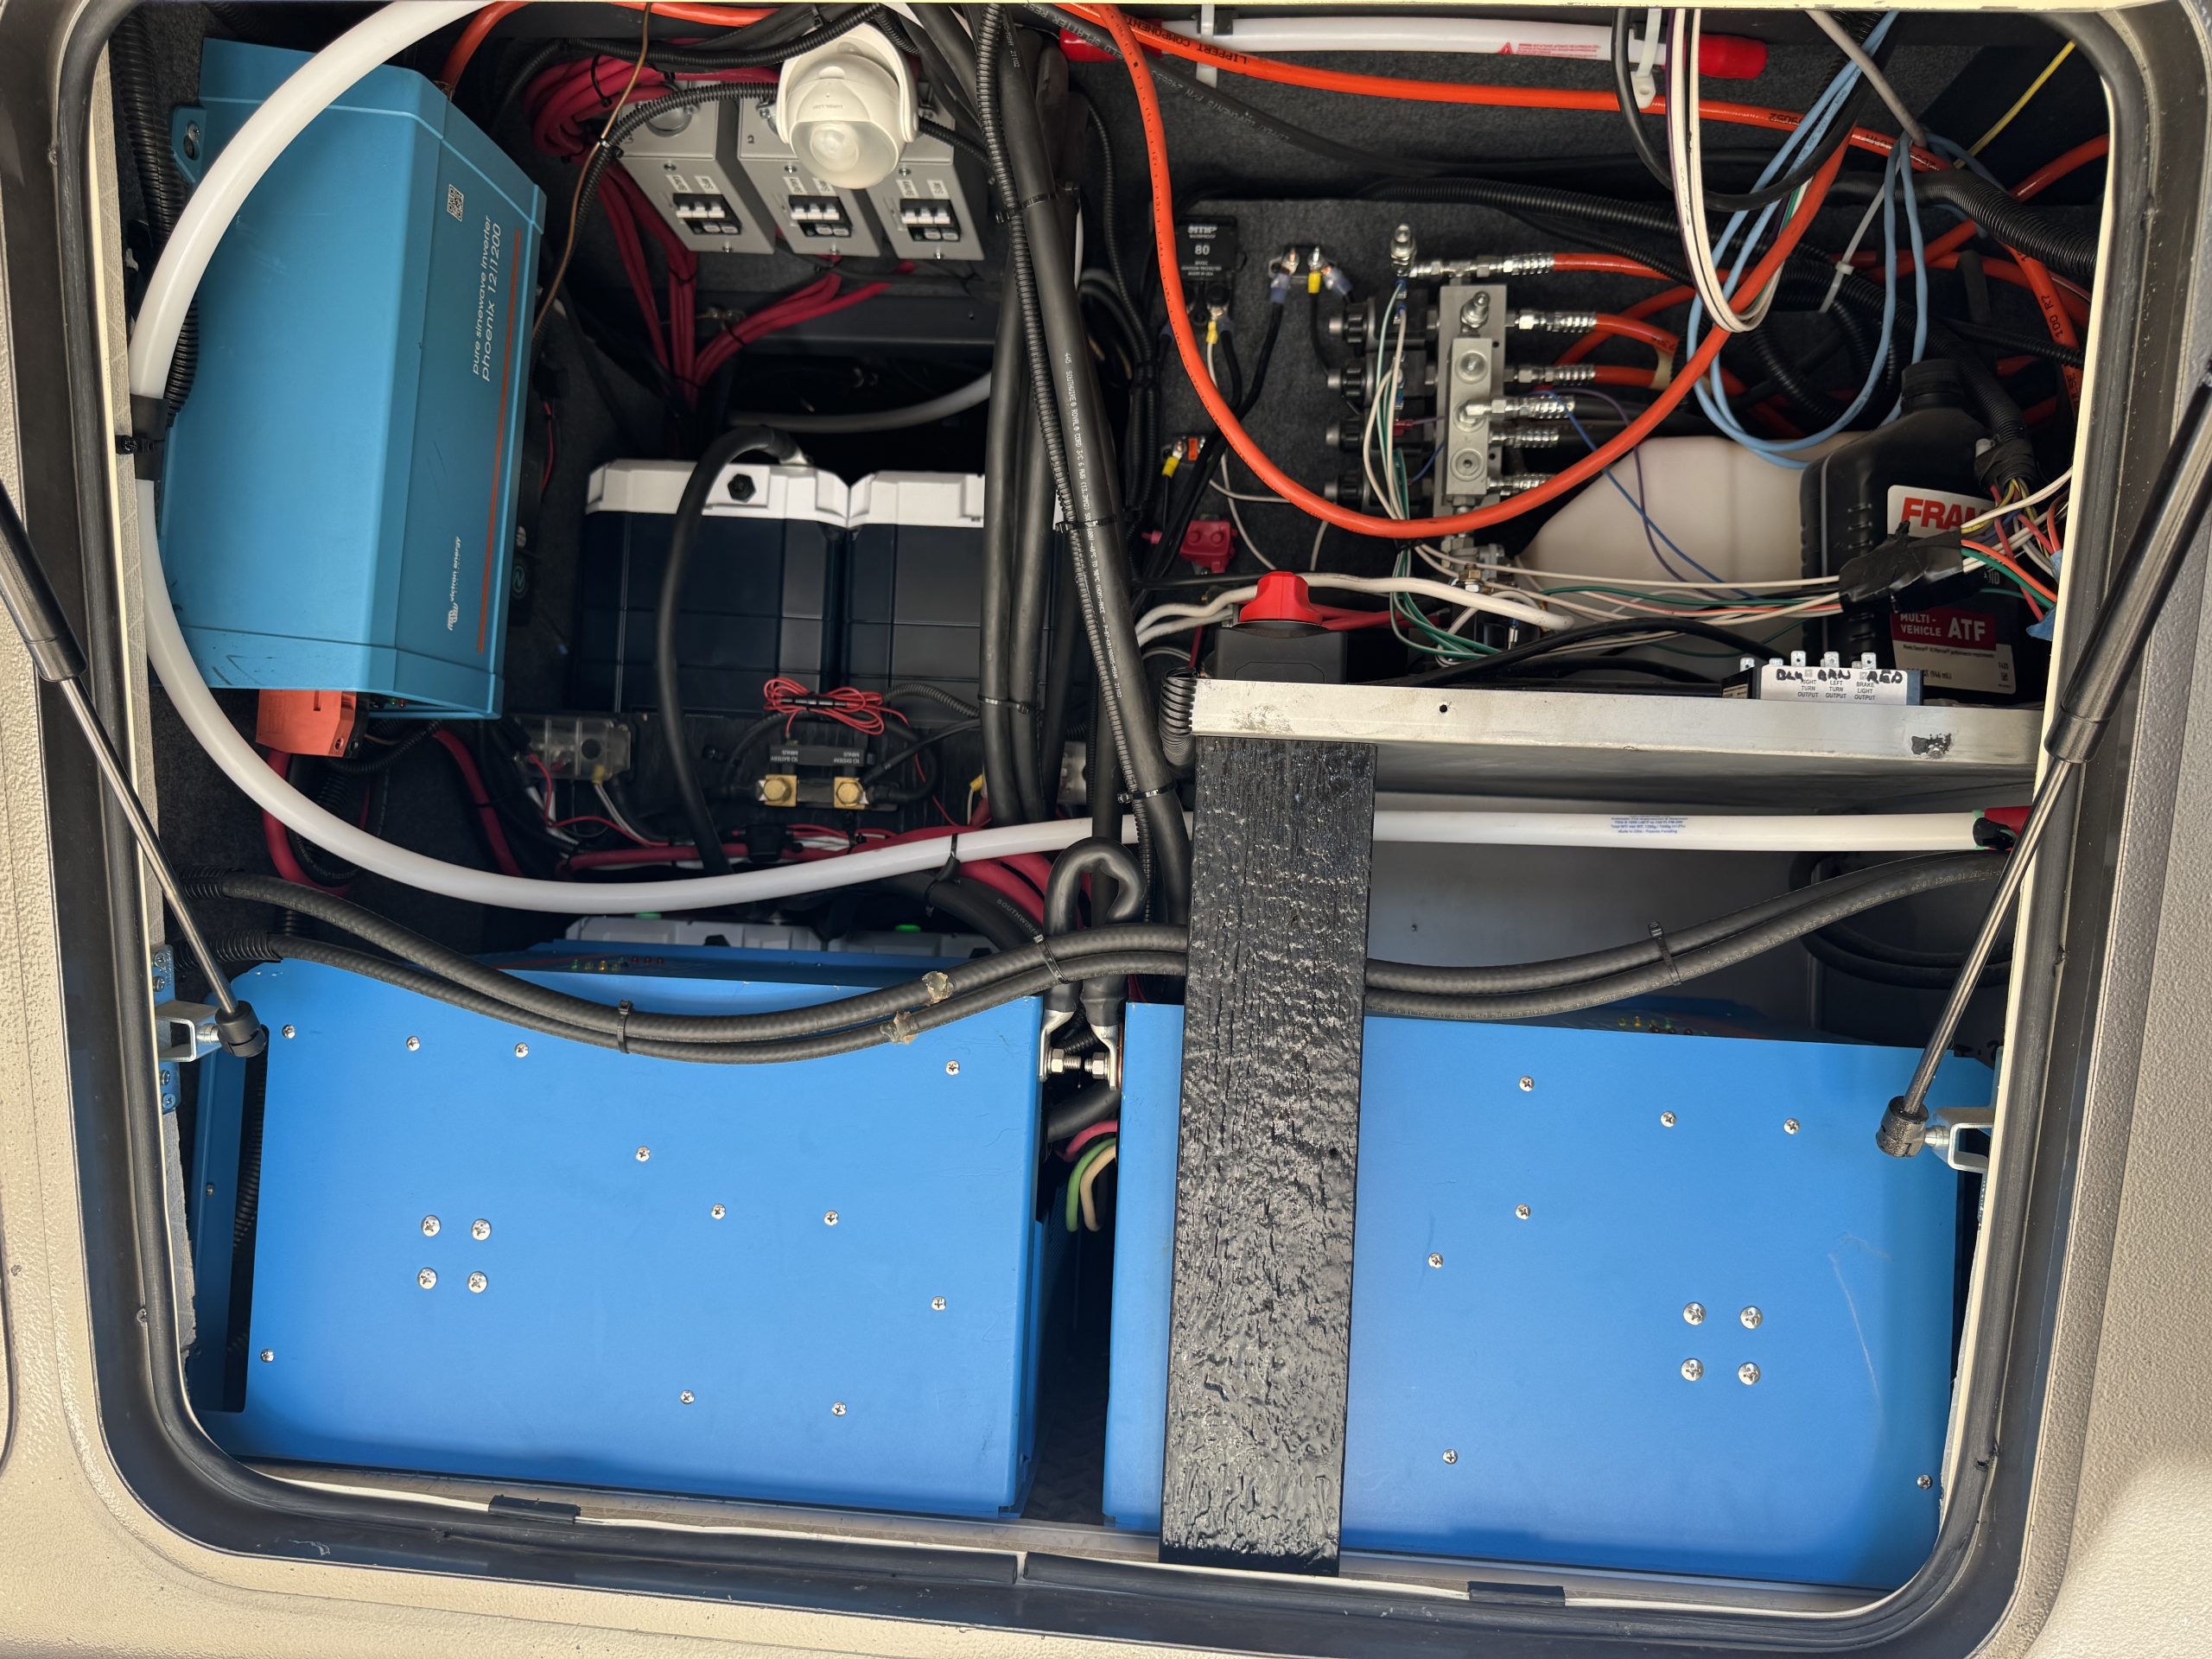
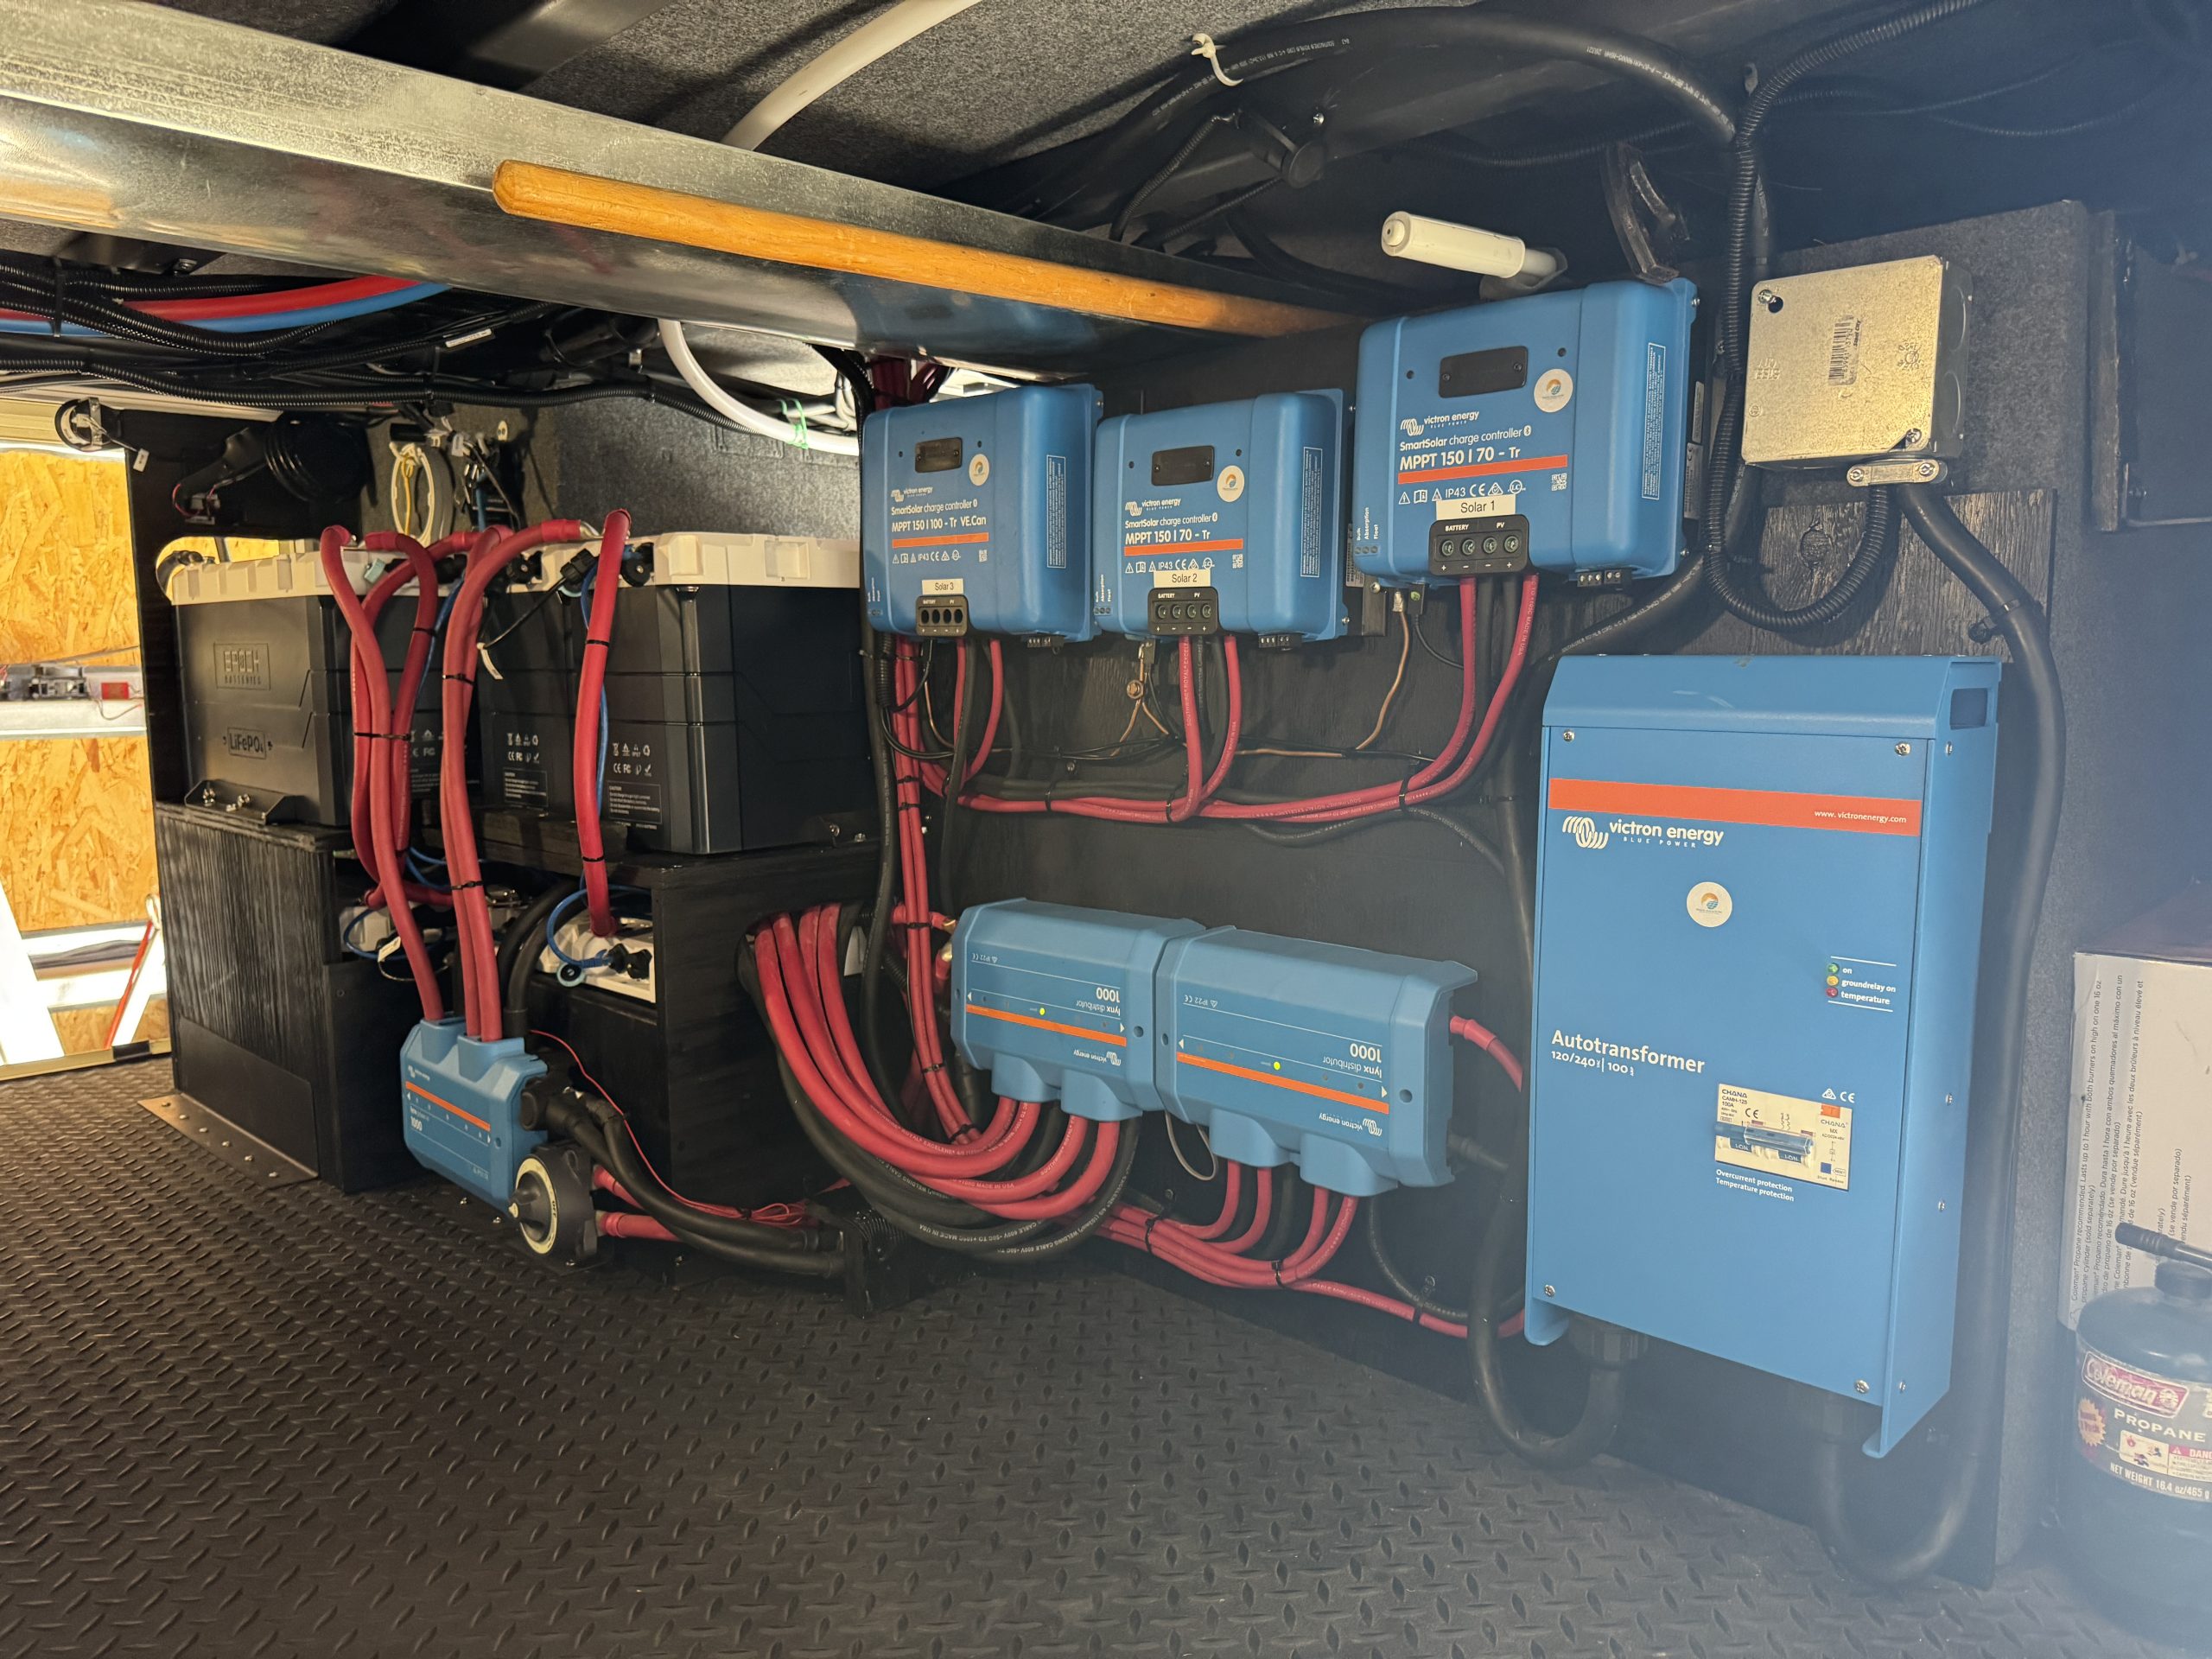
- 2 - Victron Quattro 12/5000/200-100/100 Inverter with Charger - 120V
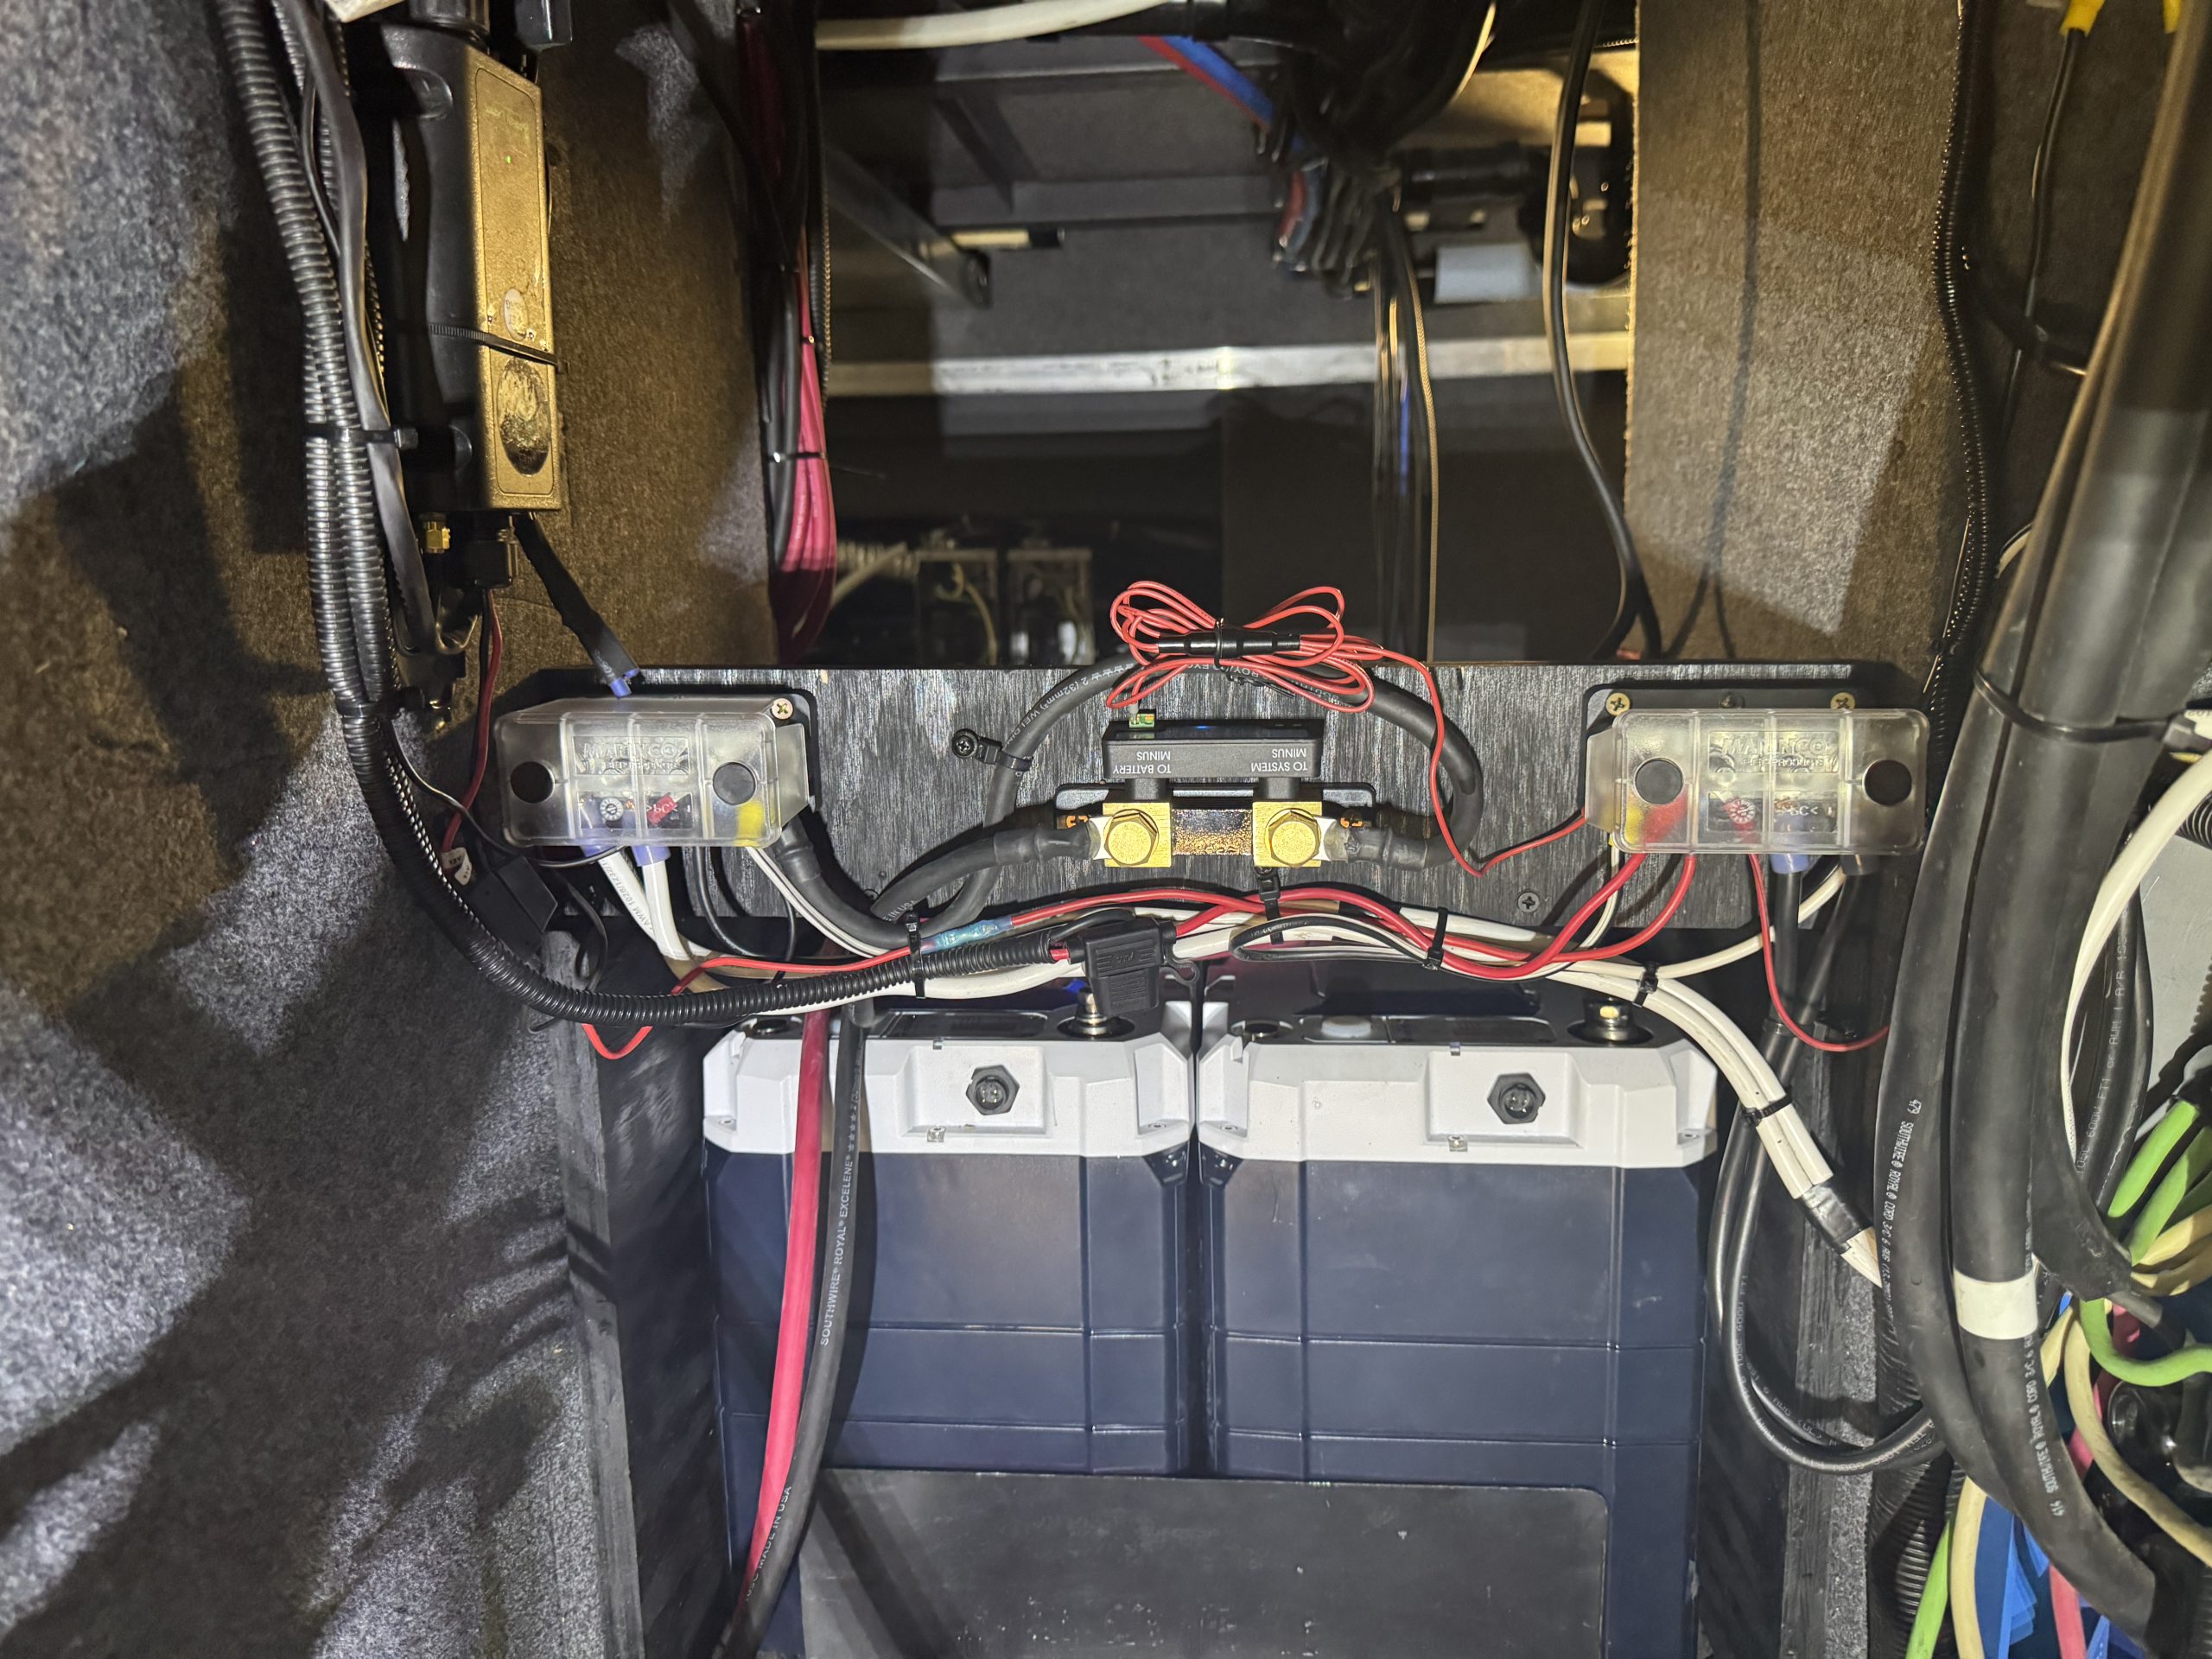
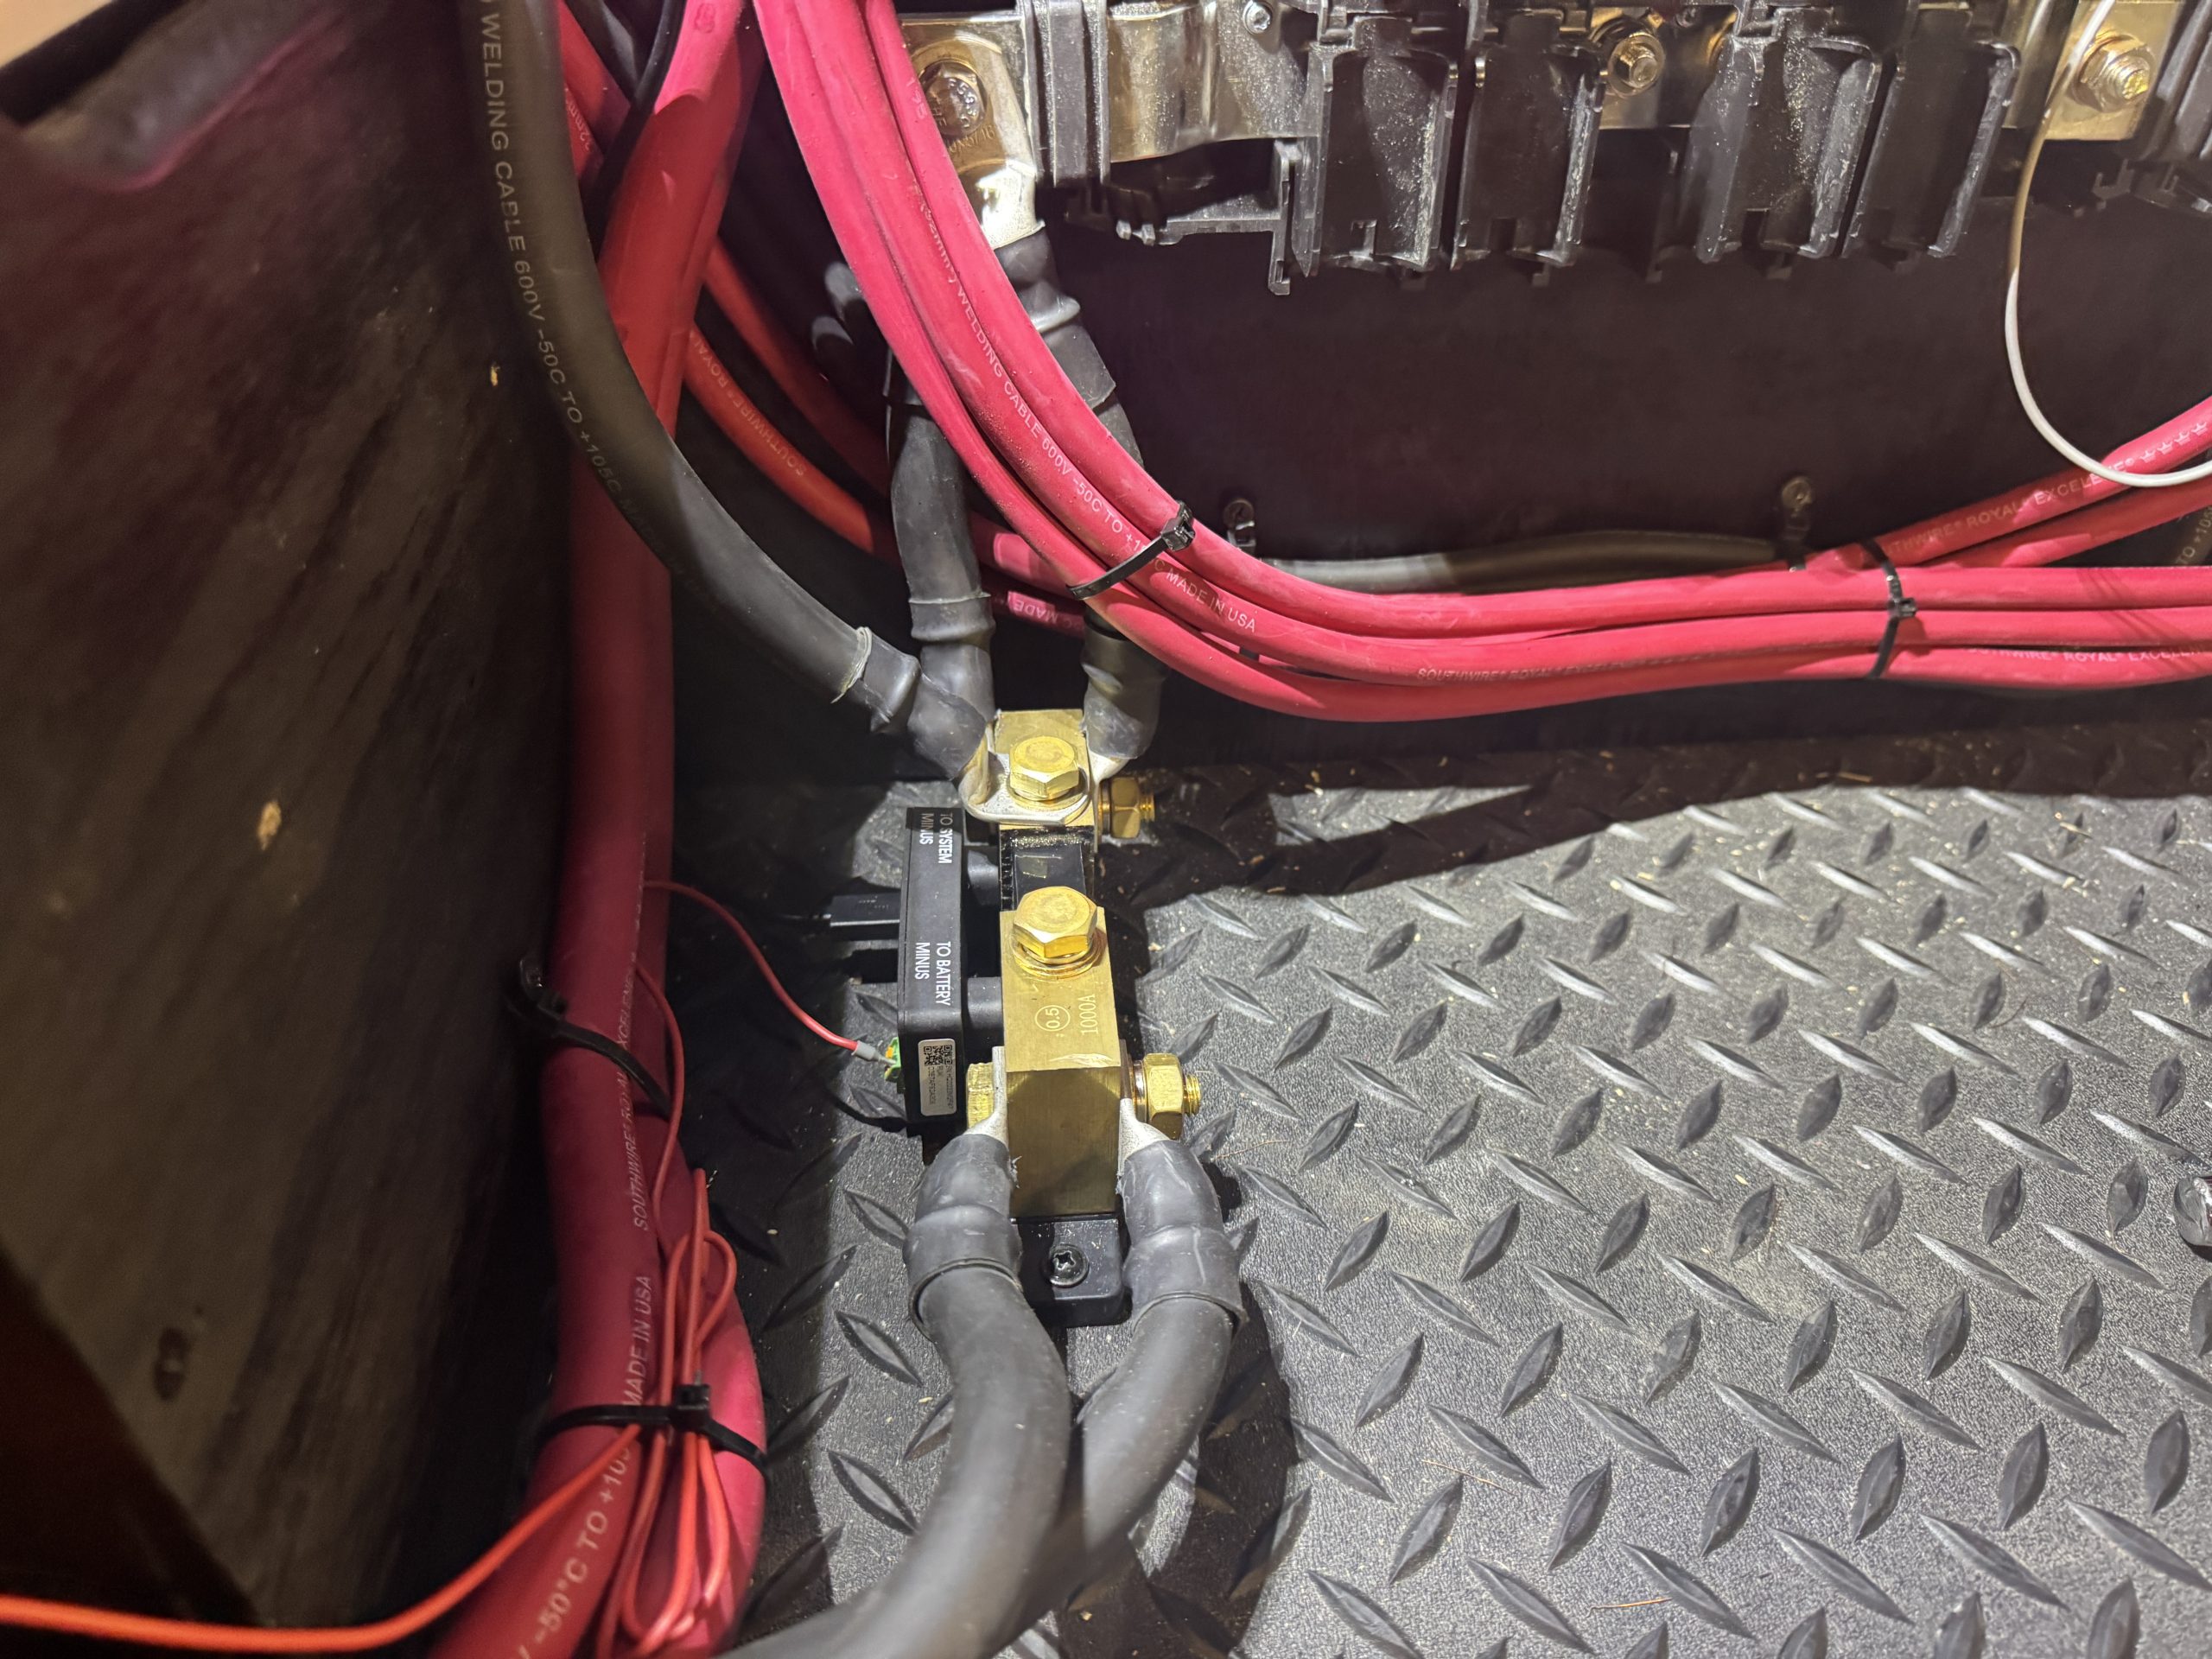
- Victron 500 amp SmartShunt
- Victron 1000 amp SmartShunt
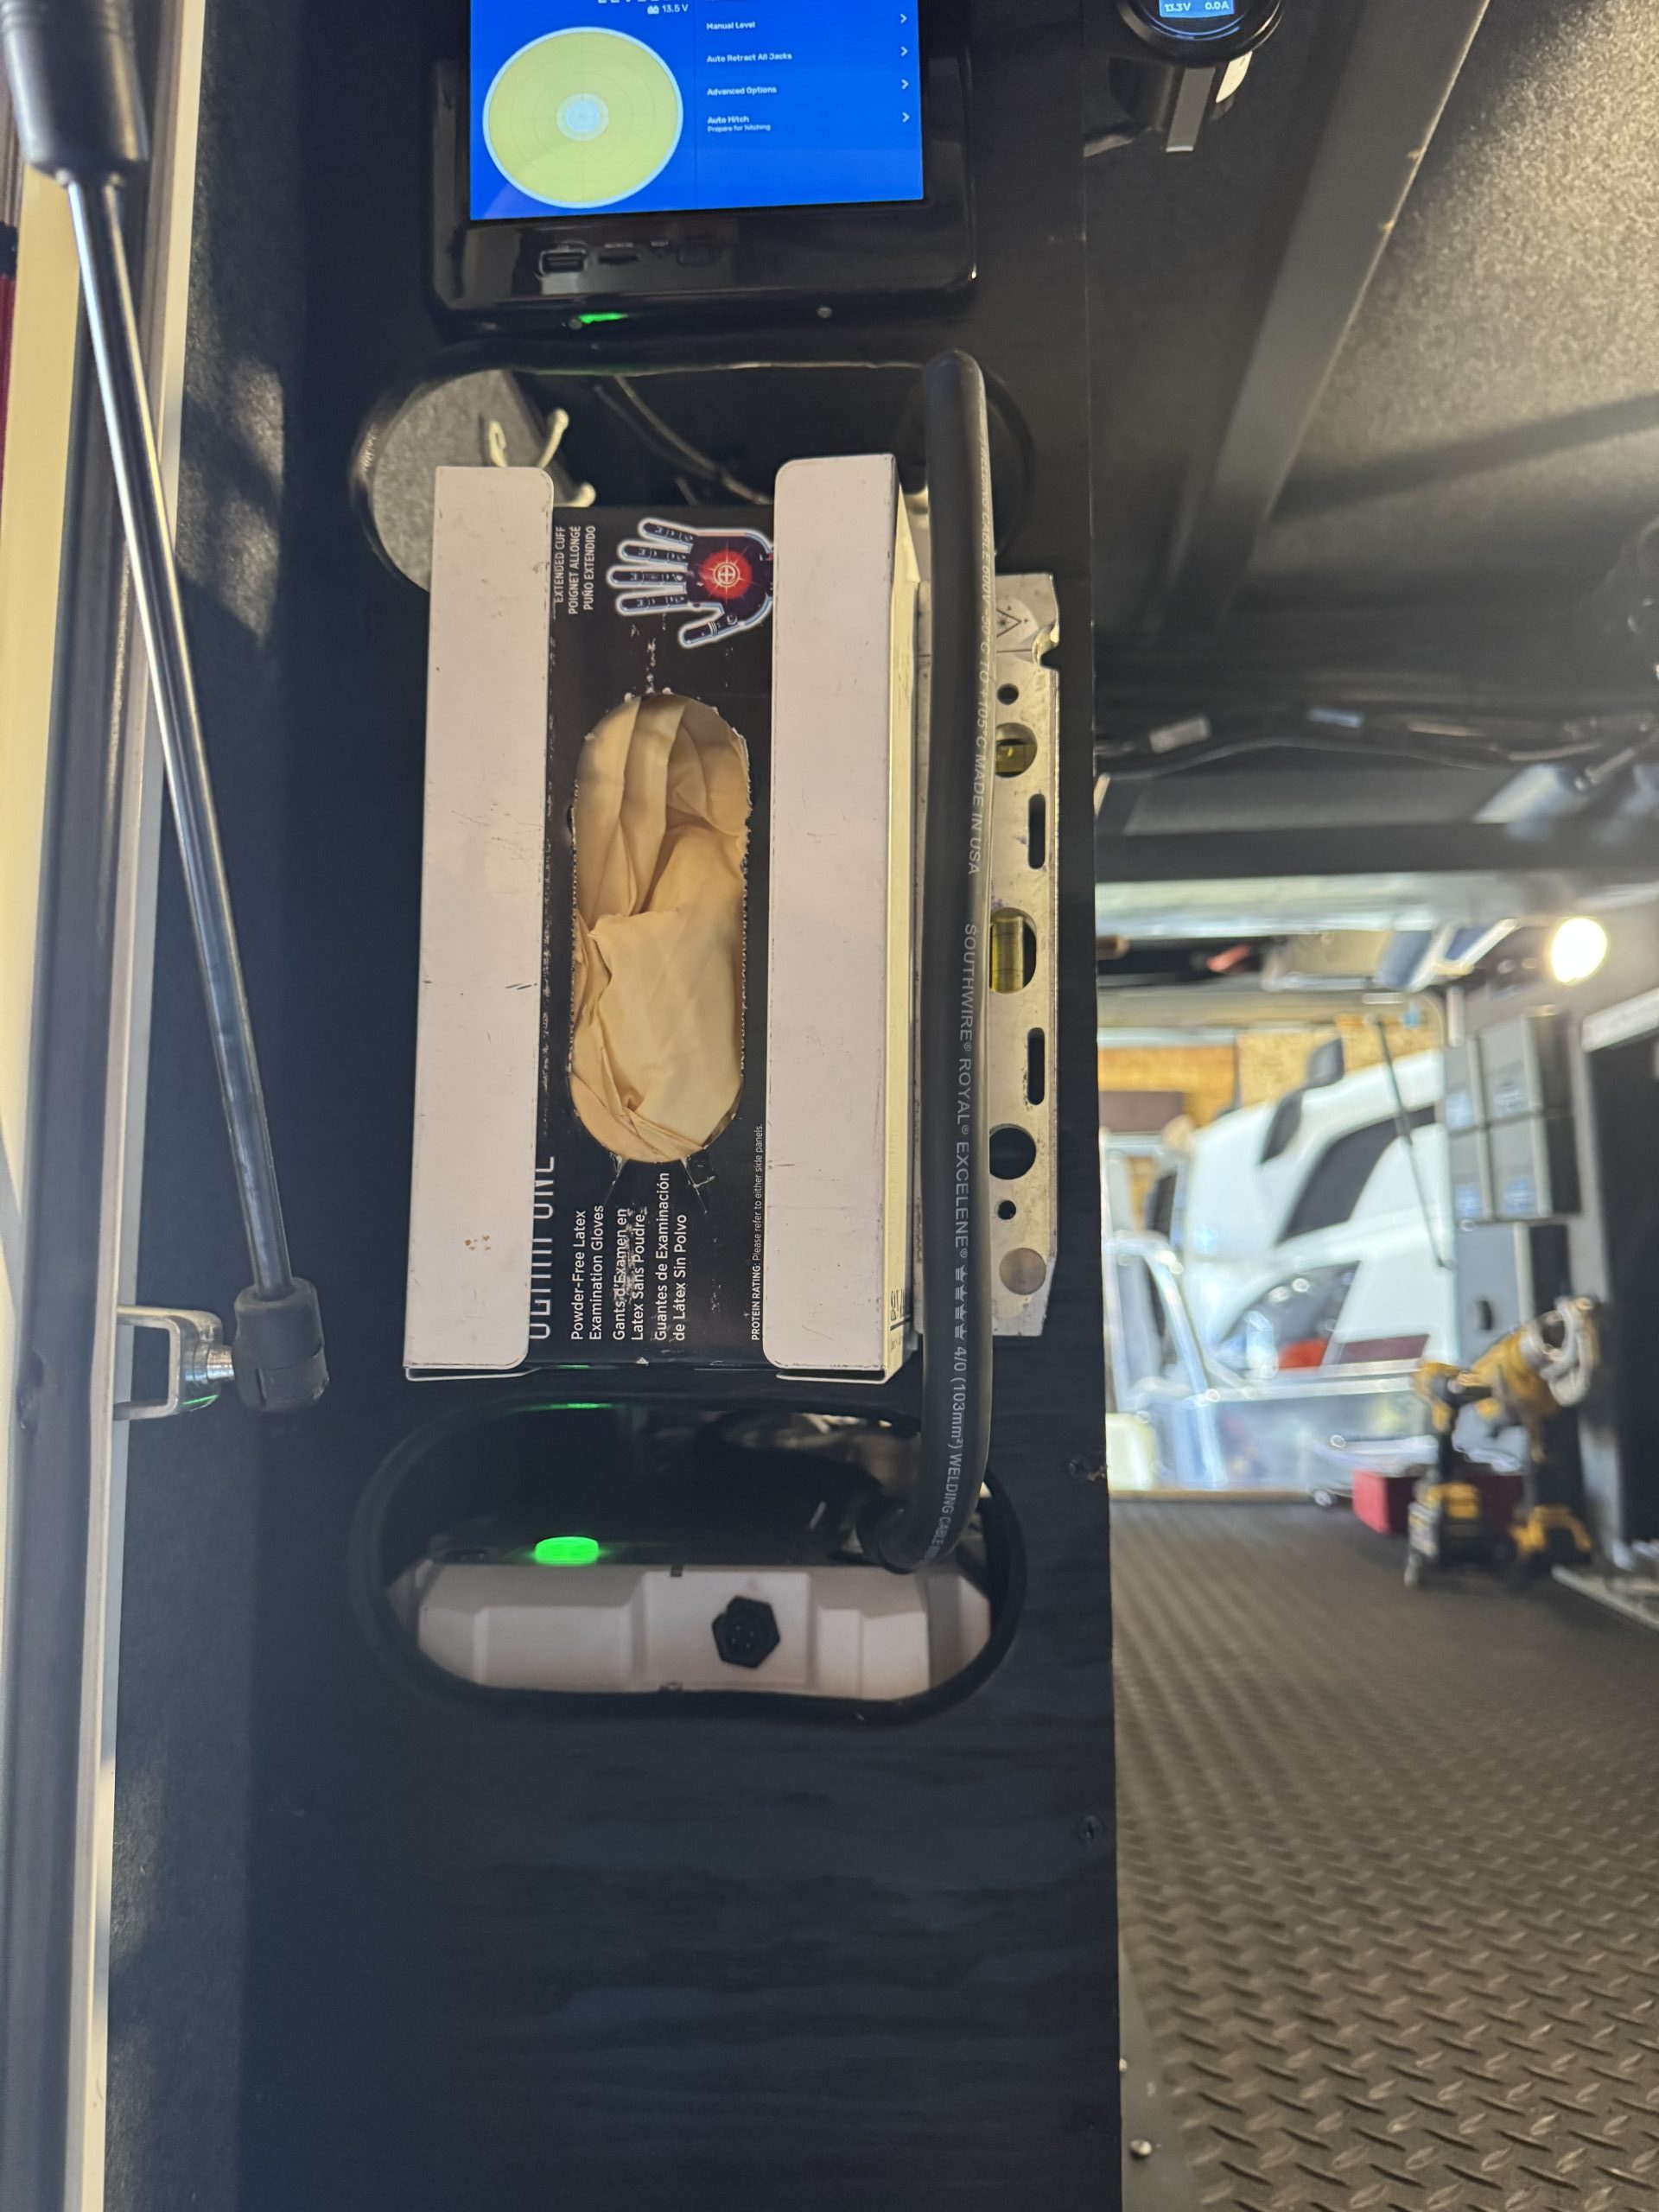
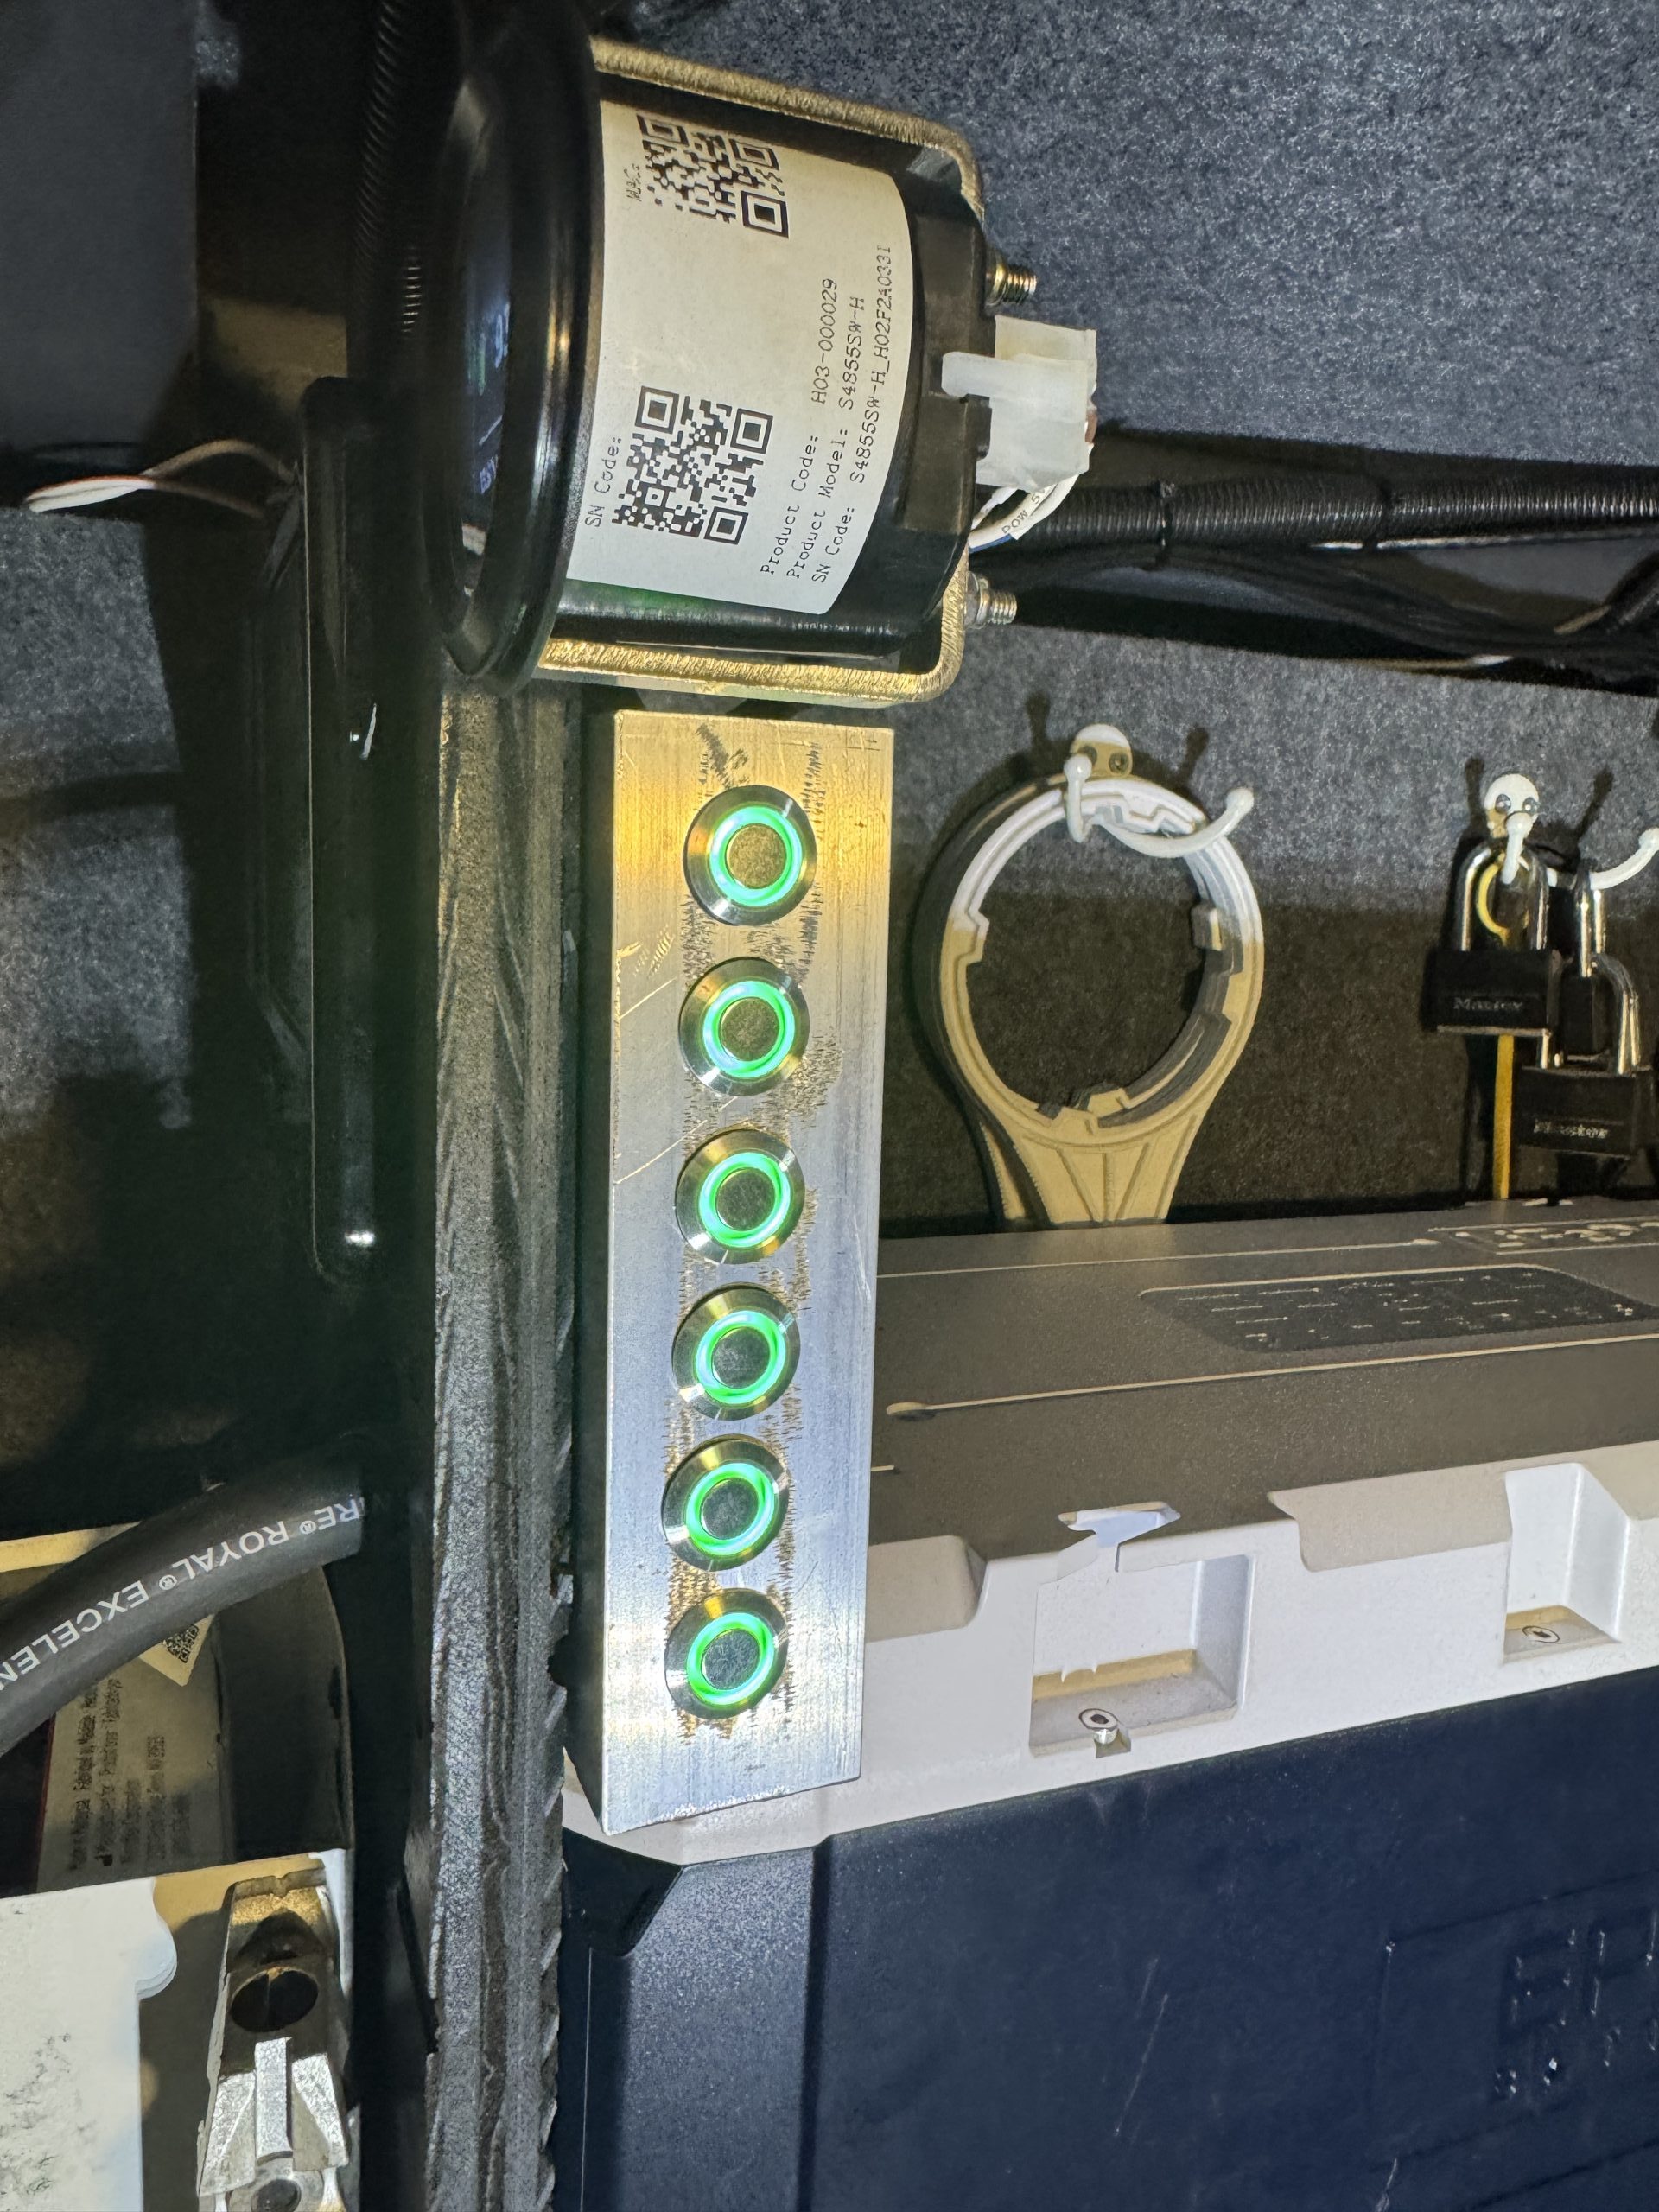
- Victron Cerbo GX Communication Center
- Victron Touch 70 GX with Mount
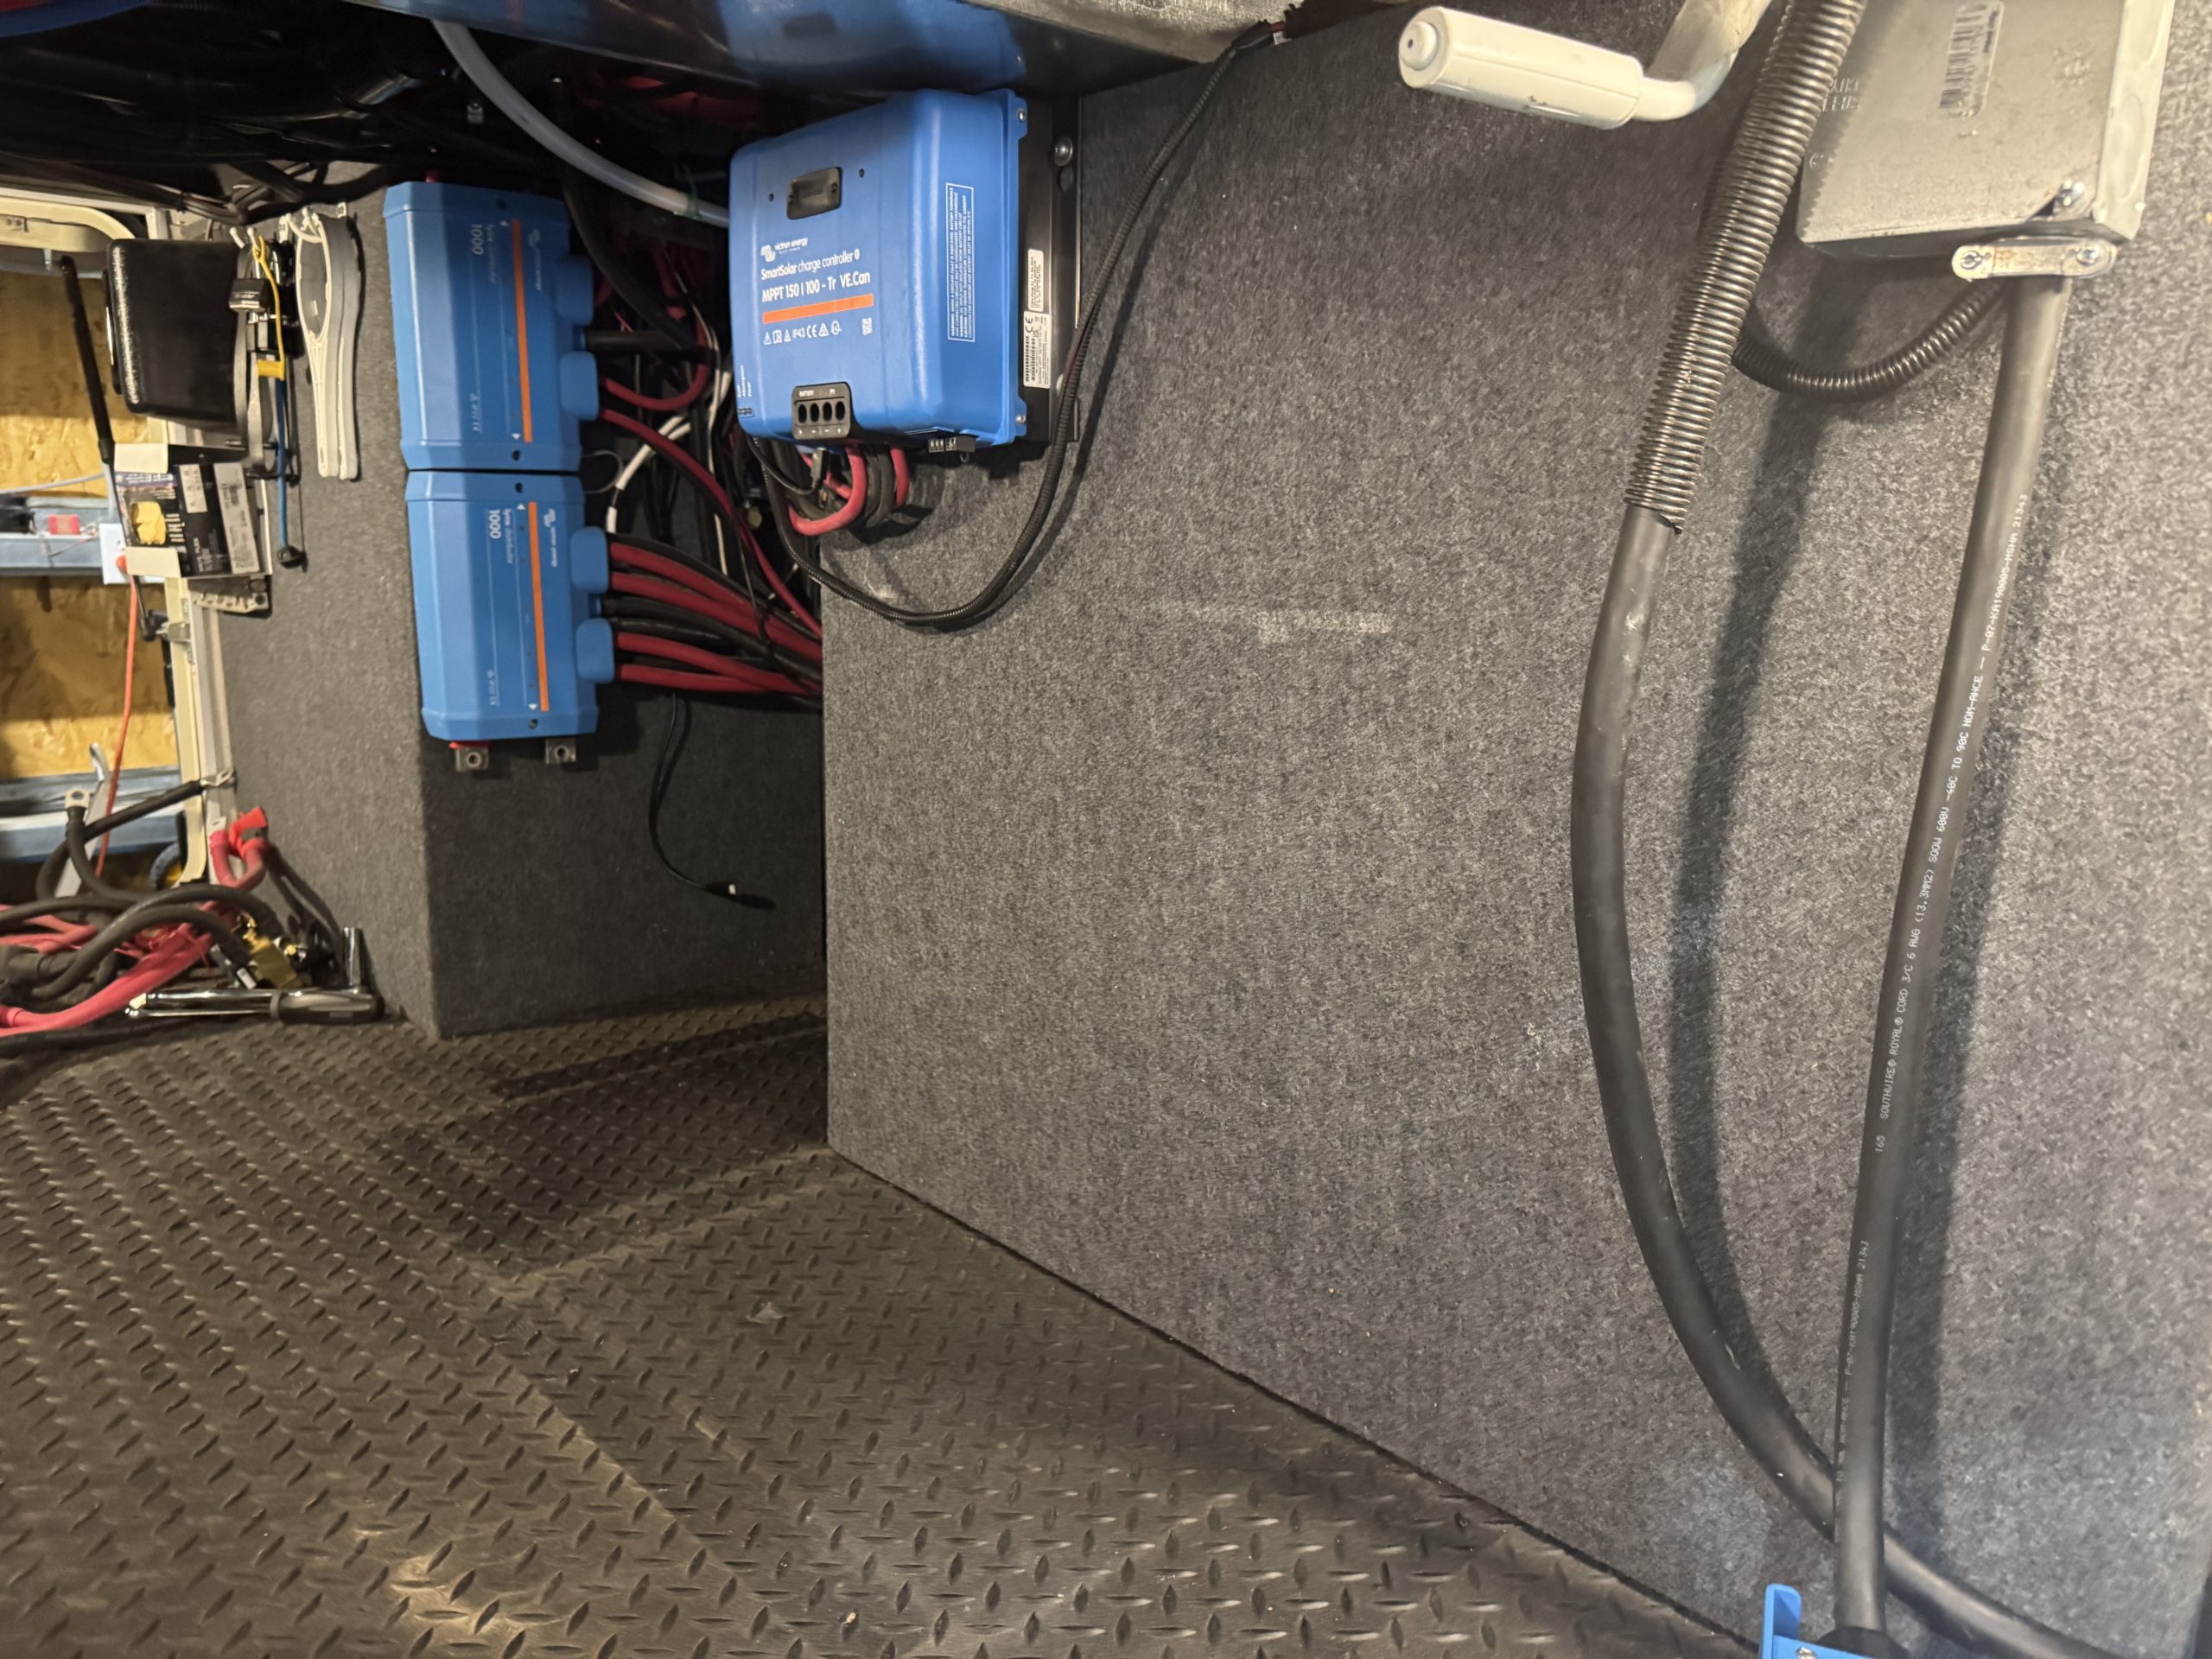
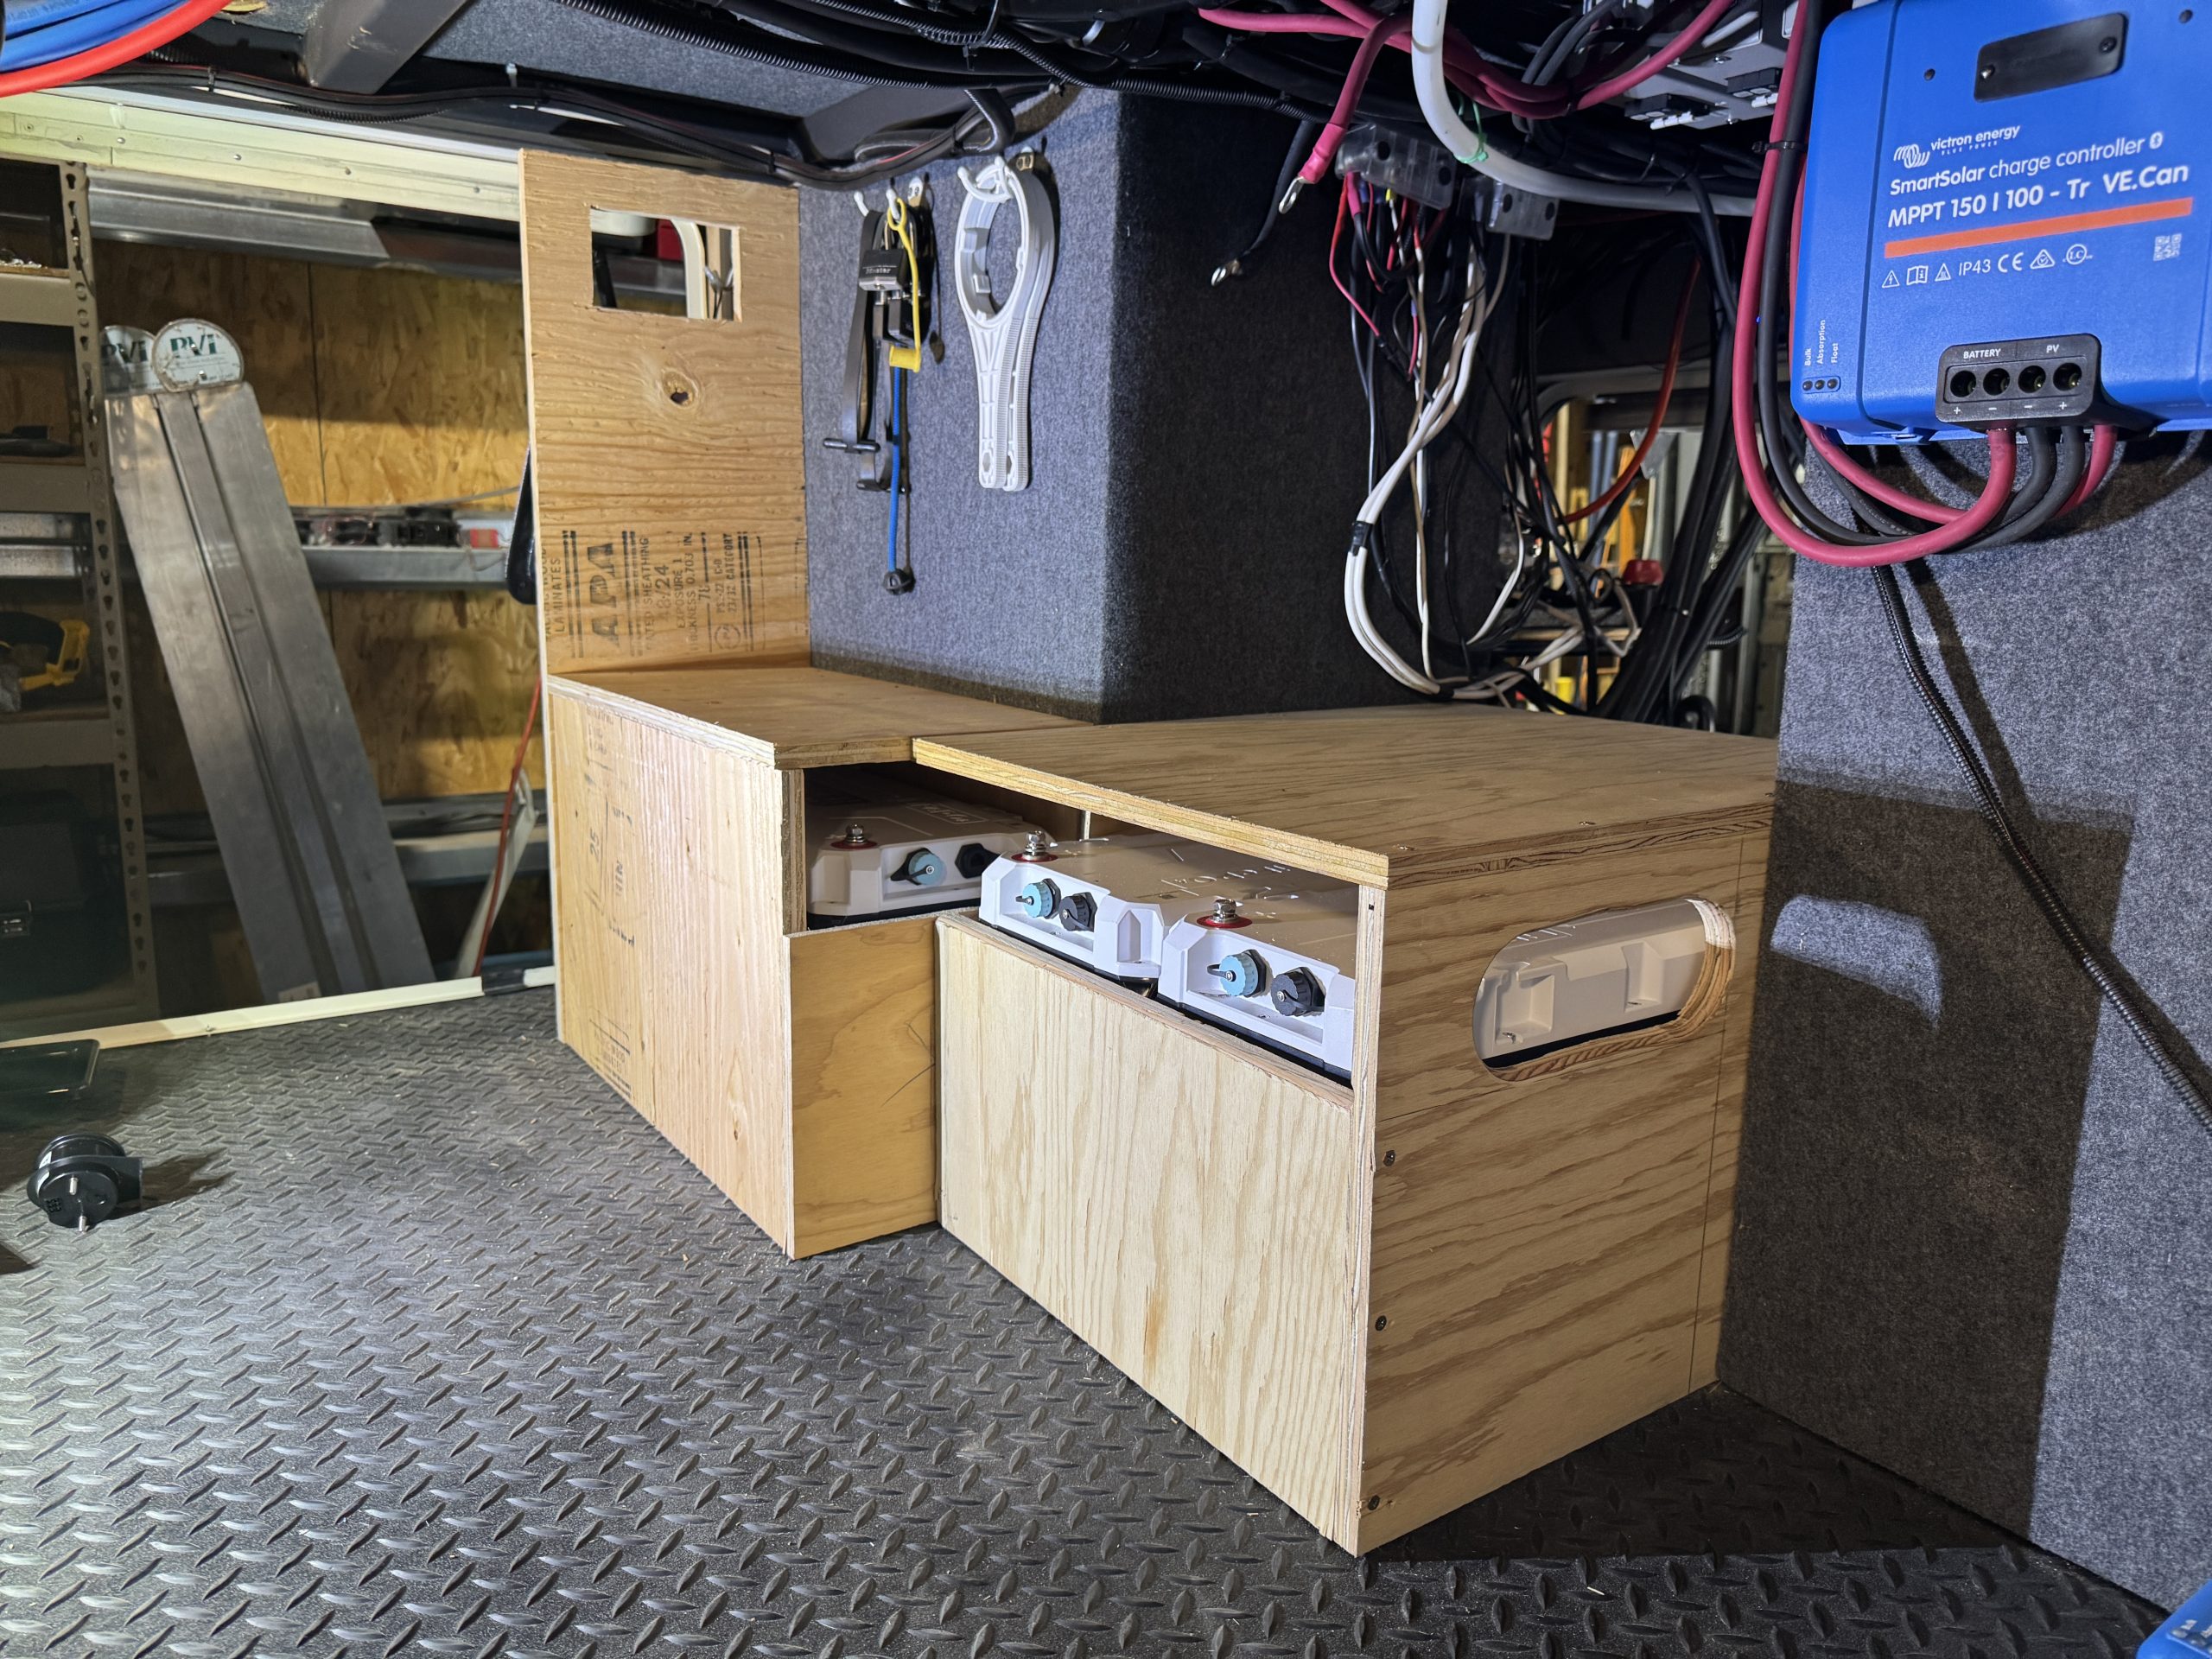
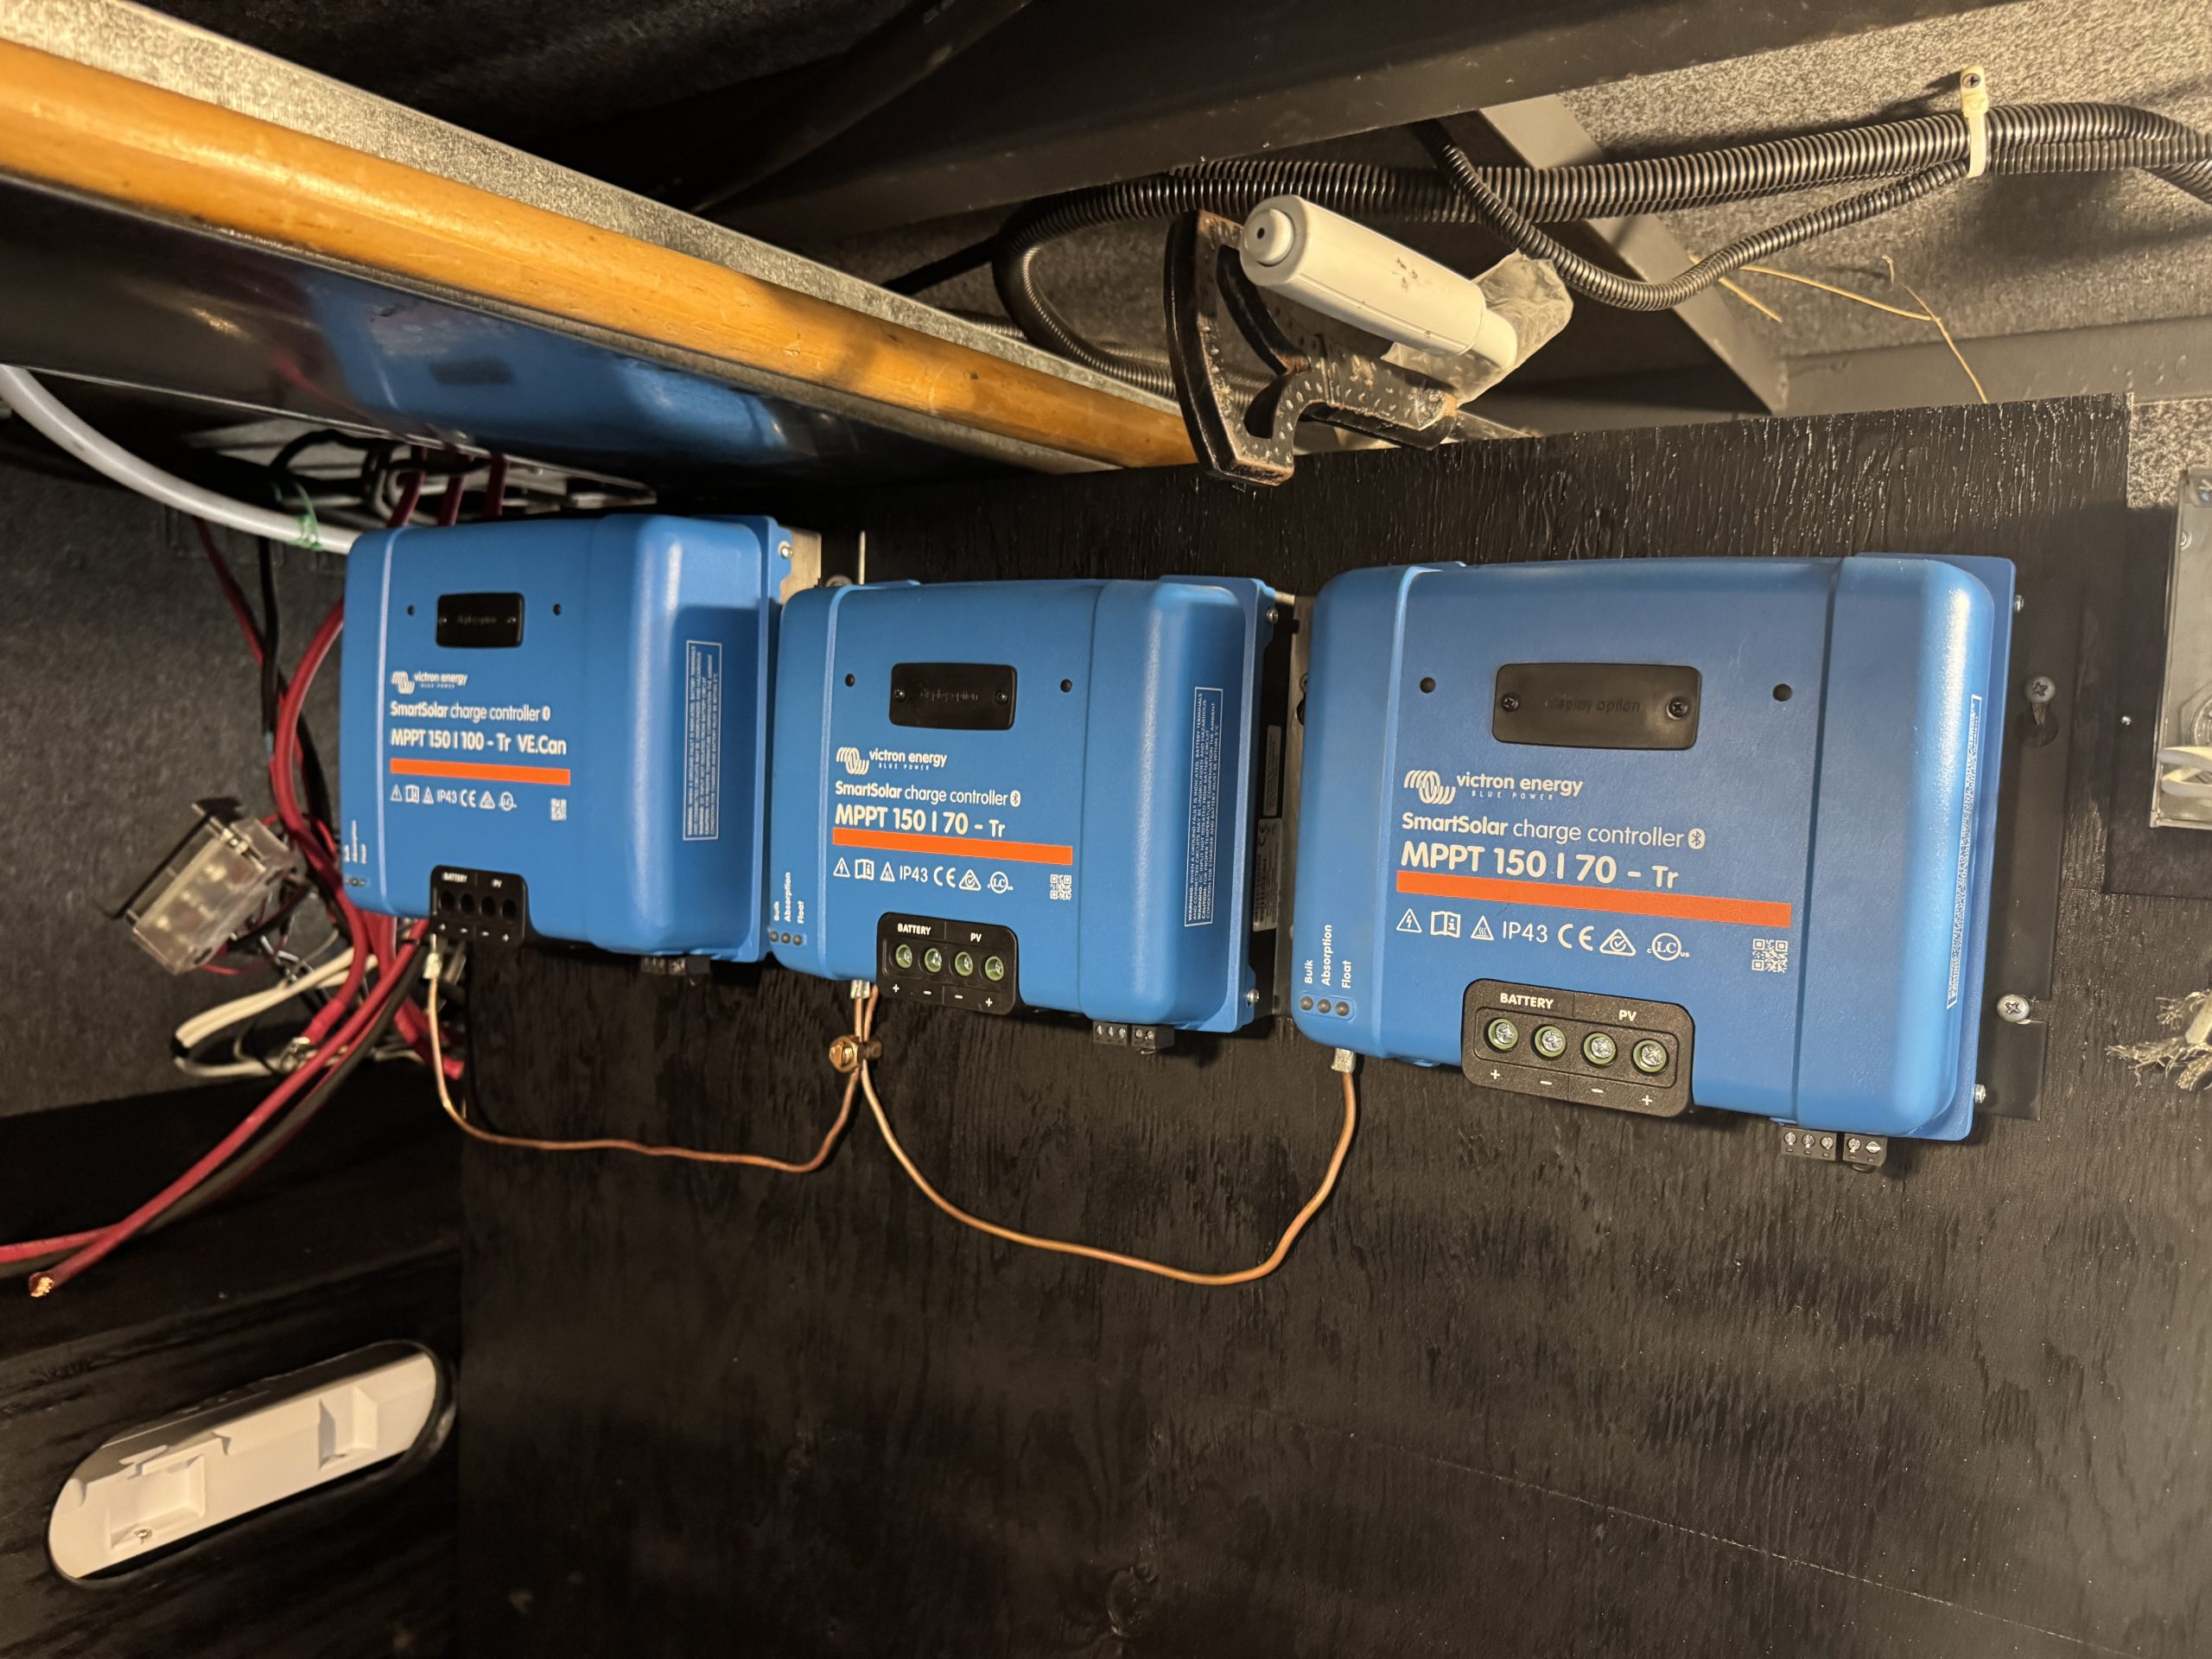
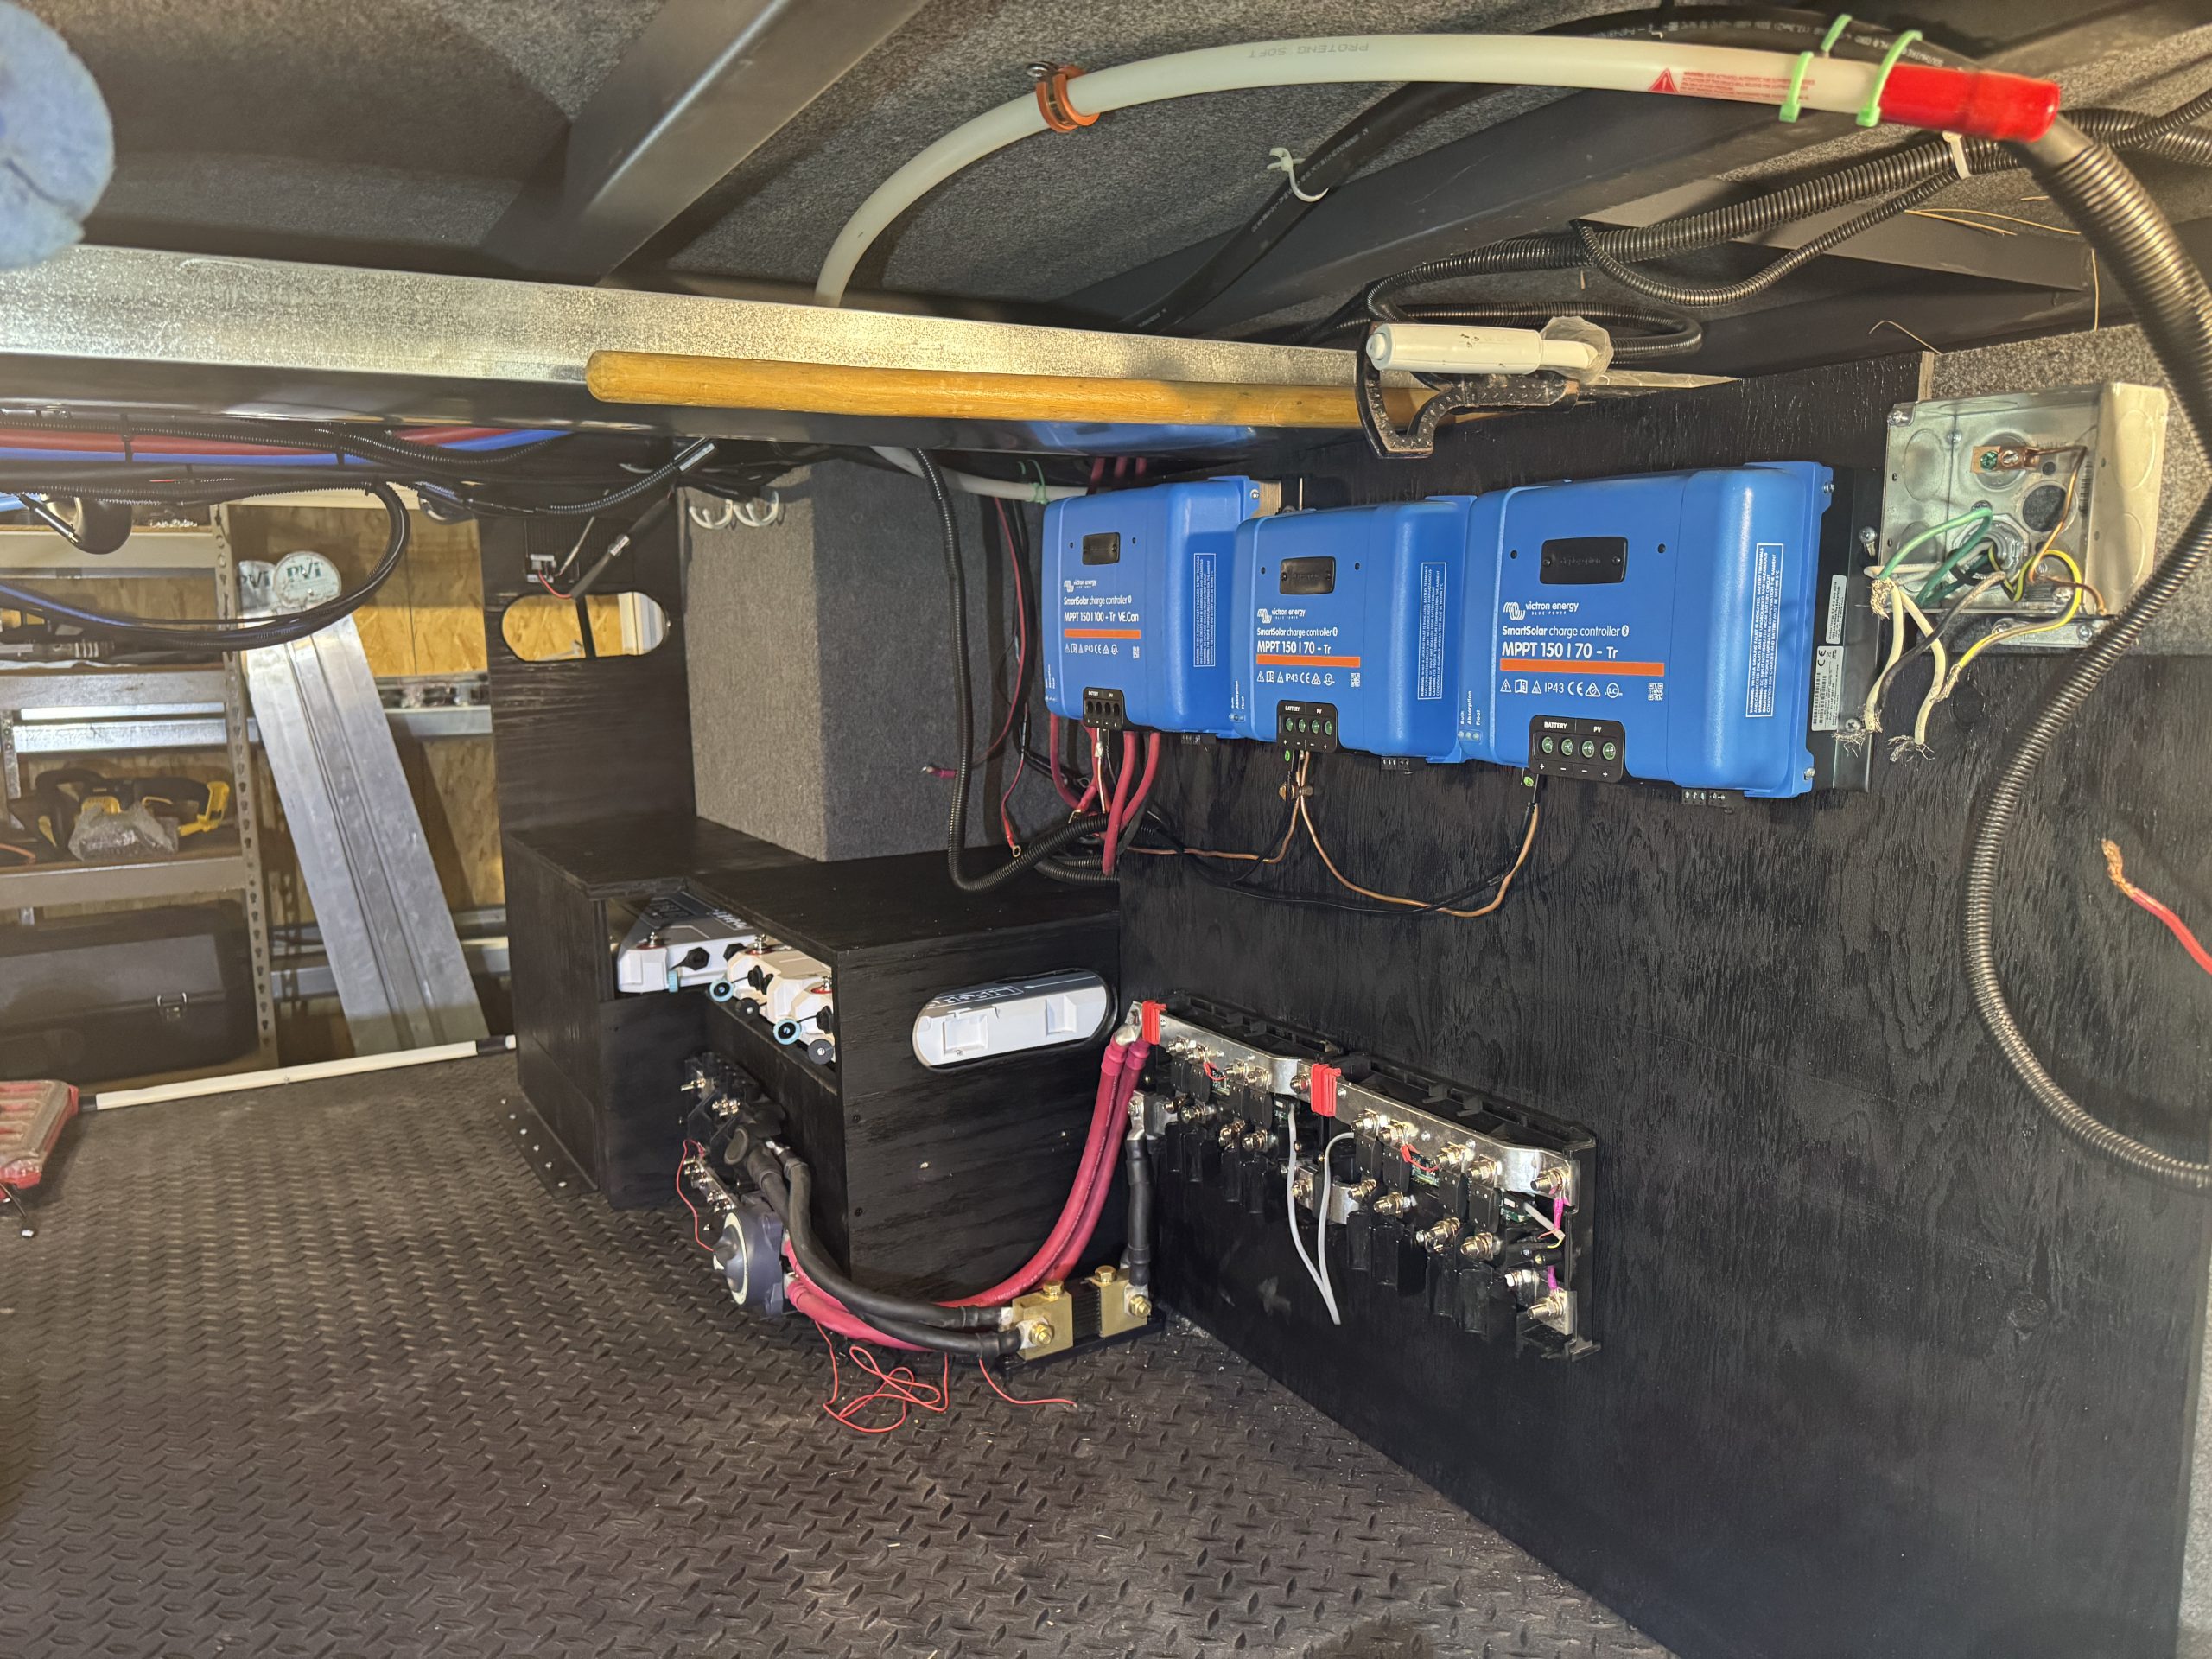
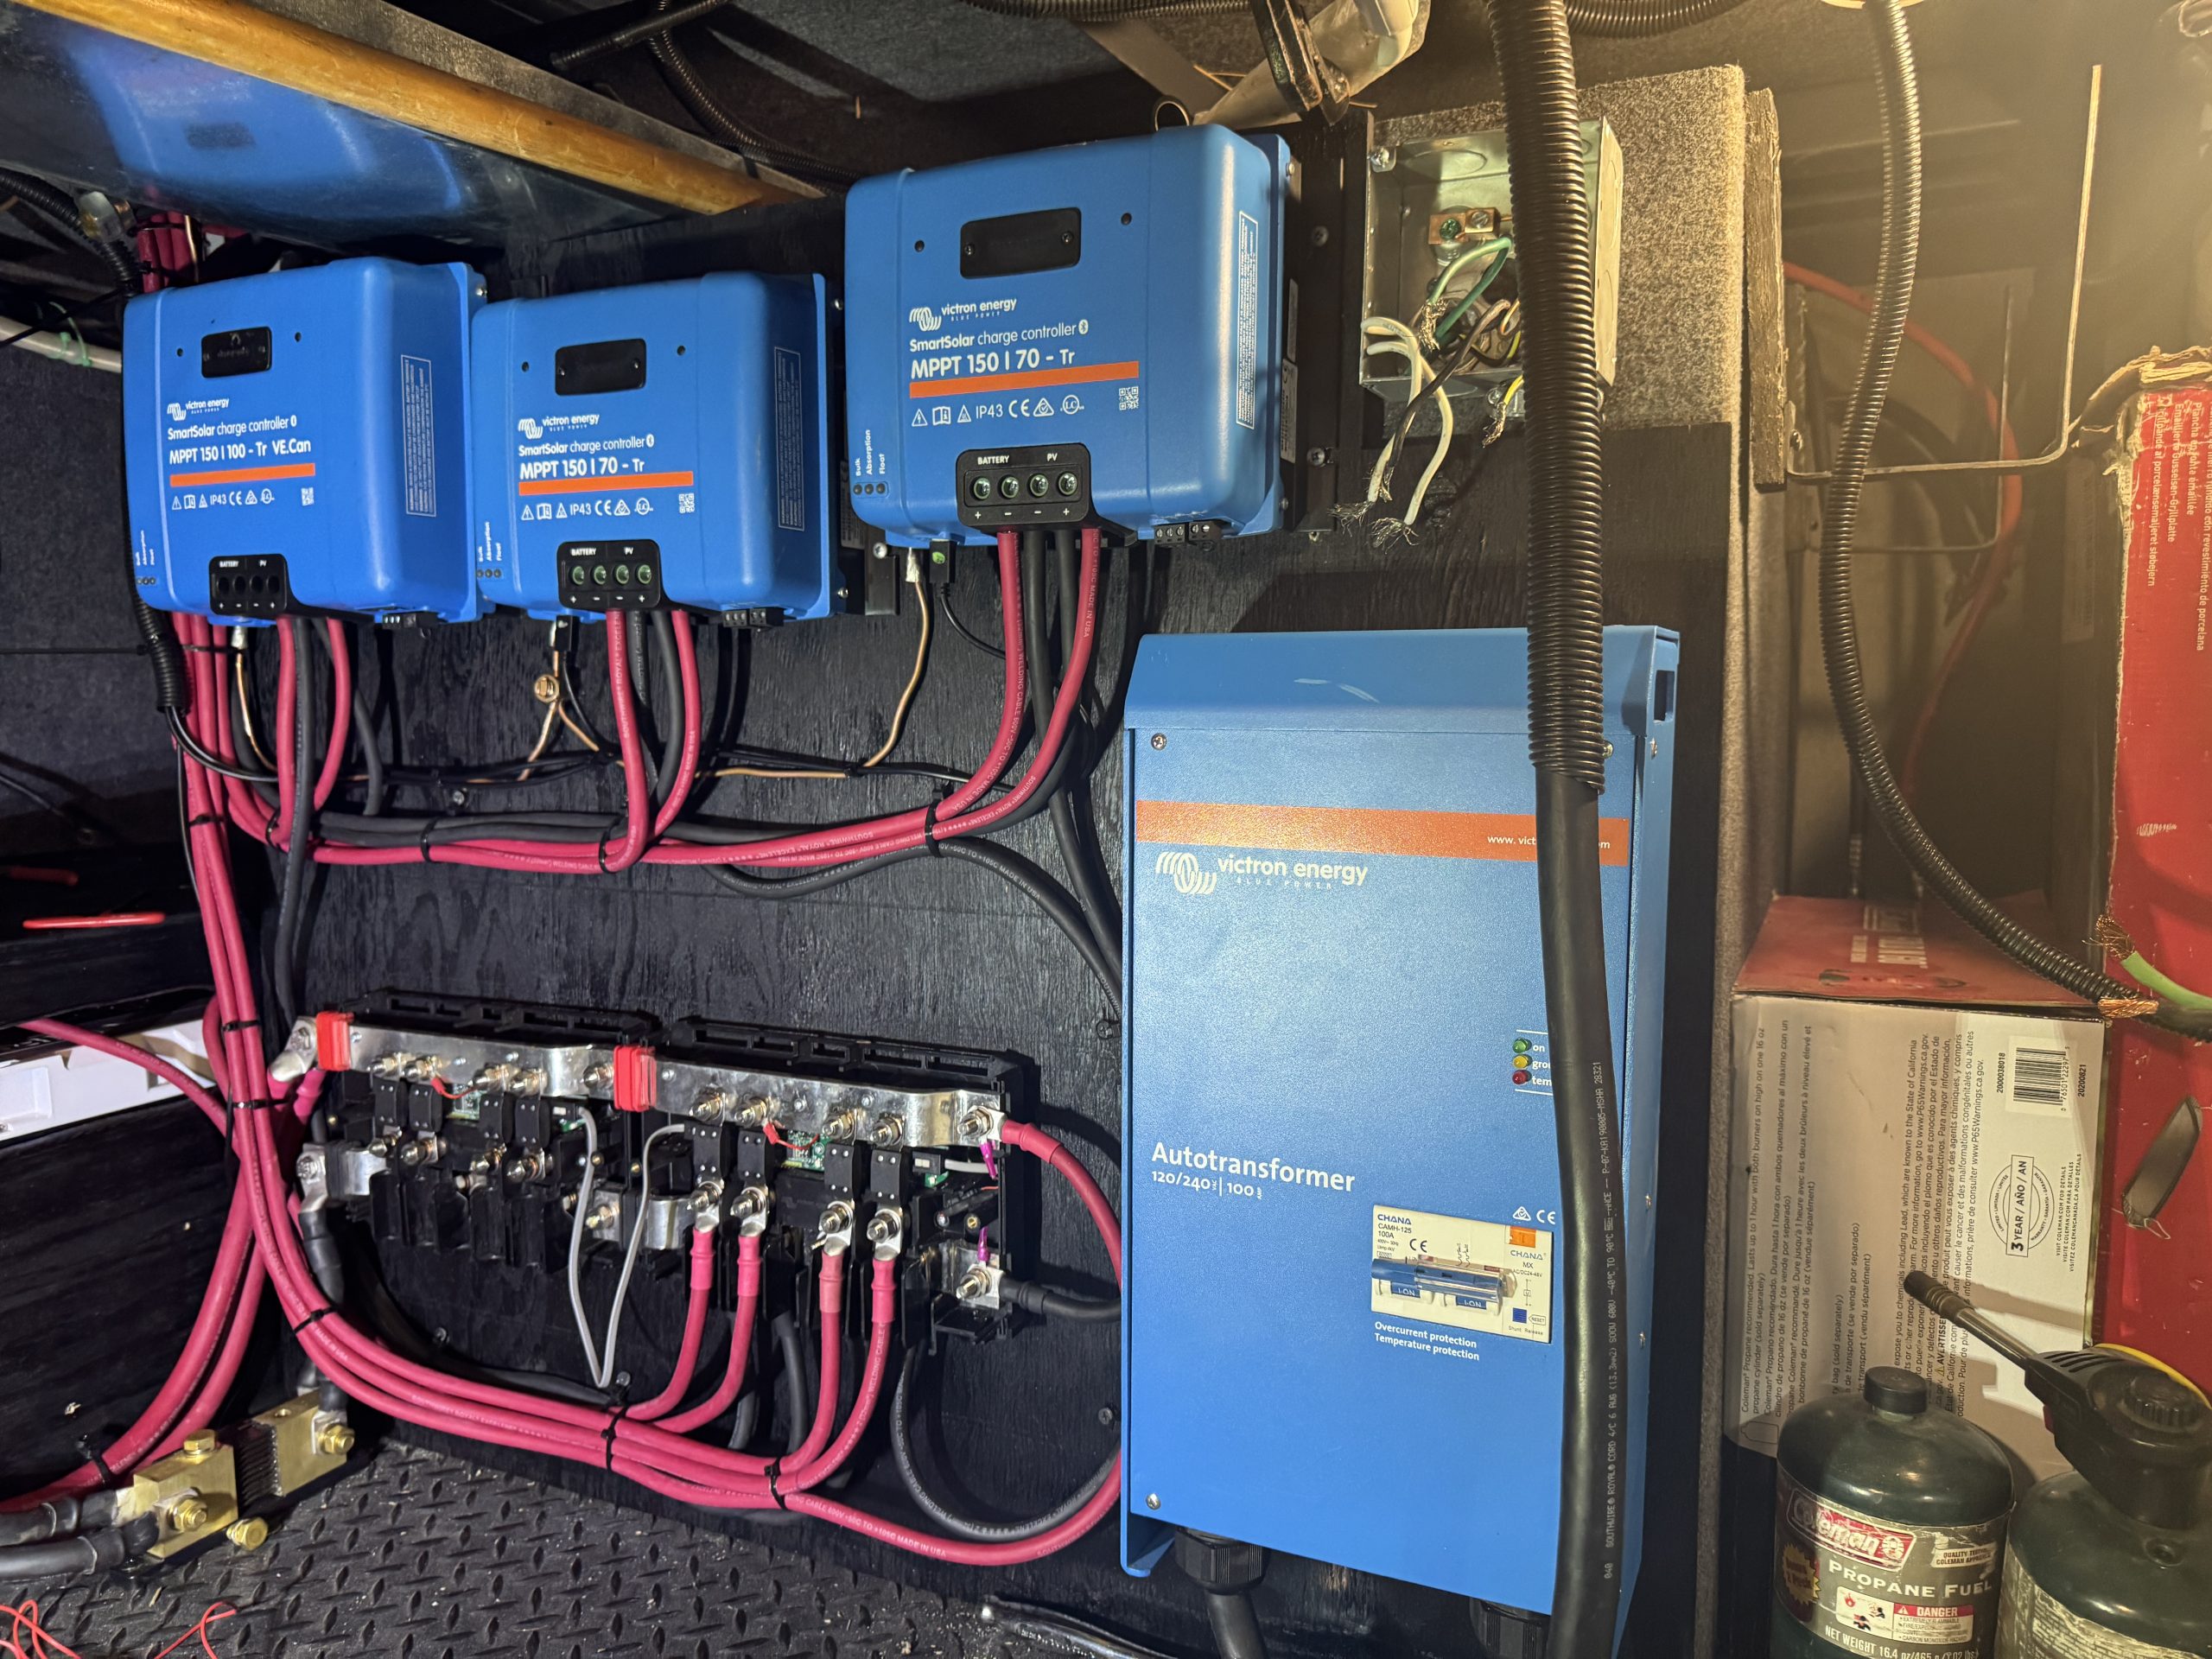
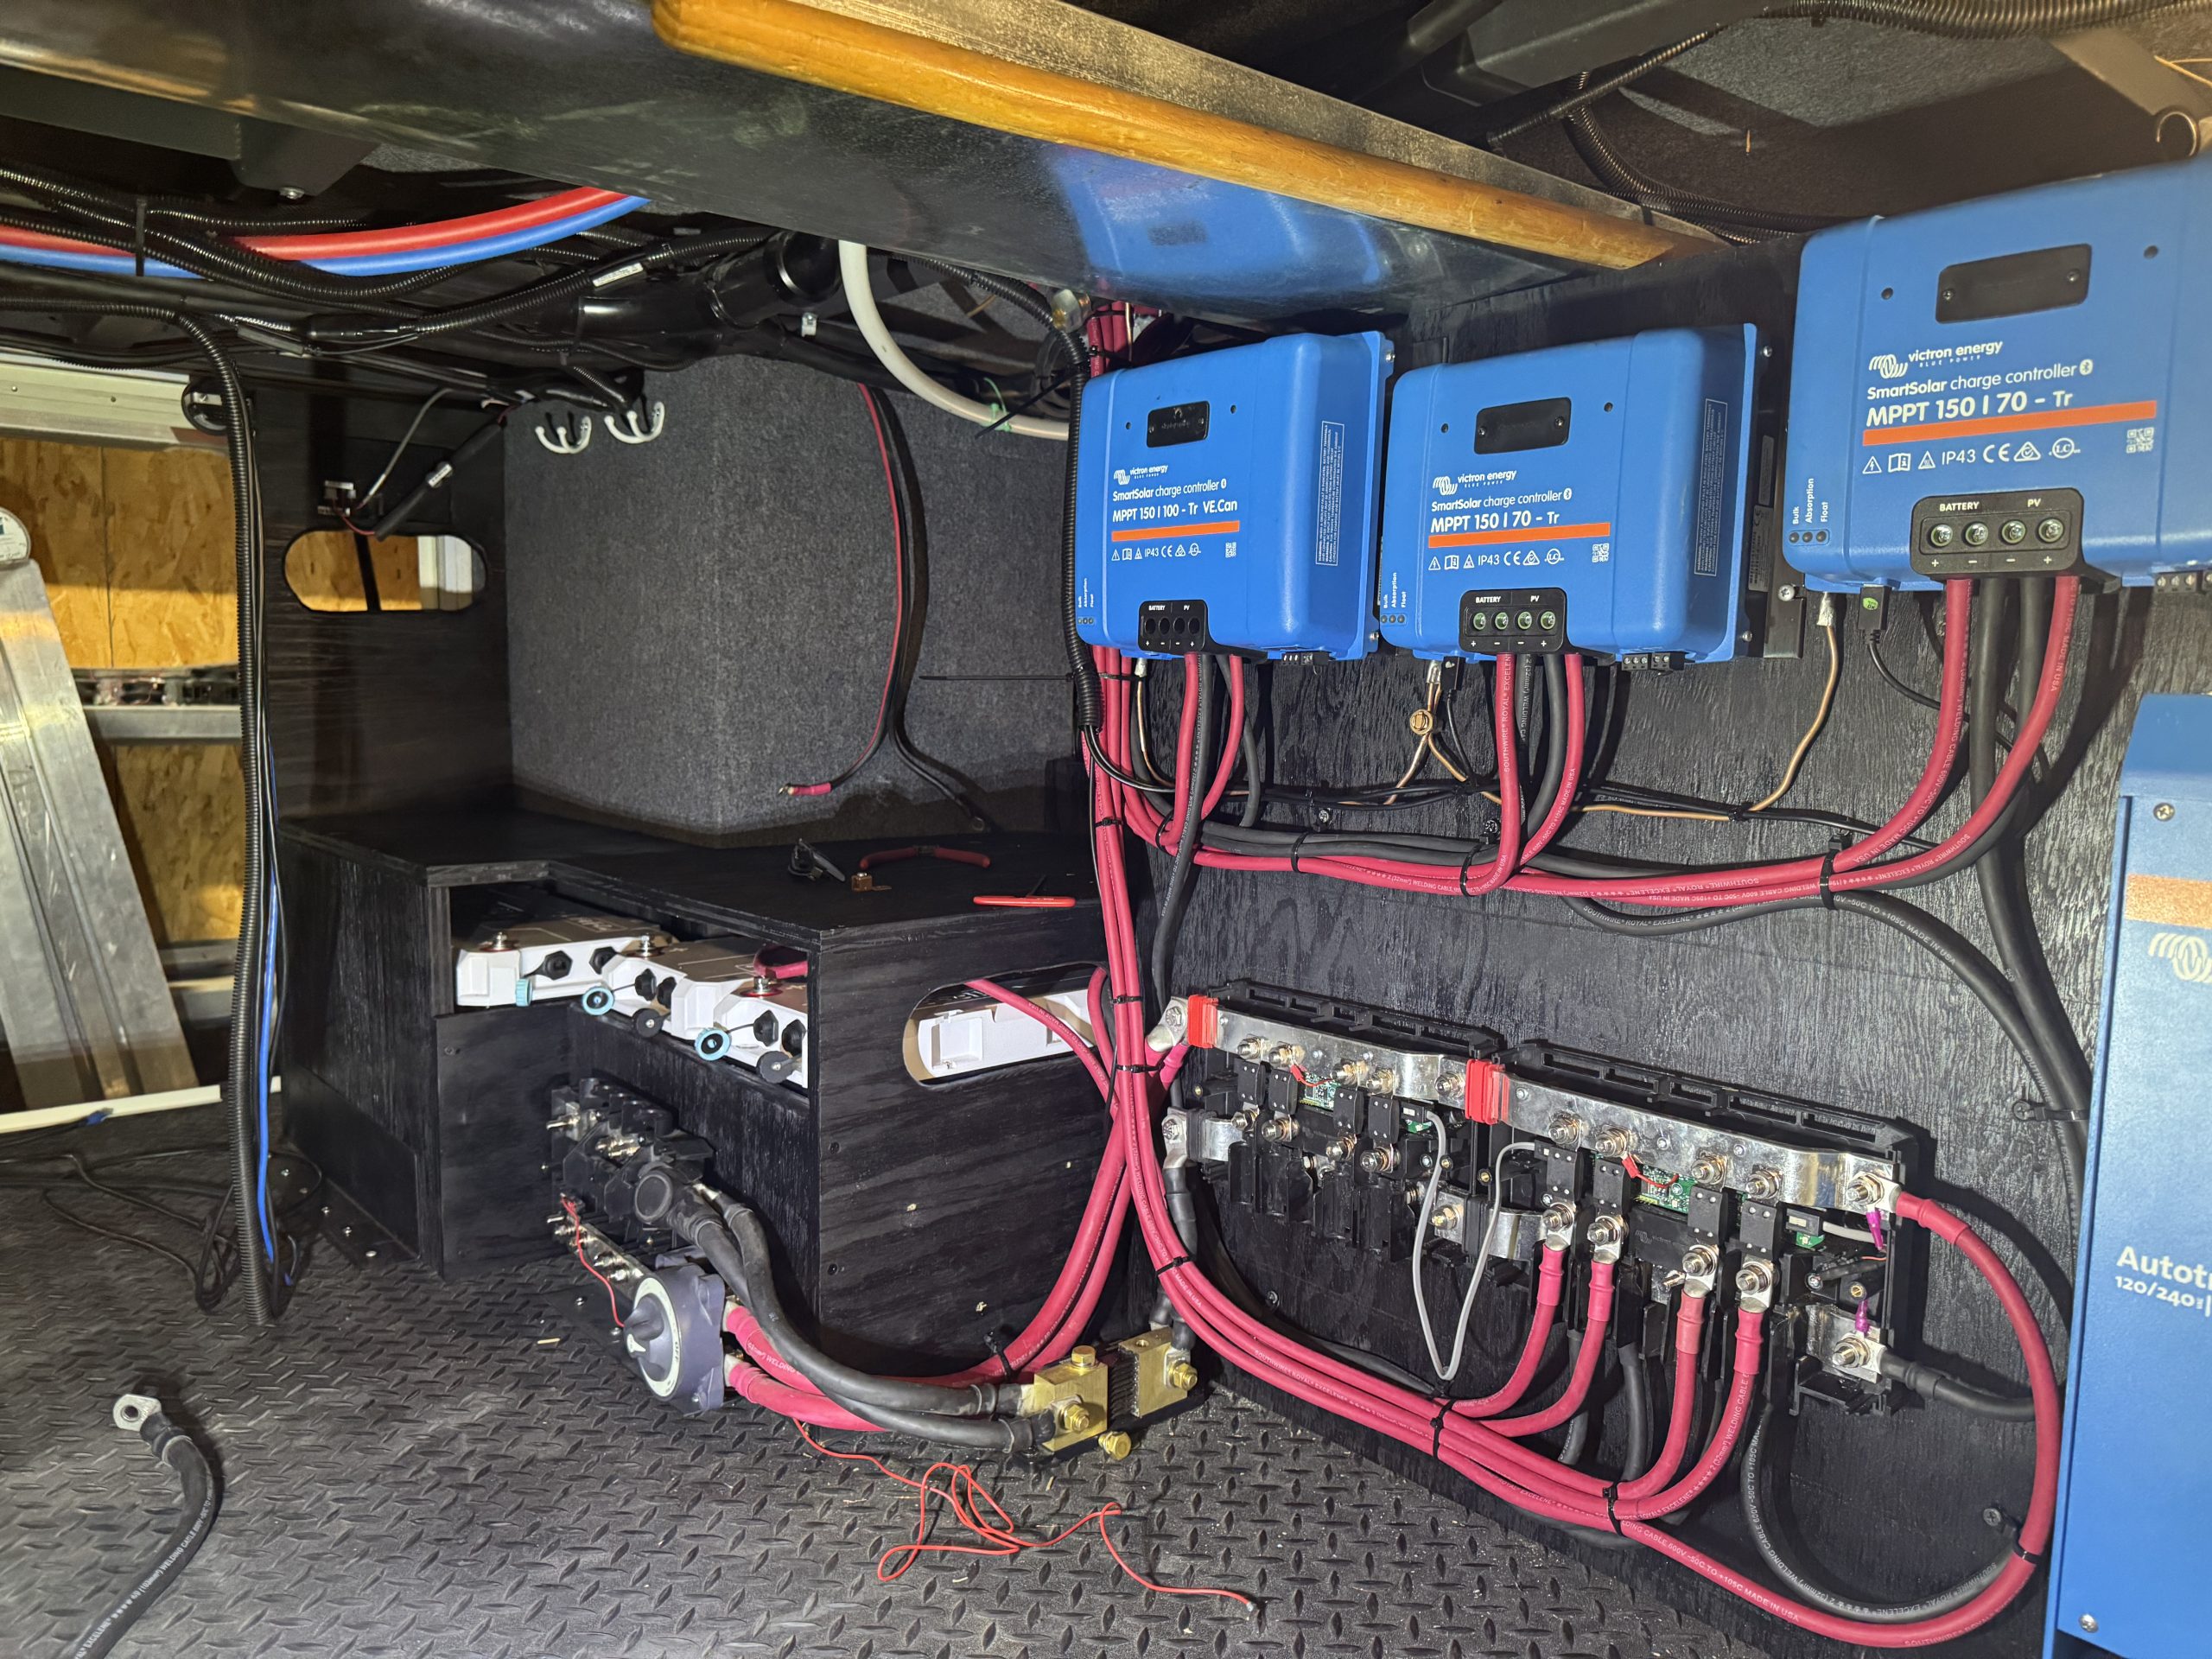
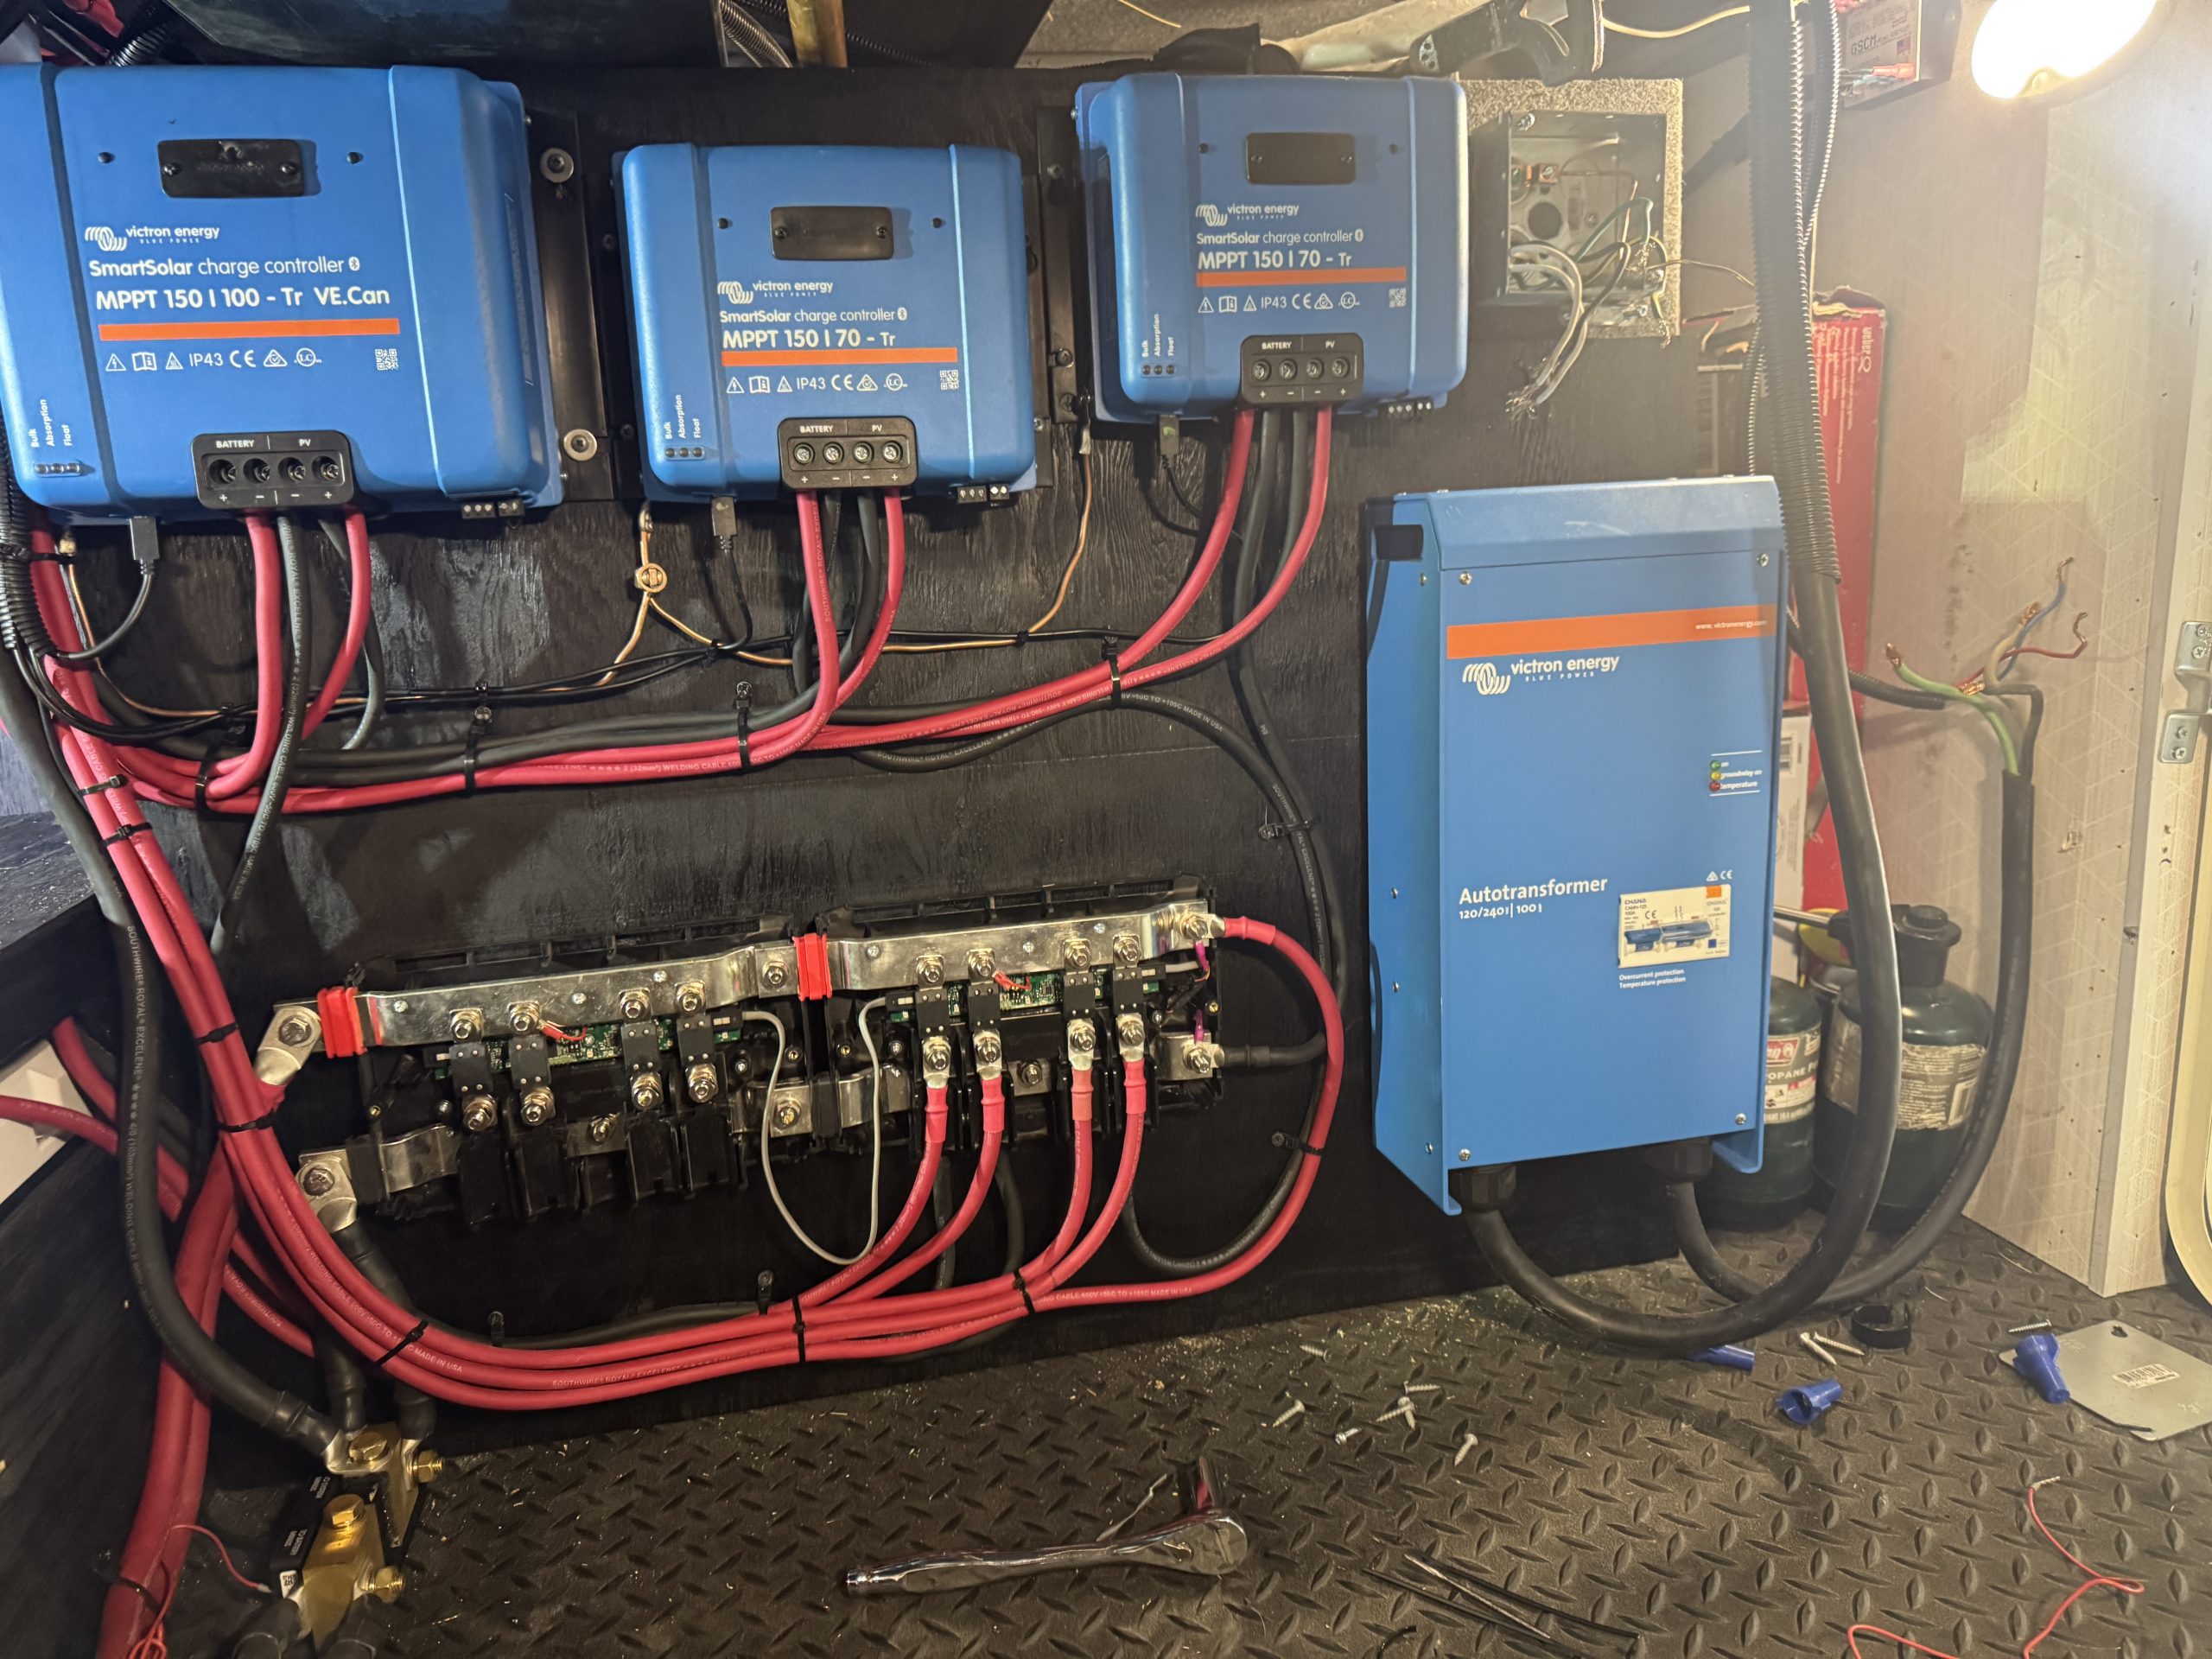
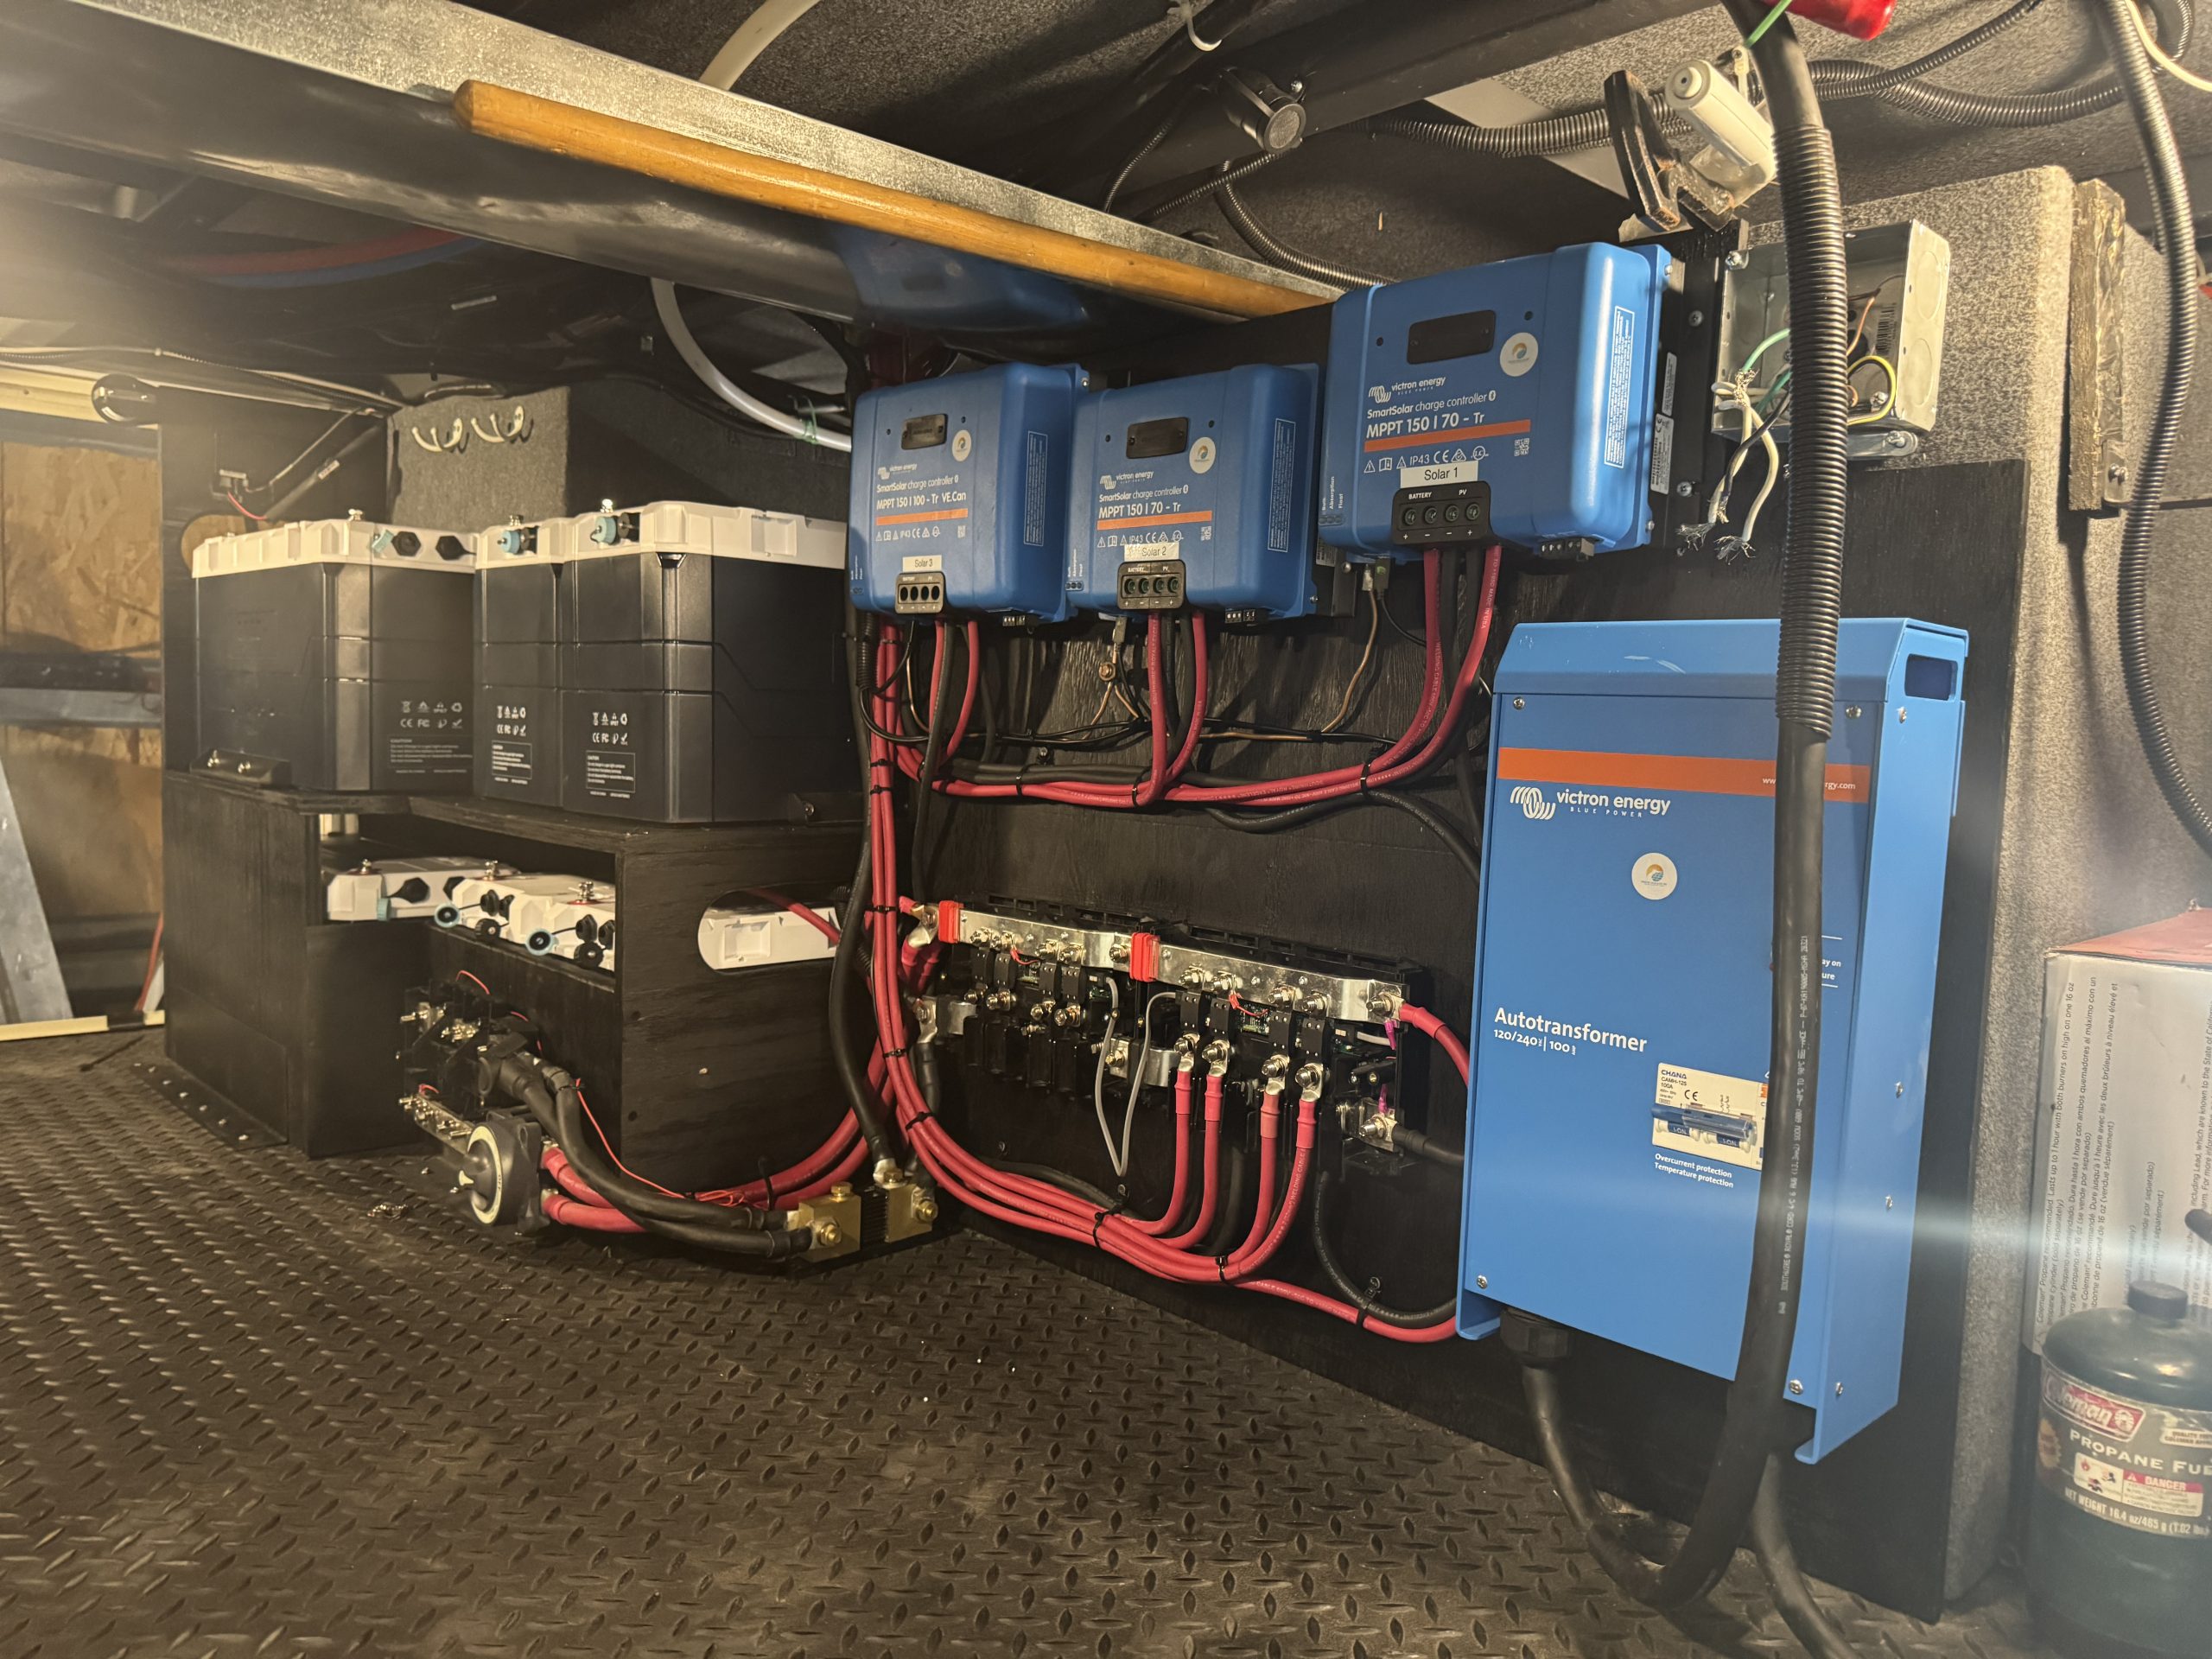
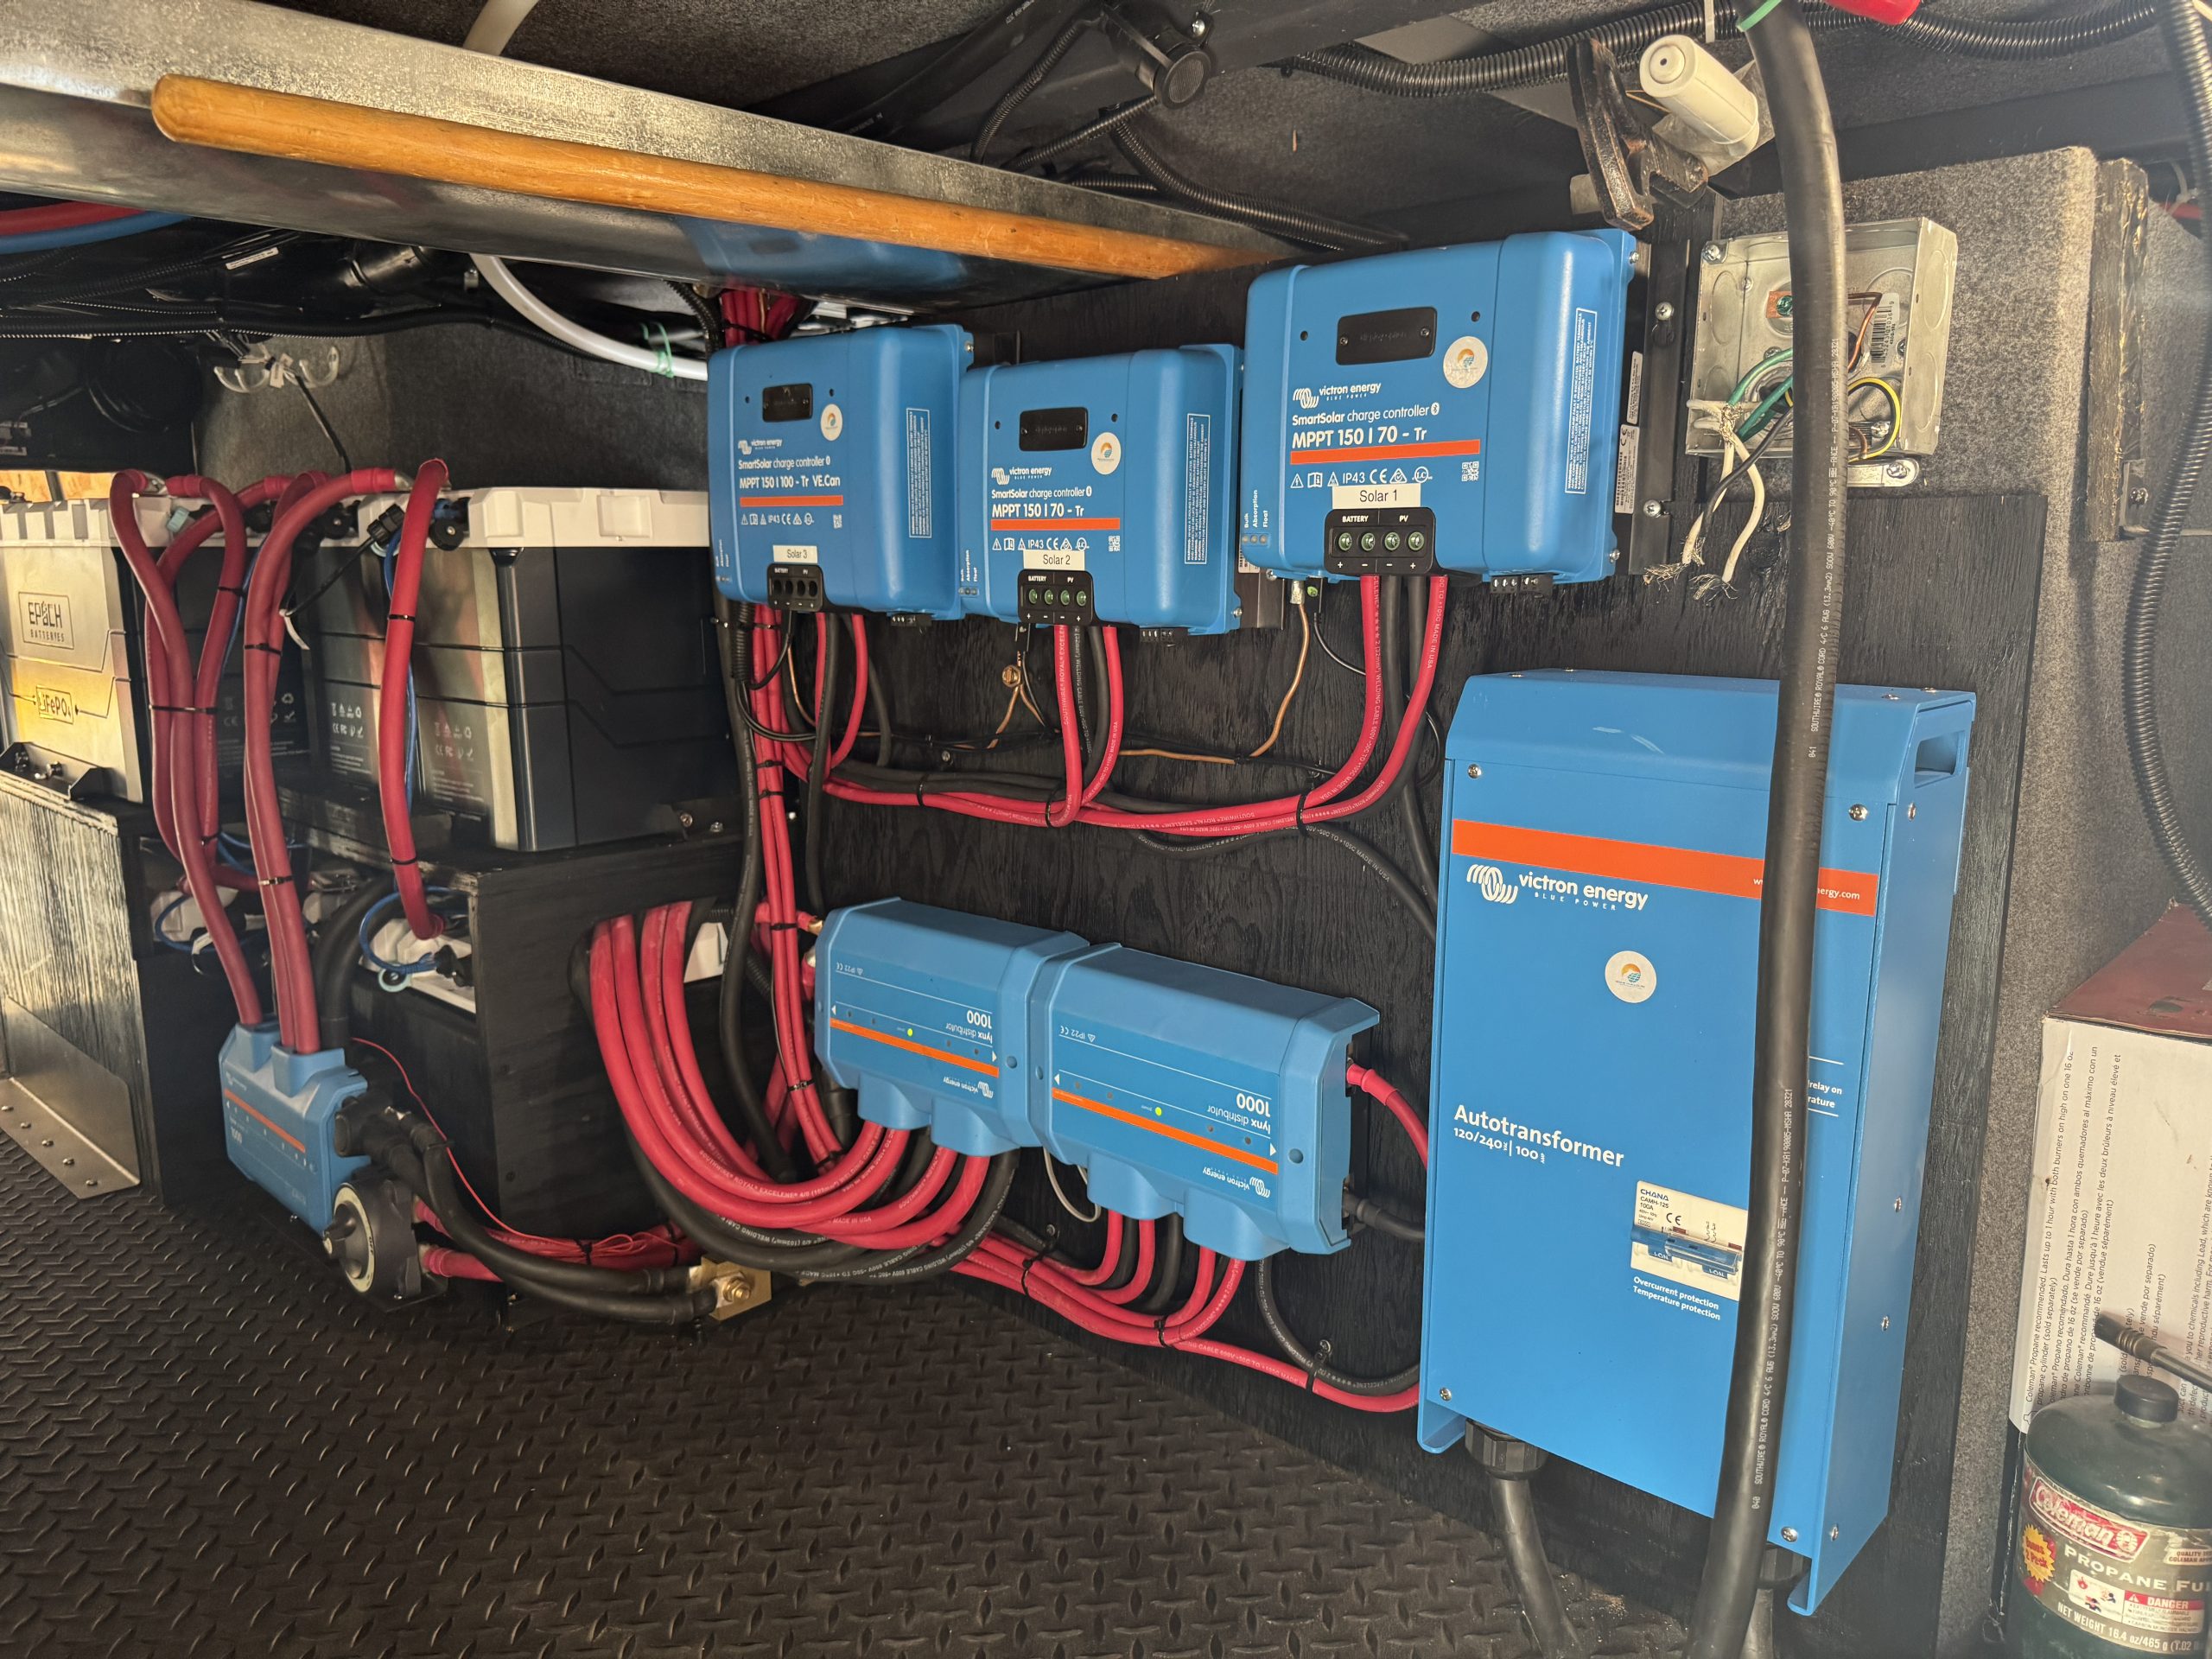
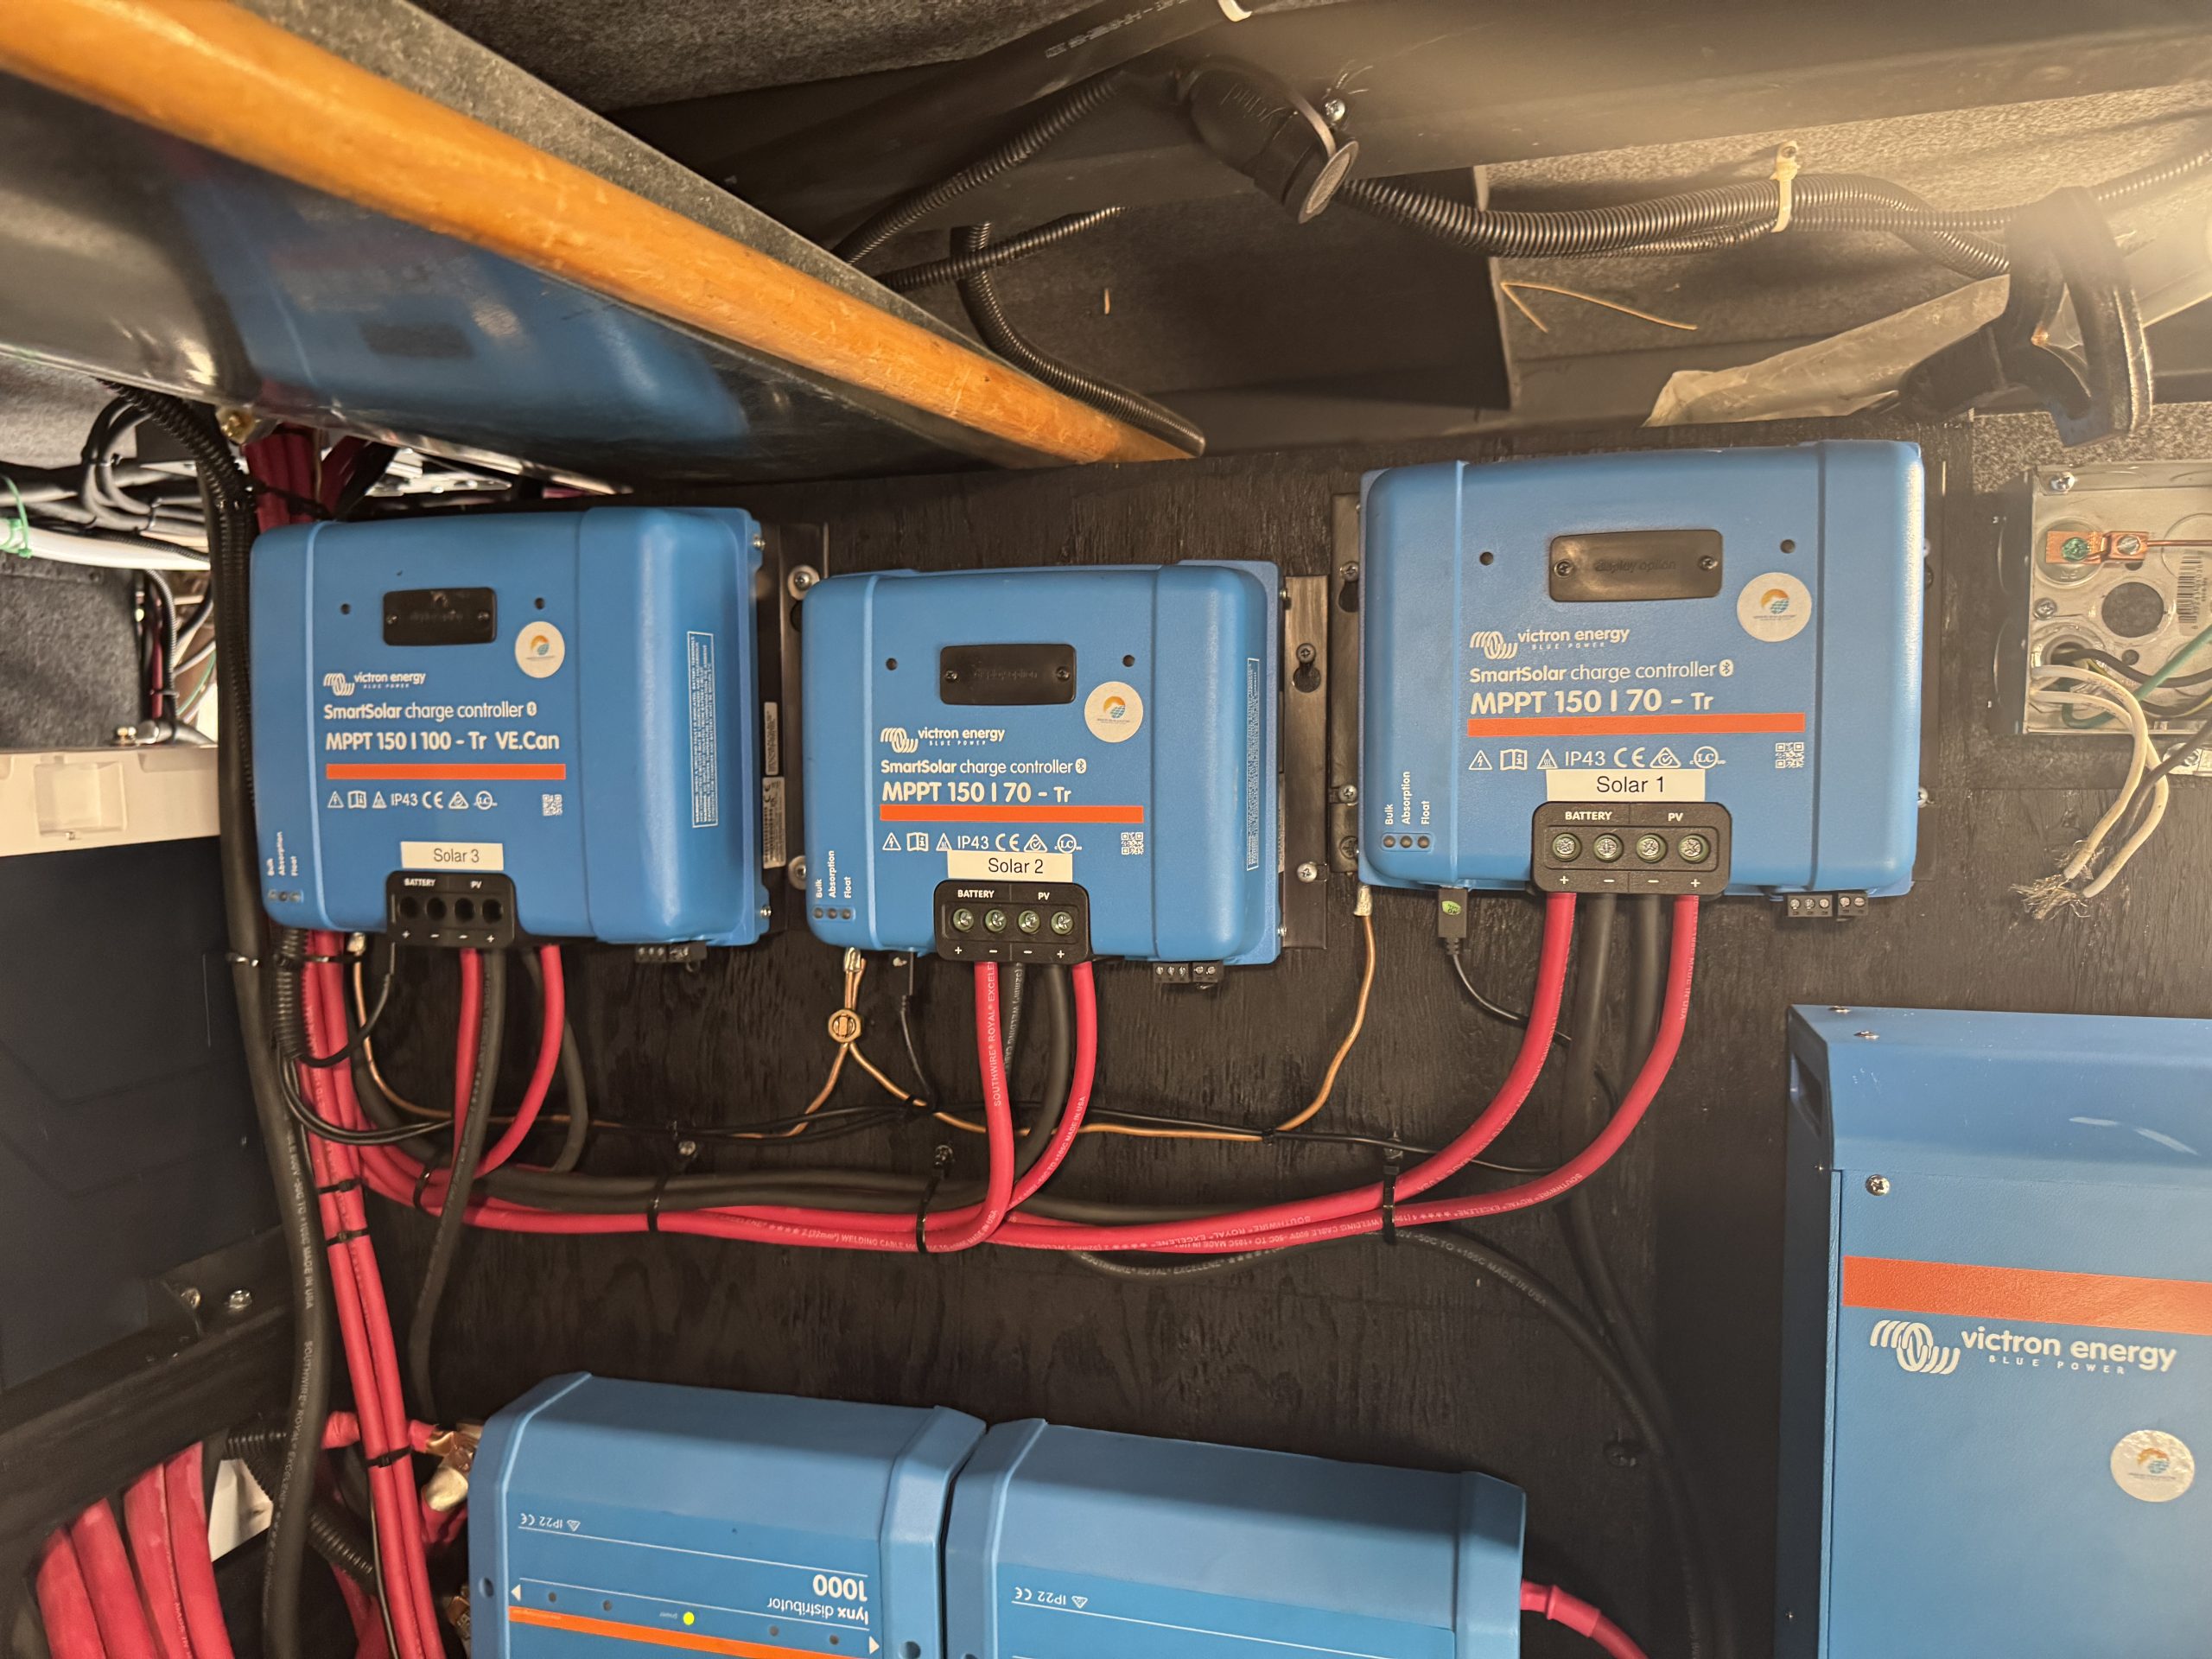
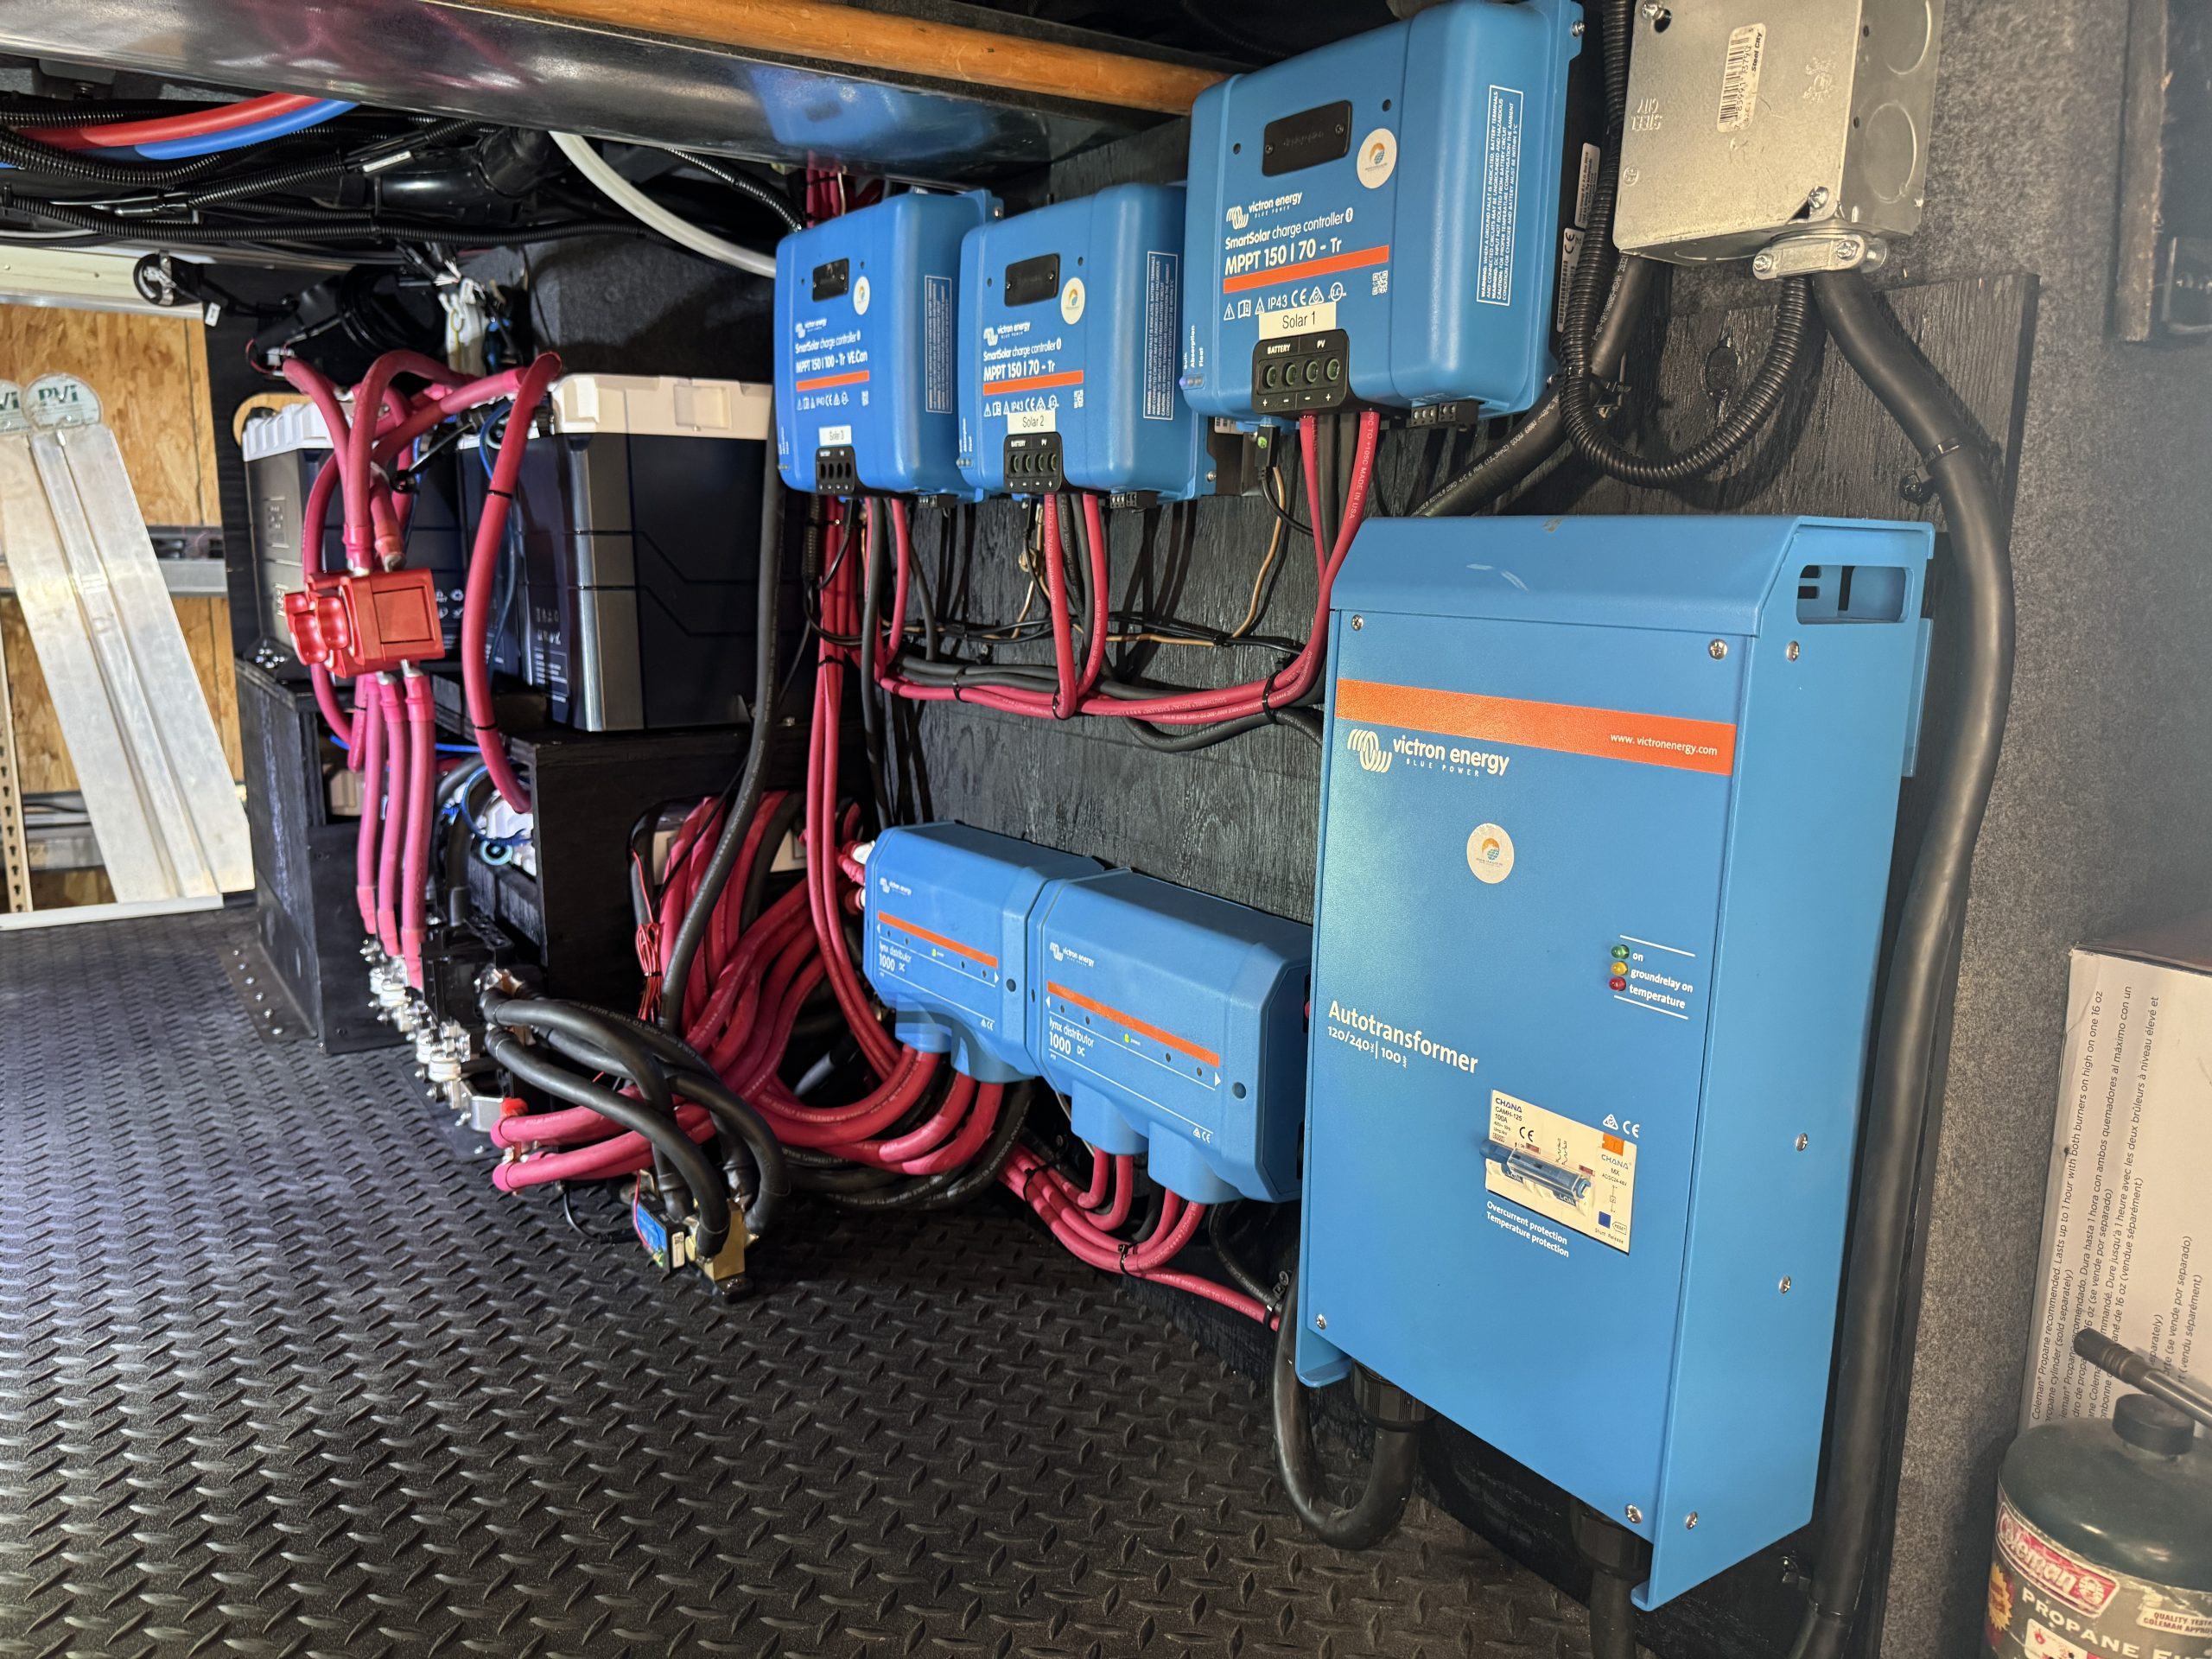
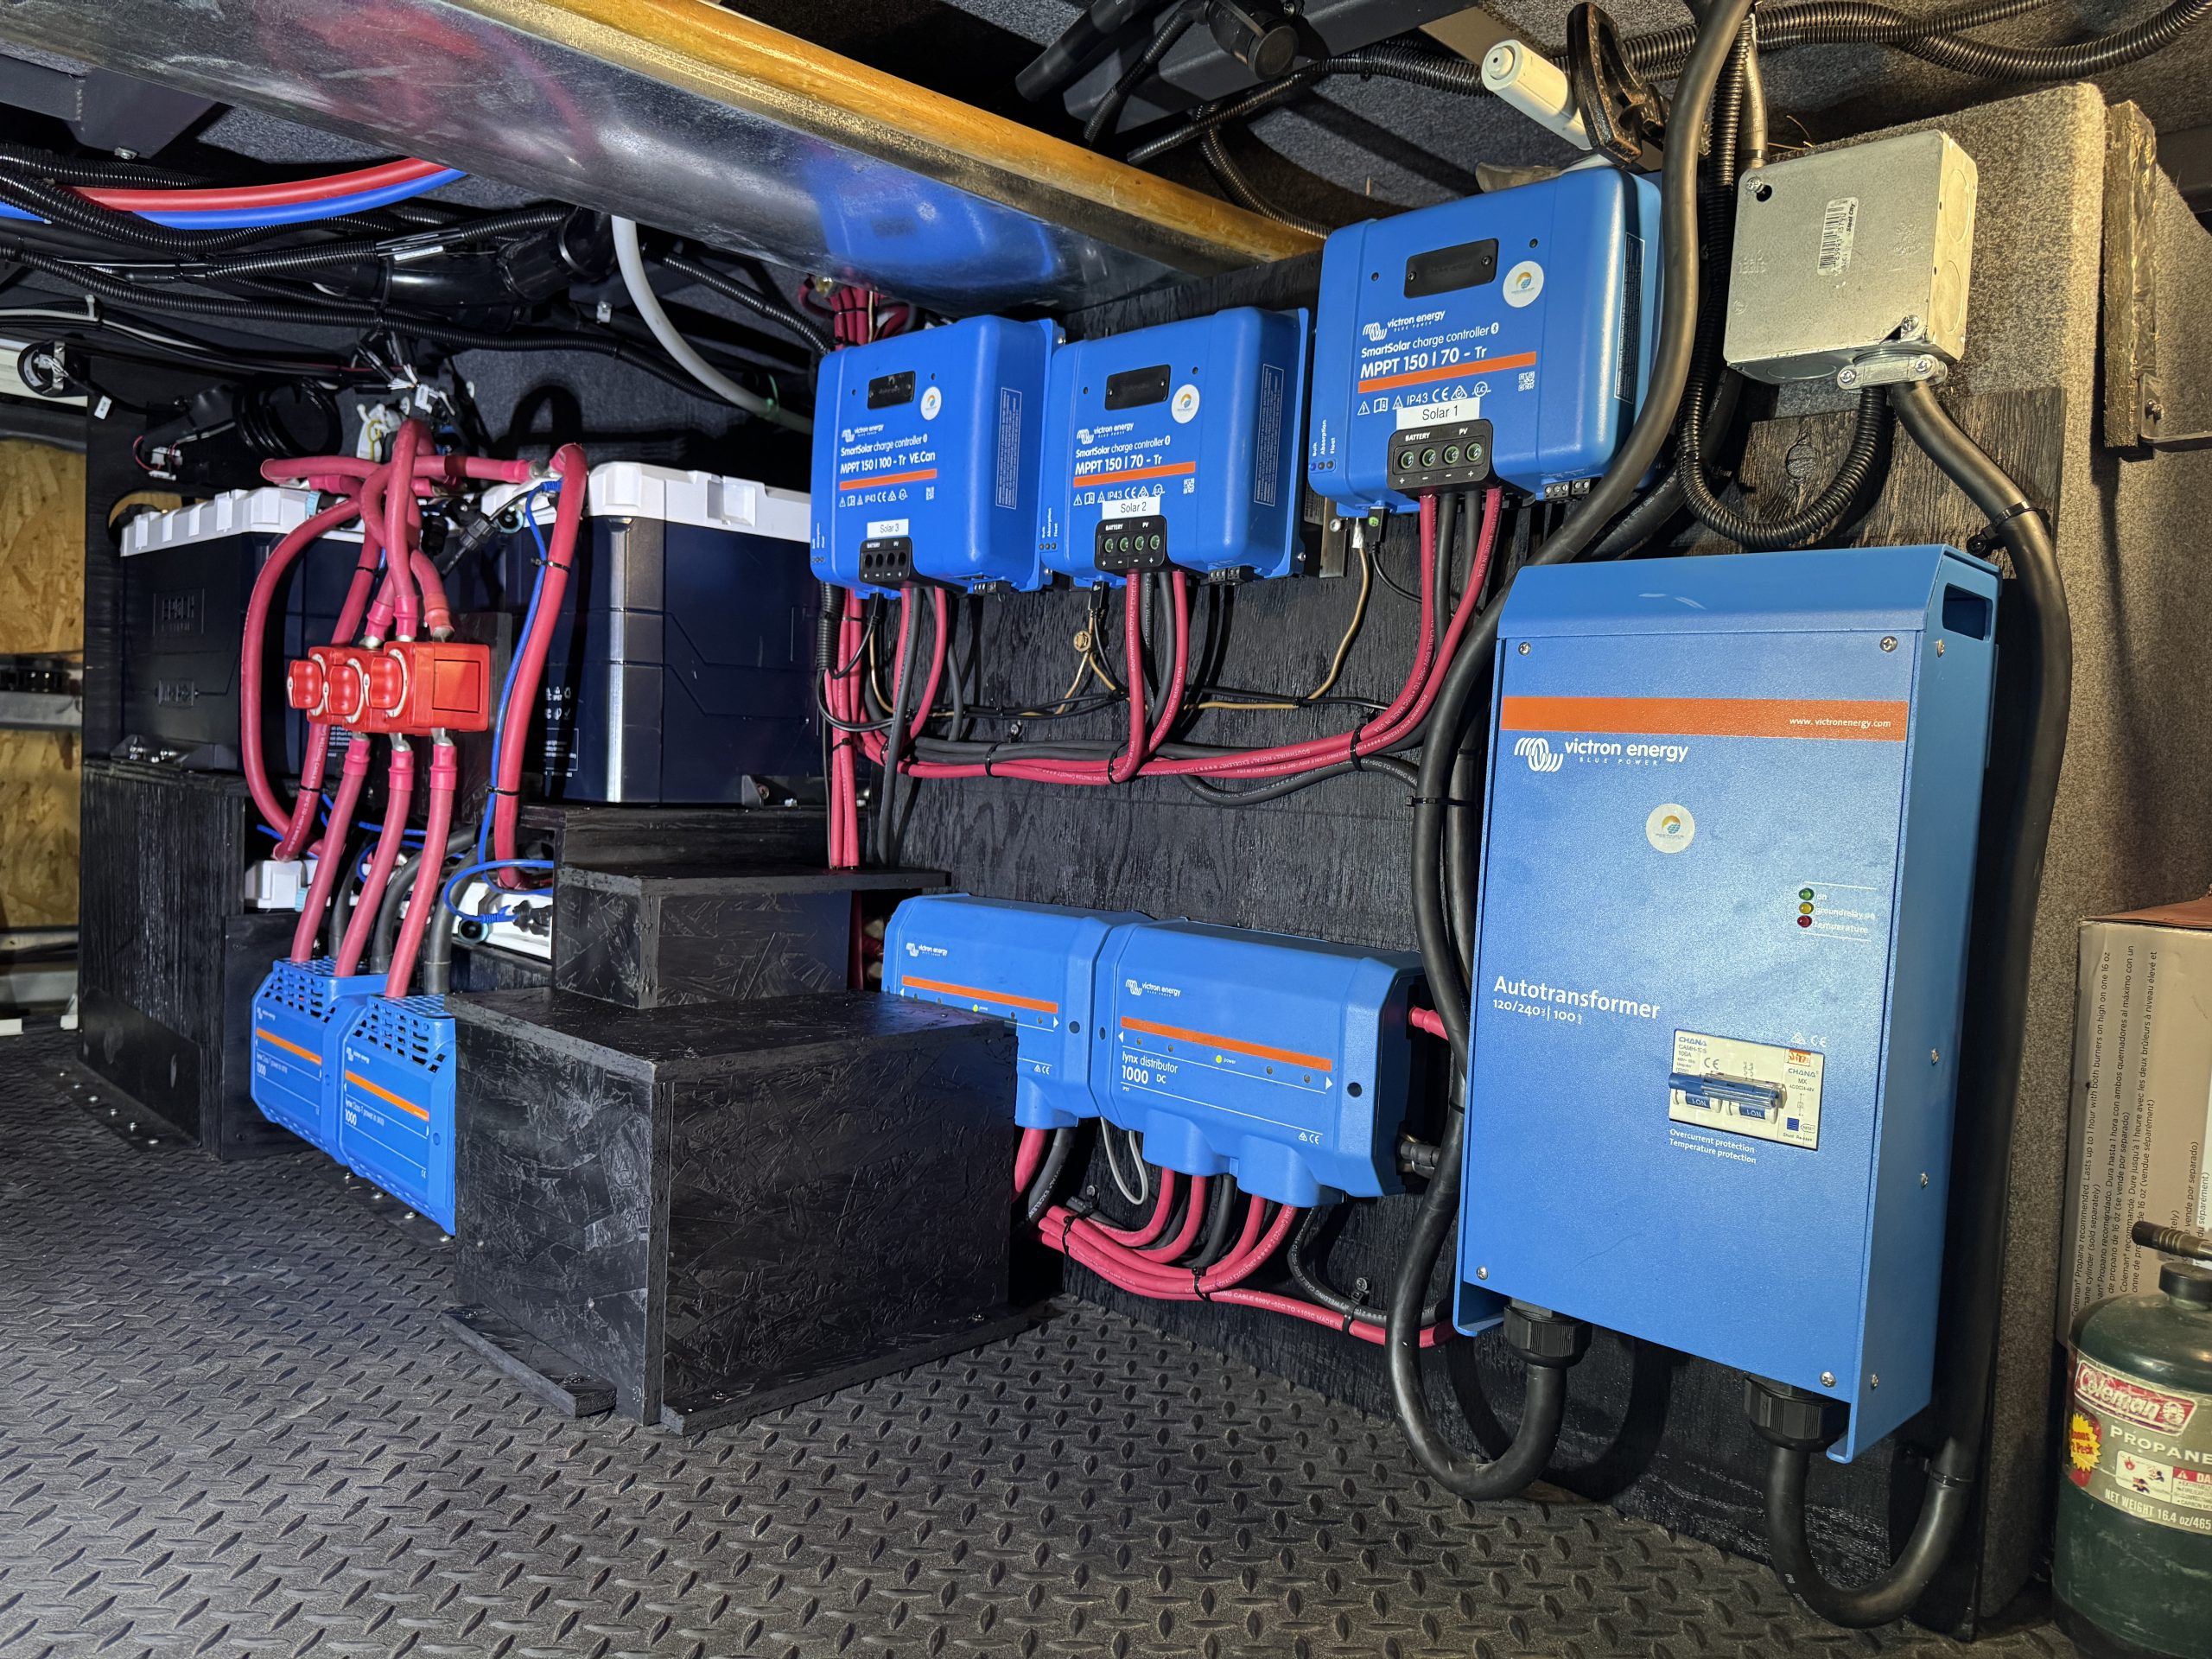
- Victron SmartSolar MPPT 150/100 Charge Controller with Bluetooth
- 2 - Victron SmartSolar MPPT 100/70 Charge Controller with Bluetooth
- Miscellaneous Victron VE.Direct and RJ45 Cables
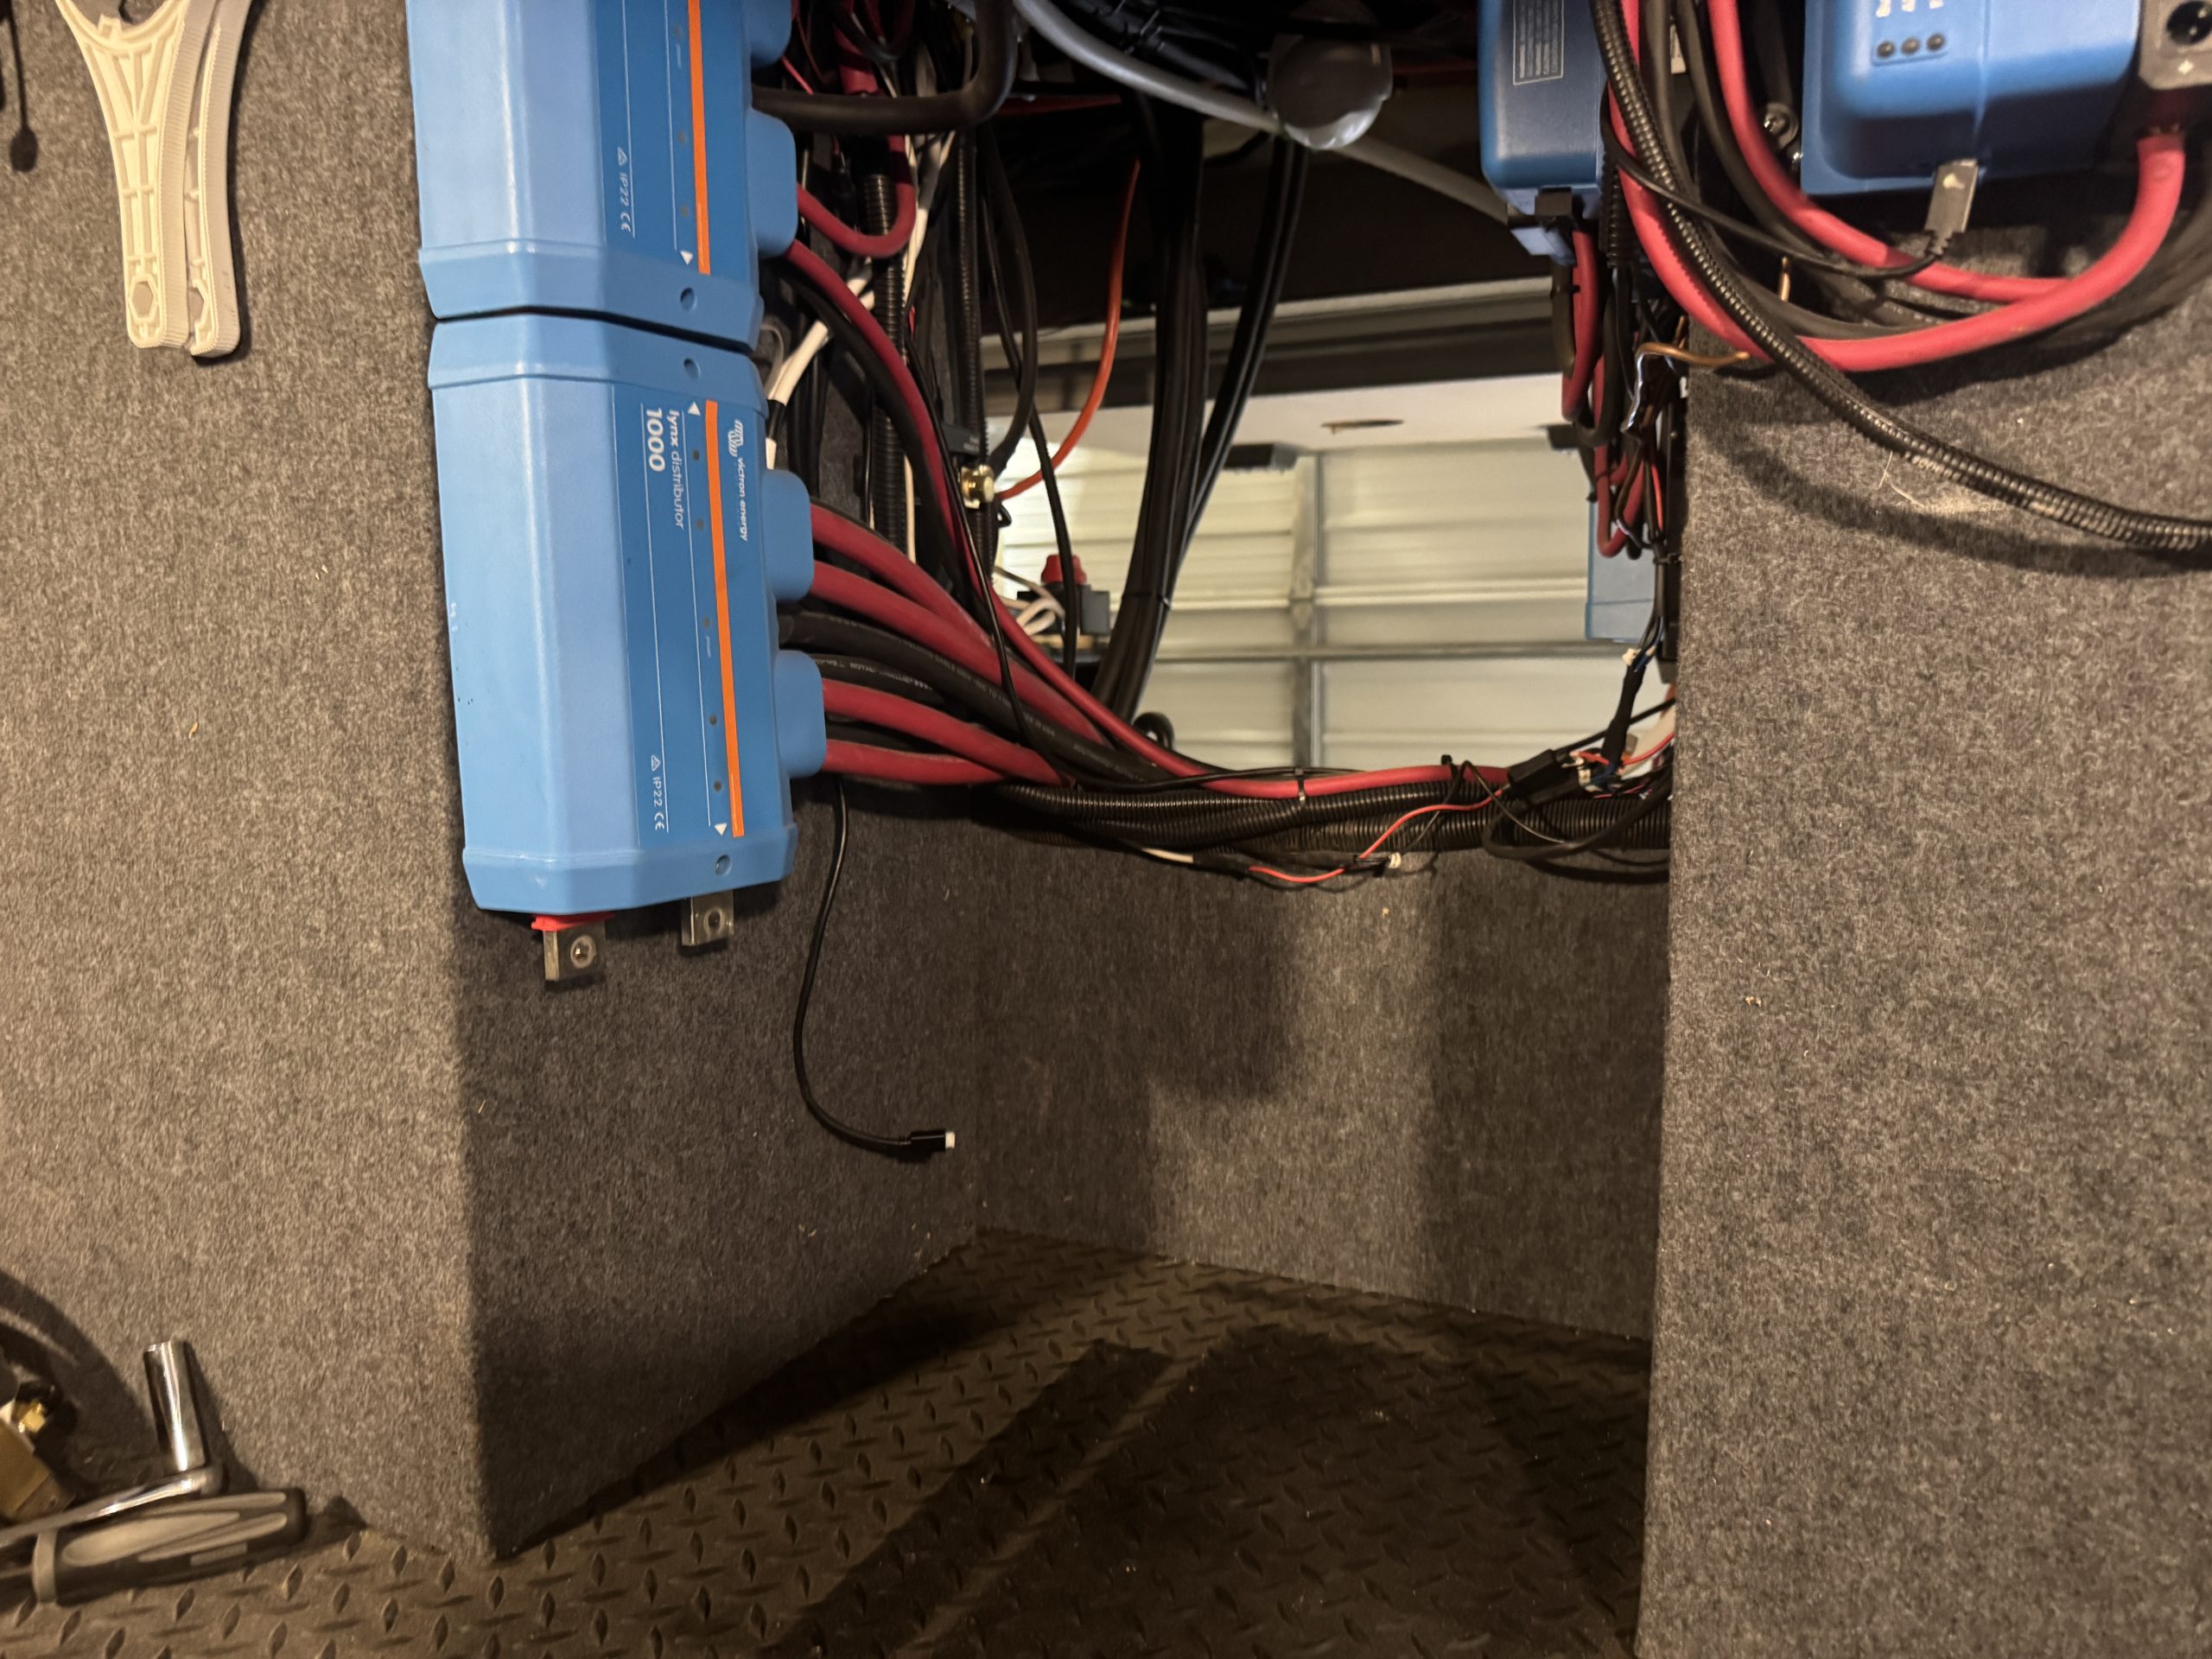
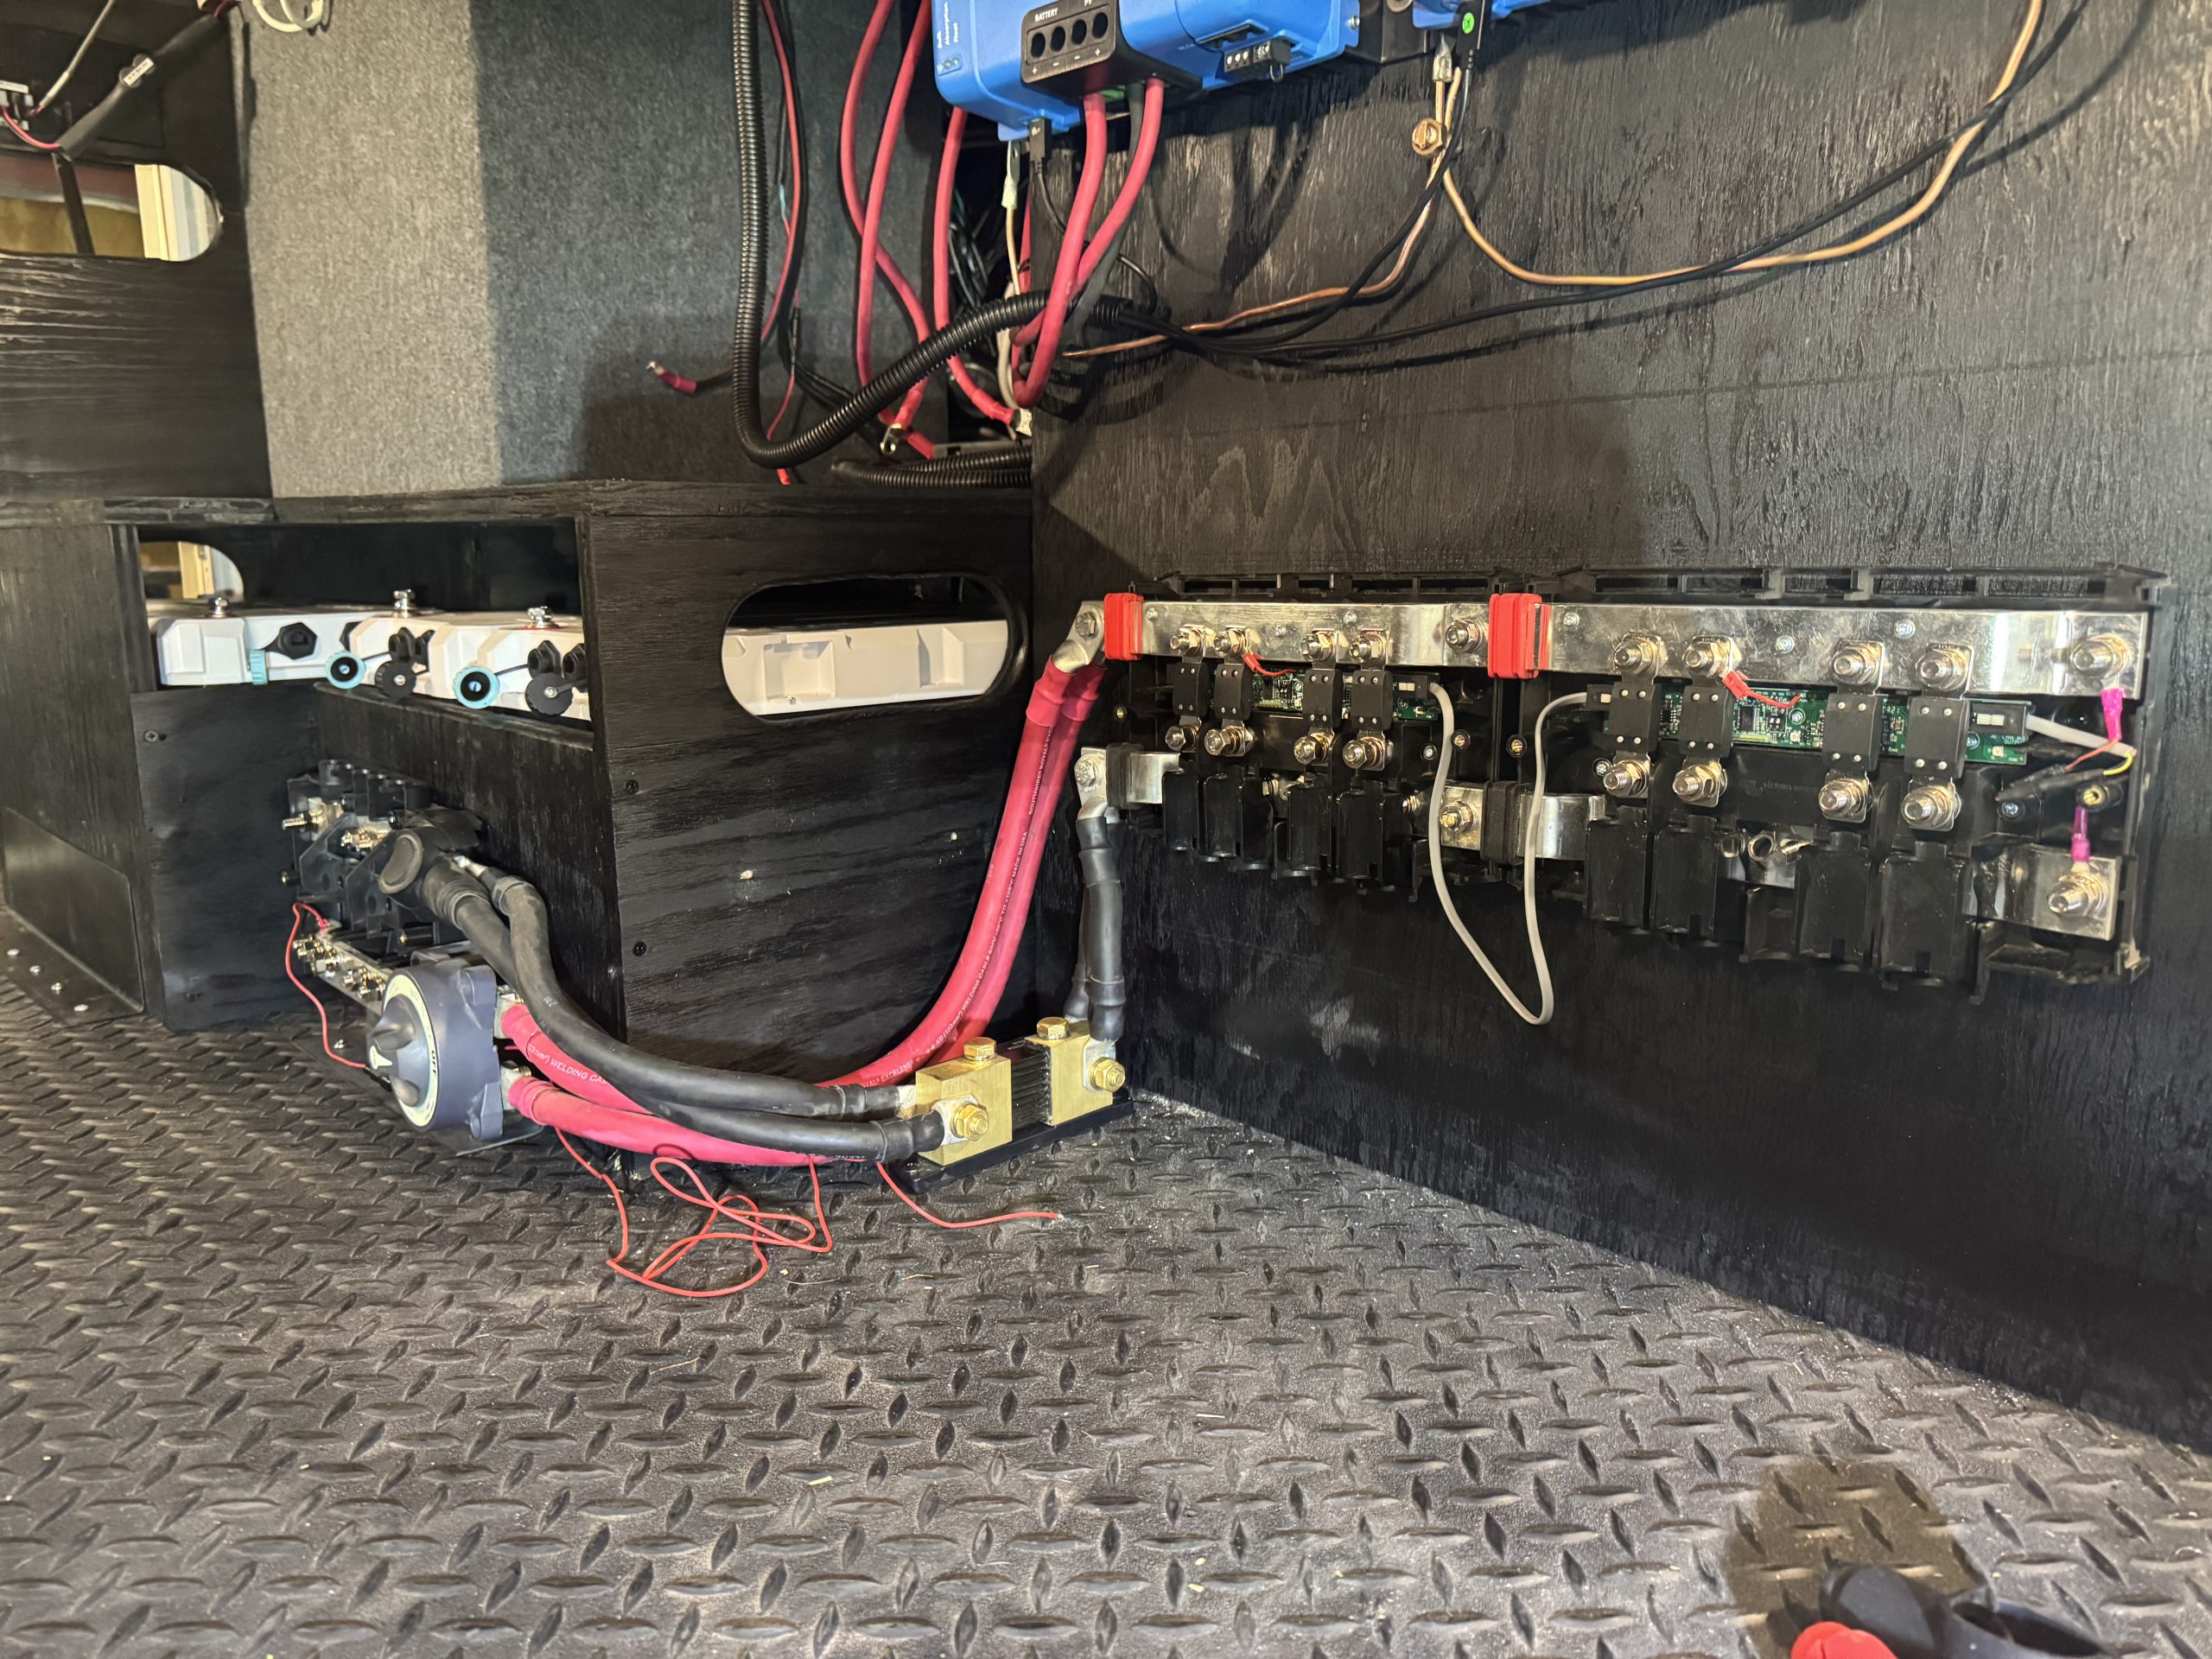
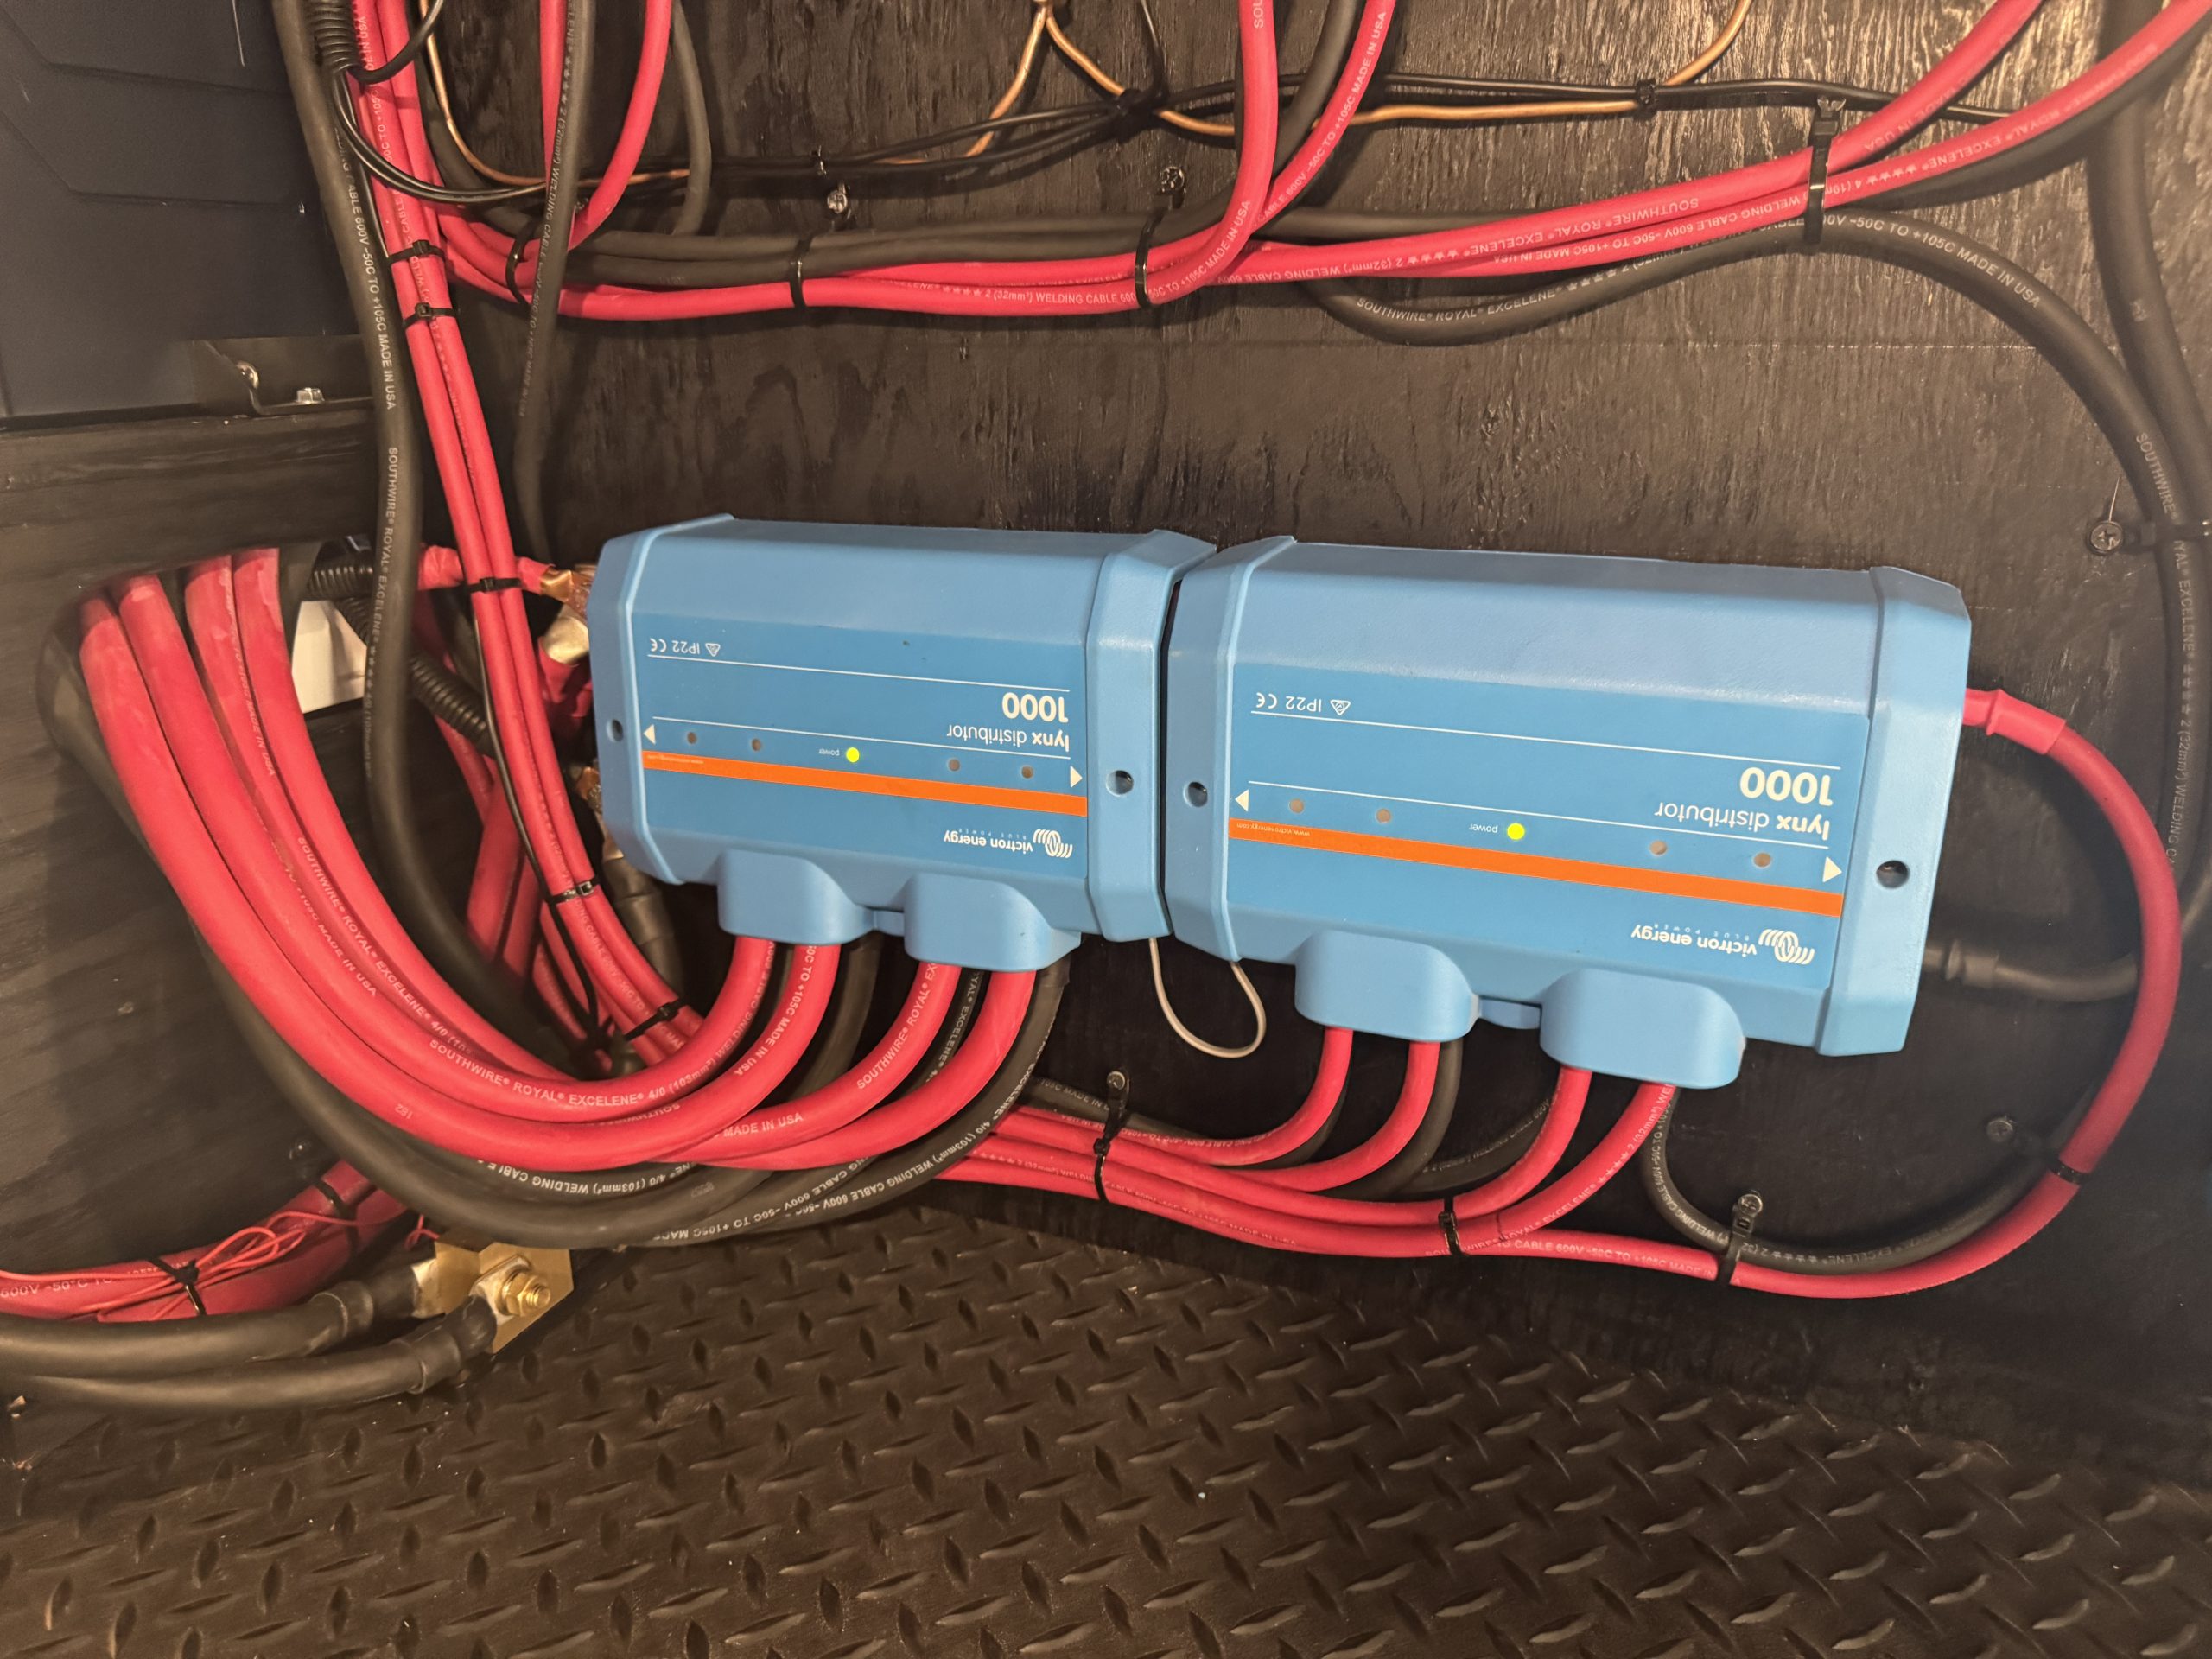
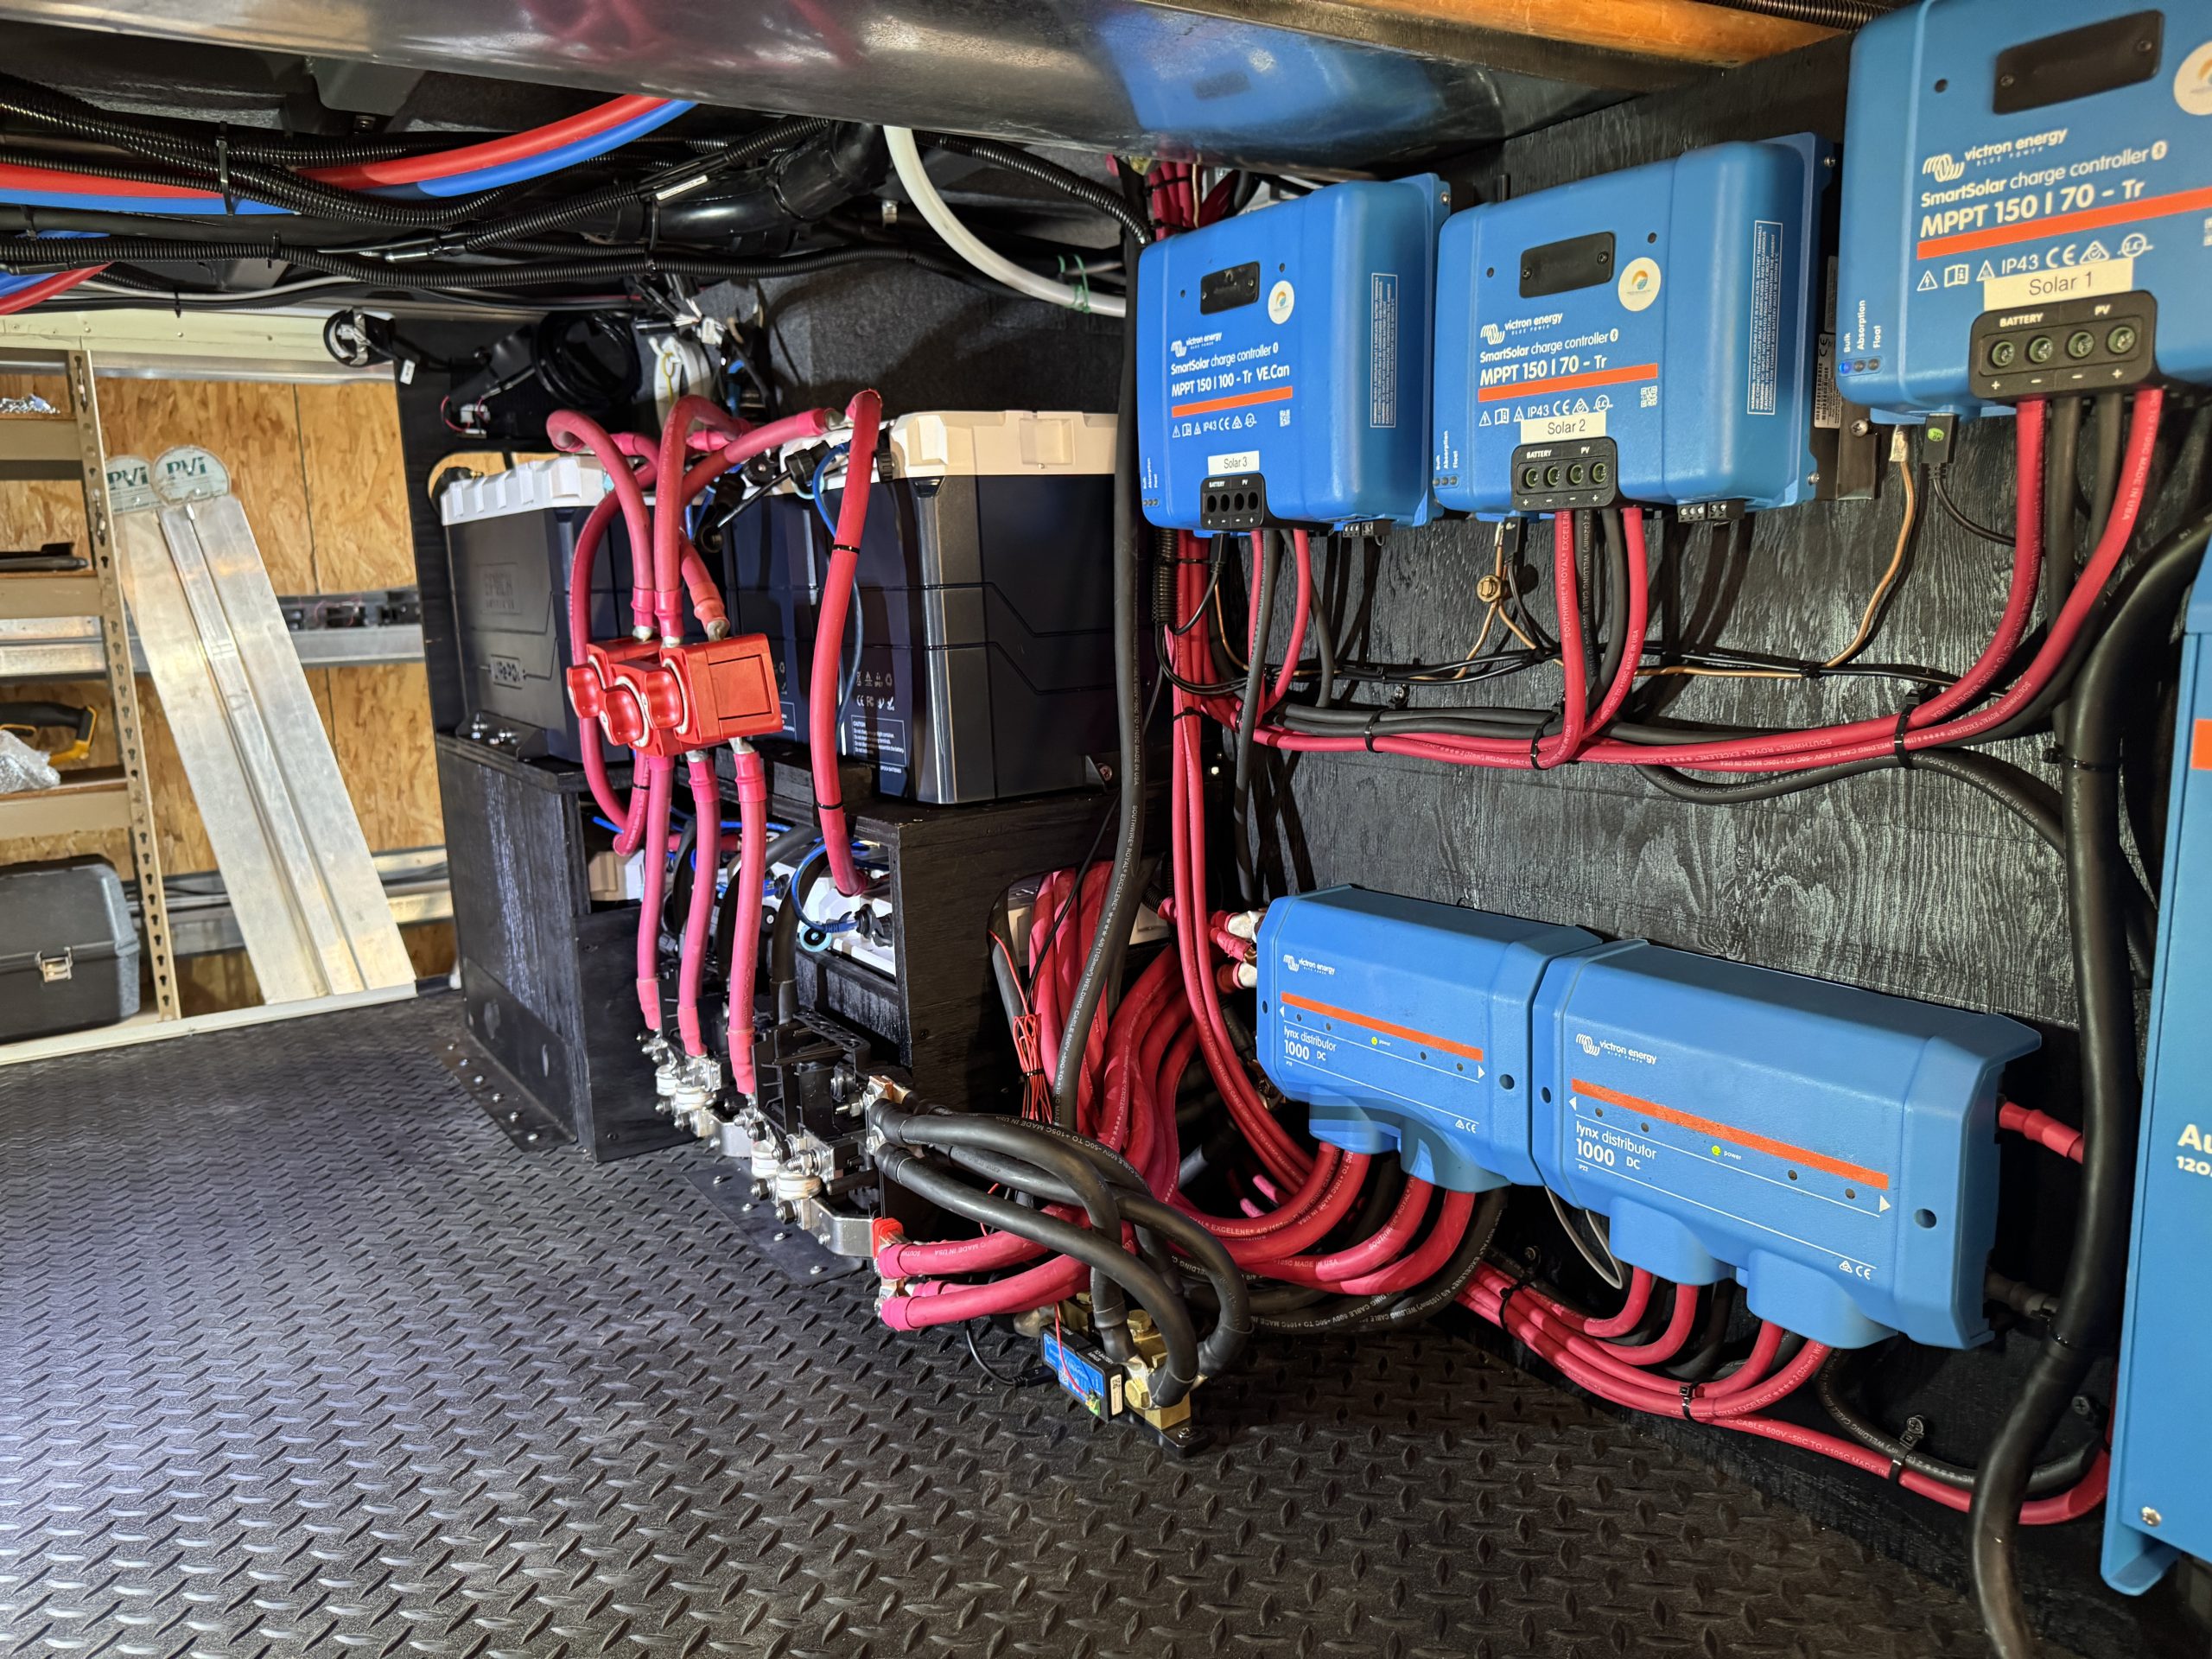
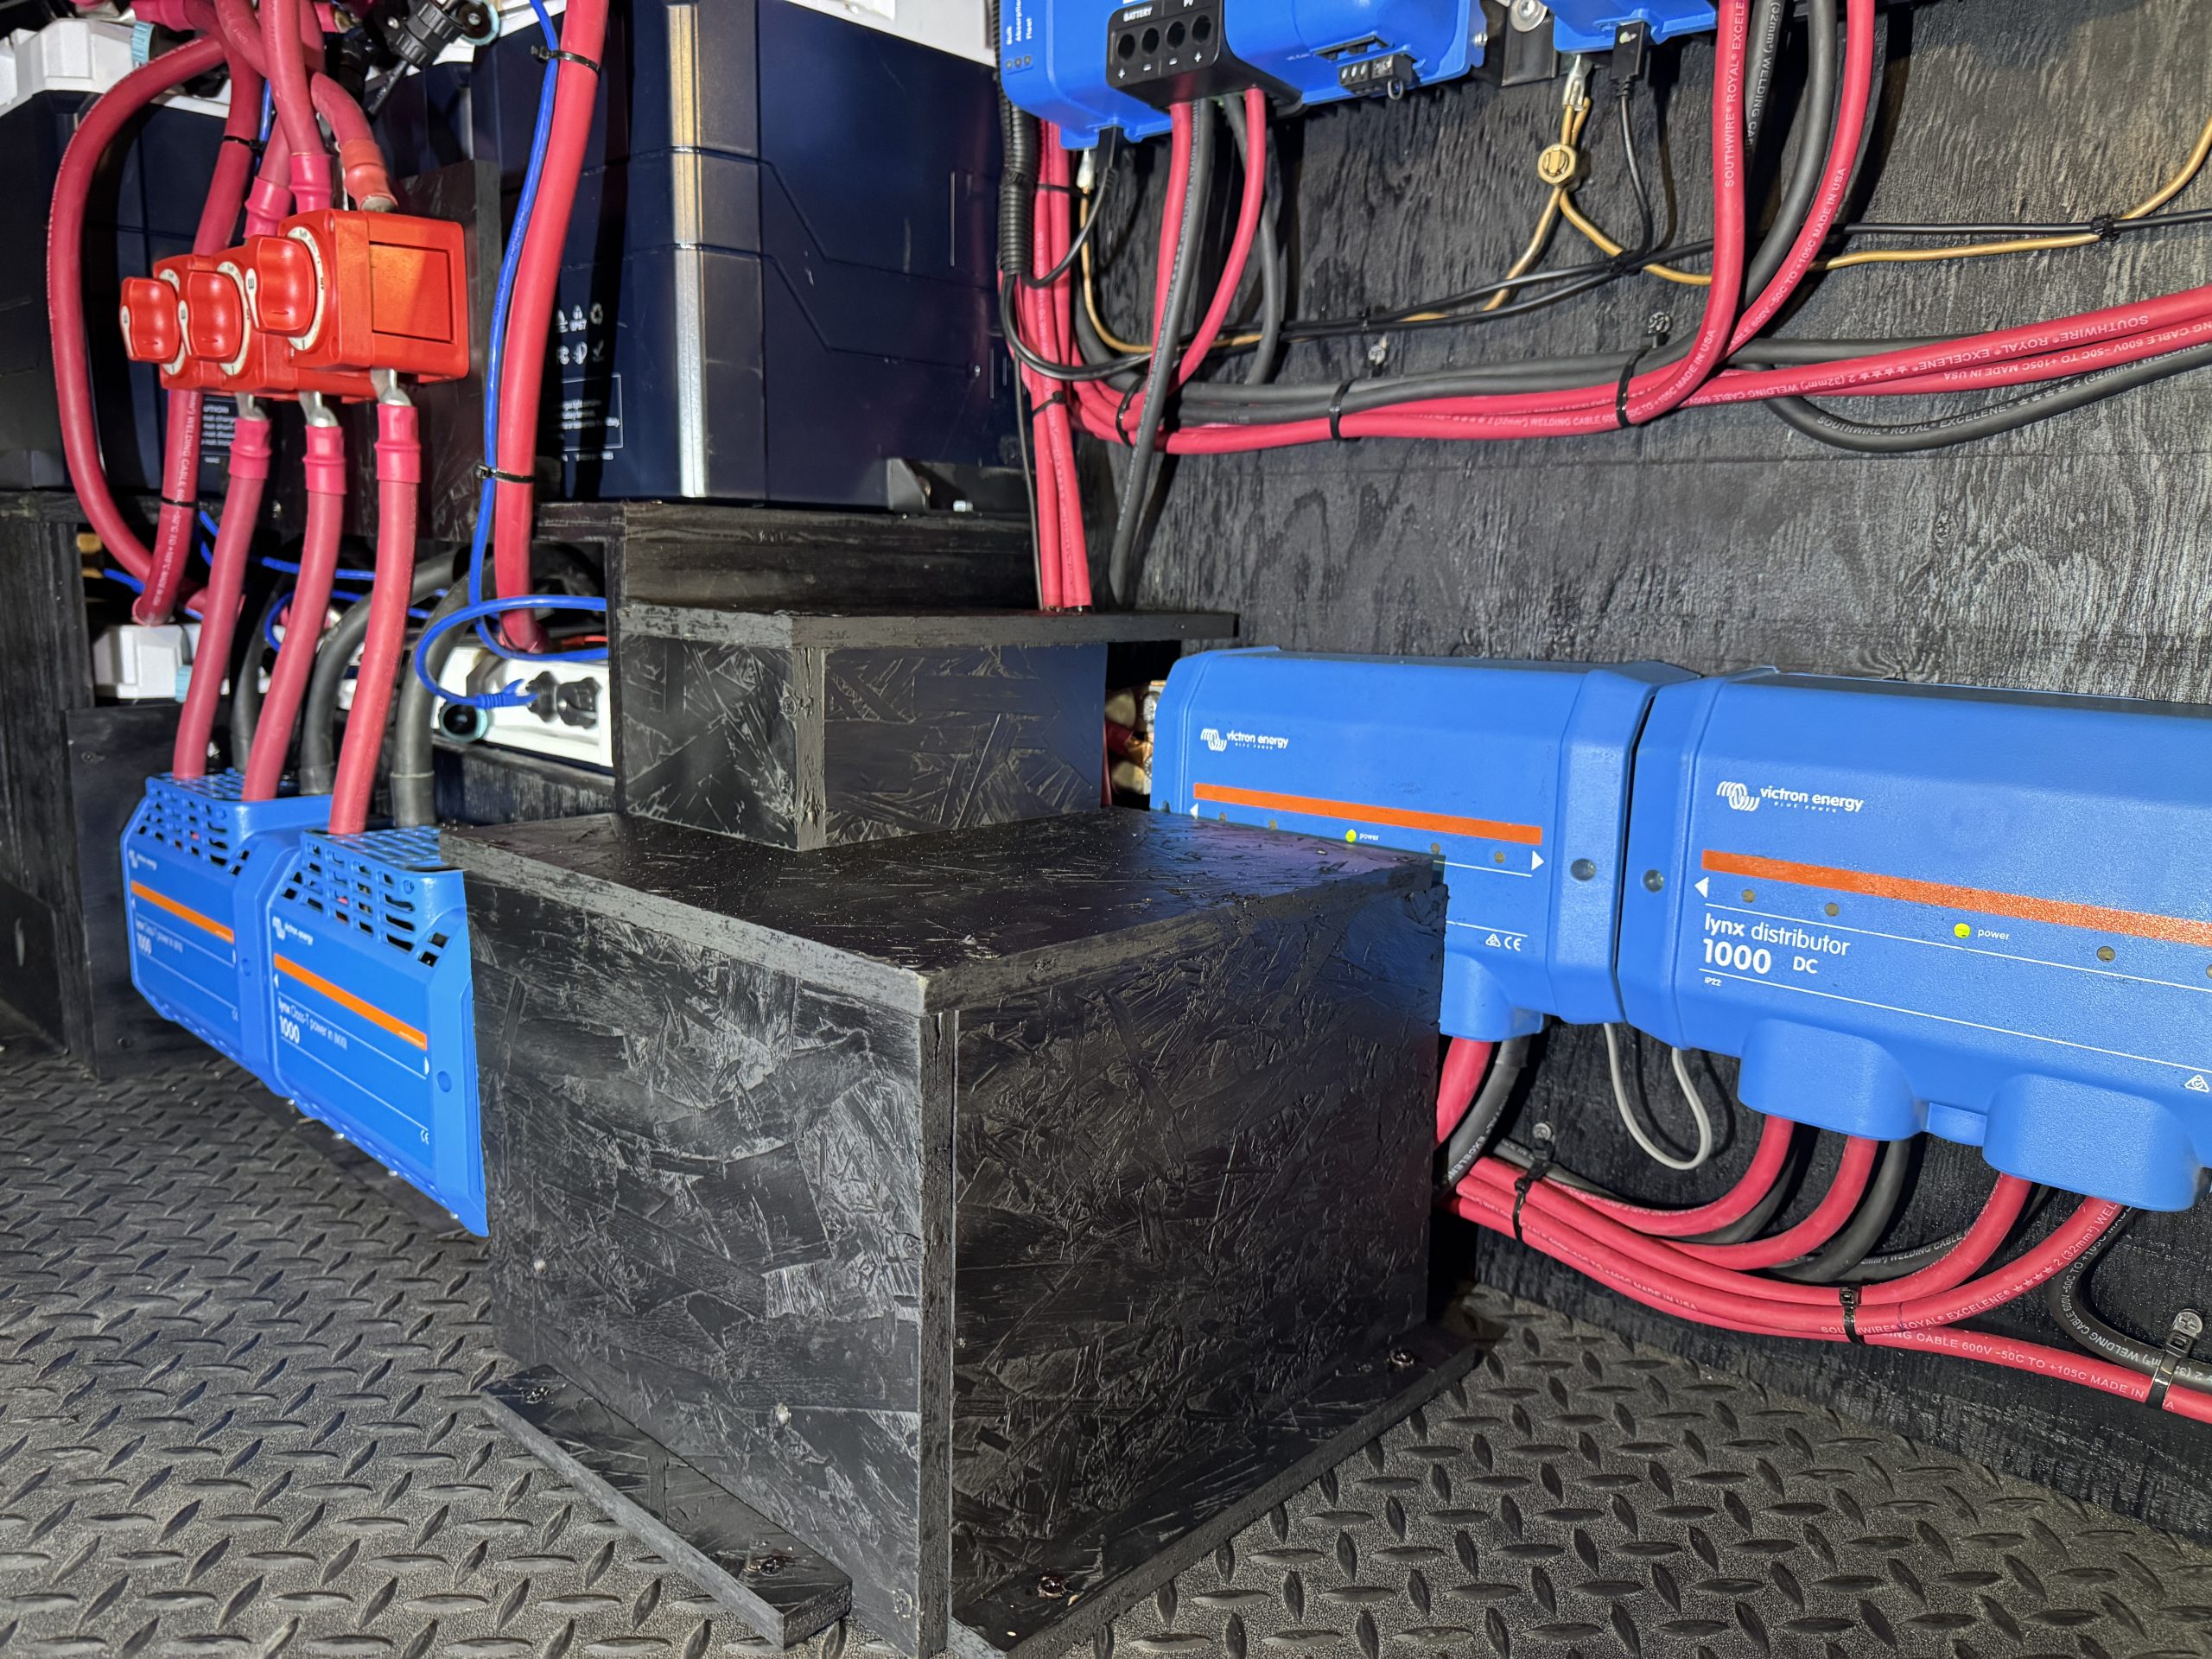
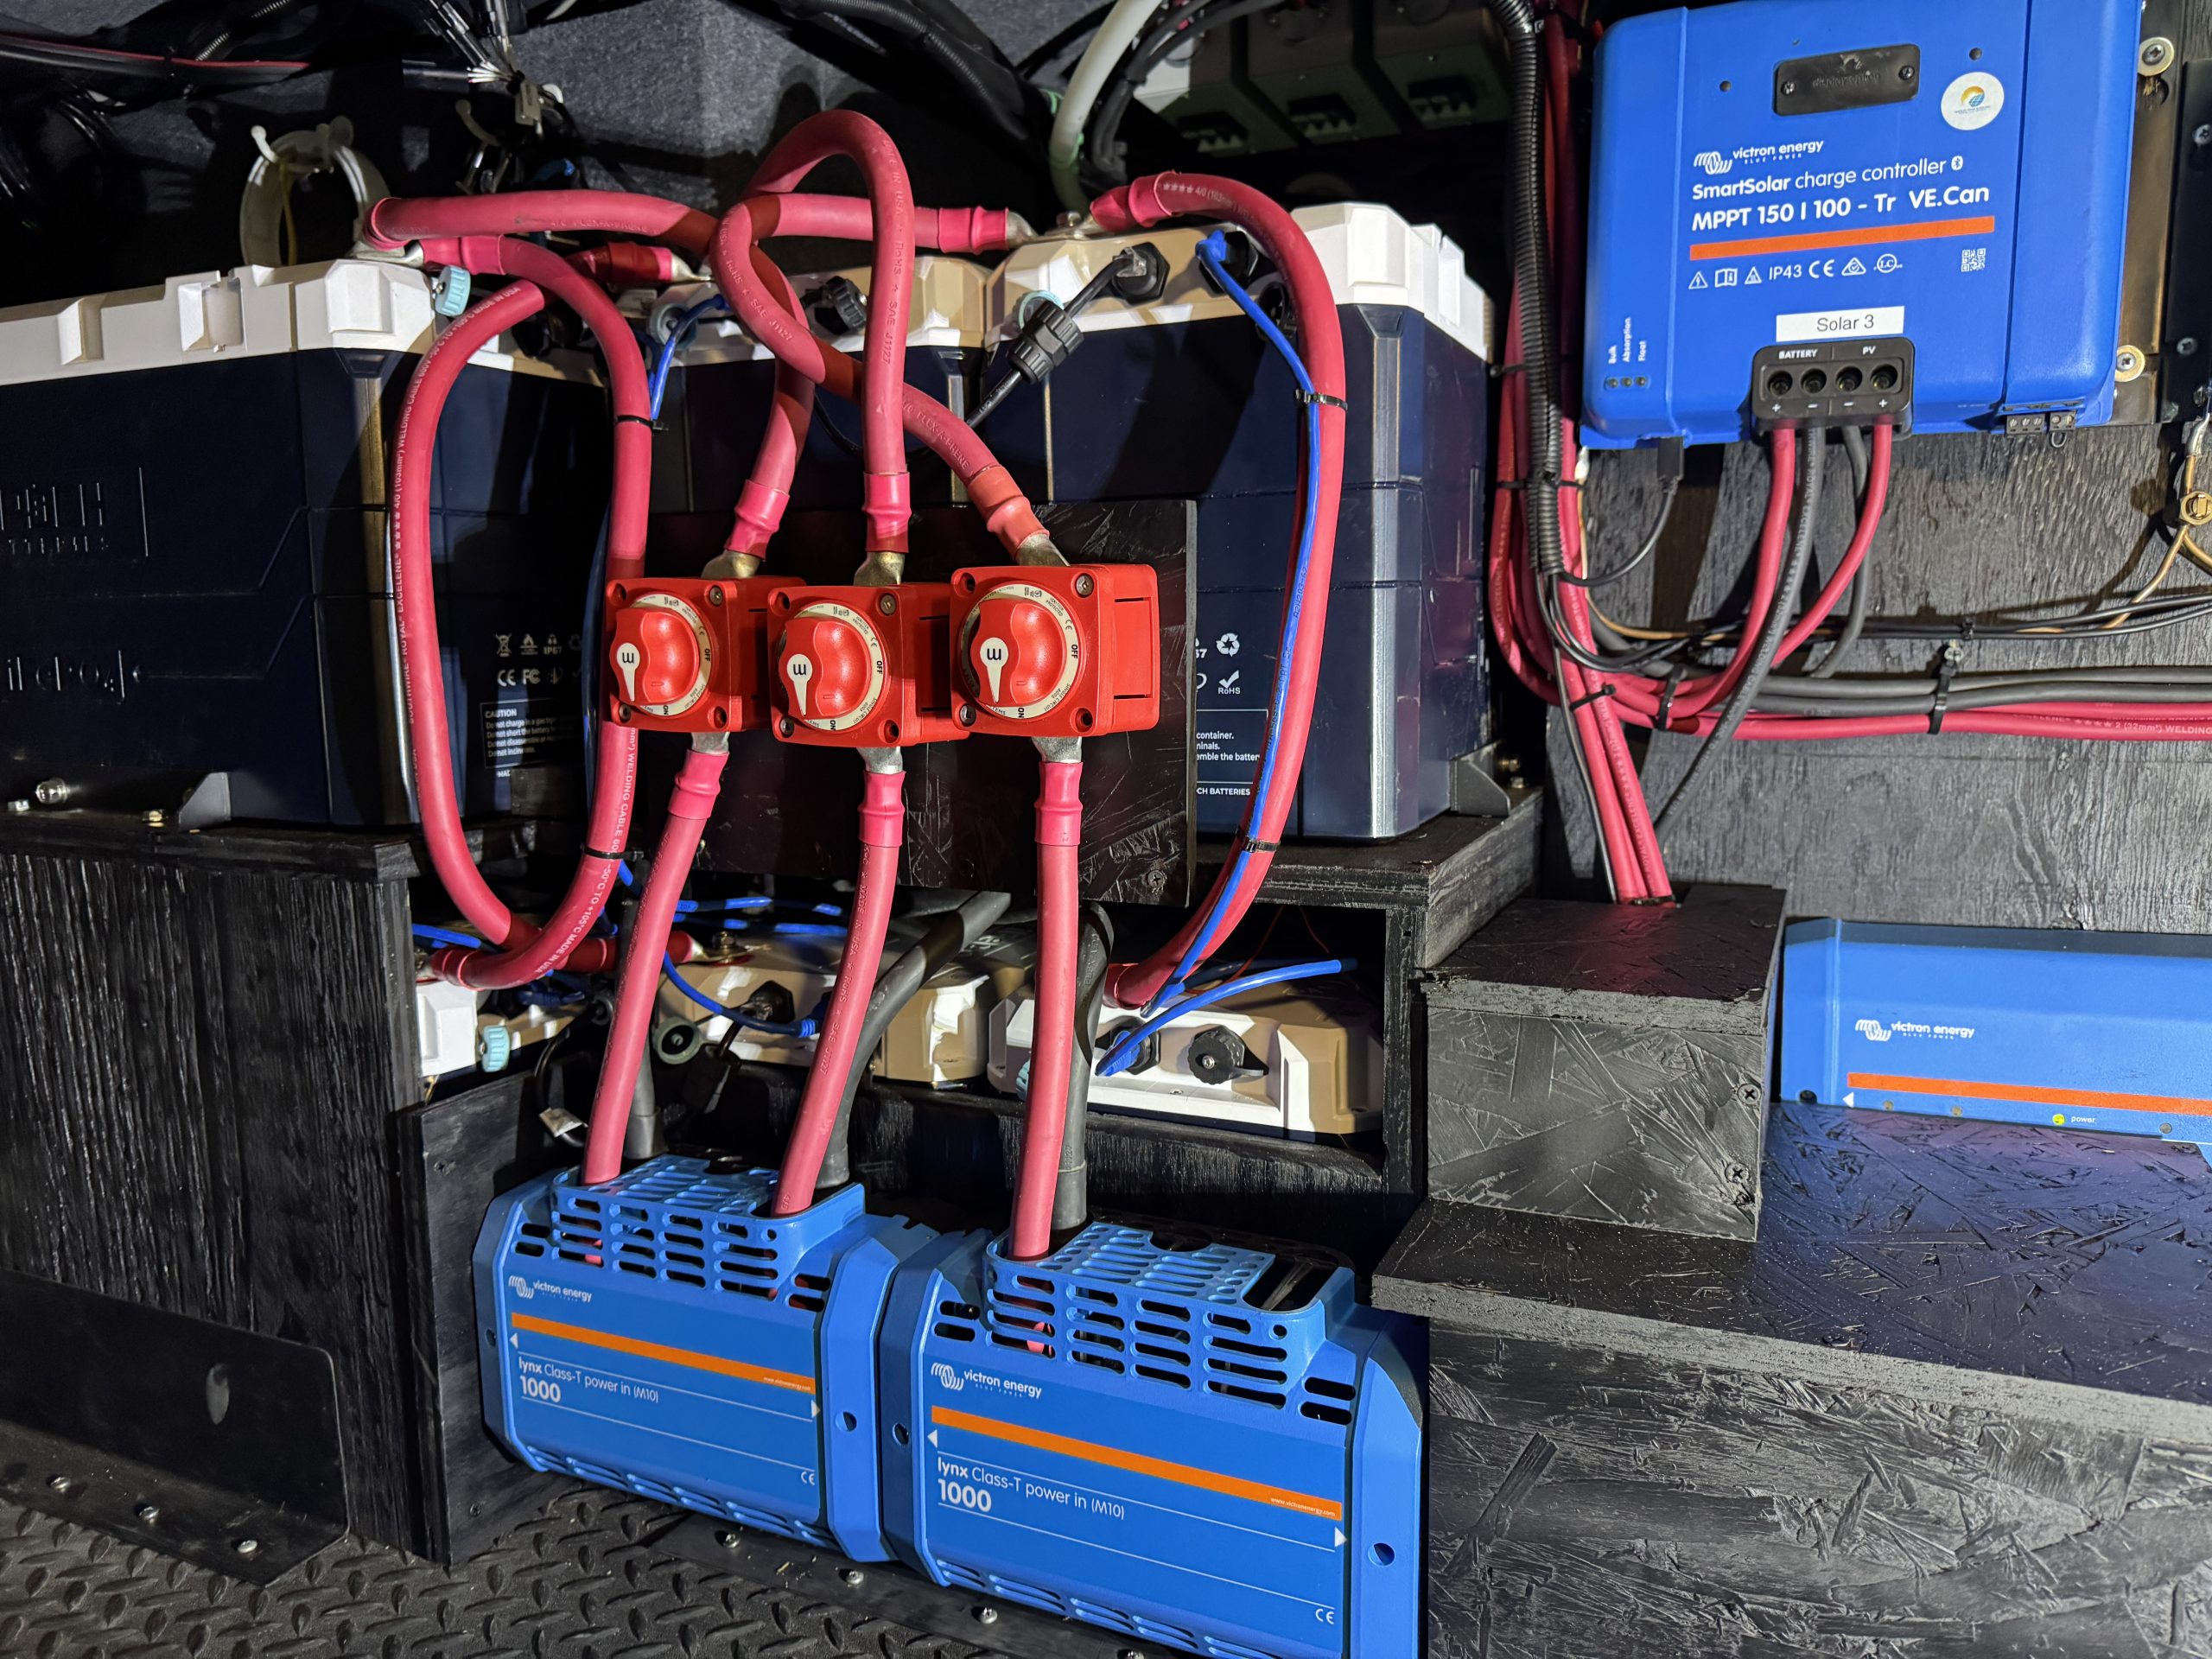
- 2 - Victron Lynx Distributors
- Victron 32 V MEGA-Fuses for 12 Volt and 24 Volt Systems (400, 200 & 125 Amp)
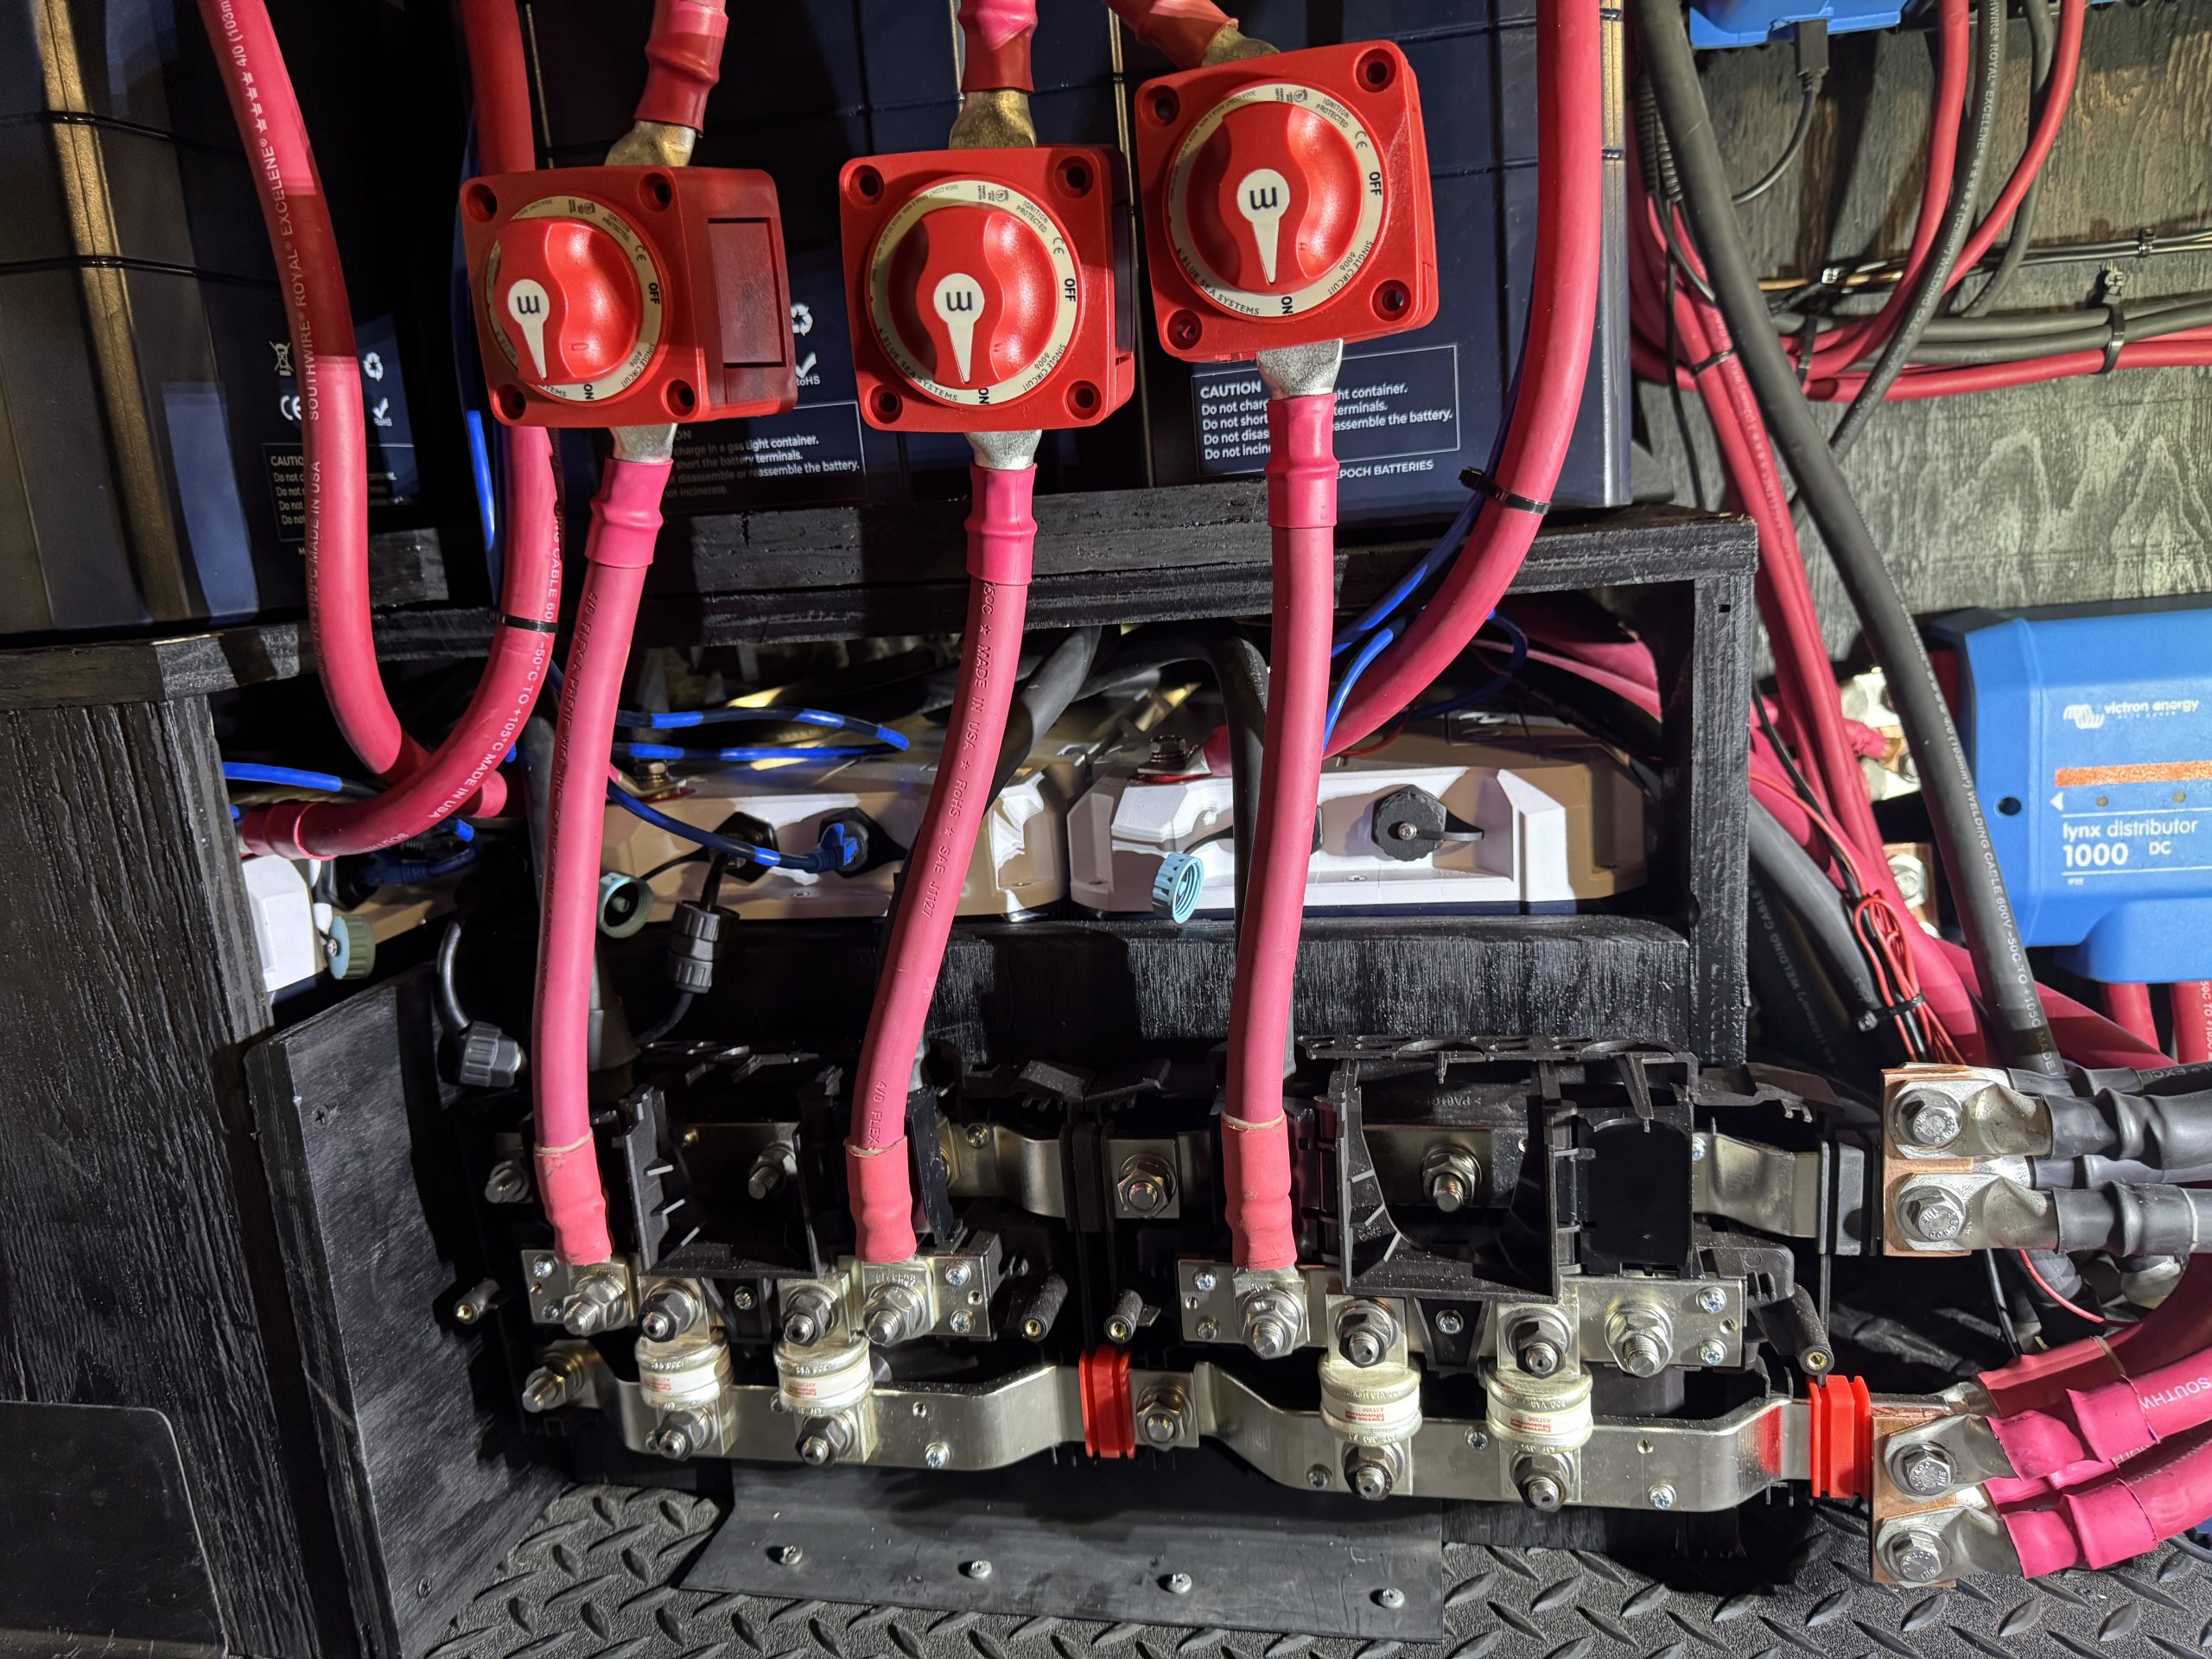
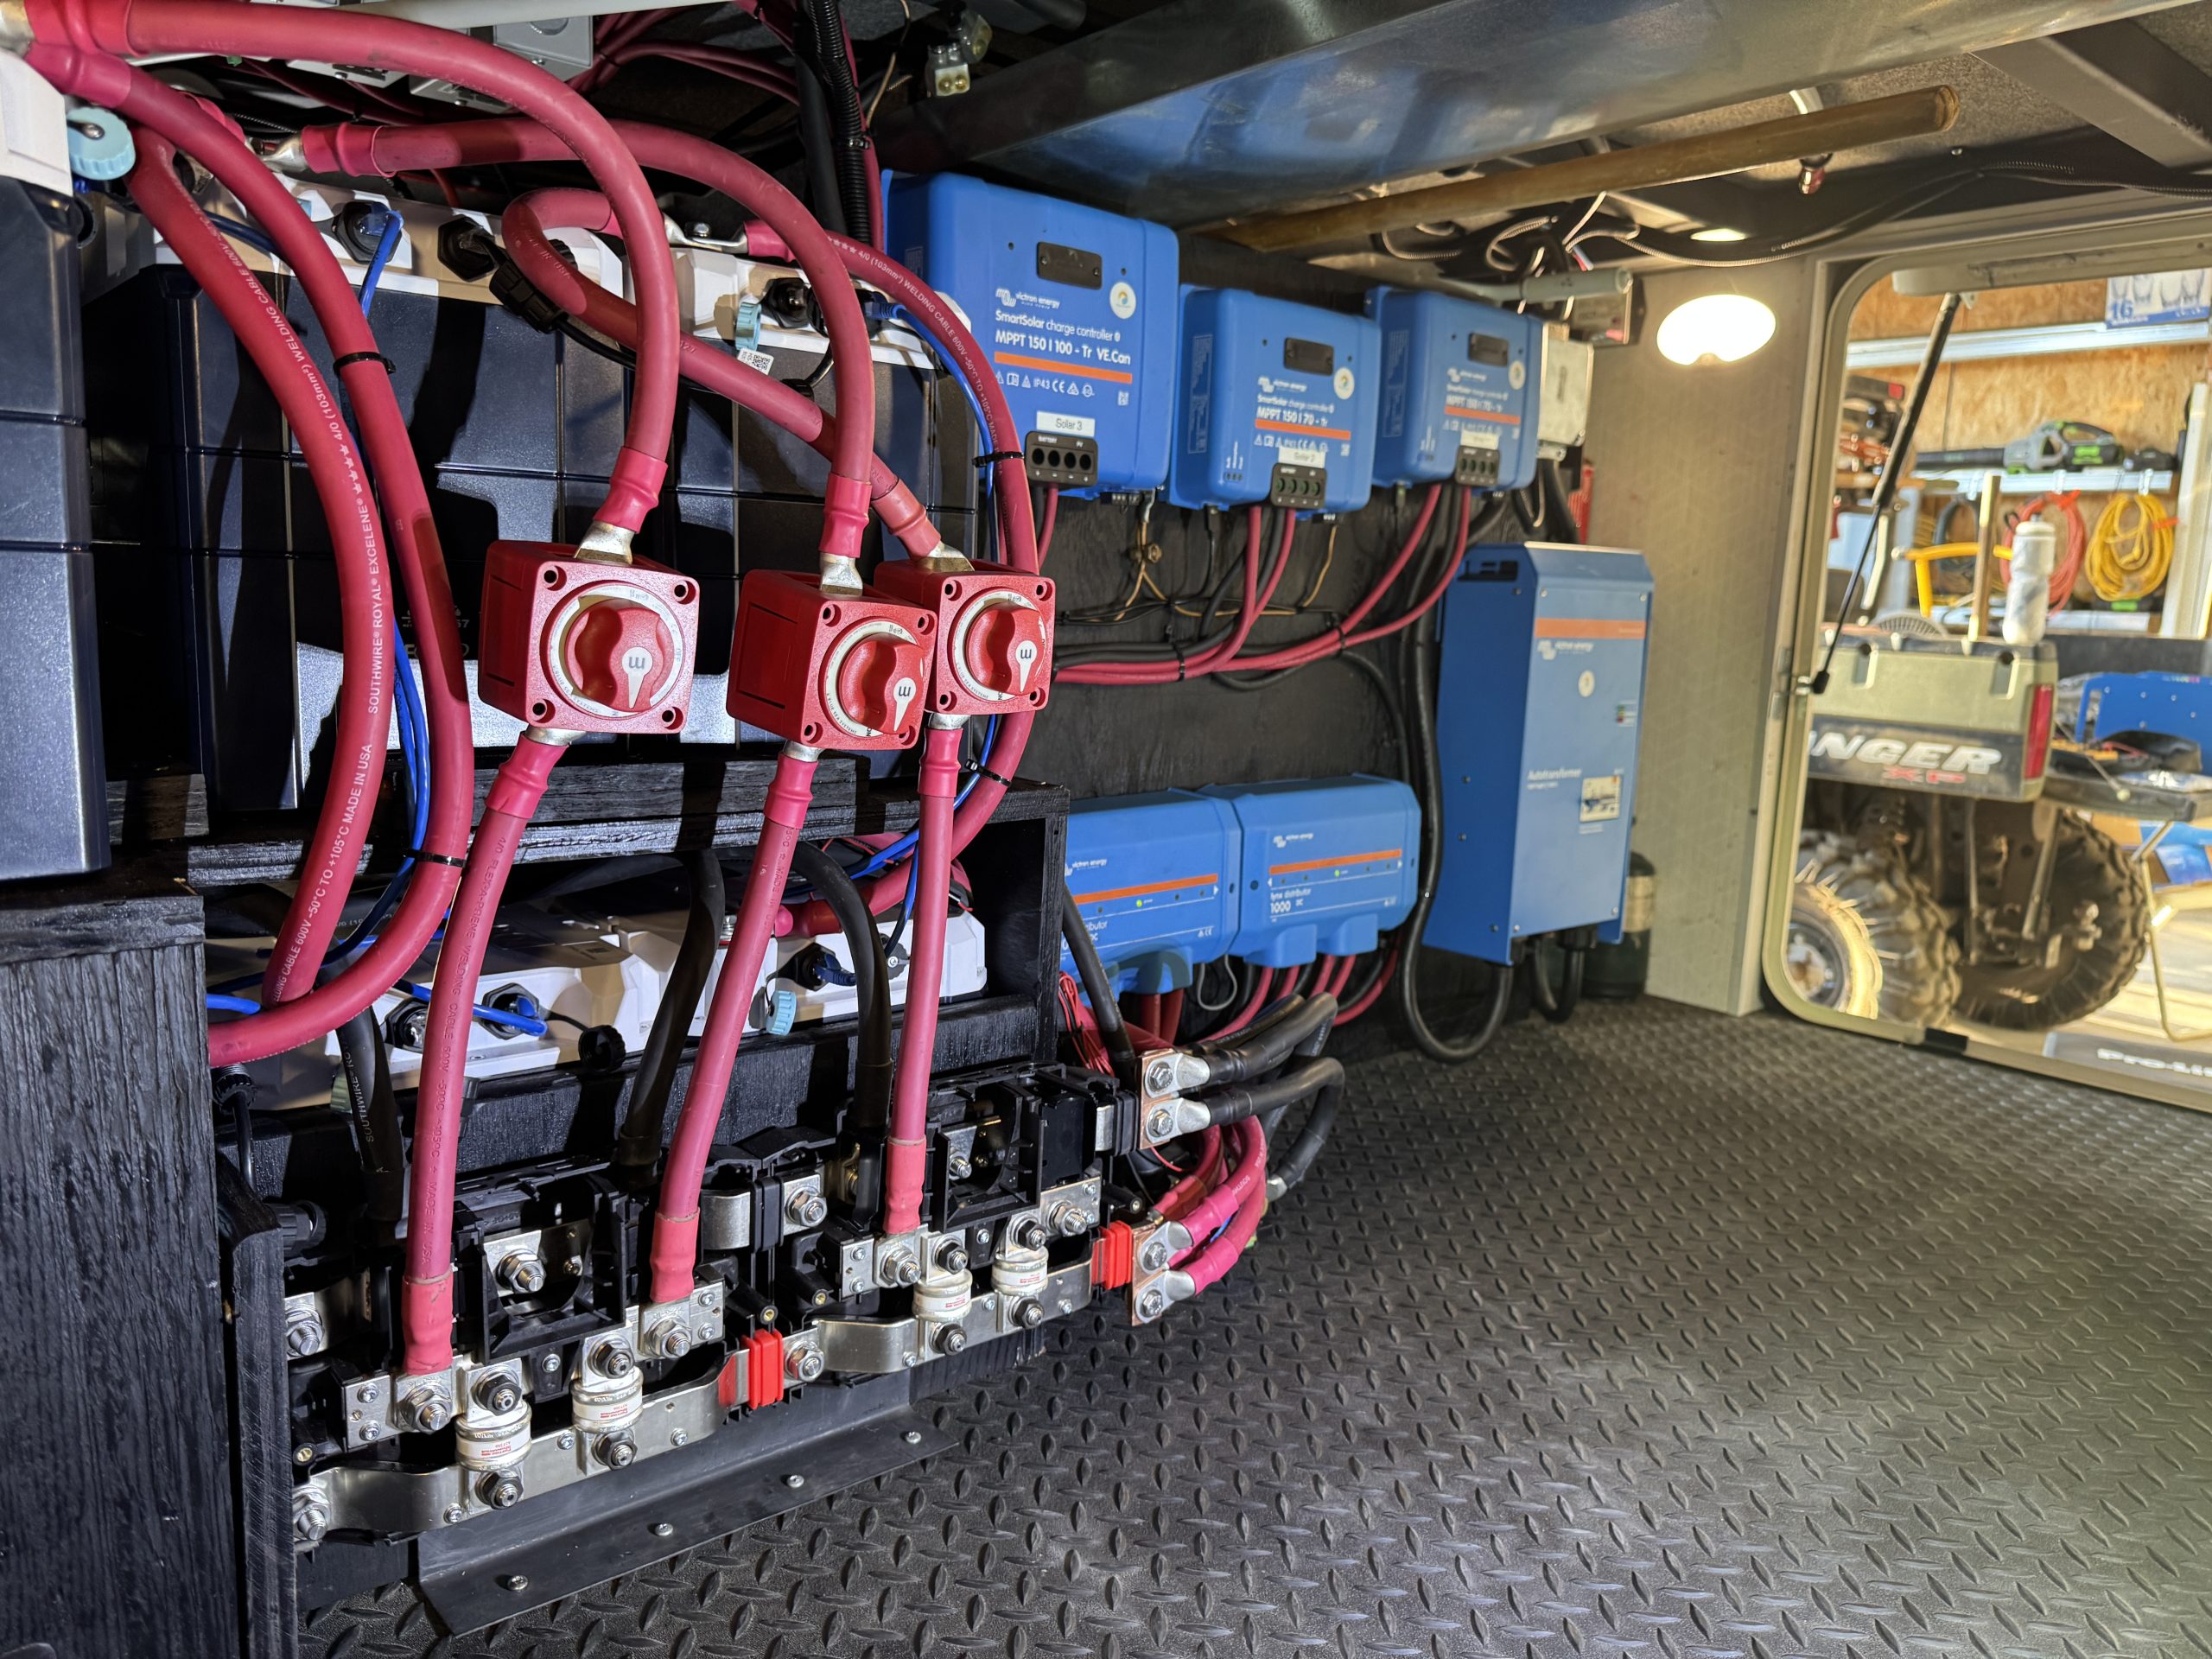
- 2 - Victron Class T Lynx Power Ins with 350 amp Class T Fuses
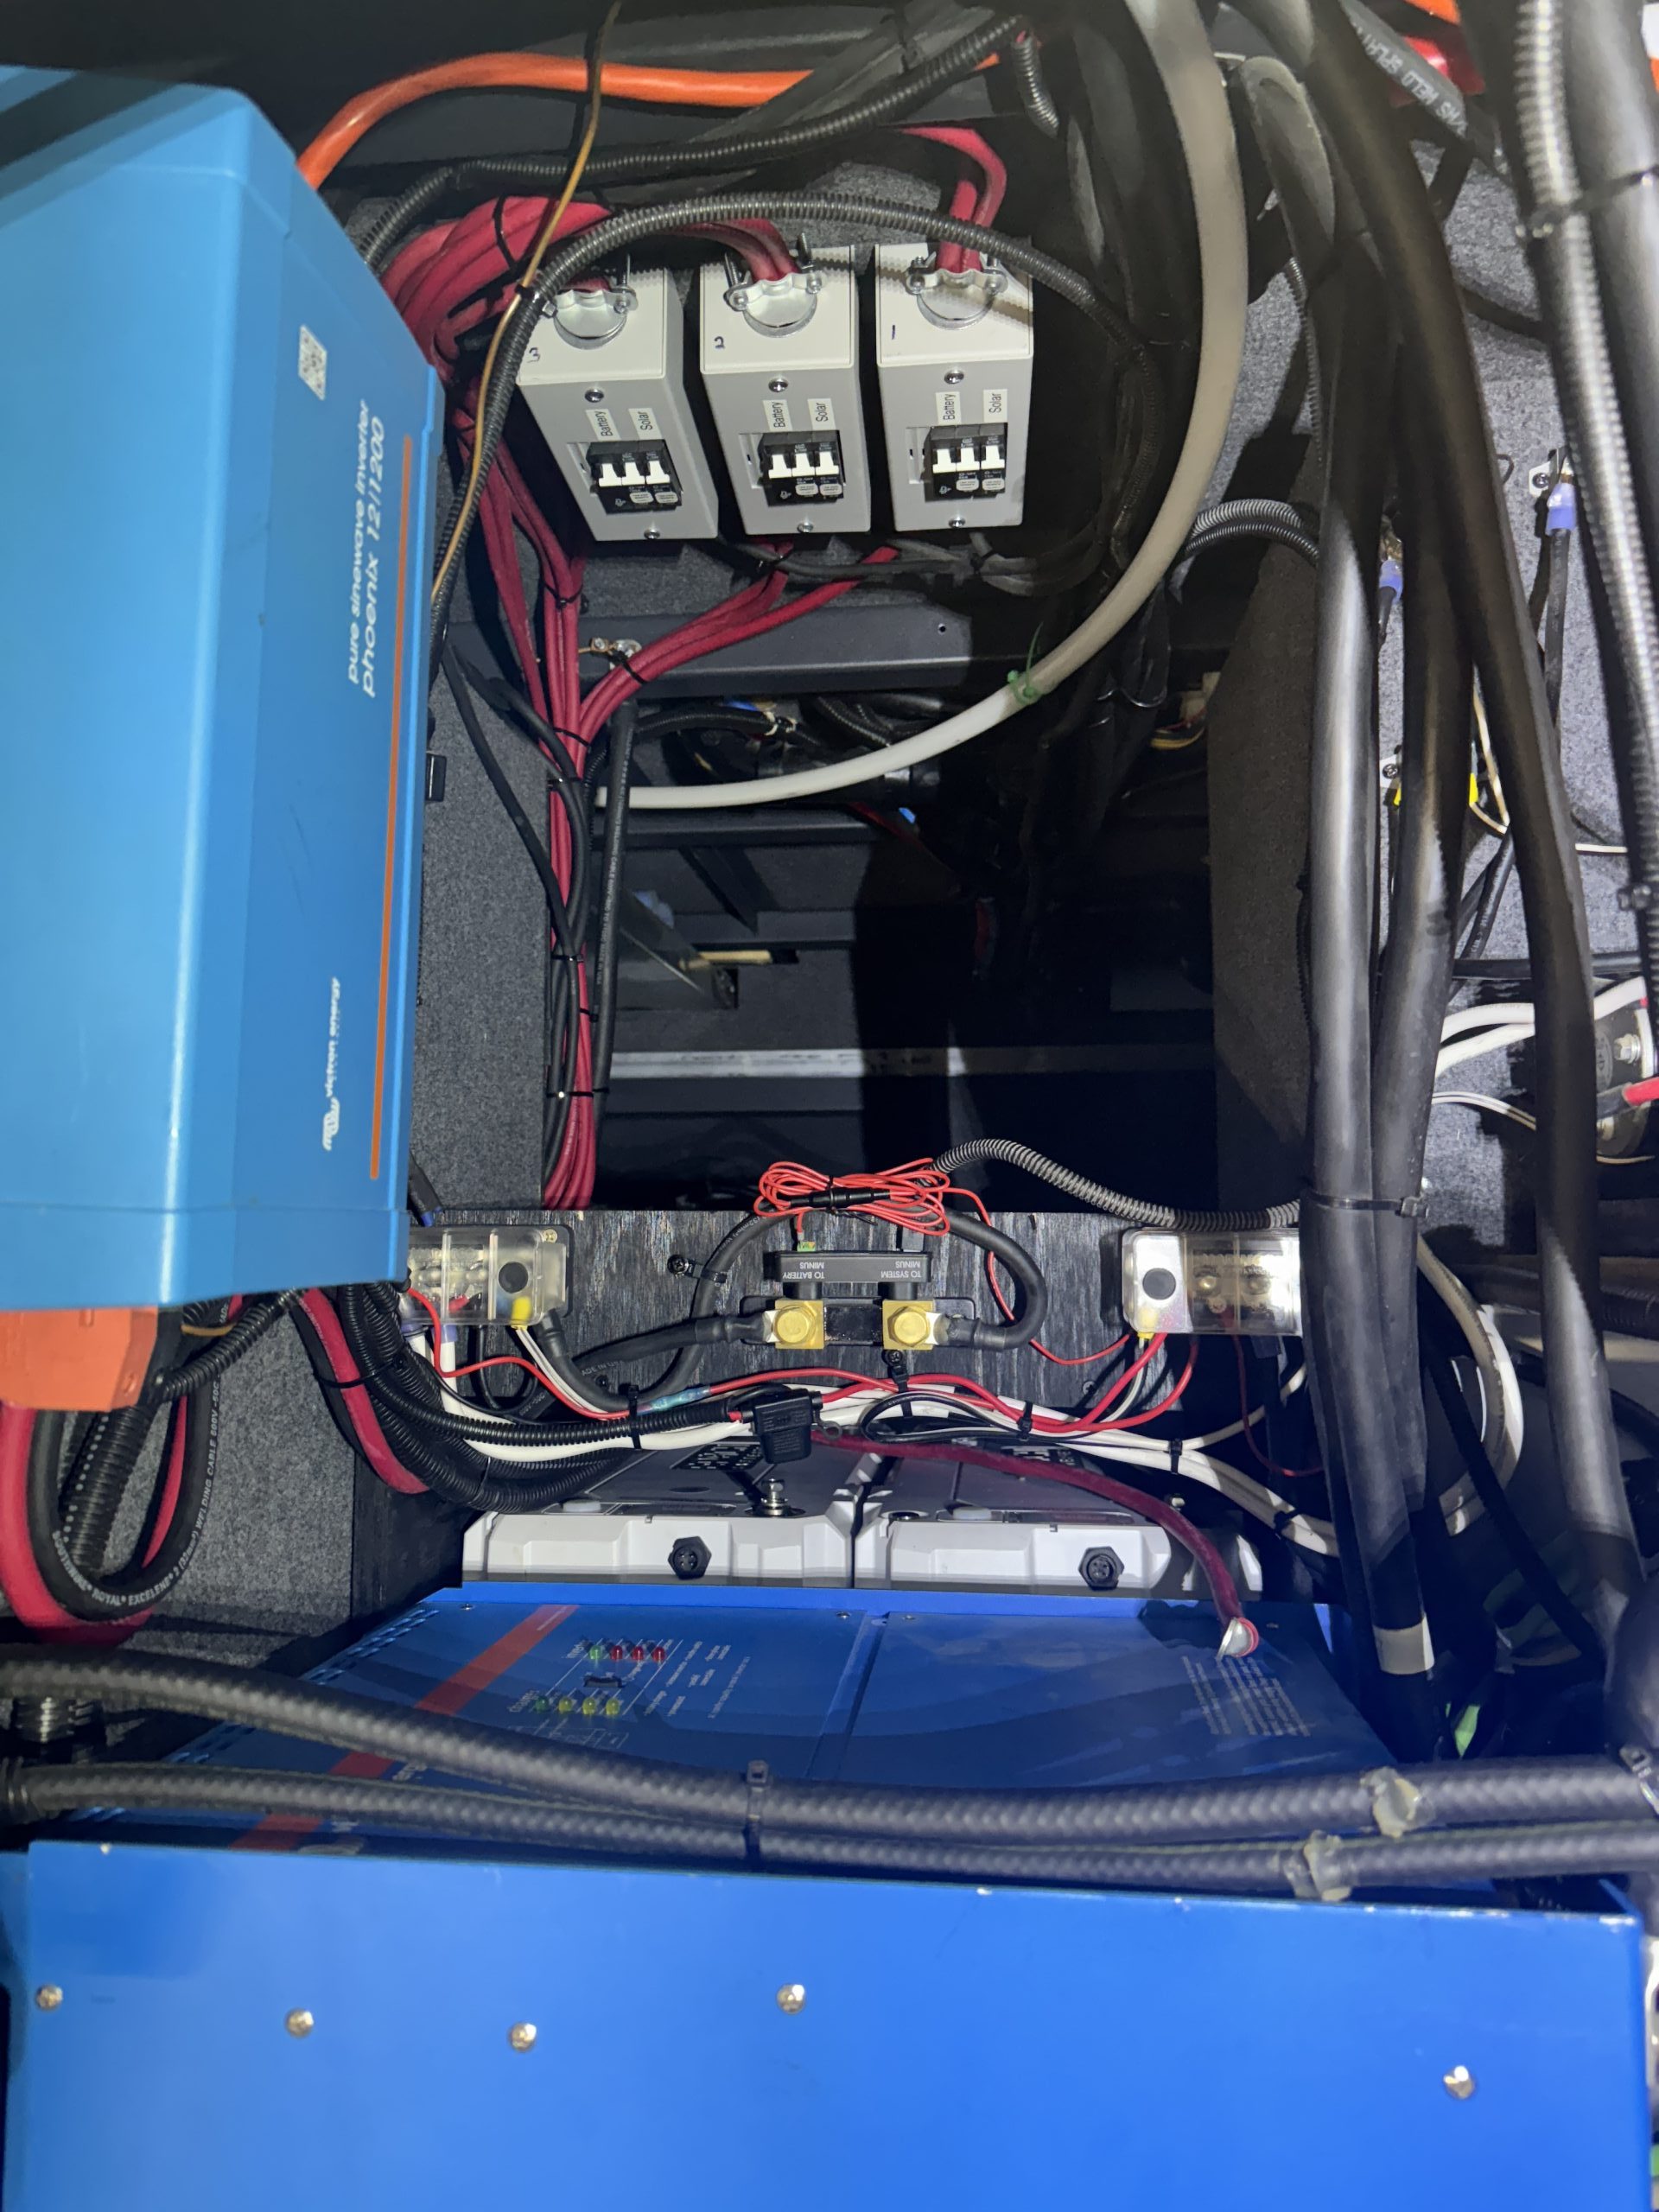
- Victron Phoenix 12/1200 Inverter with remote switch
- Victron VE.Bus Smart Dongle
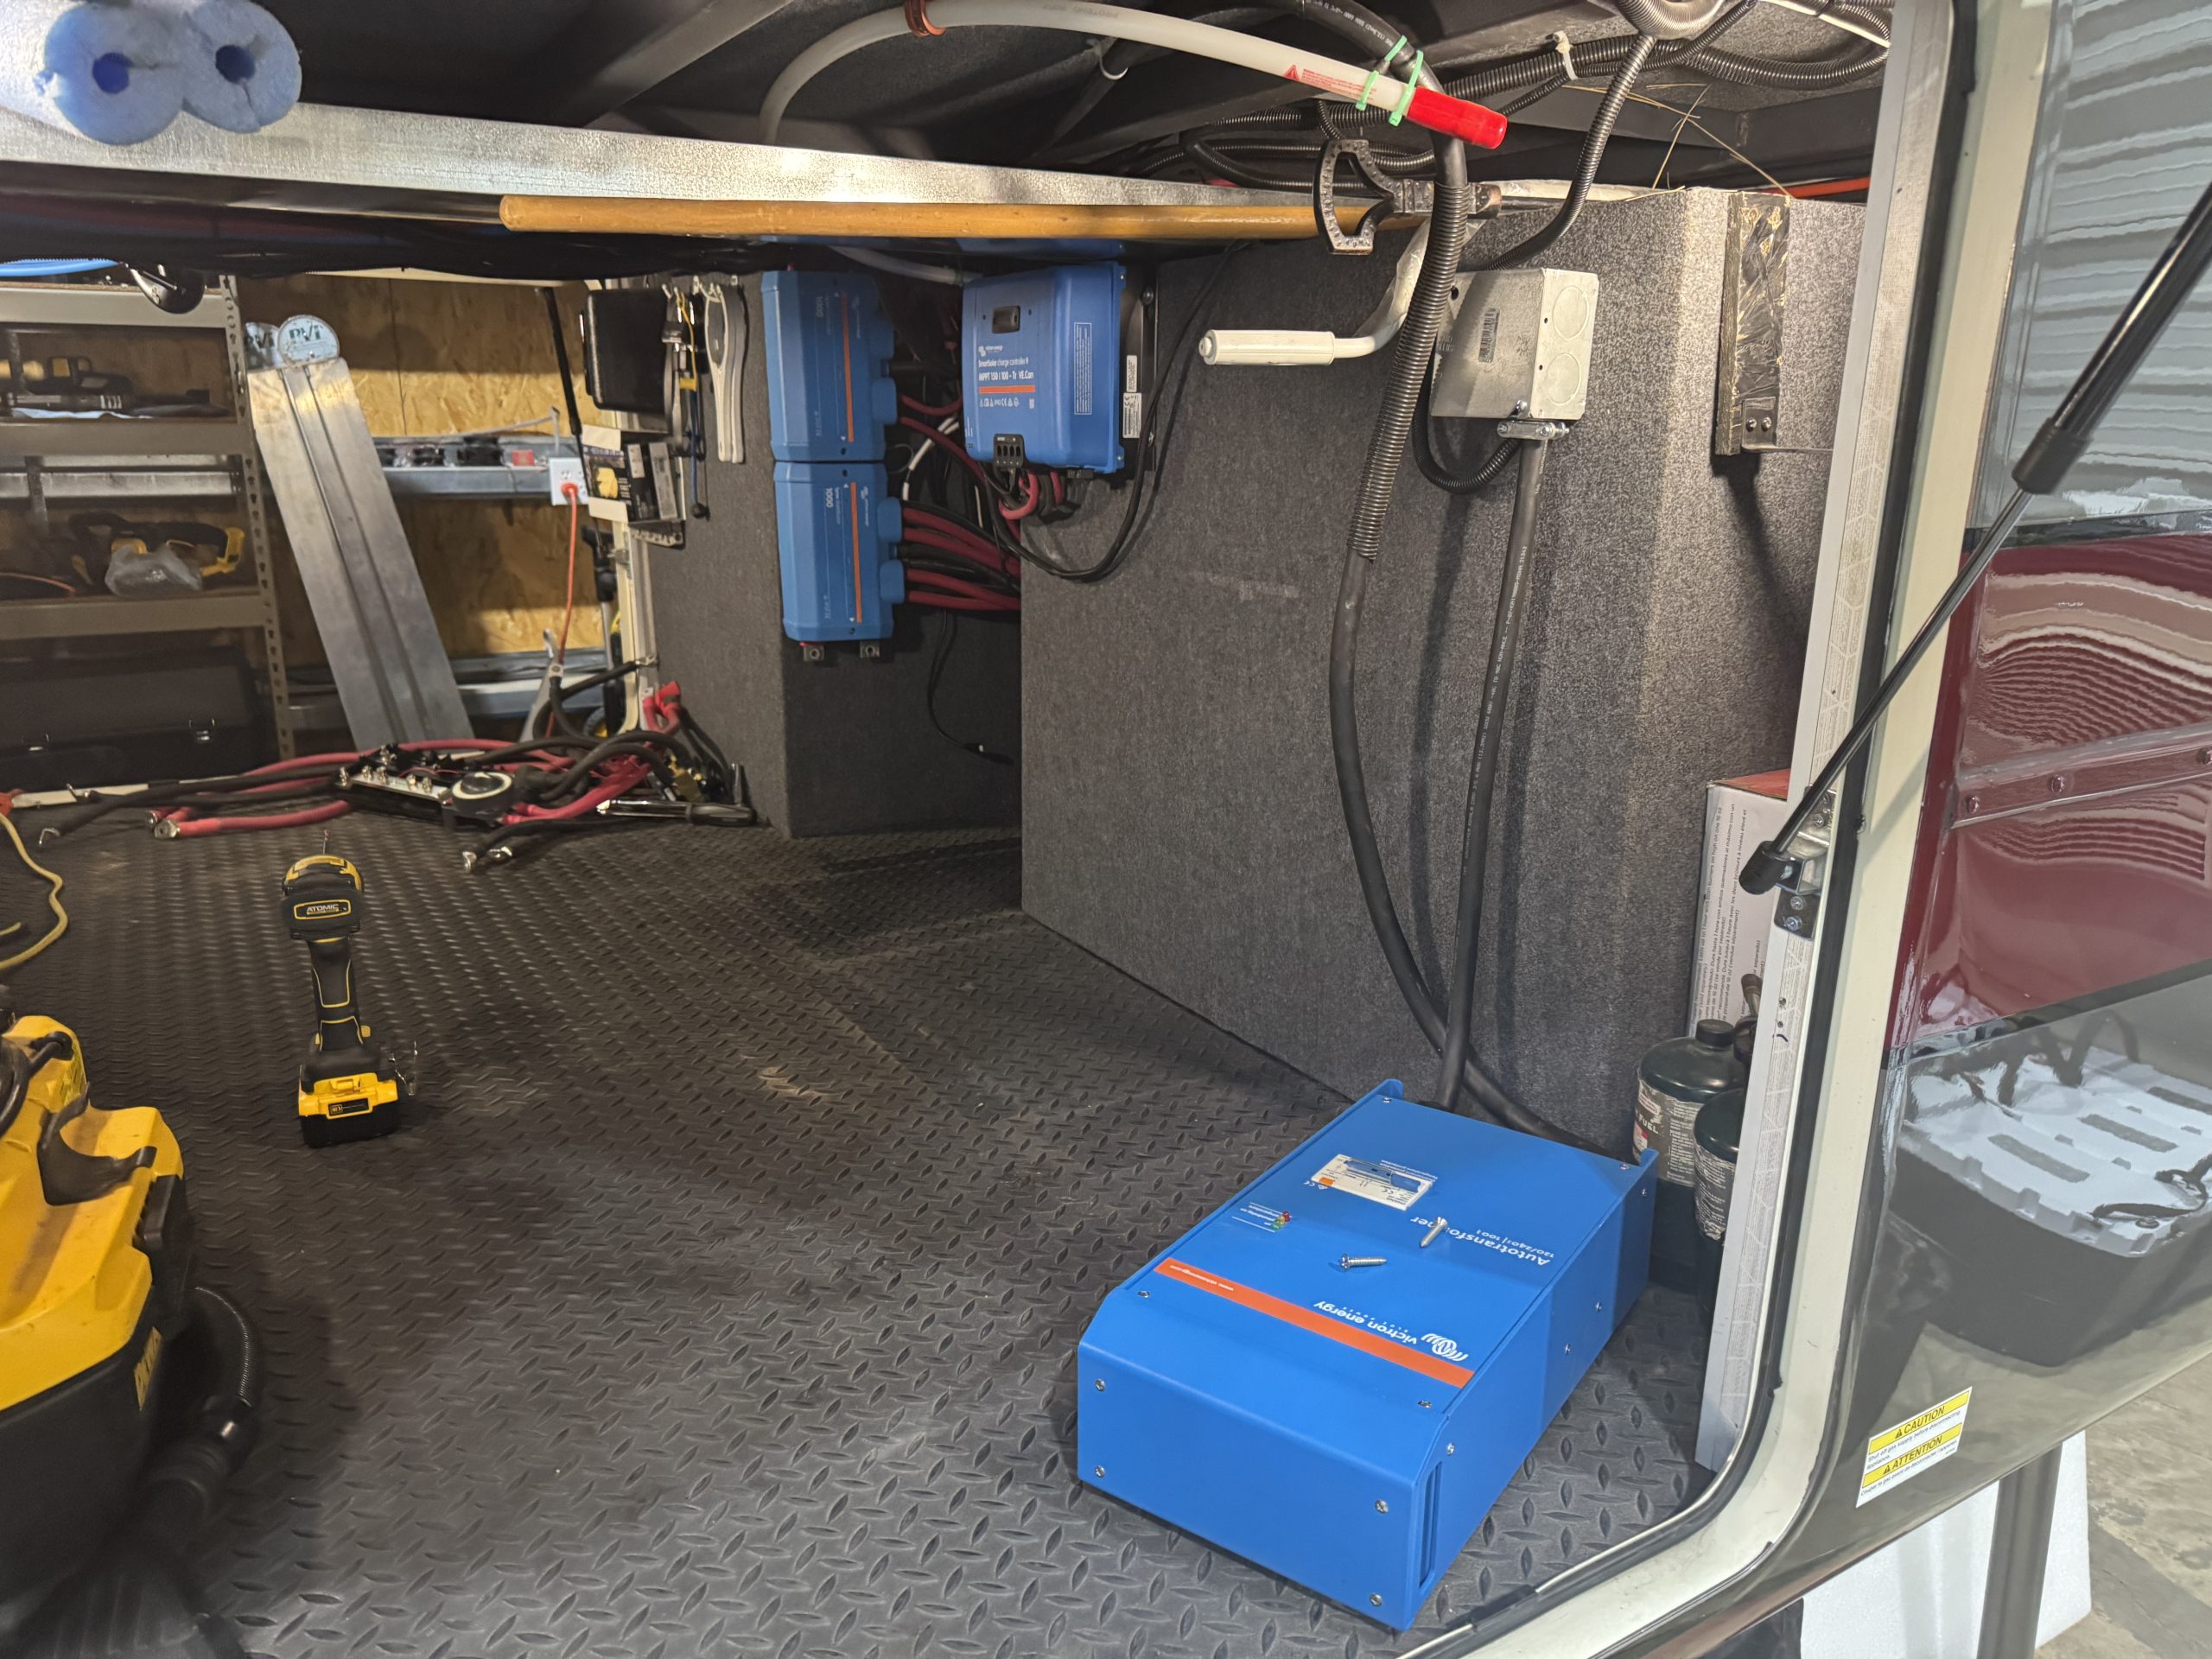
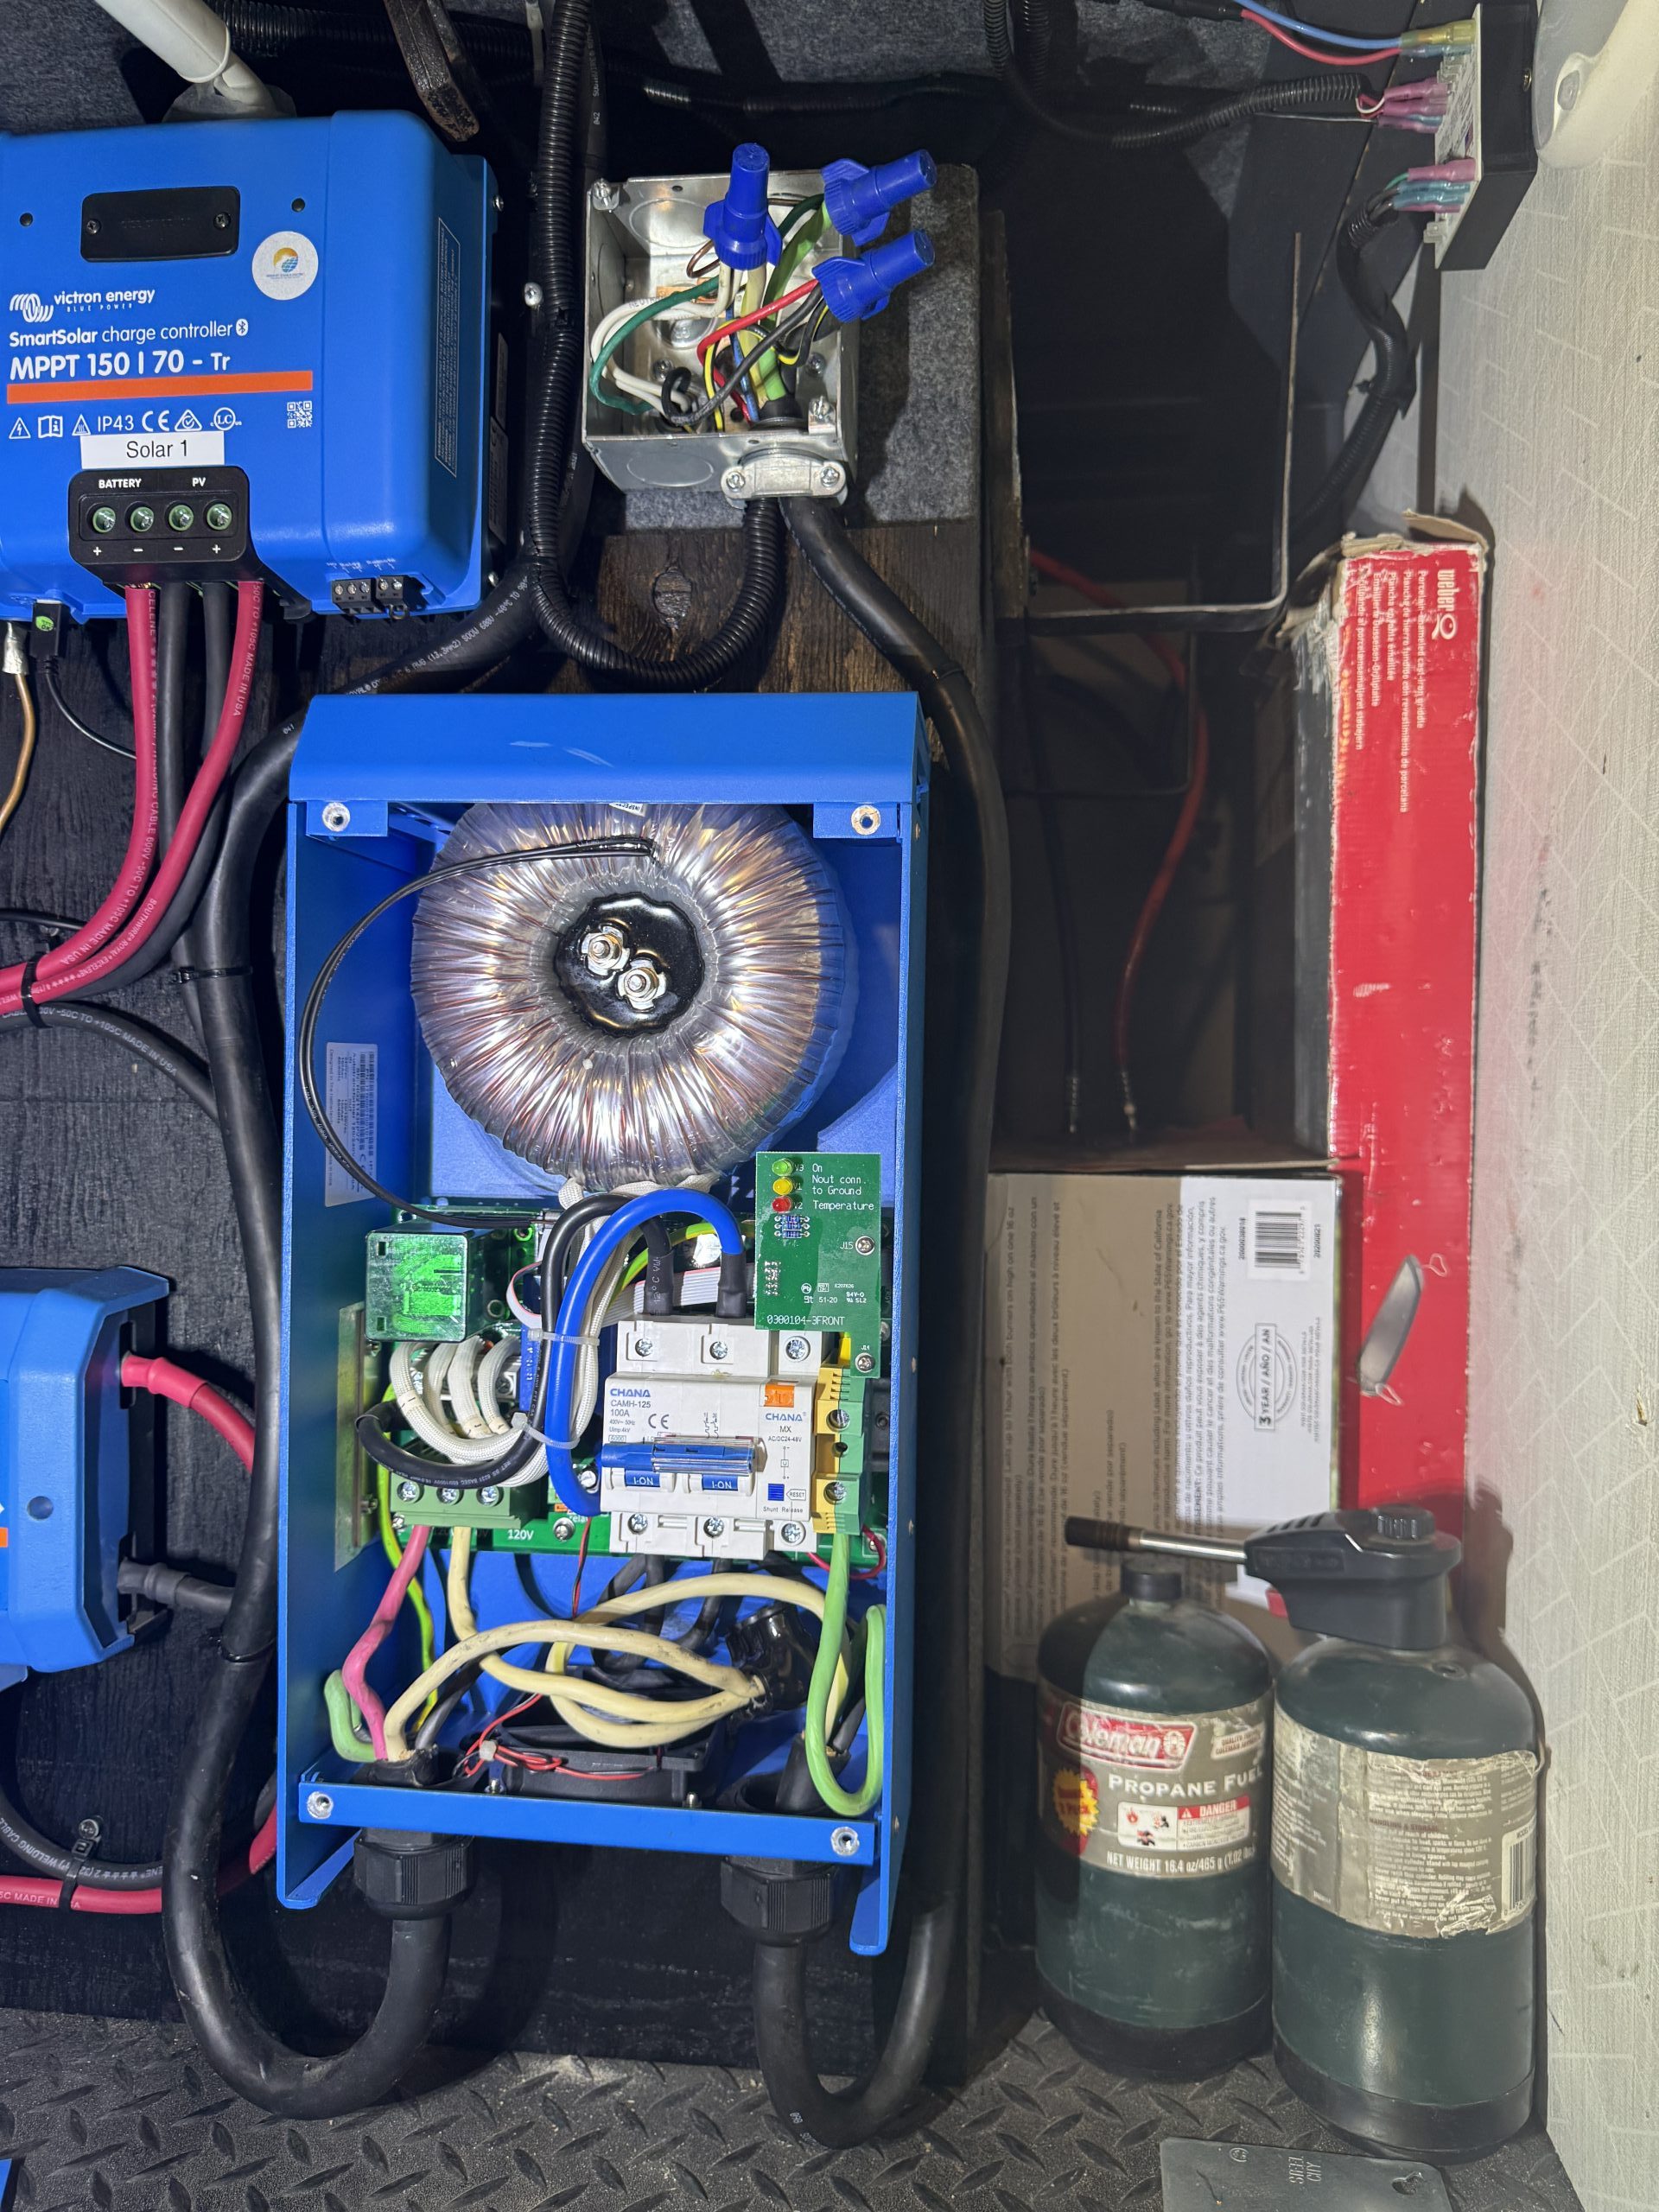
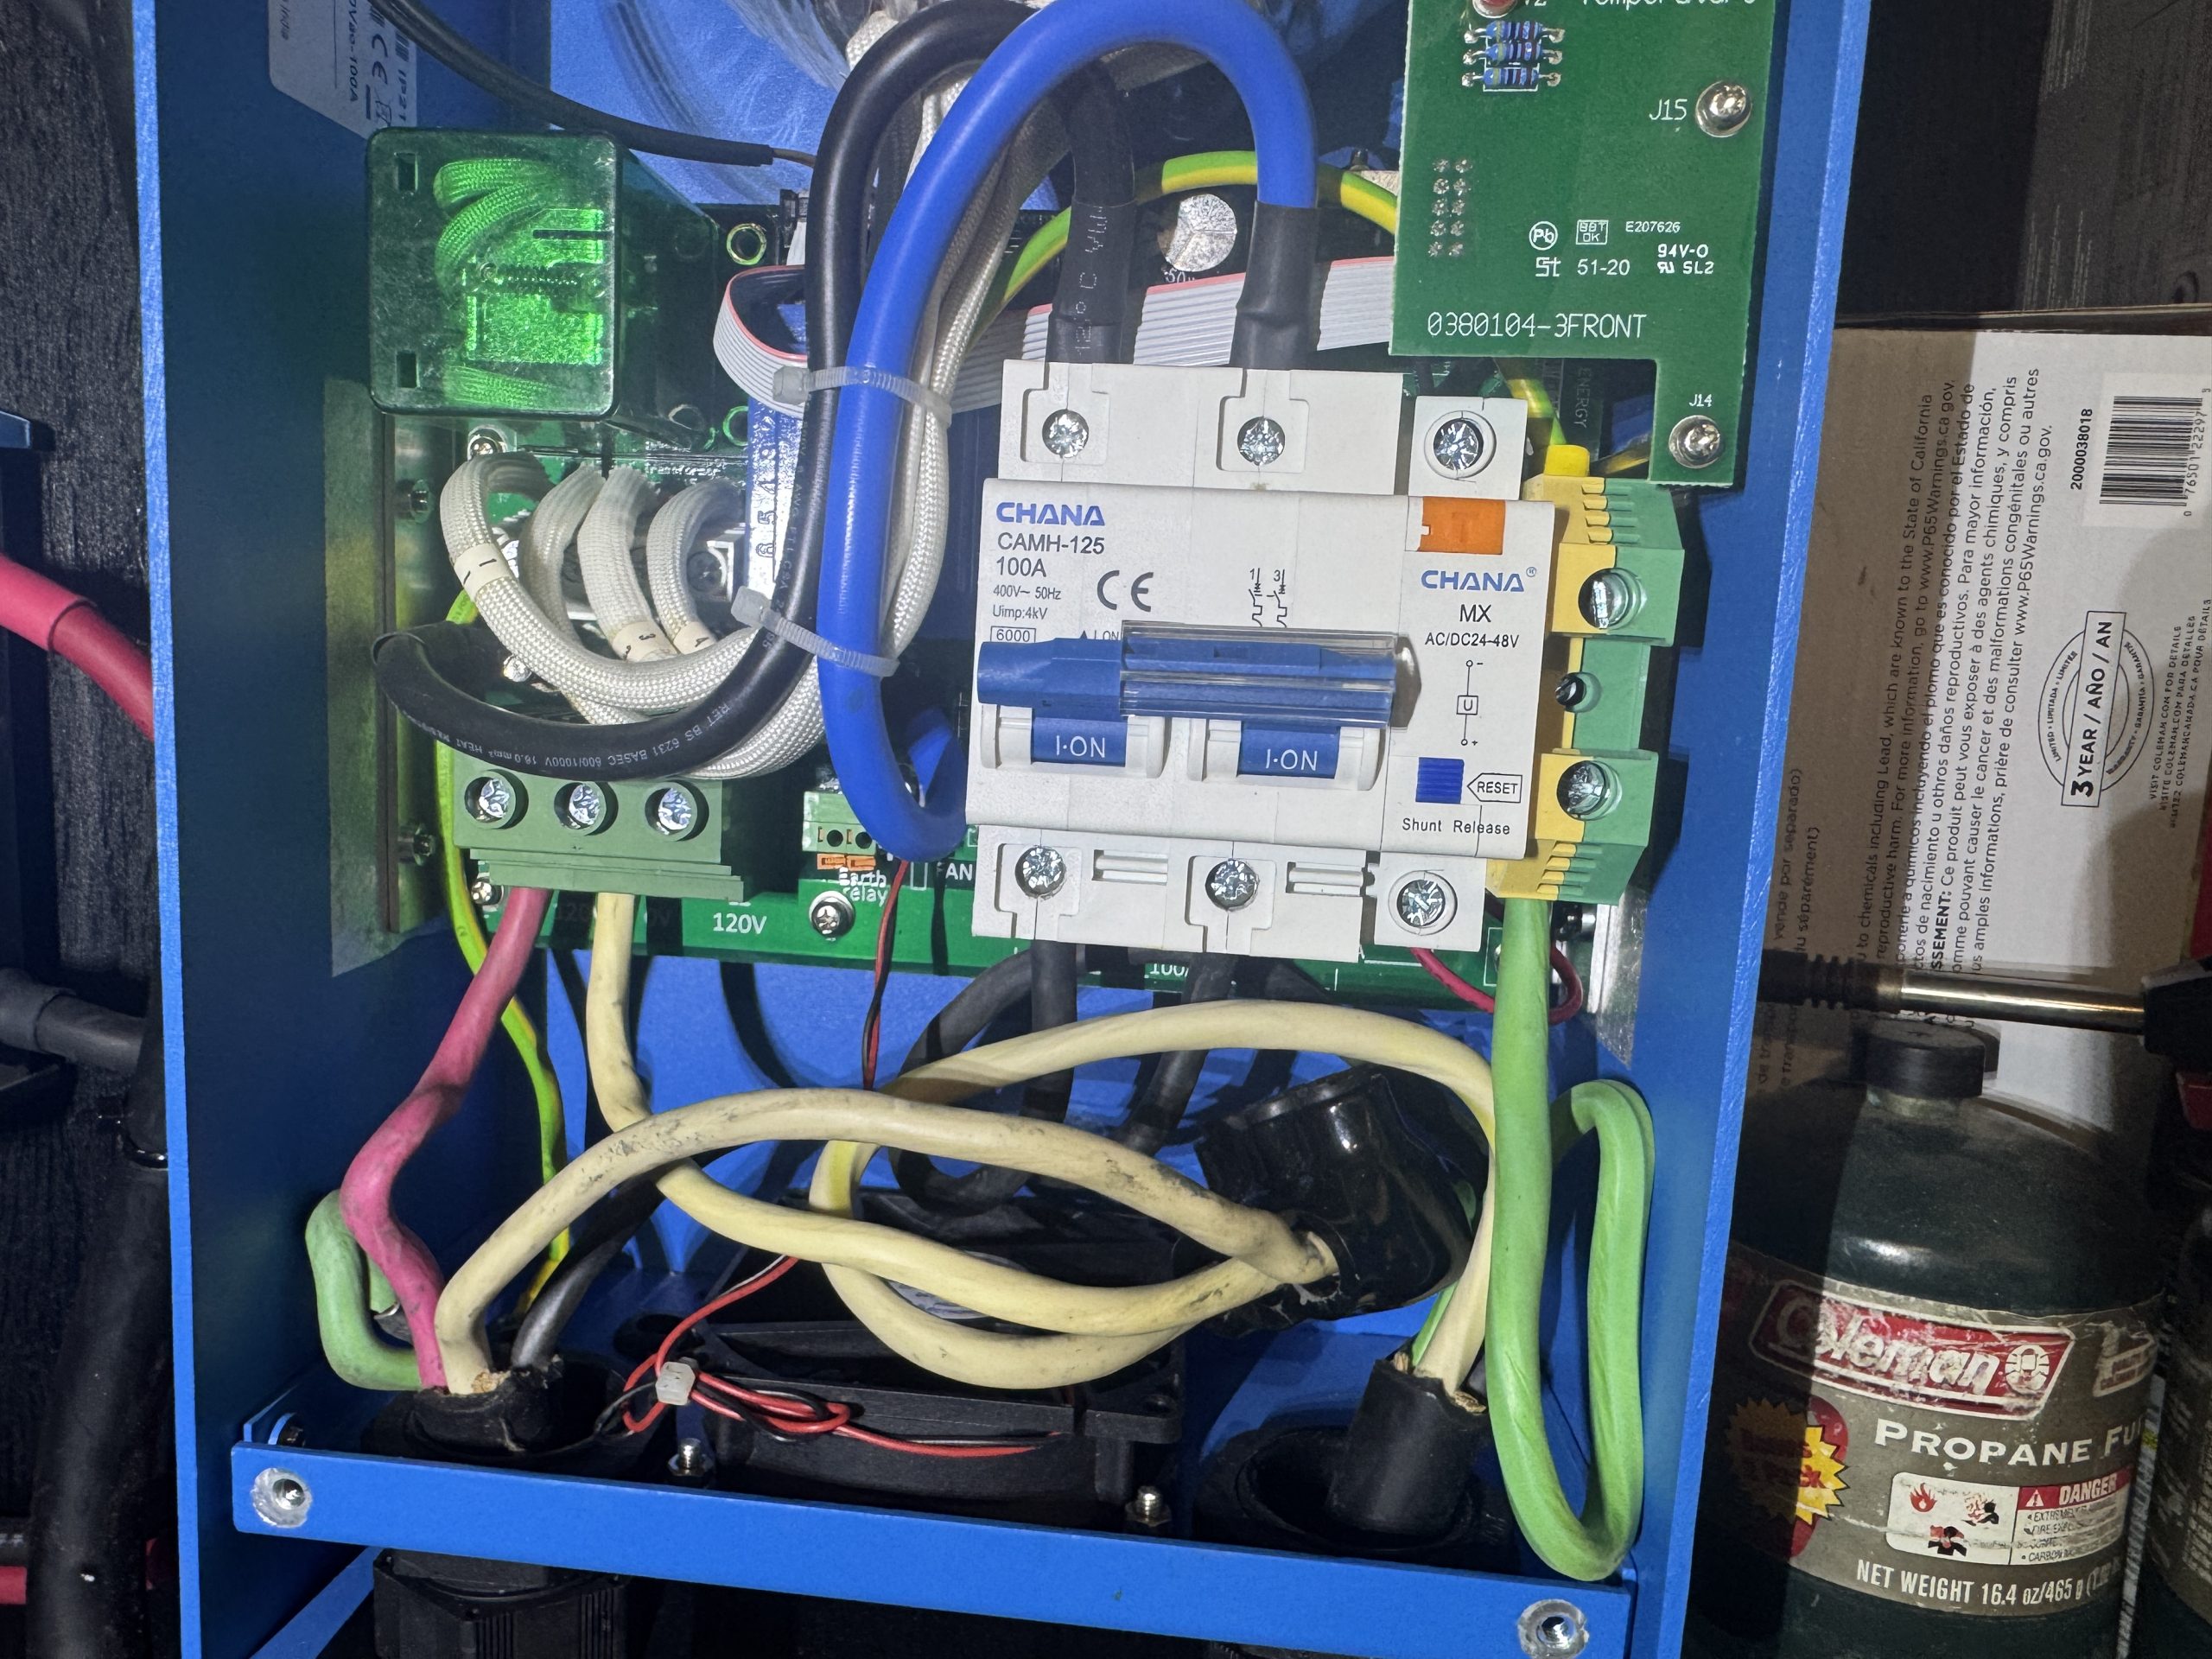
- Victron Autotransformer - 100 amp
- Progressive Dynamics Power Panel (from factory)
- 2 - Magnum Energy Transfer Switch - 1 CSW-TS15 & 1 CSW-TS20
- 3 sets of 4 AWG Solar Wire run from roof to electrical compartment (from factory)
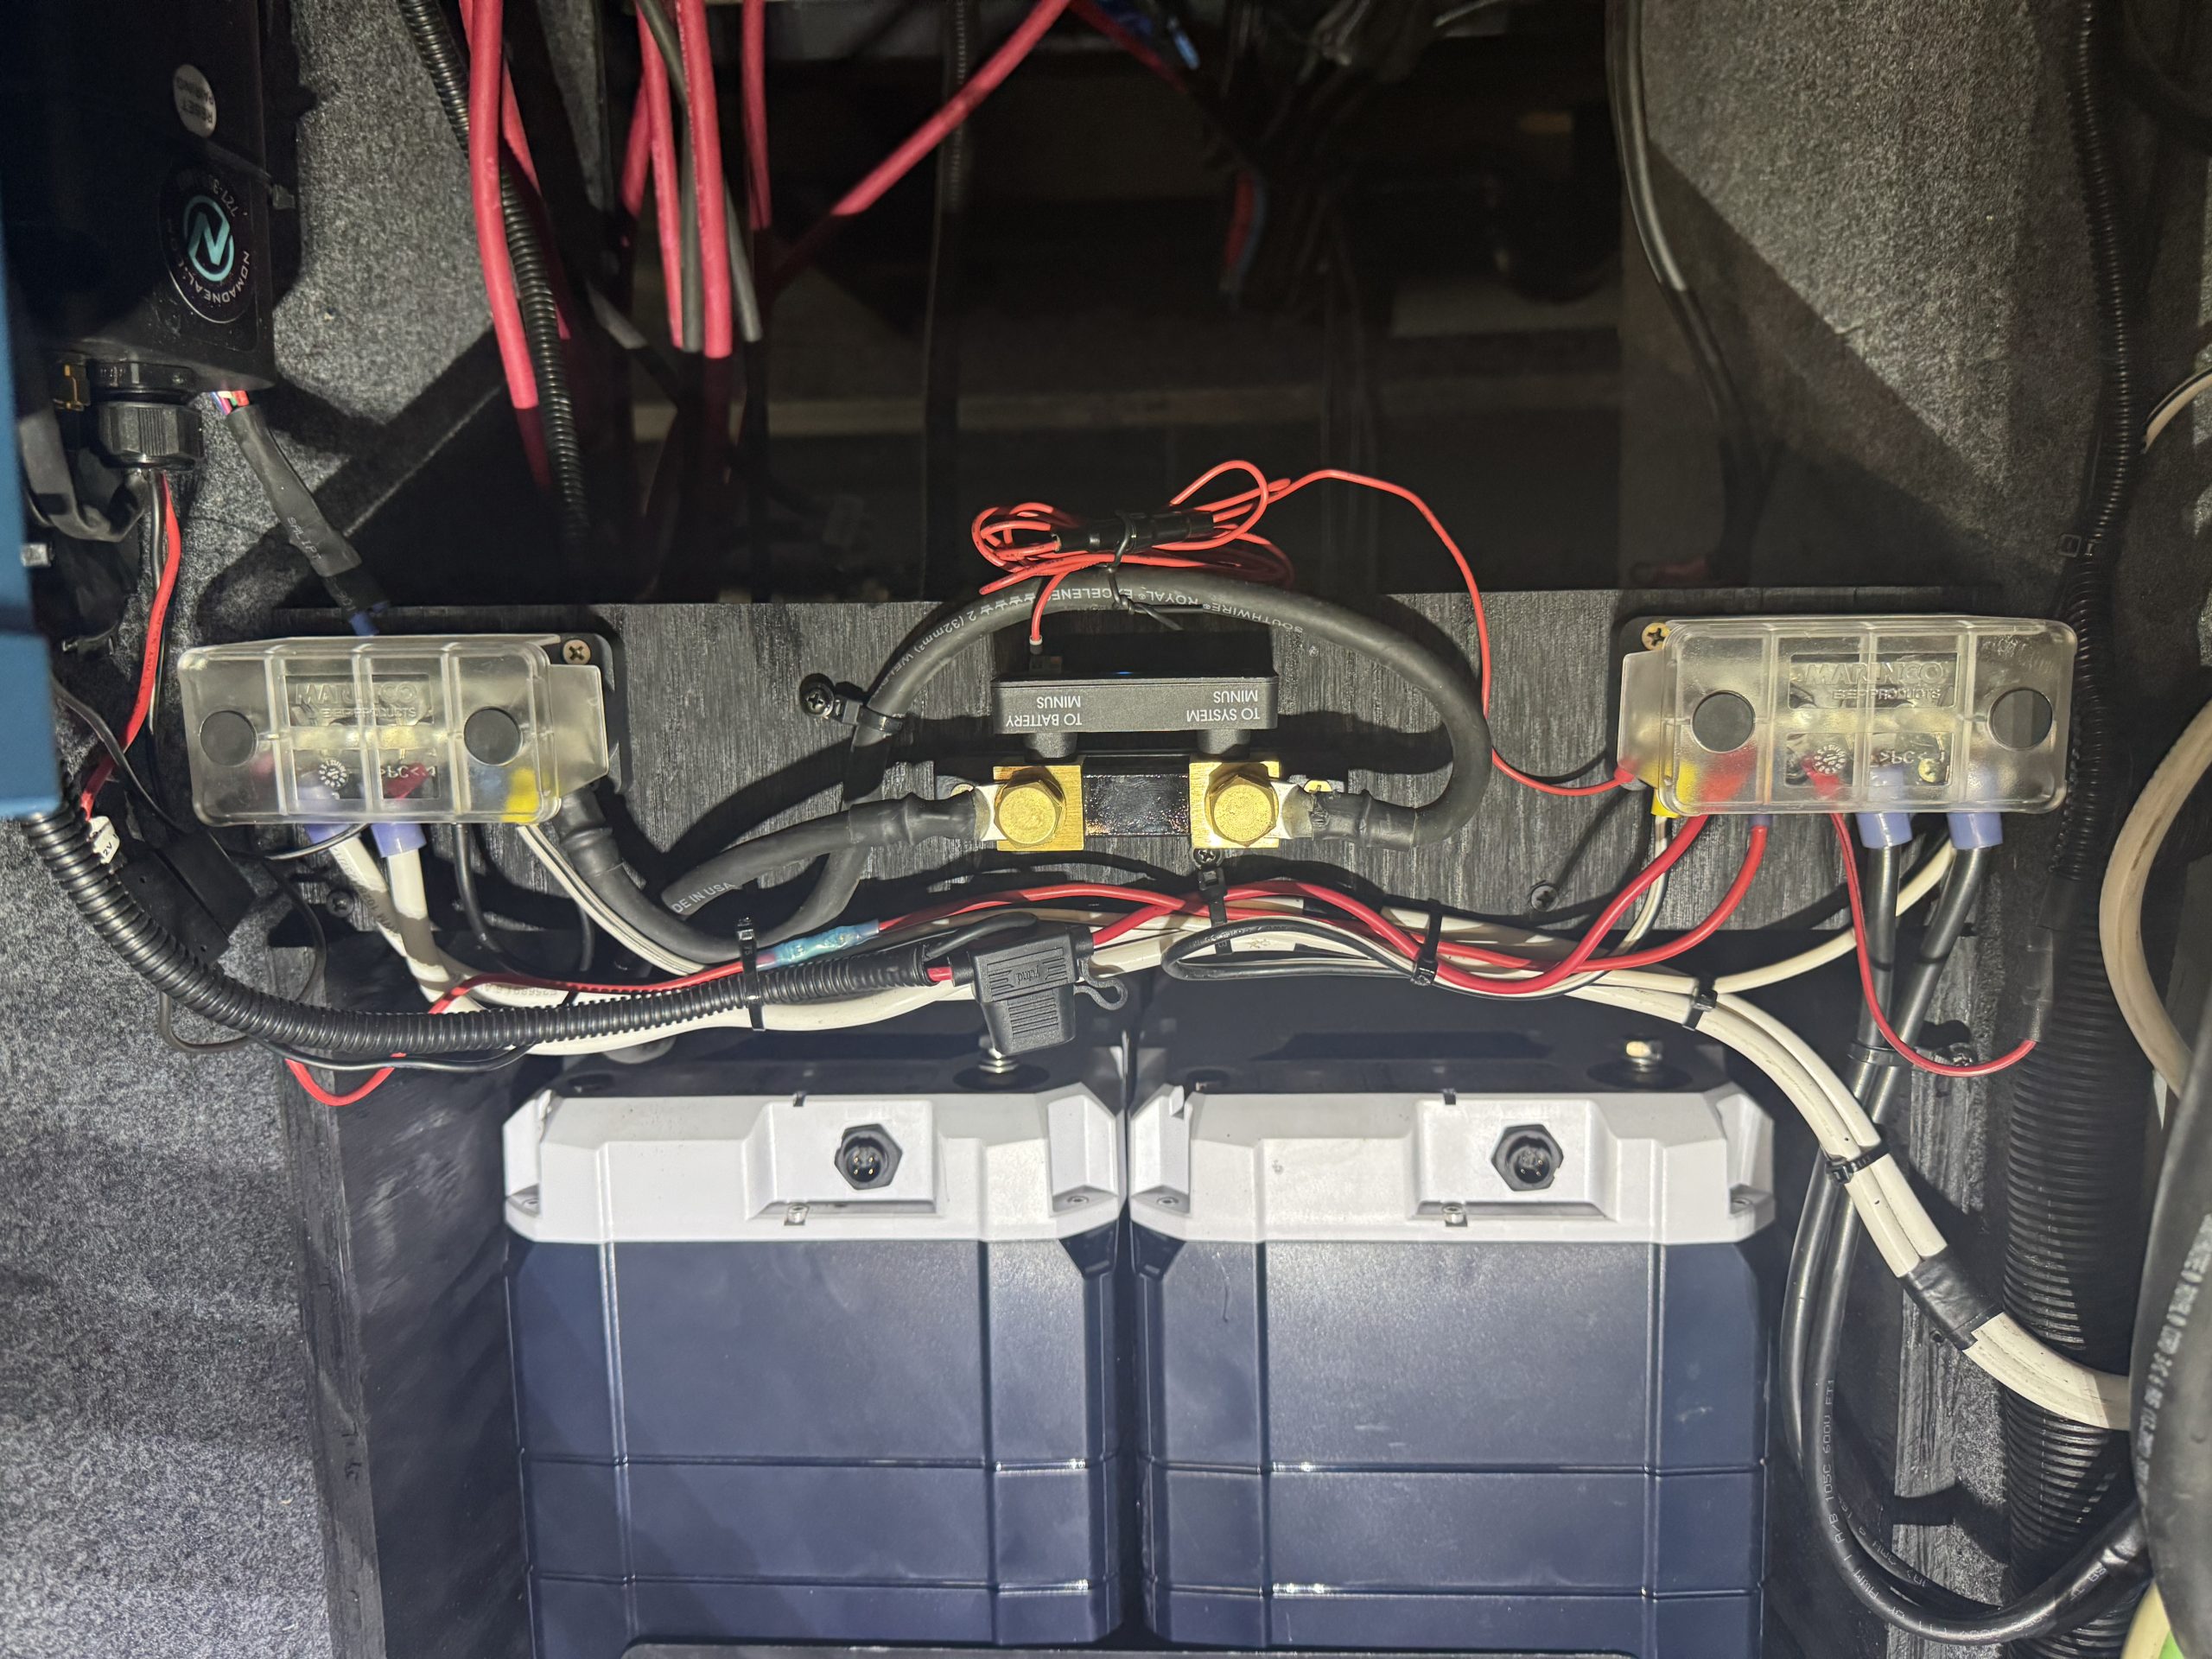
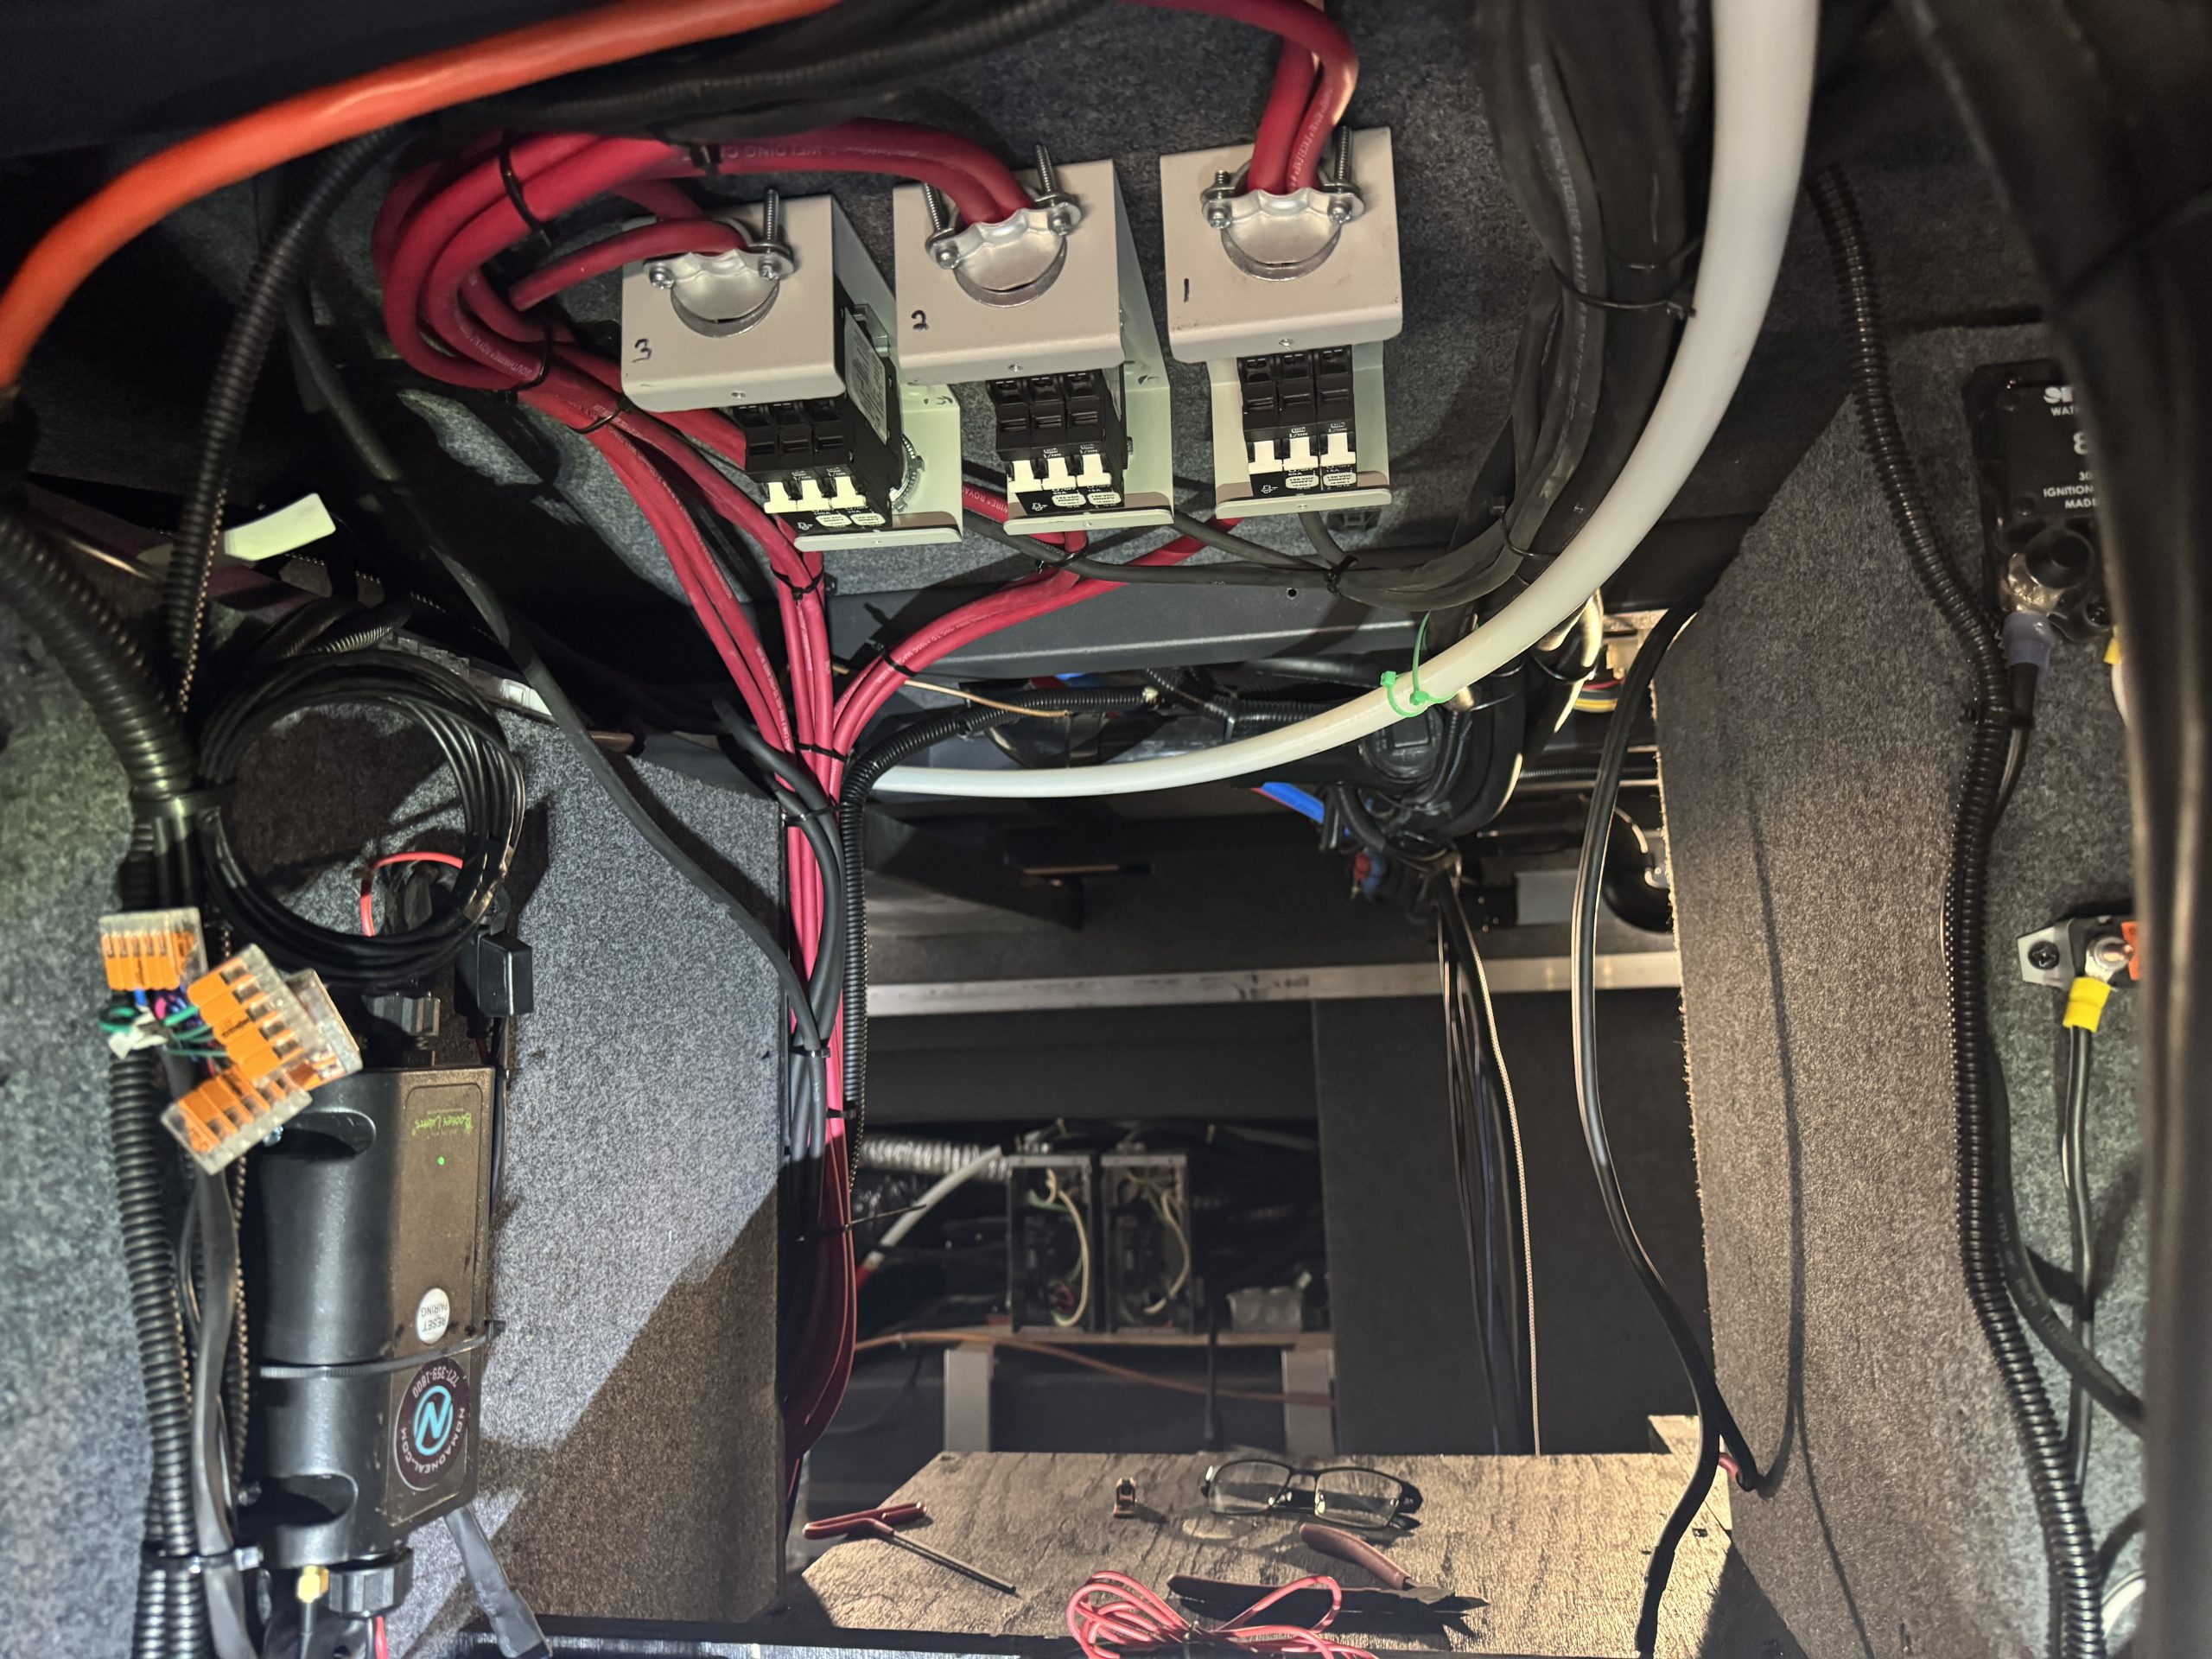
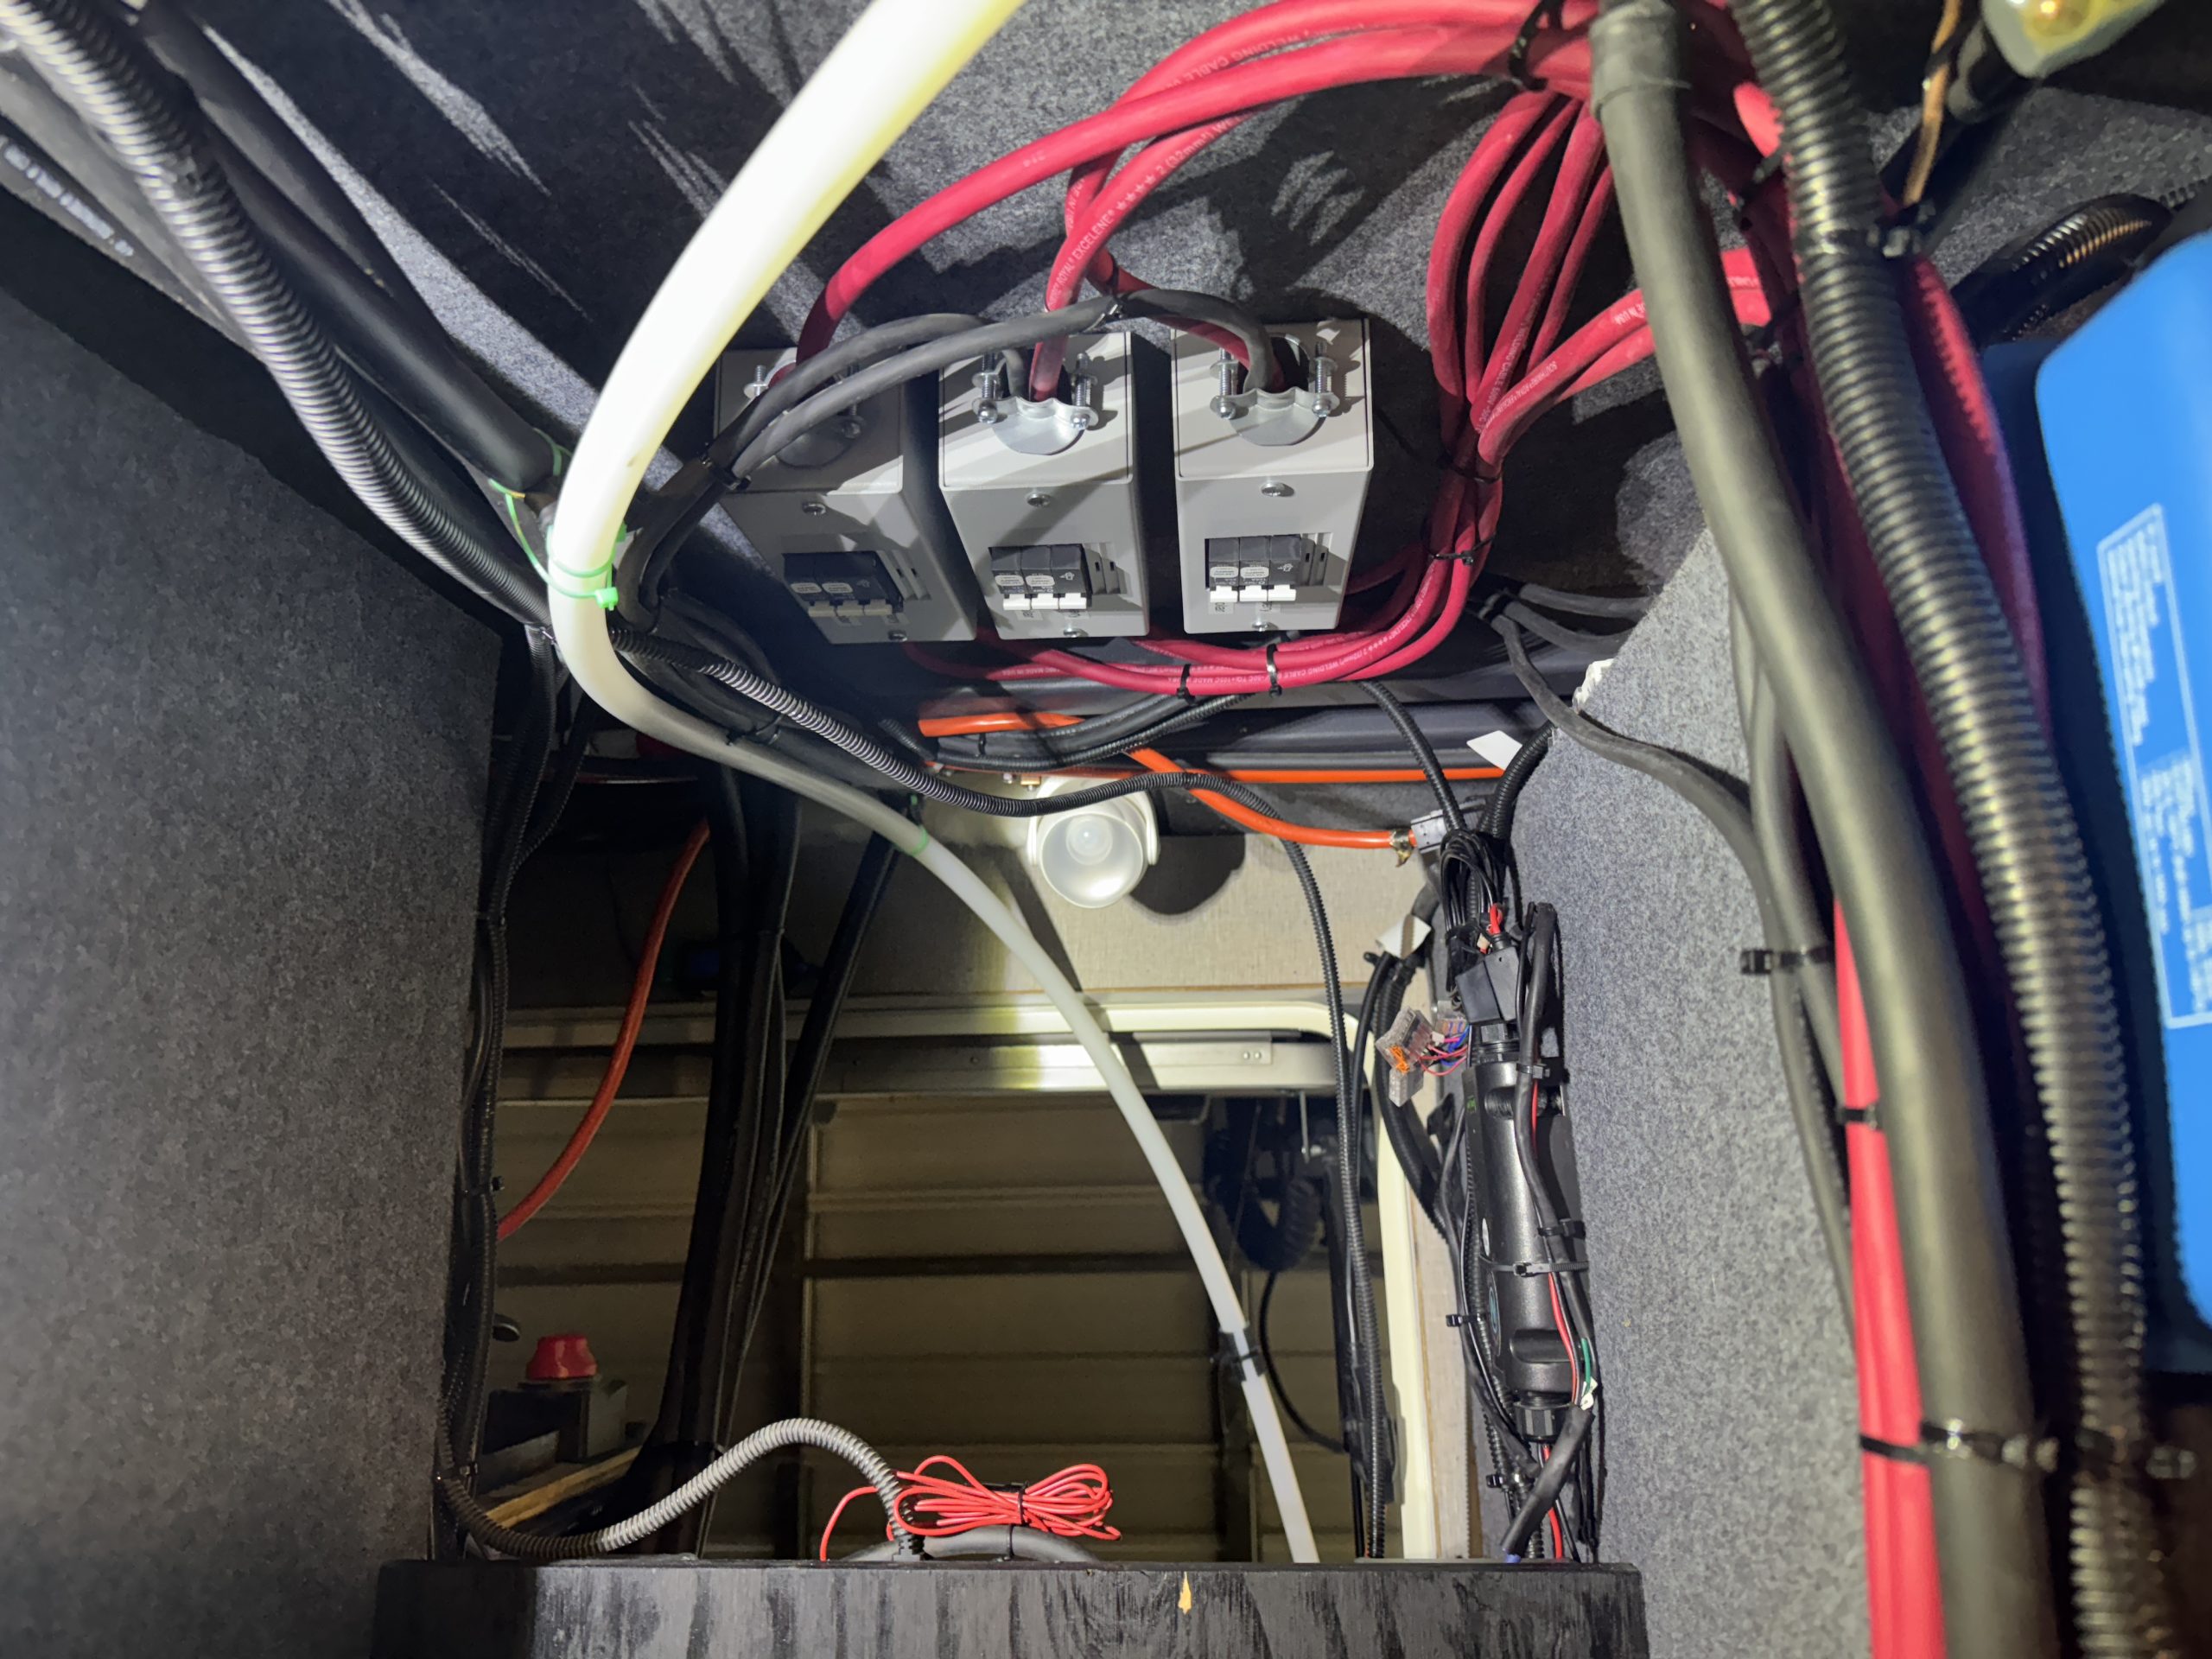
- 3 - Blue Sea 6006 On/Off Battery Switches
- 2 - 70 amp load centers with 50 amp double pole breakers to divide and then combine power legs going to and from the Quattros
- Atkinson Electronics GSCM Mini generator control module
- 3 - Micro Air Easy Starts
- 2 - BEP Pro Installer 4 Stud Bus Bar – 500 amp
- 3.5 Feet of 6/4 Soow Cord
- 60 Feet of 6/3 Soow Cord
- 15 Feet of 10/3 Soow Cord
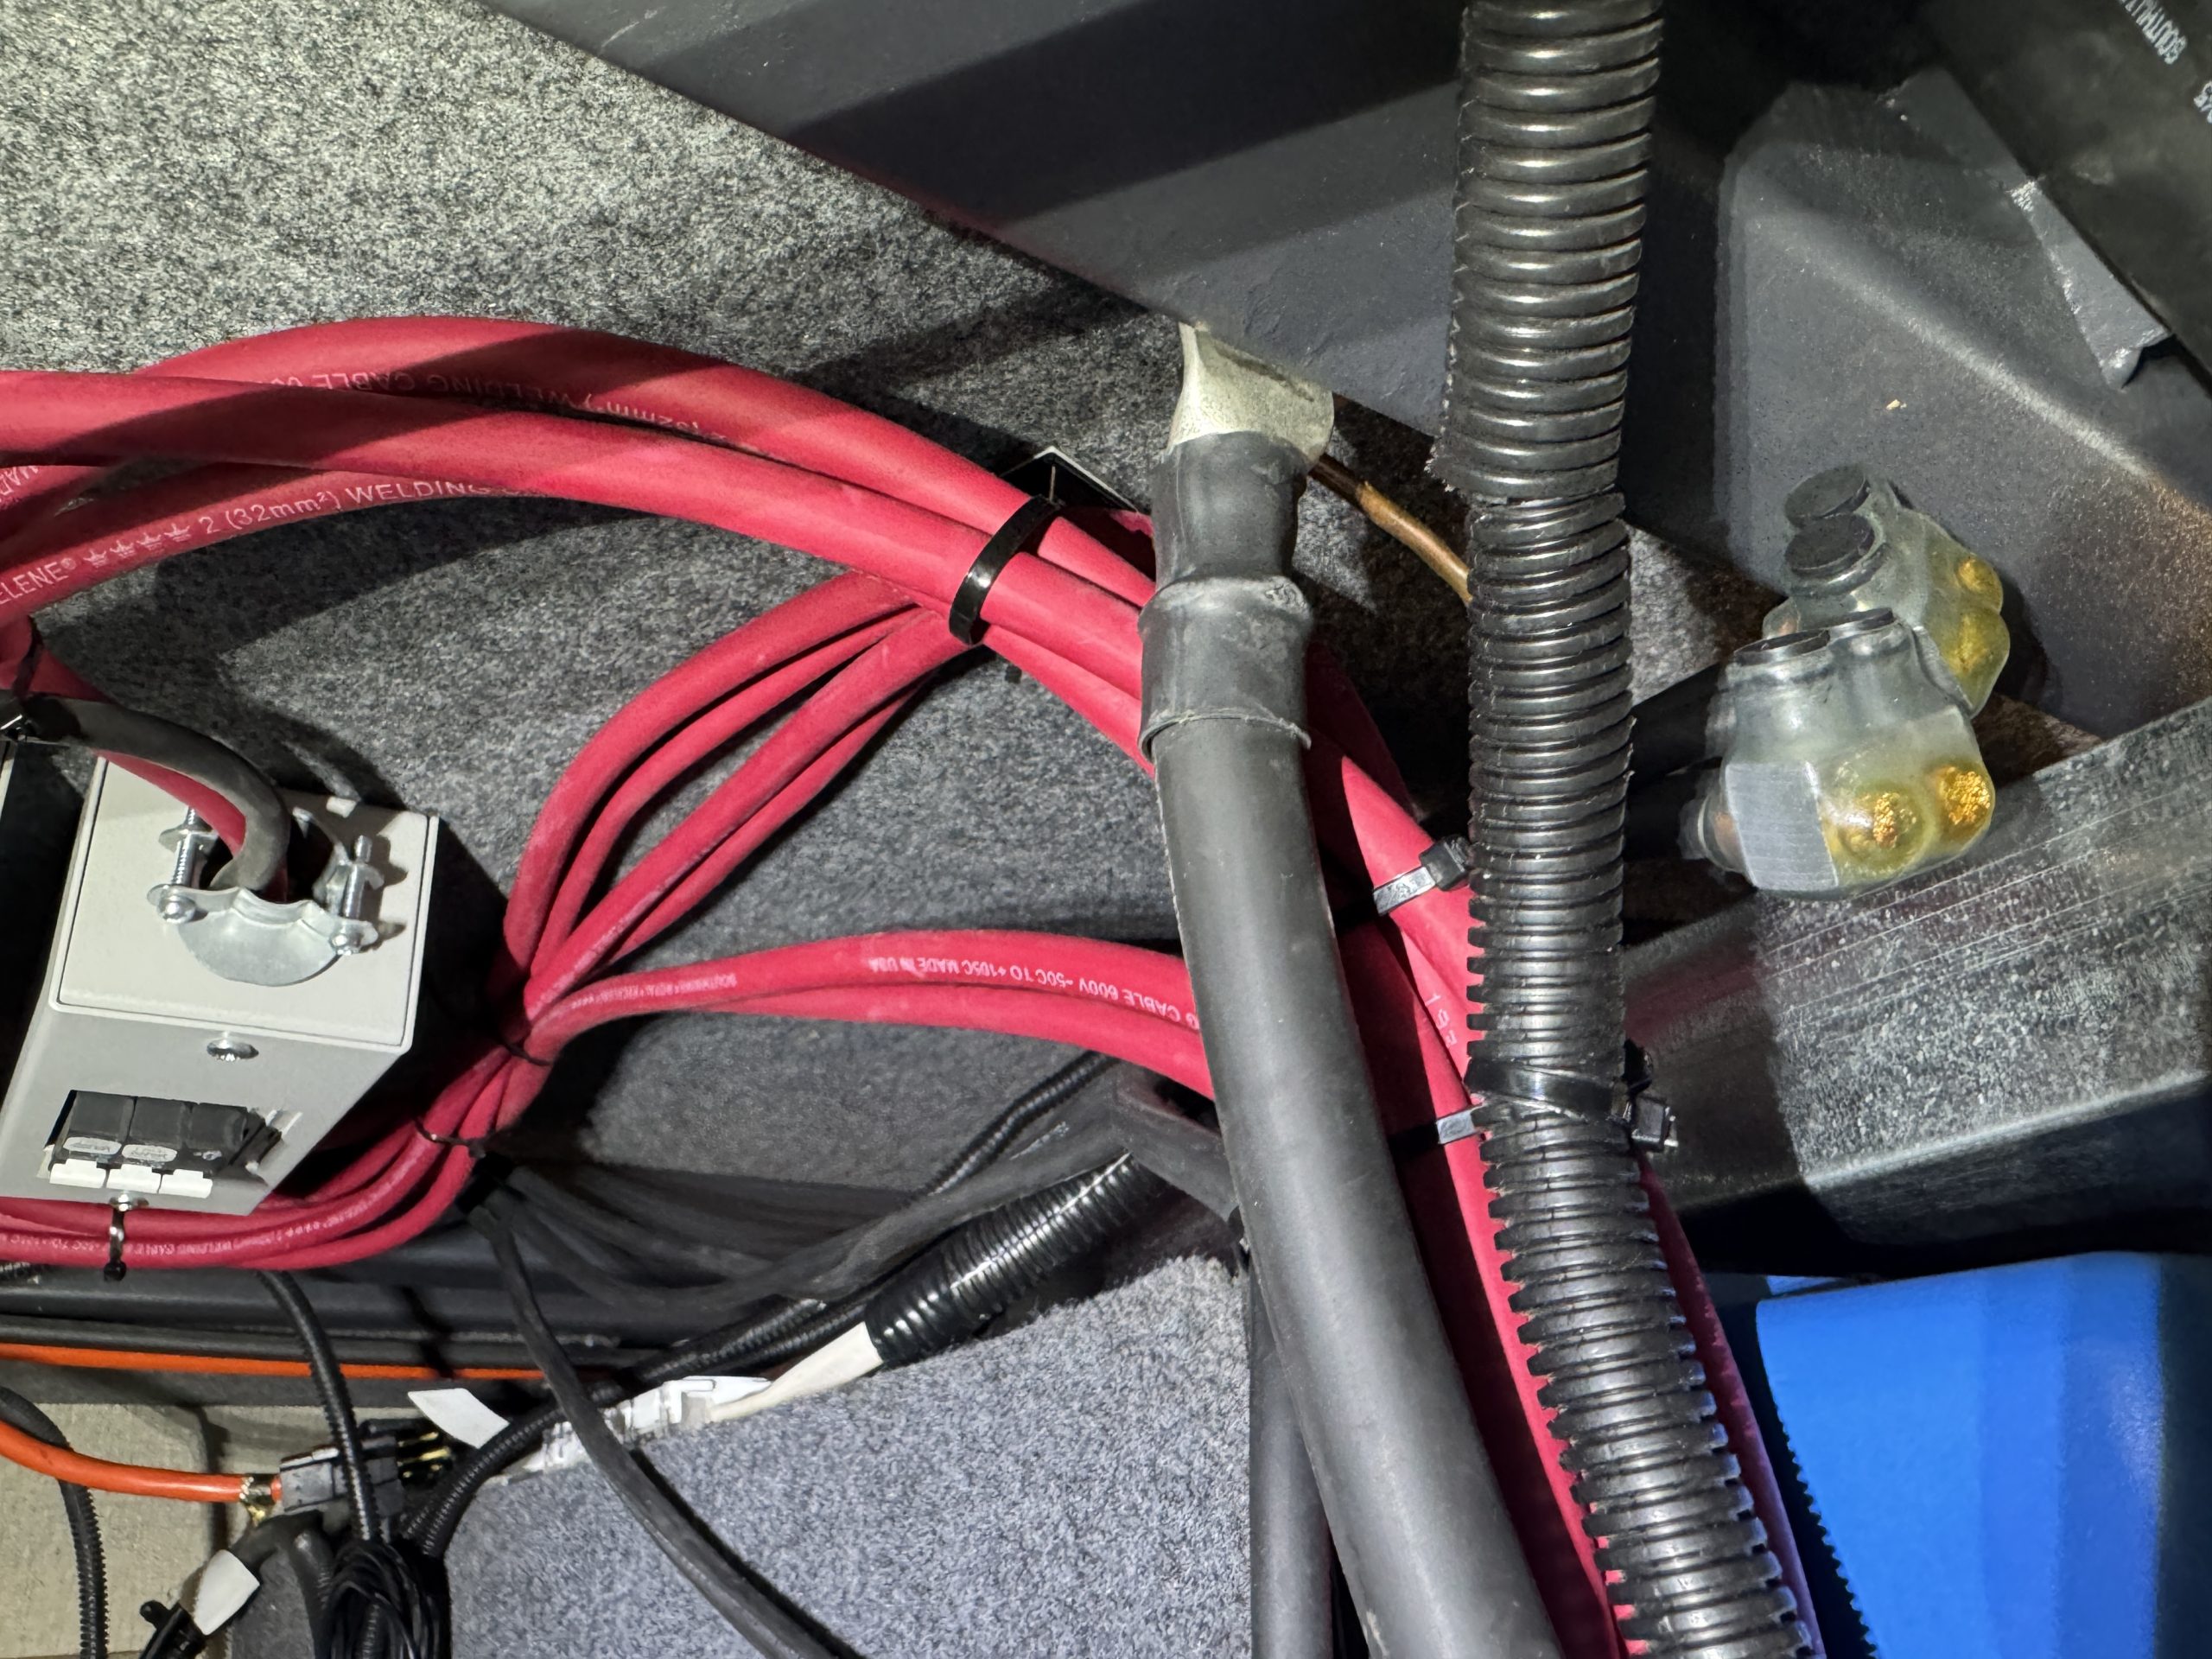
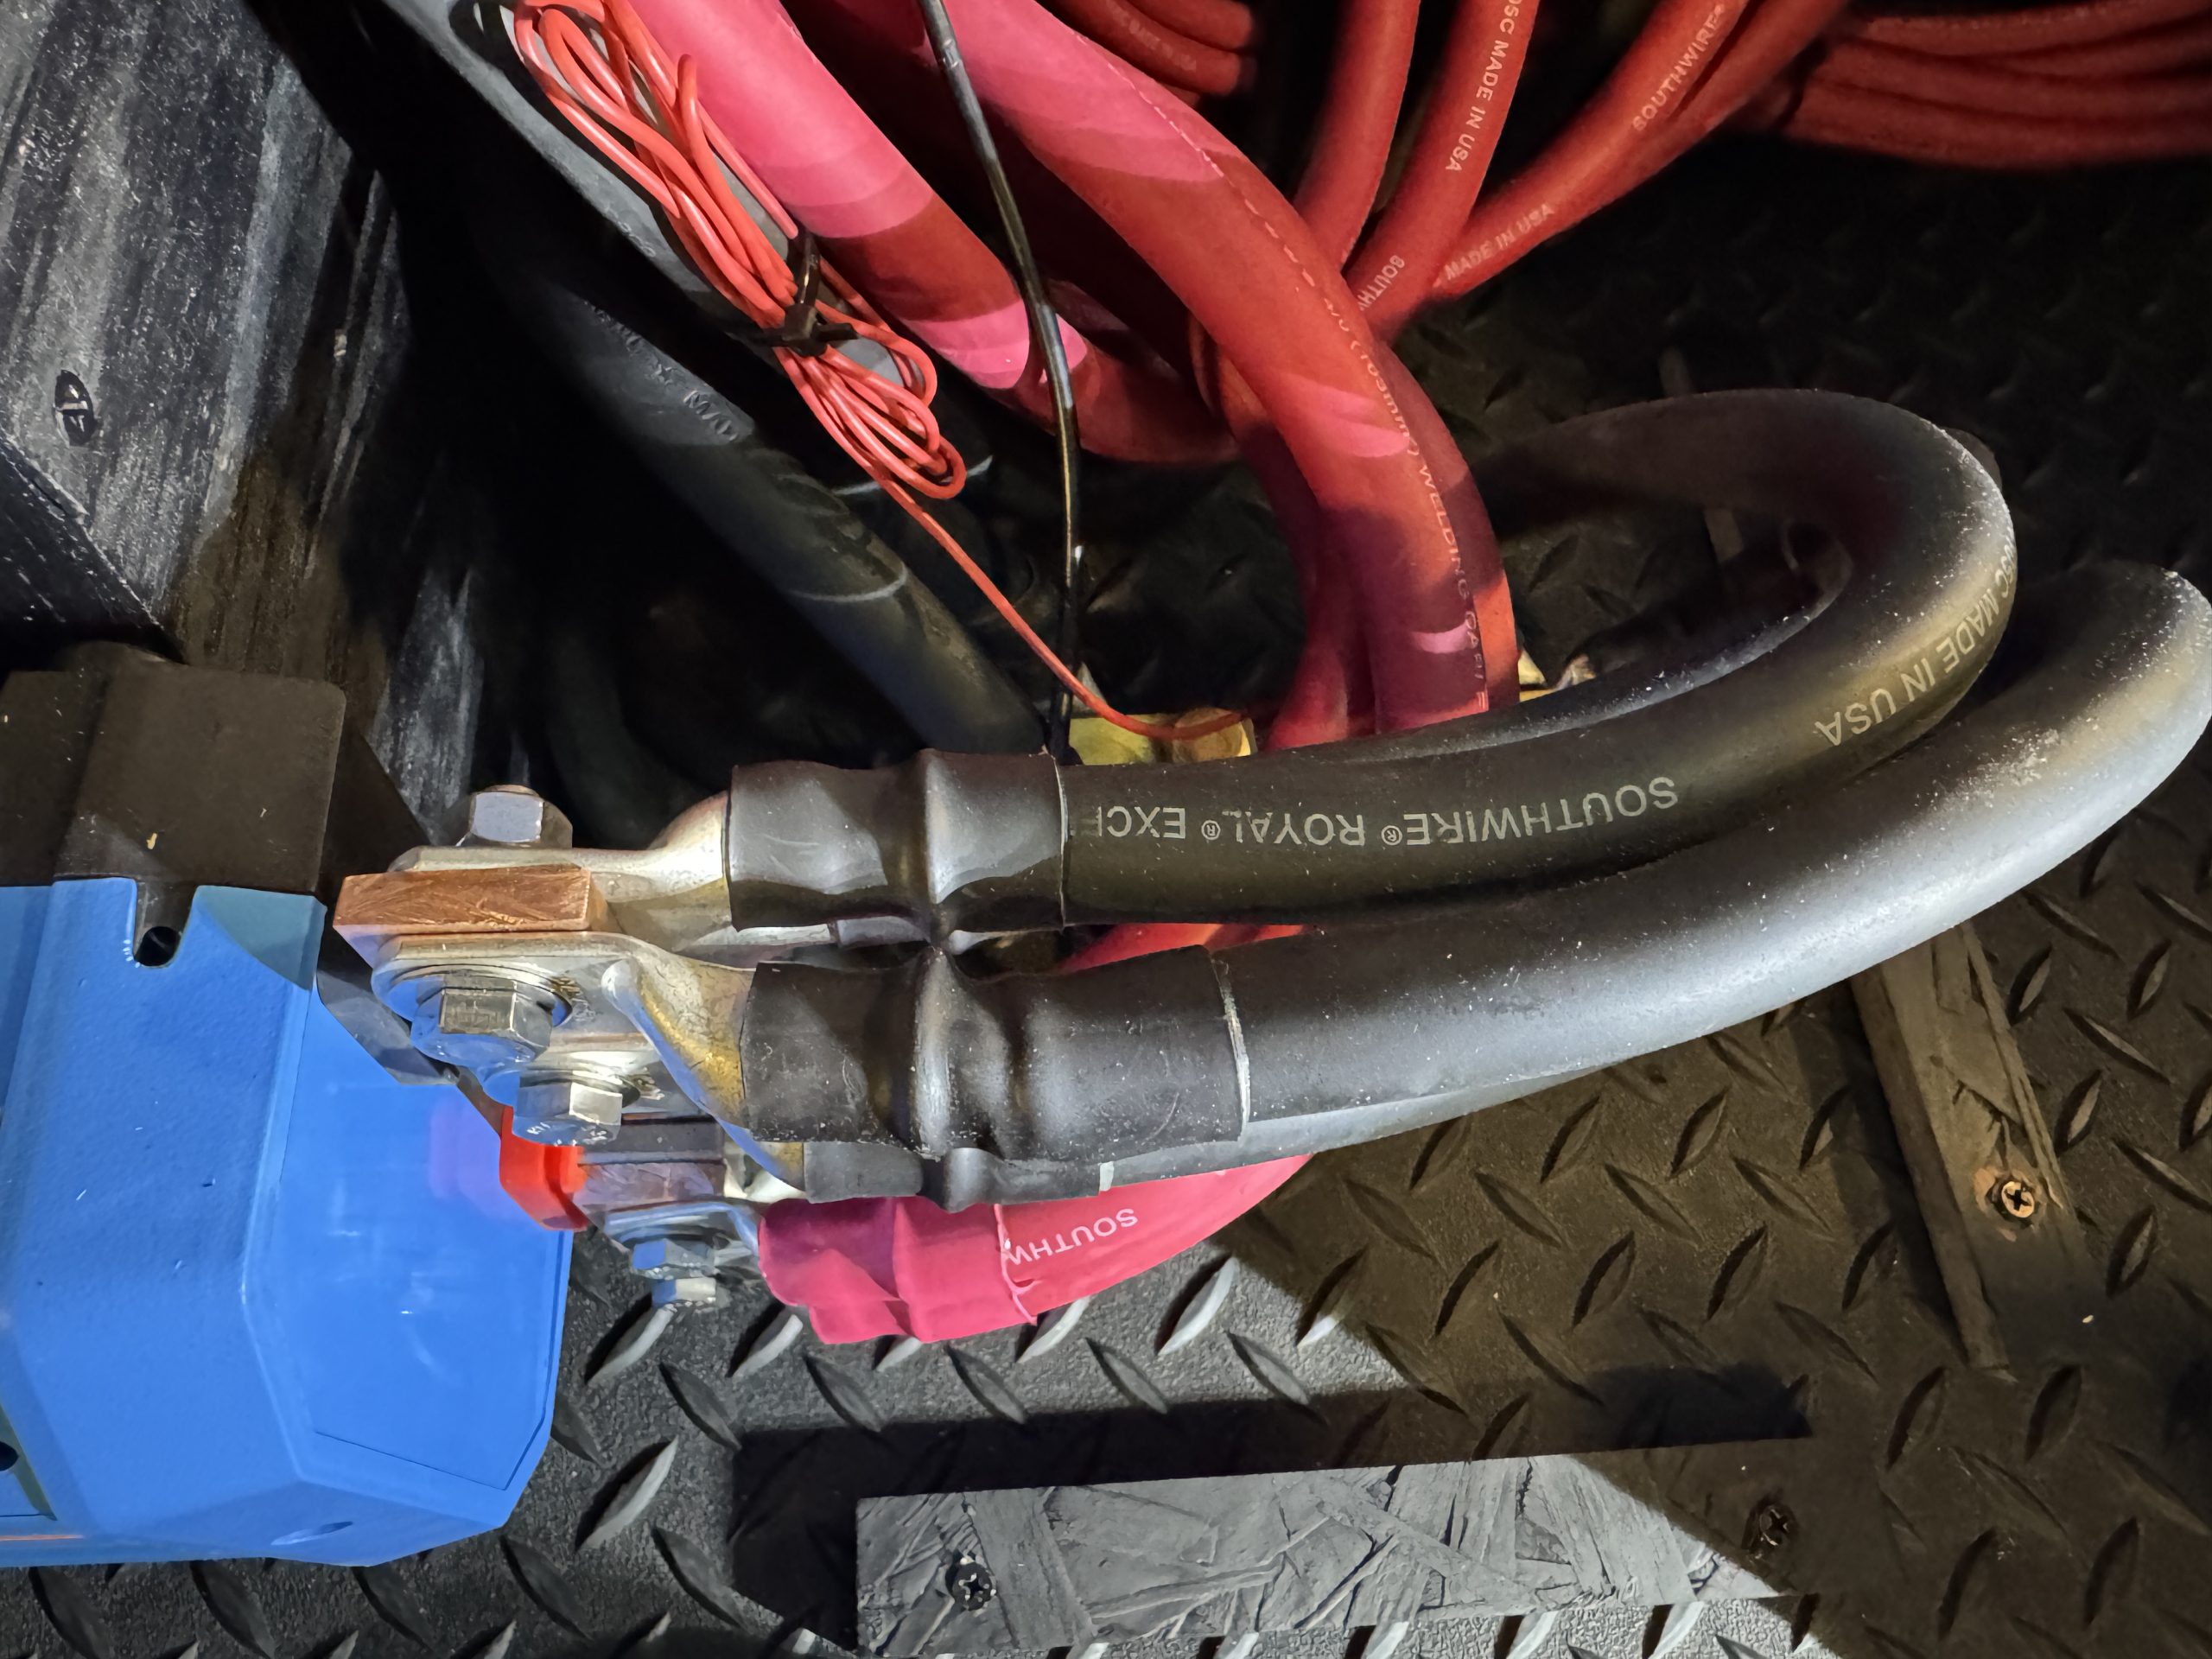
- 24 Feet of 4/0 Welding Cable - Red
- 29 Feet of 4/0 Welding Cable – Black
- 18 Feet of 2 AWG Welding Cable - Red
- 15 Feet of 2 AWG Welding Cable – Black
- 10 Feet of 6 AWG Bare Copper Grounding Wire
- Red and Black Dual Wall Shrink Tubing
- Various 4/0 Tinned Copper Lugs
- Various 2 AWG Tinned Copper Lugs
- Various 4 AWG Tinned Copper Lugs
- Various 6 AWG Tinned Copper Lugs
- 6 - REC TwinPeak 2S Mono 72 Series 365 Watt Solar Panels
- 12 - NewPowa 100 Watt Compact Solar Panels
- 84 - NewPowa Adjustable Z-Bracket Solar Panel Mounts
- 2 - AM Solar Roof Combiner Boxes with an additional set of bus bars
- 4 - AM Solar Strain Relief
- Miscellaneous MC4 Male/Female Solar Panel Cable Connectors
- 3 - Midnite Solar Baby Box Enclosure with DIN Rail
- 100 Feet 10 AWG USE-2 Black cable
- Midnite Solar MNEPV Series 150 V DIN Mount DC Breakers (1 - 100 amp, 2 - 80 Amp 1 - 20 Amp, & 2 - 15 Amp)
- 6 - Ruuvi Temperature Sensors
- 5 - Mopeka Pro Check Tank Sensors
- Miscellaneous parts, sealant and connectors
Installation Notes
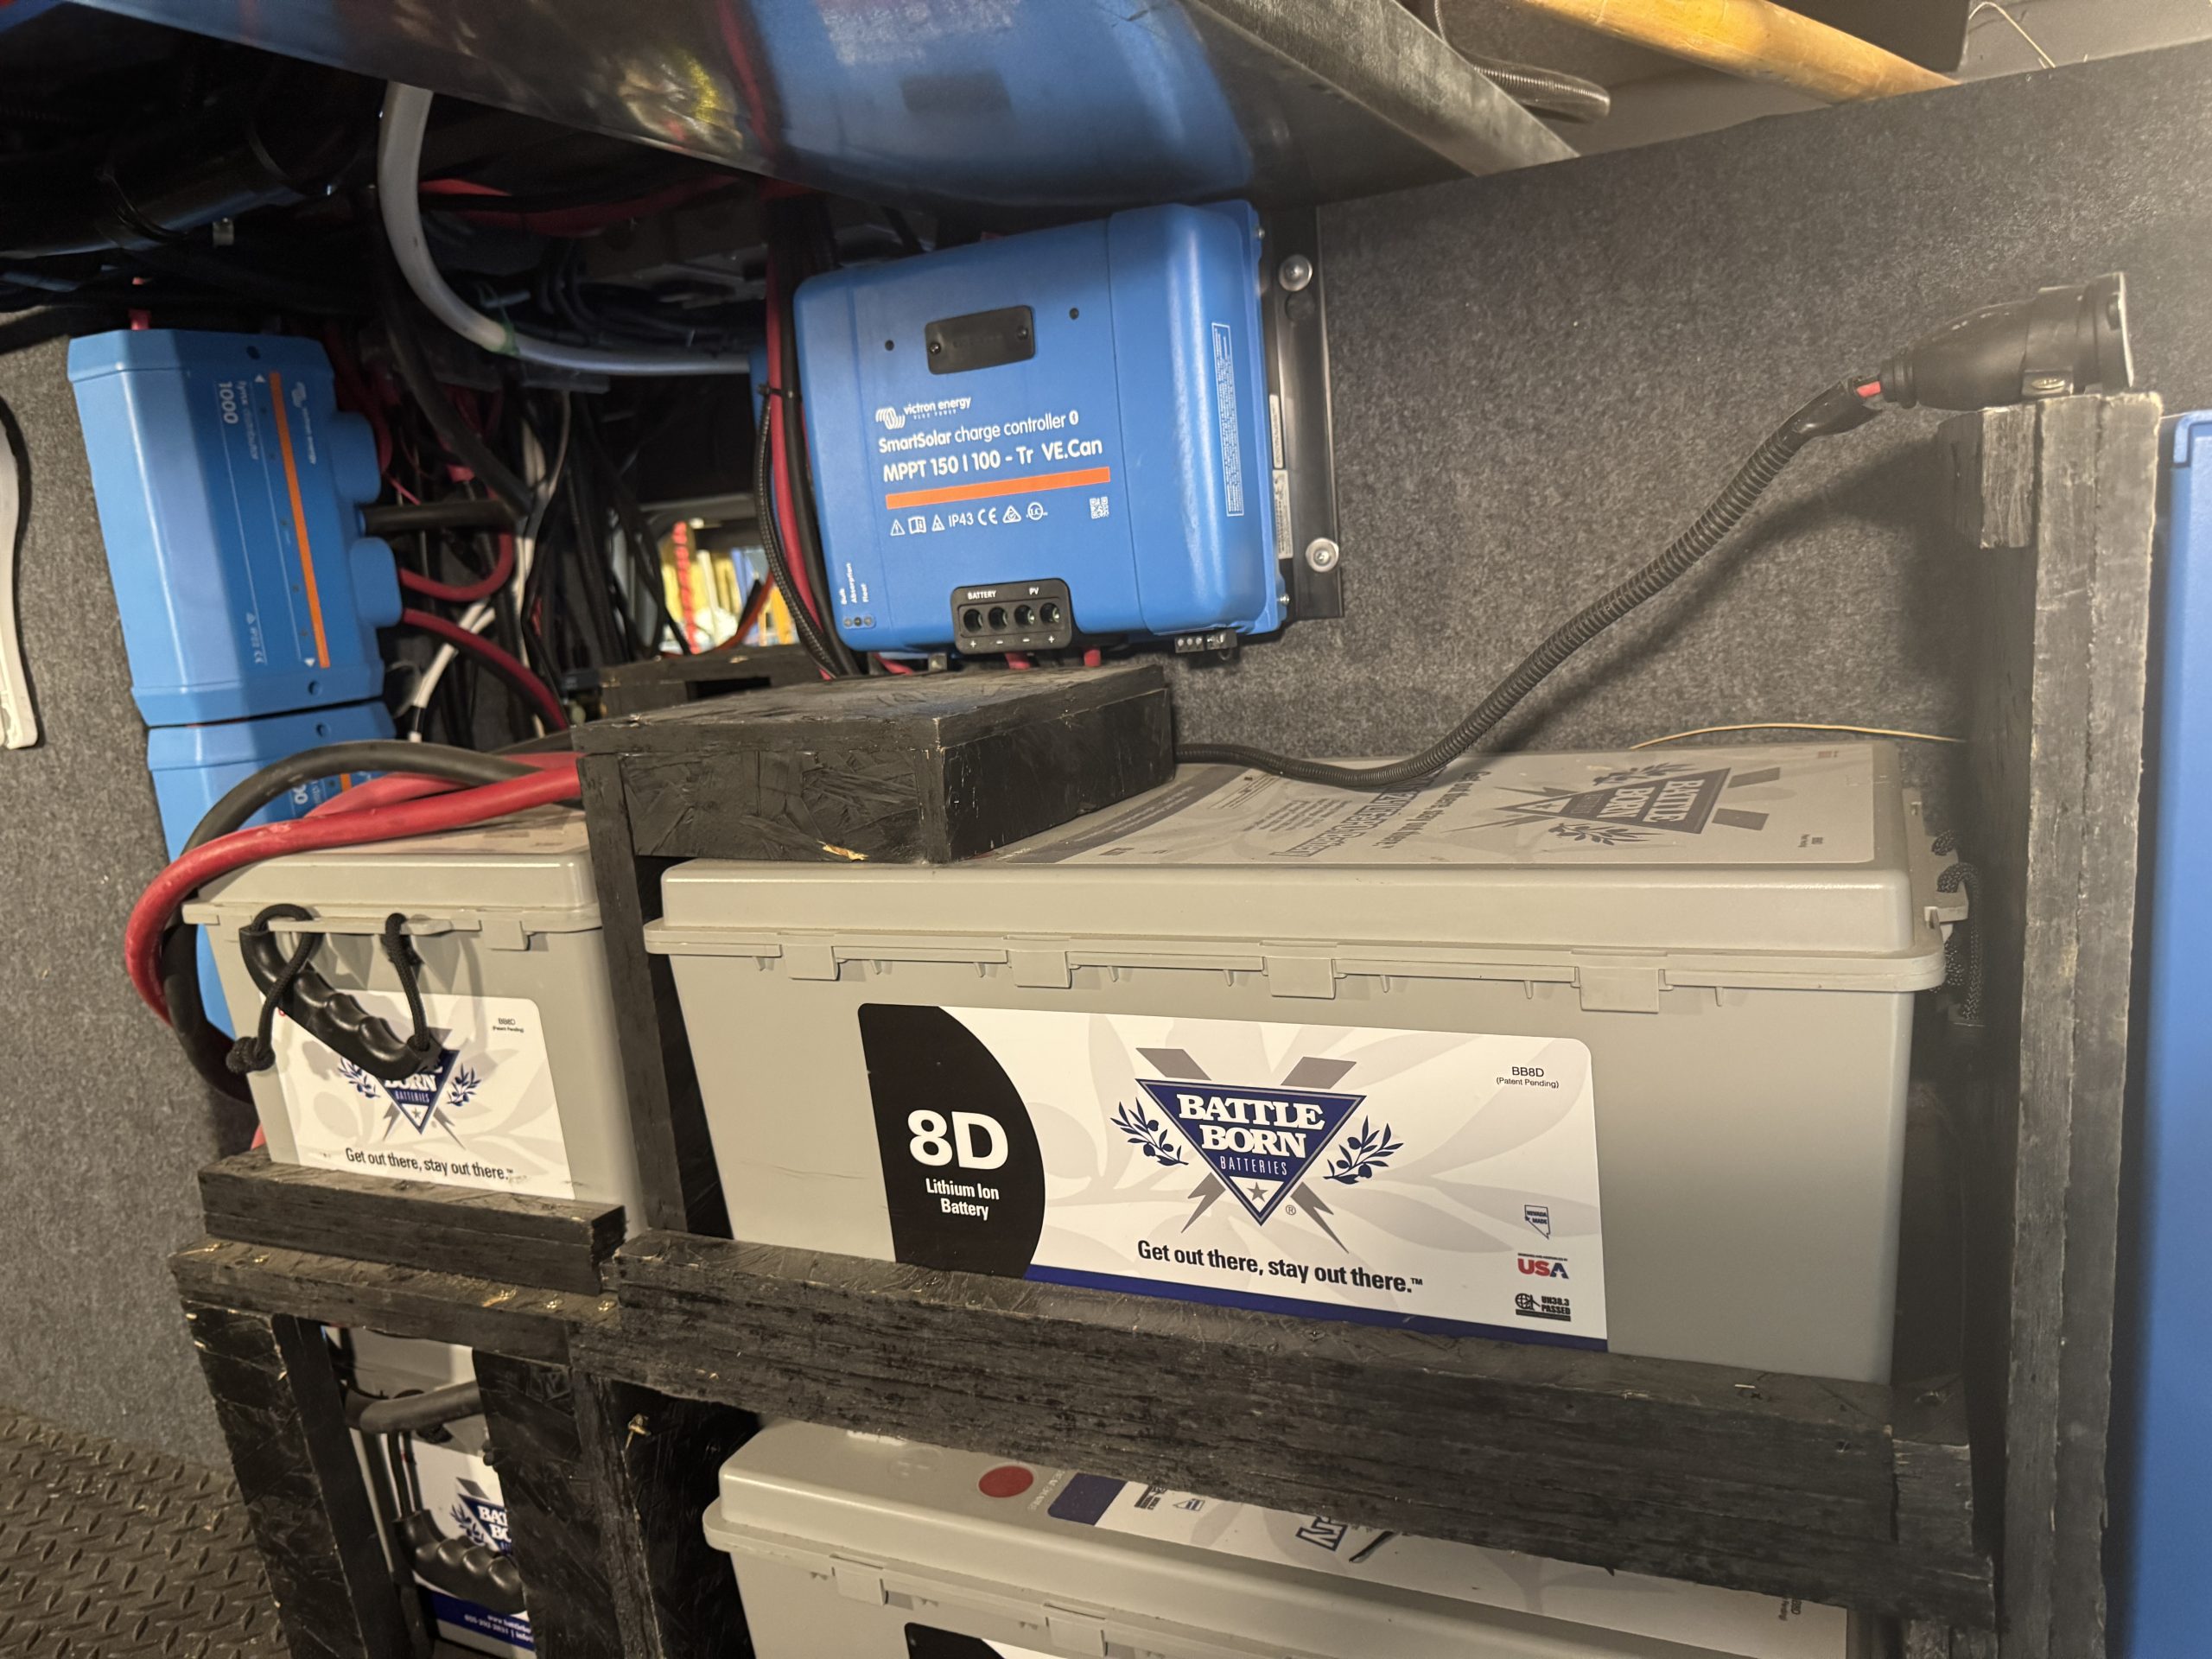
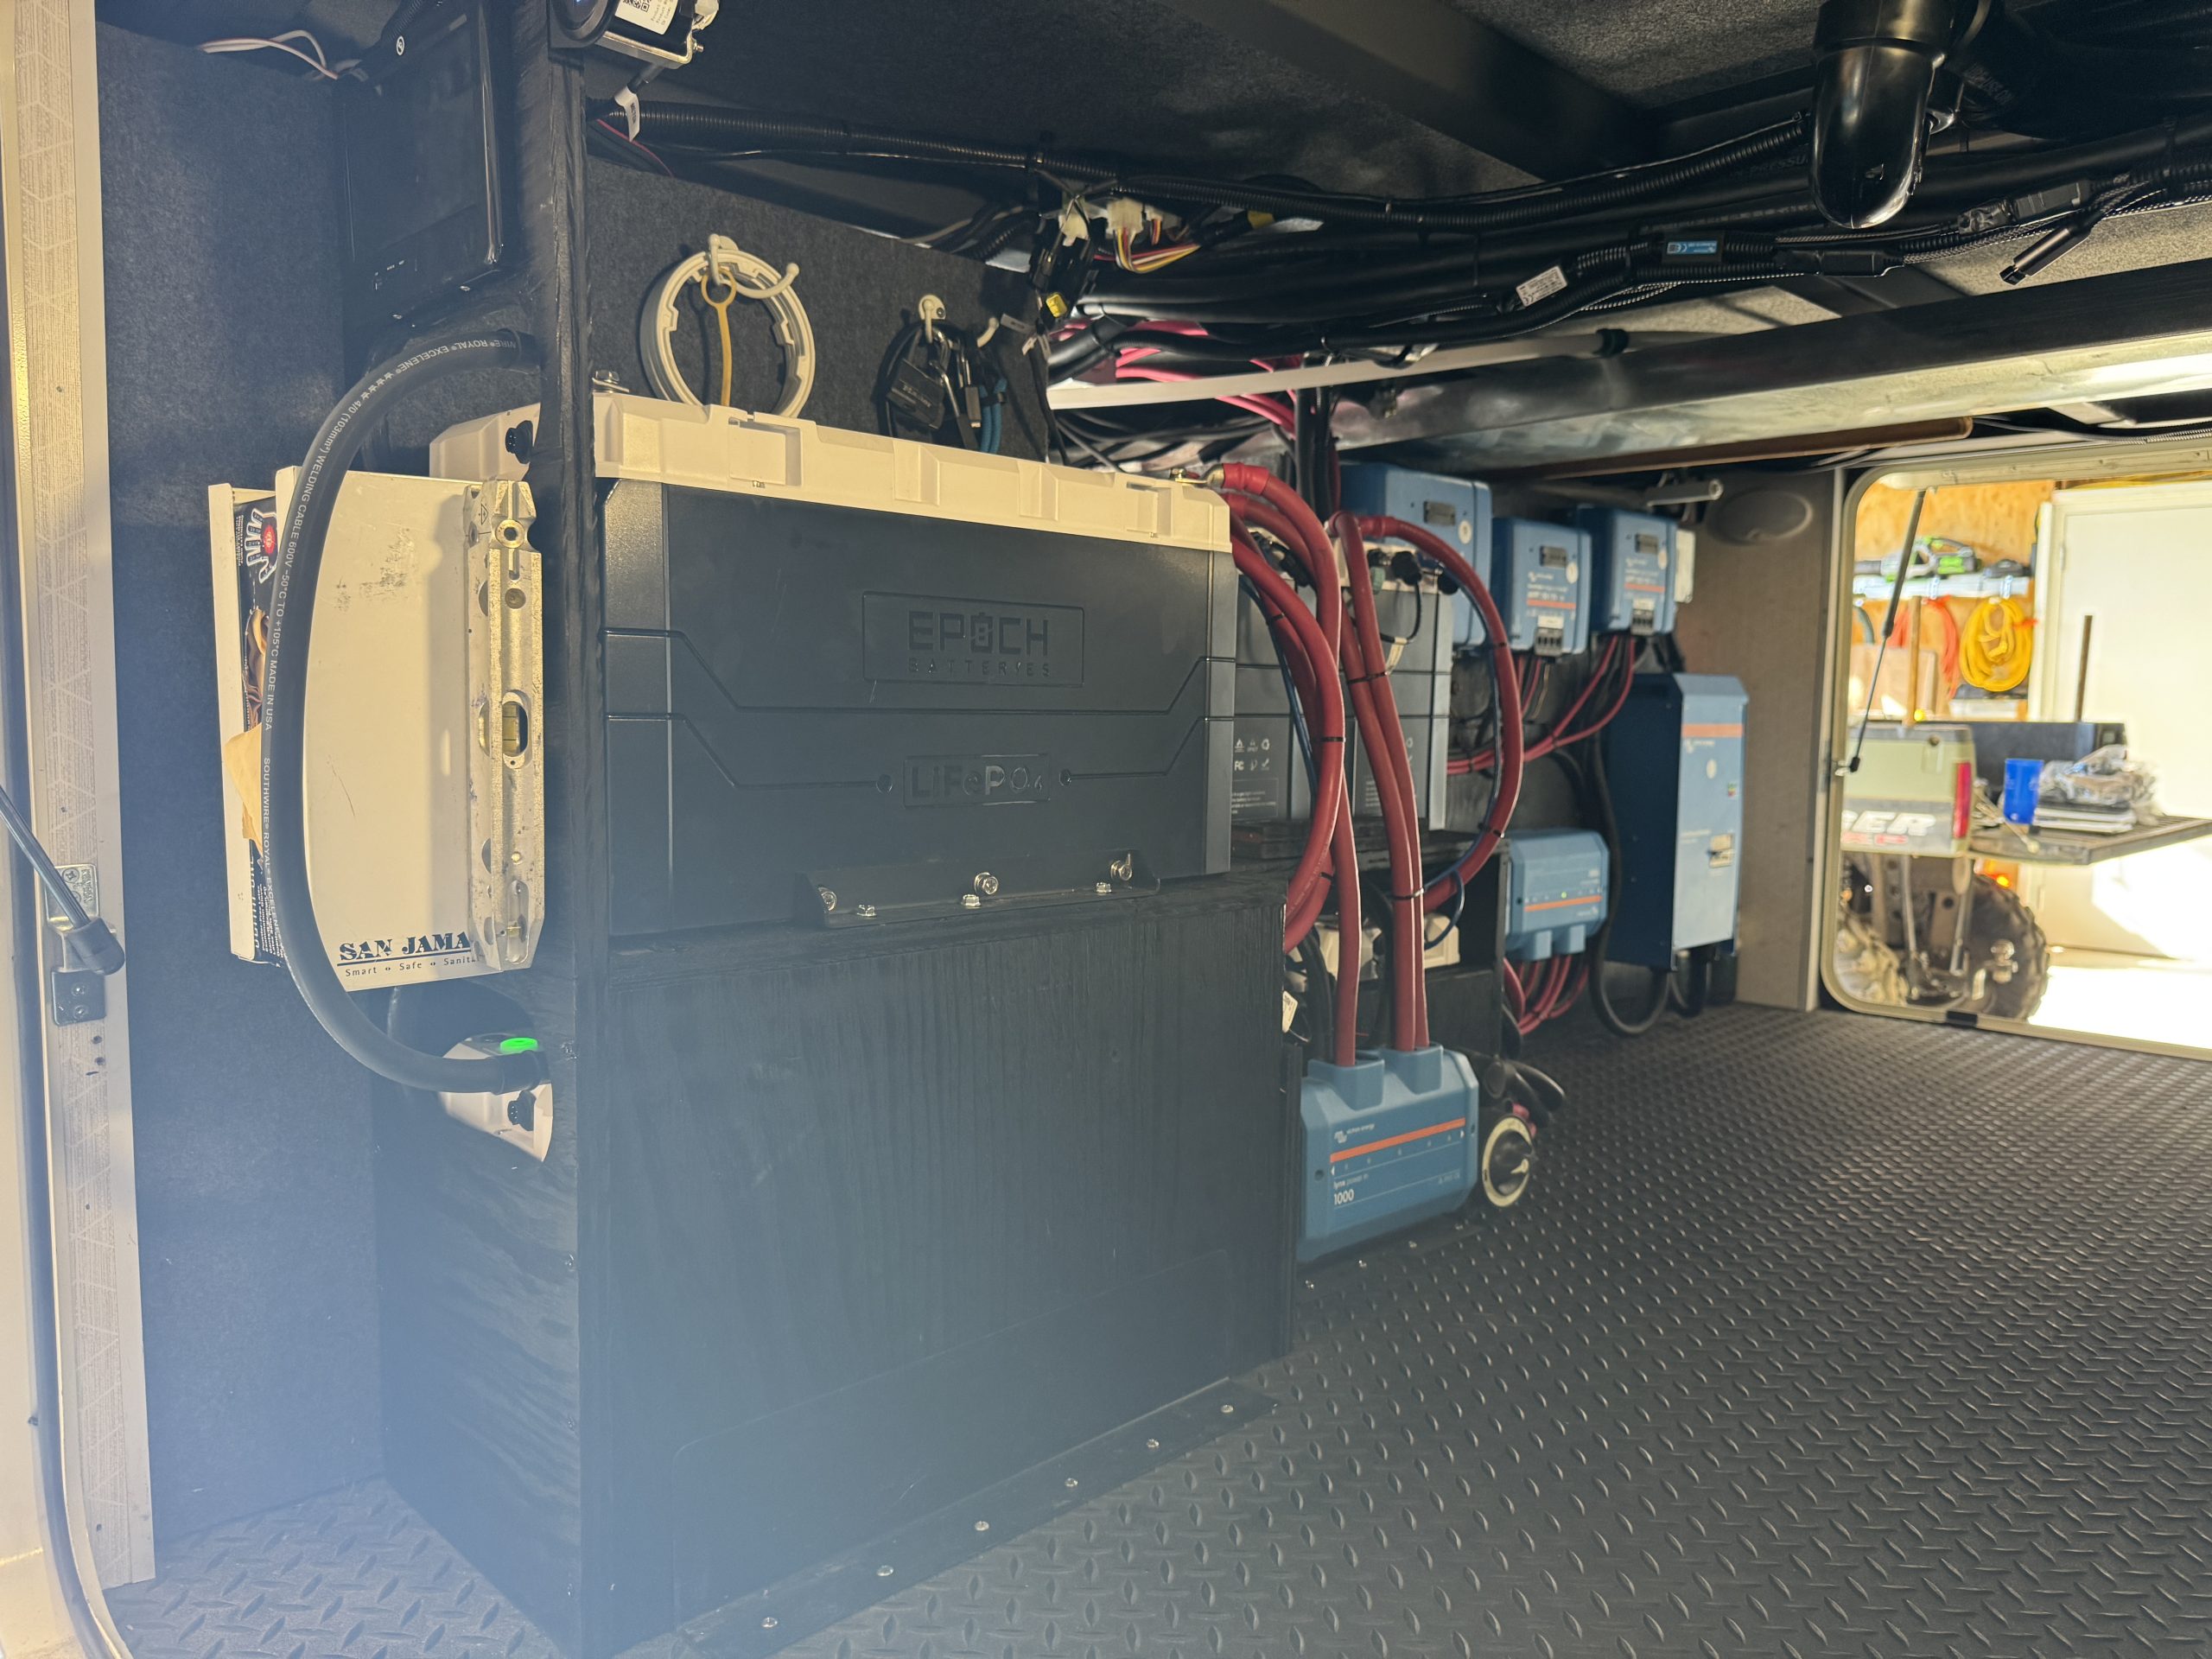
This installation was completed in August of 2024. This is my personal RV and I have been using this system since I installed it in June of 2022. This year I became on EPOCH battery dealer and I decided to upgrade the Battle Born battery bank in my system to a larger EPOCH battery bank. There was nothing wrong with the Battle Born batteries. They functioned flawlessly and I will be using them in a new system in my truck. The EPOCH batteries offer different features than the Battle Born batteries and are constructed of prismatic lithium cells rather than the cylindrical cells Battle Born uses. Because I am no an EPOCH battery dealer, I wanted to get some personal experience with them. I don’t like selling products to customers with which I do not have personal experience. This helps me from a technical standpoint for system design, installation and support.
The primary reasons I decided to switch batteries were two fold. First, I wanted more capacity for my system. We never came close to running out of energy with the Battle Born battery bank, but I was careful about running heavy loads (like air conditioners) when we didn’t have hook ups (or want to run the generator). This new EPOCH battery bank has two and a half times the storage capacity of my Battle Born battery bank. This significant increase in capacity only required adding two more batteries. The Battle Born batteries were 270 amp hours each (times 4, for a total of 1080 amp hours) and the EPOCH’s are 460 amp hours each (times 6, for a total of 2760 amp hours). The batteries have almost the exact same footprint, but the EPOCHs are taller than the Battle Born 8D’s. Second, I wanted to take advantage of some of the features that EPOCH offers in their Elite series batteries. These features include individual on/off switches on each battery, integrated internal fusing and hard wired communication between the batteries and the Victron ecosystem. There are other features as well, like internal heaters and Bluetooth access to the BMS, but Battle Born has these features too (just not in the 8D batteries that I had).
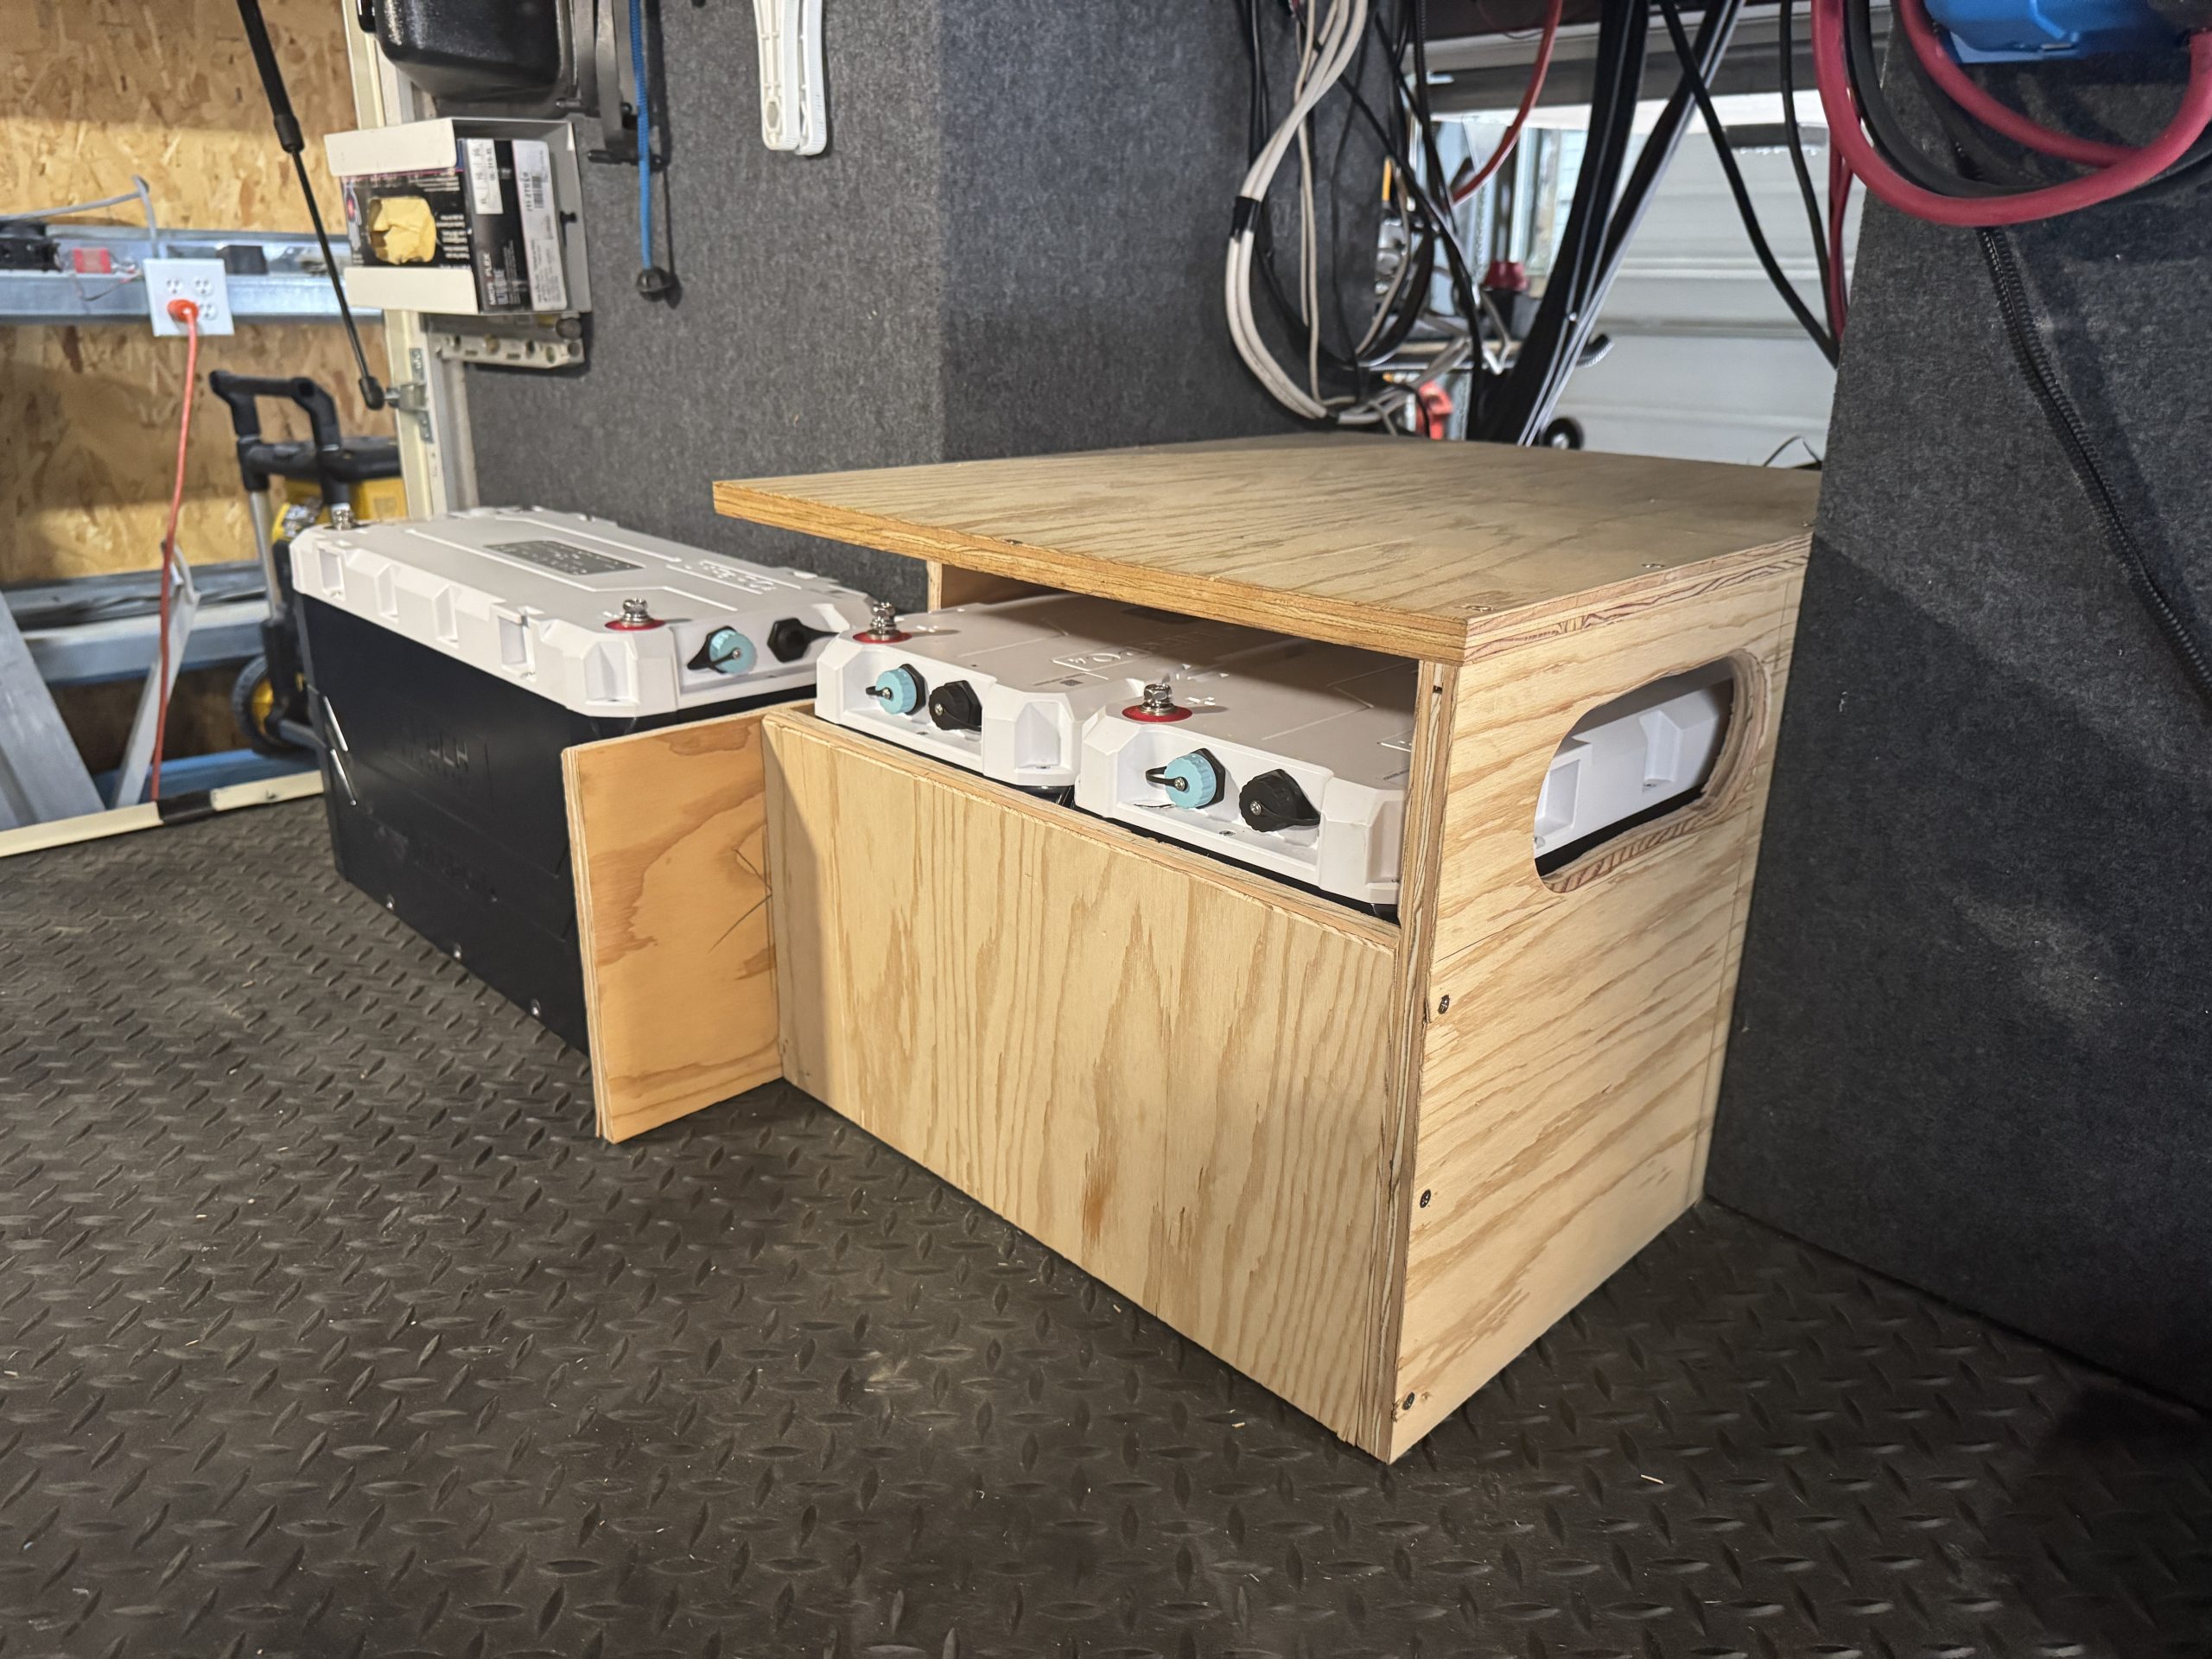
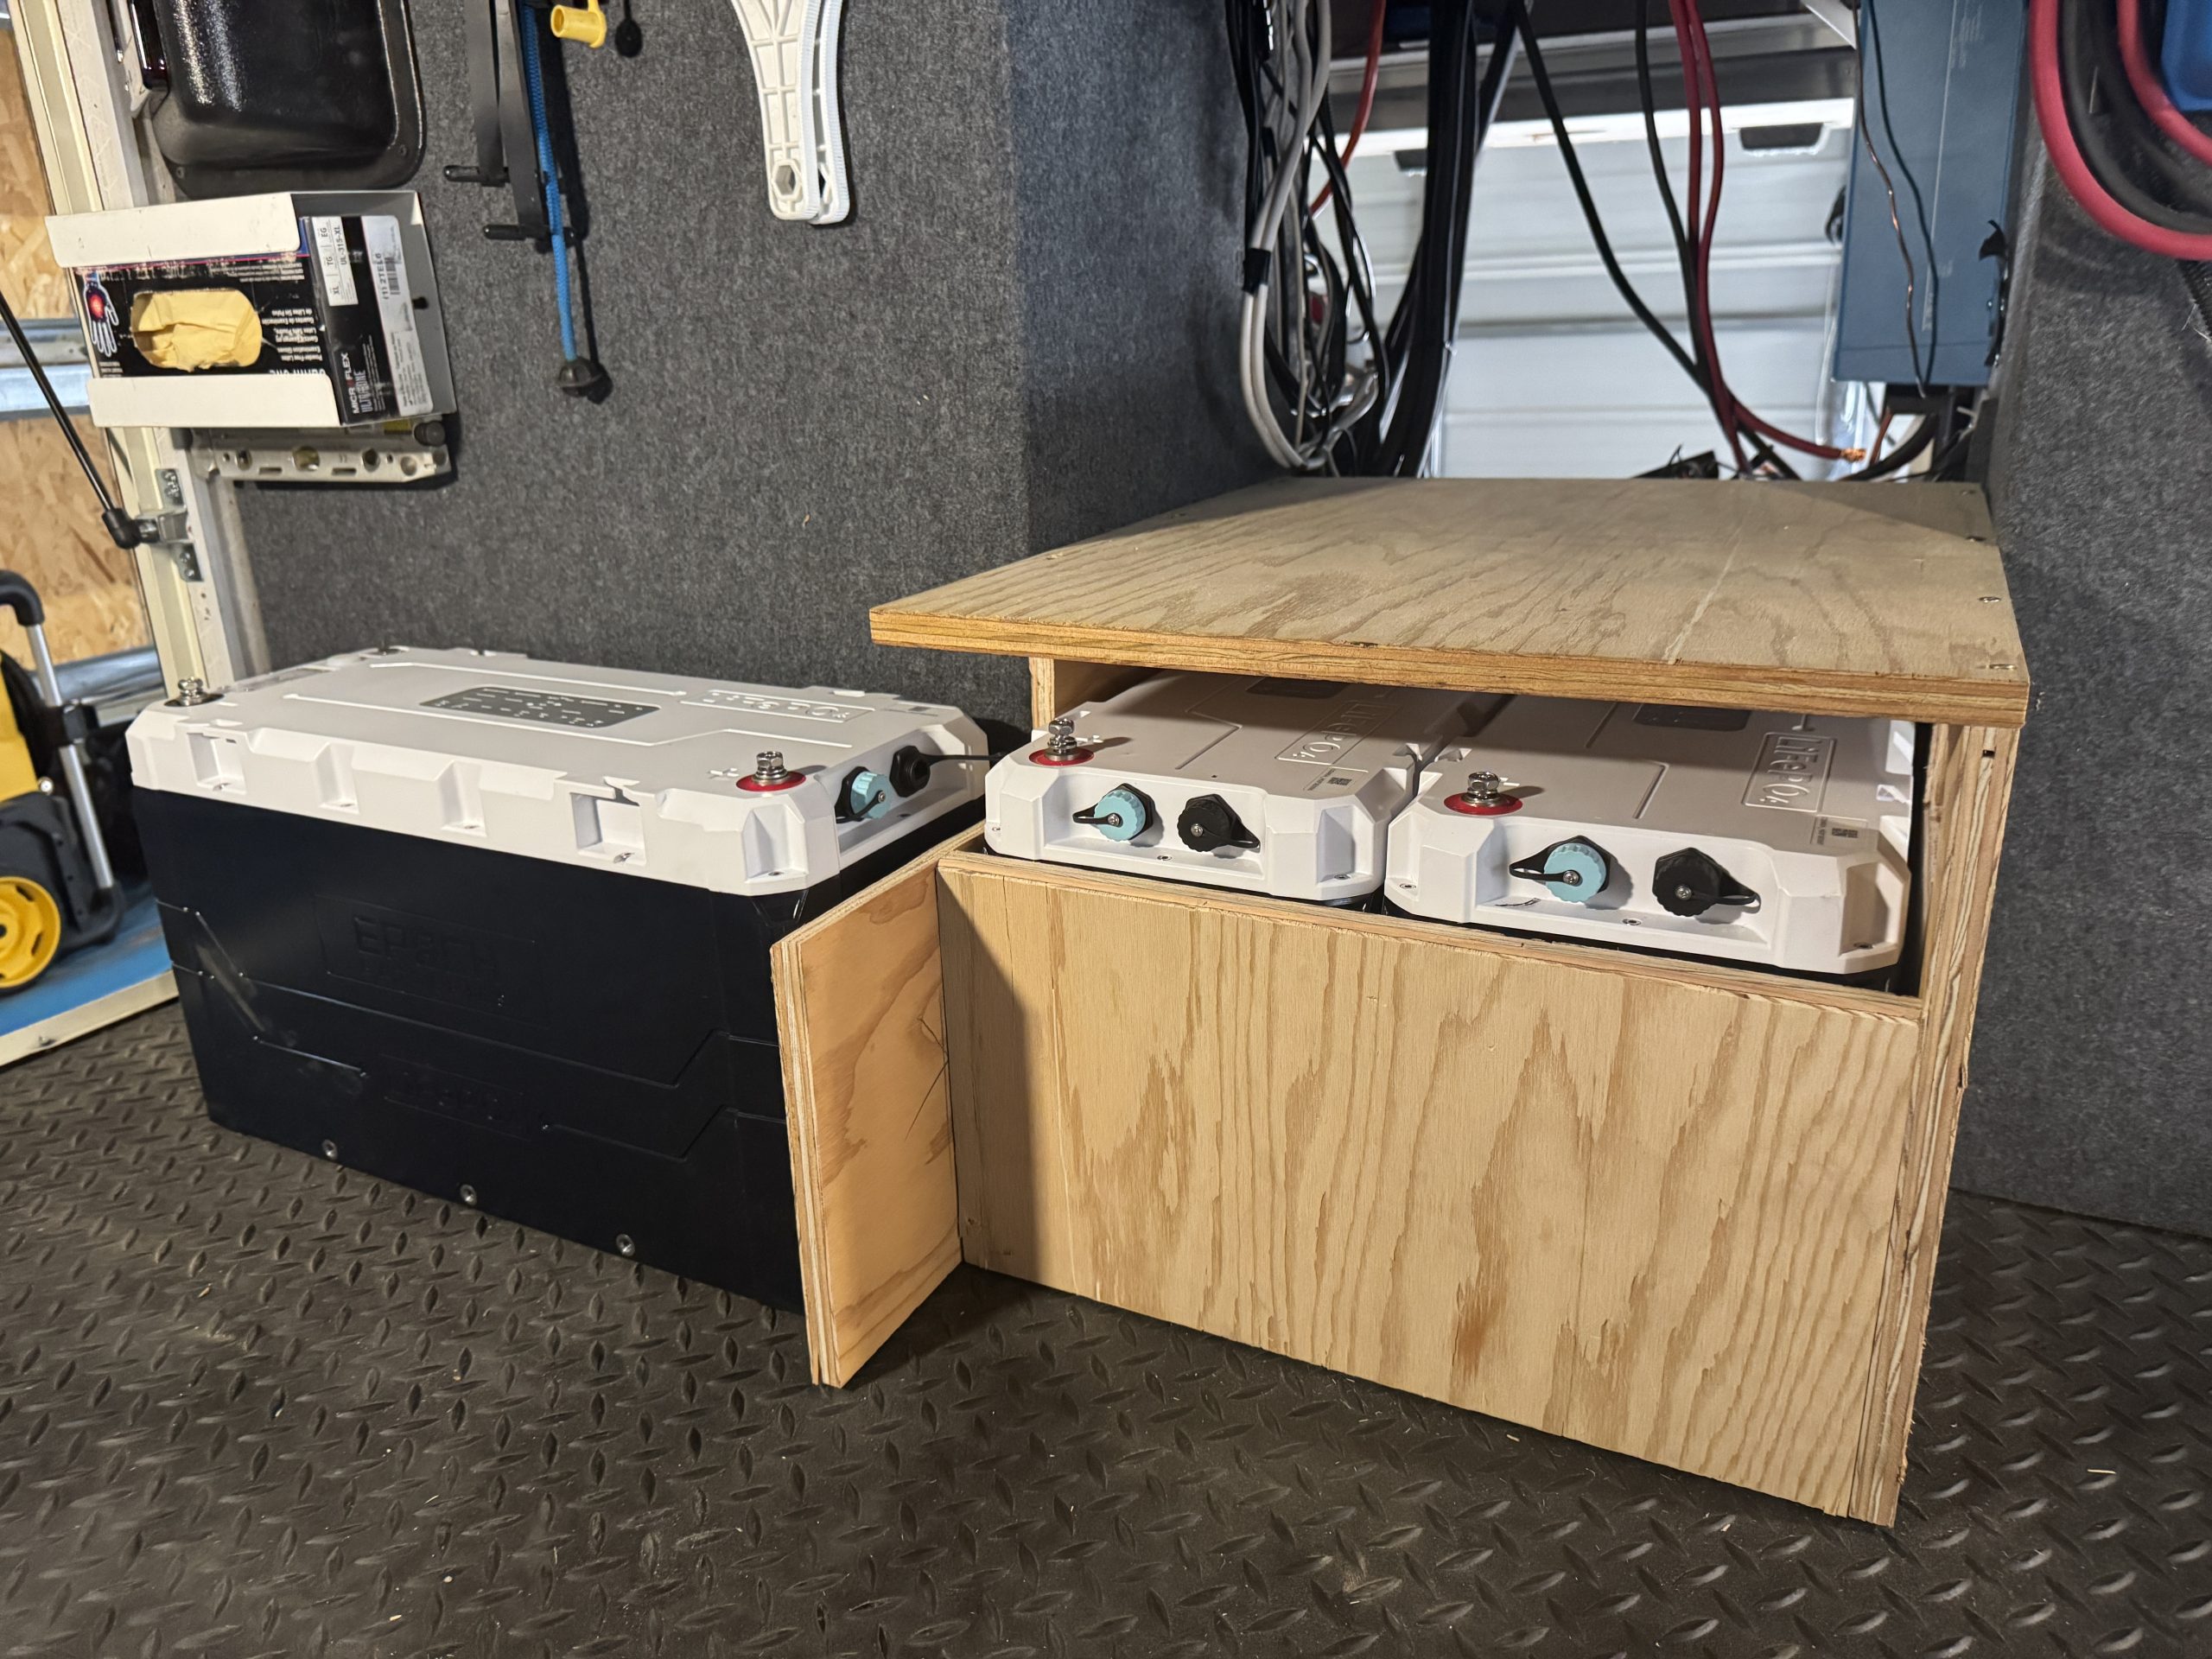
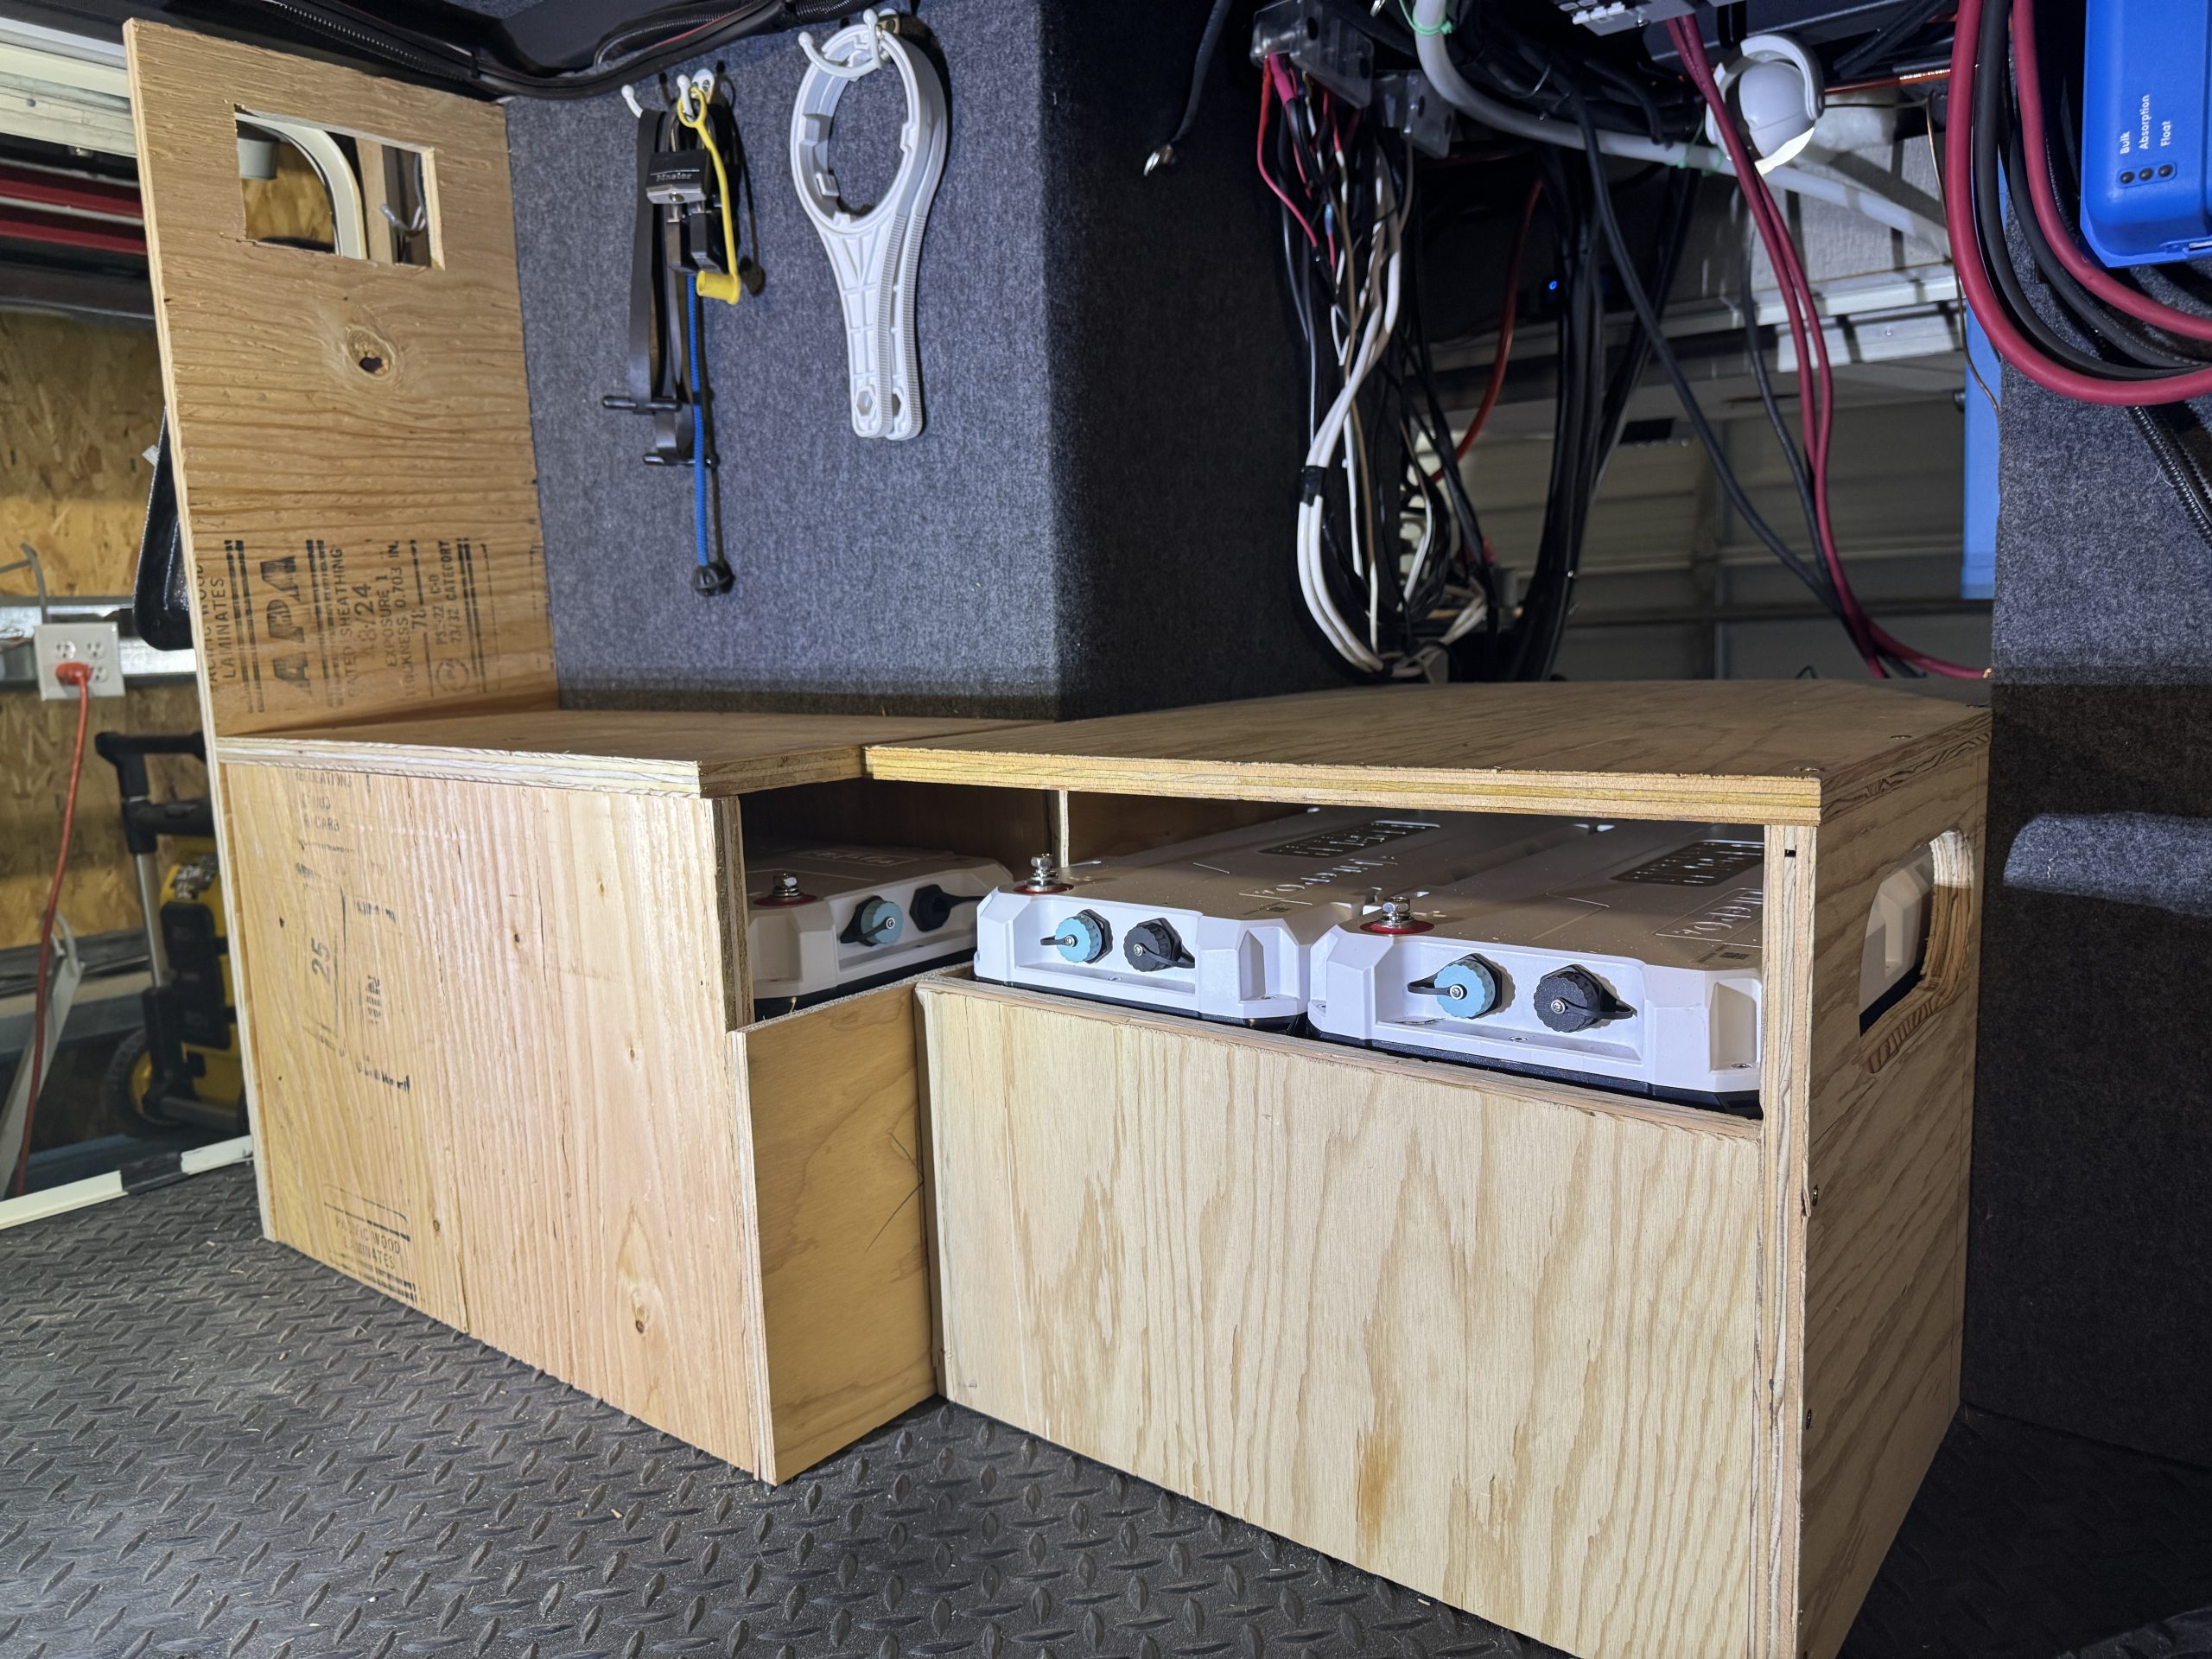
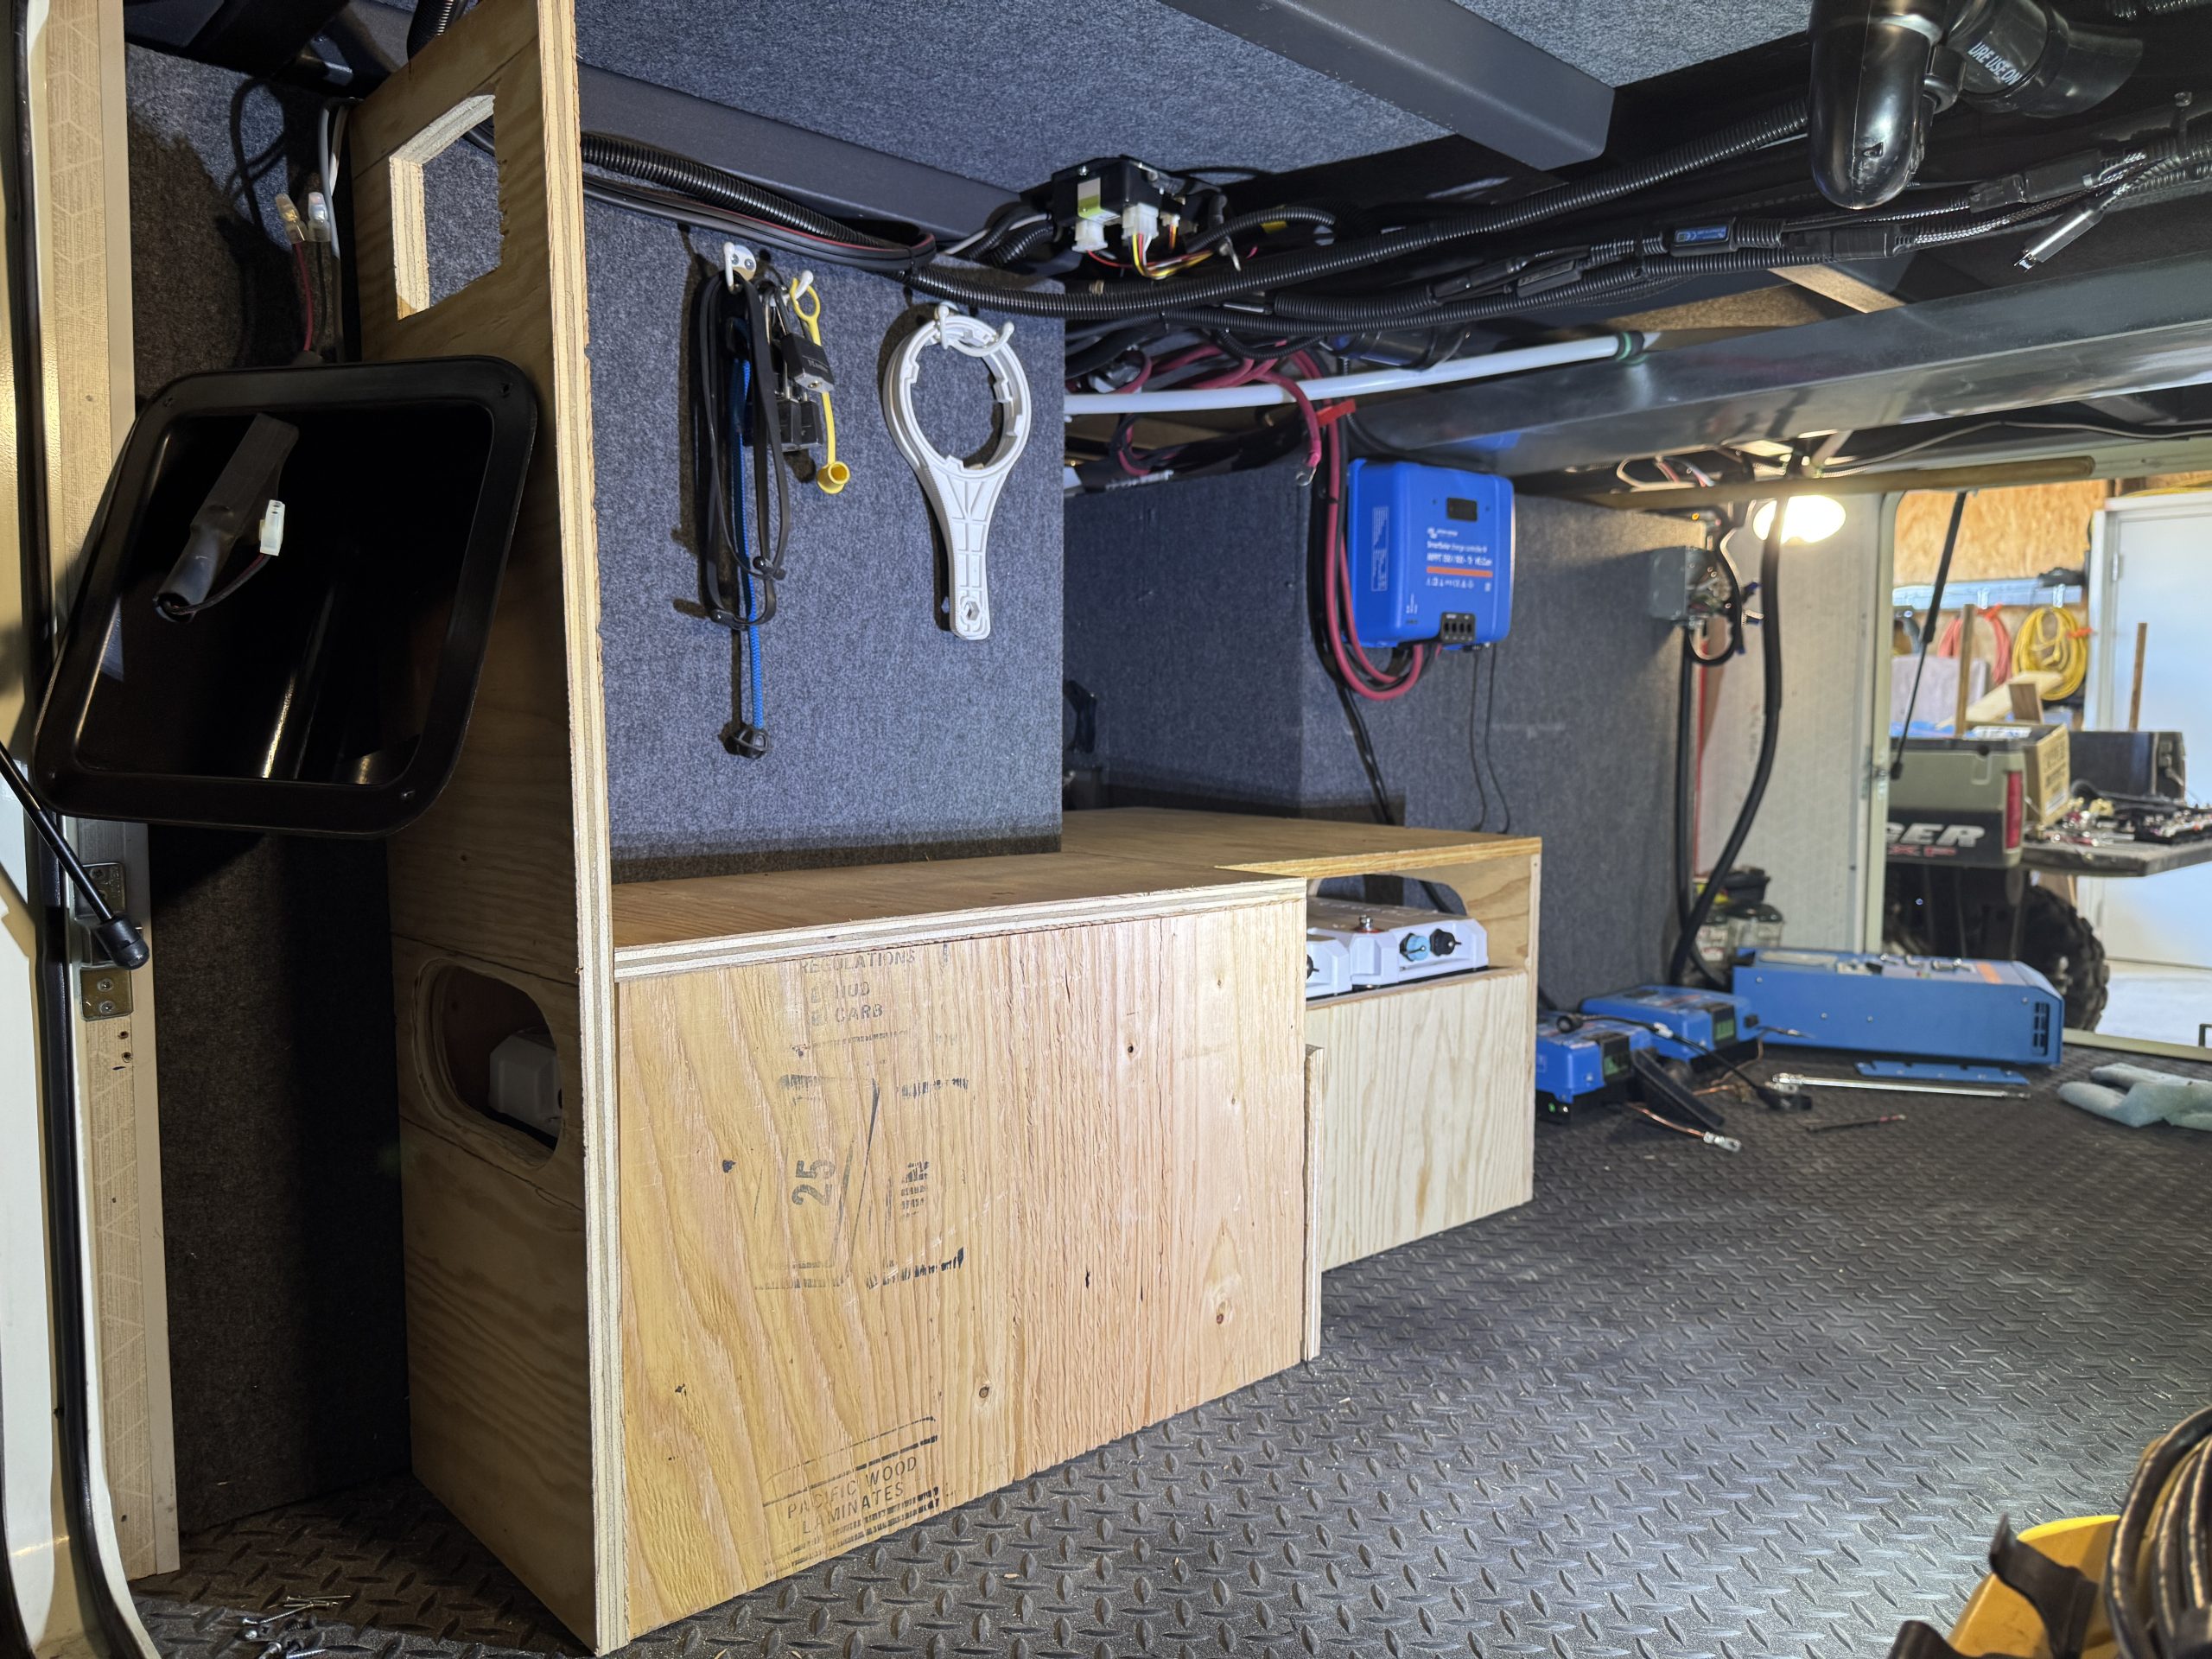
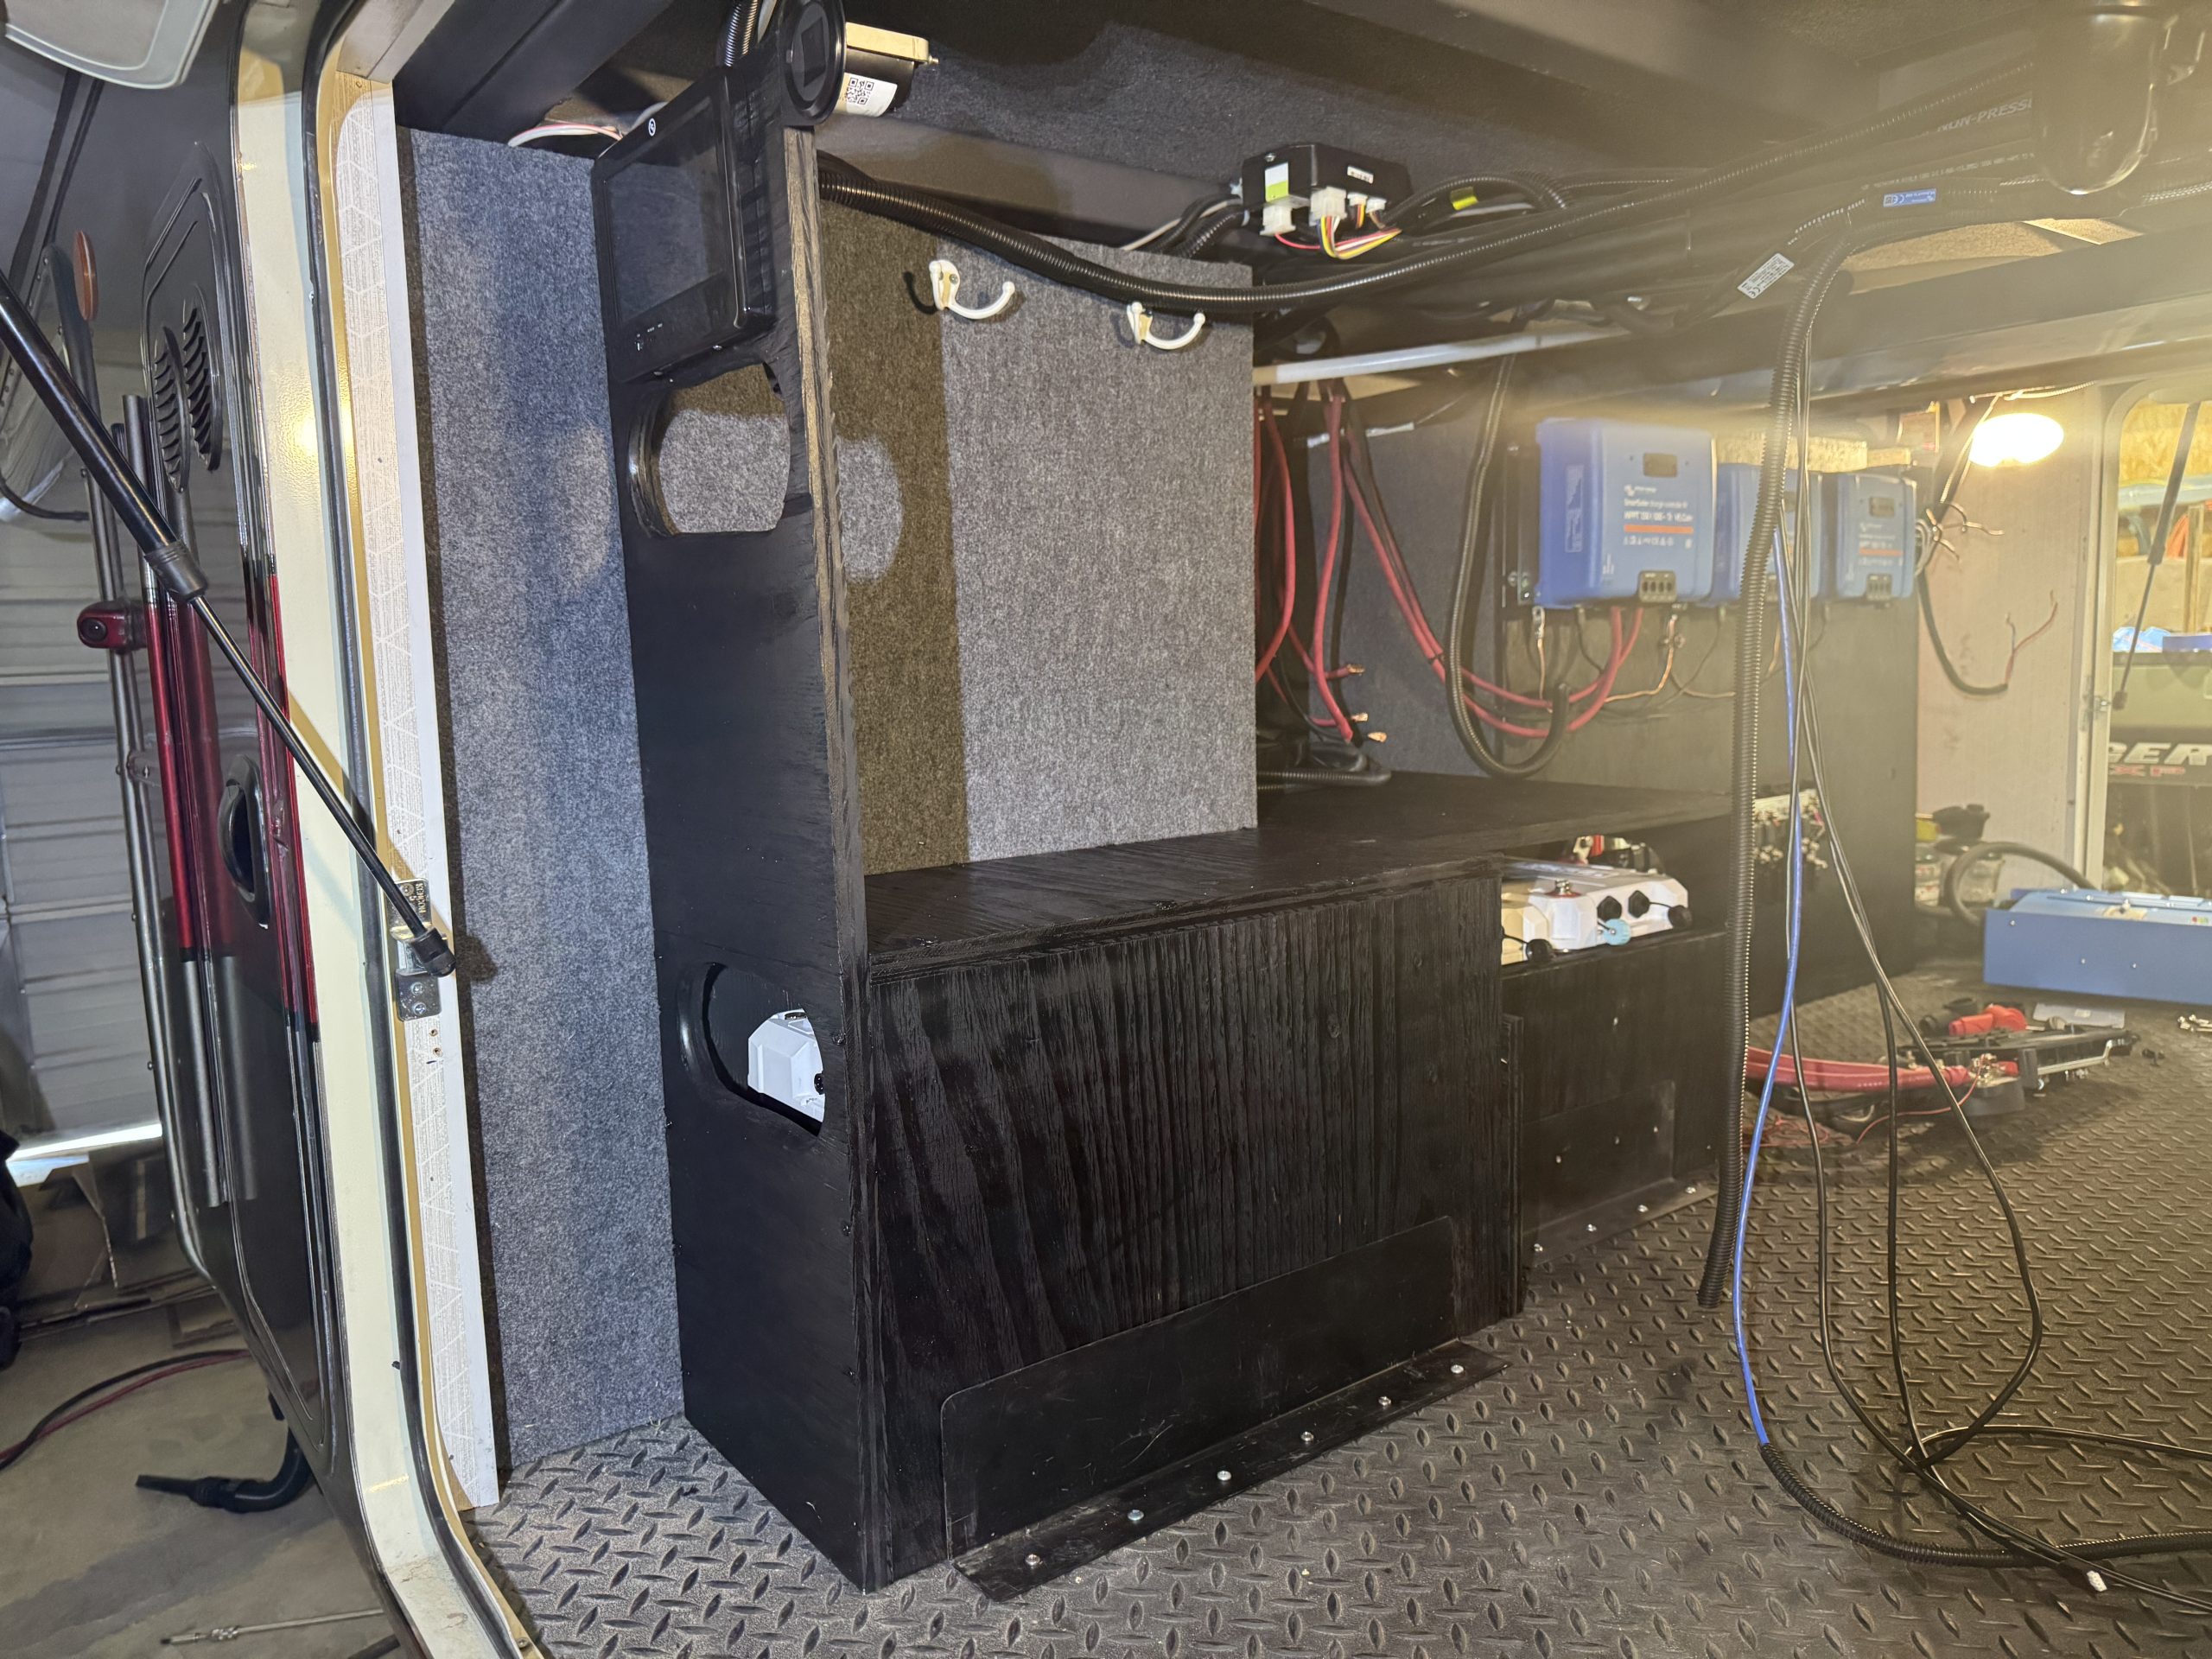
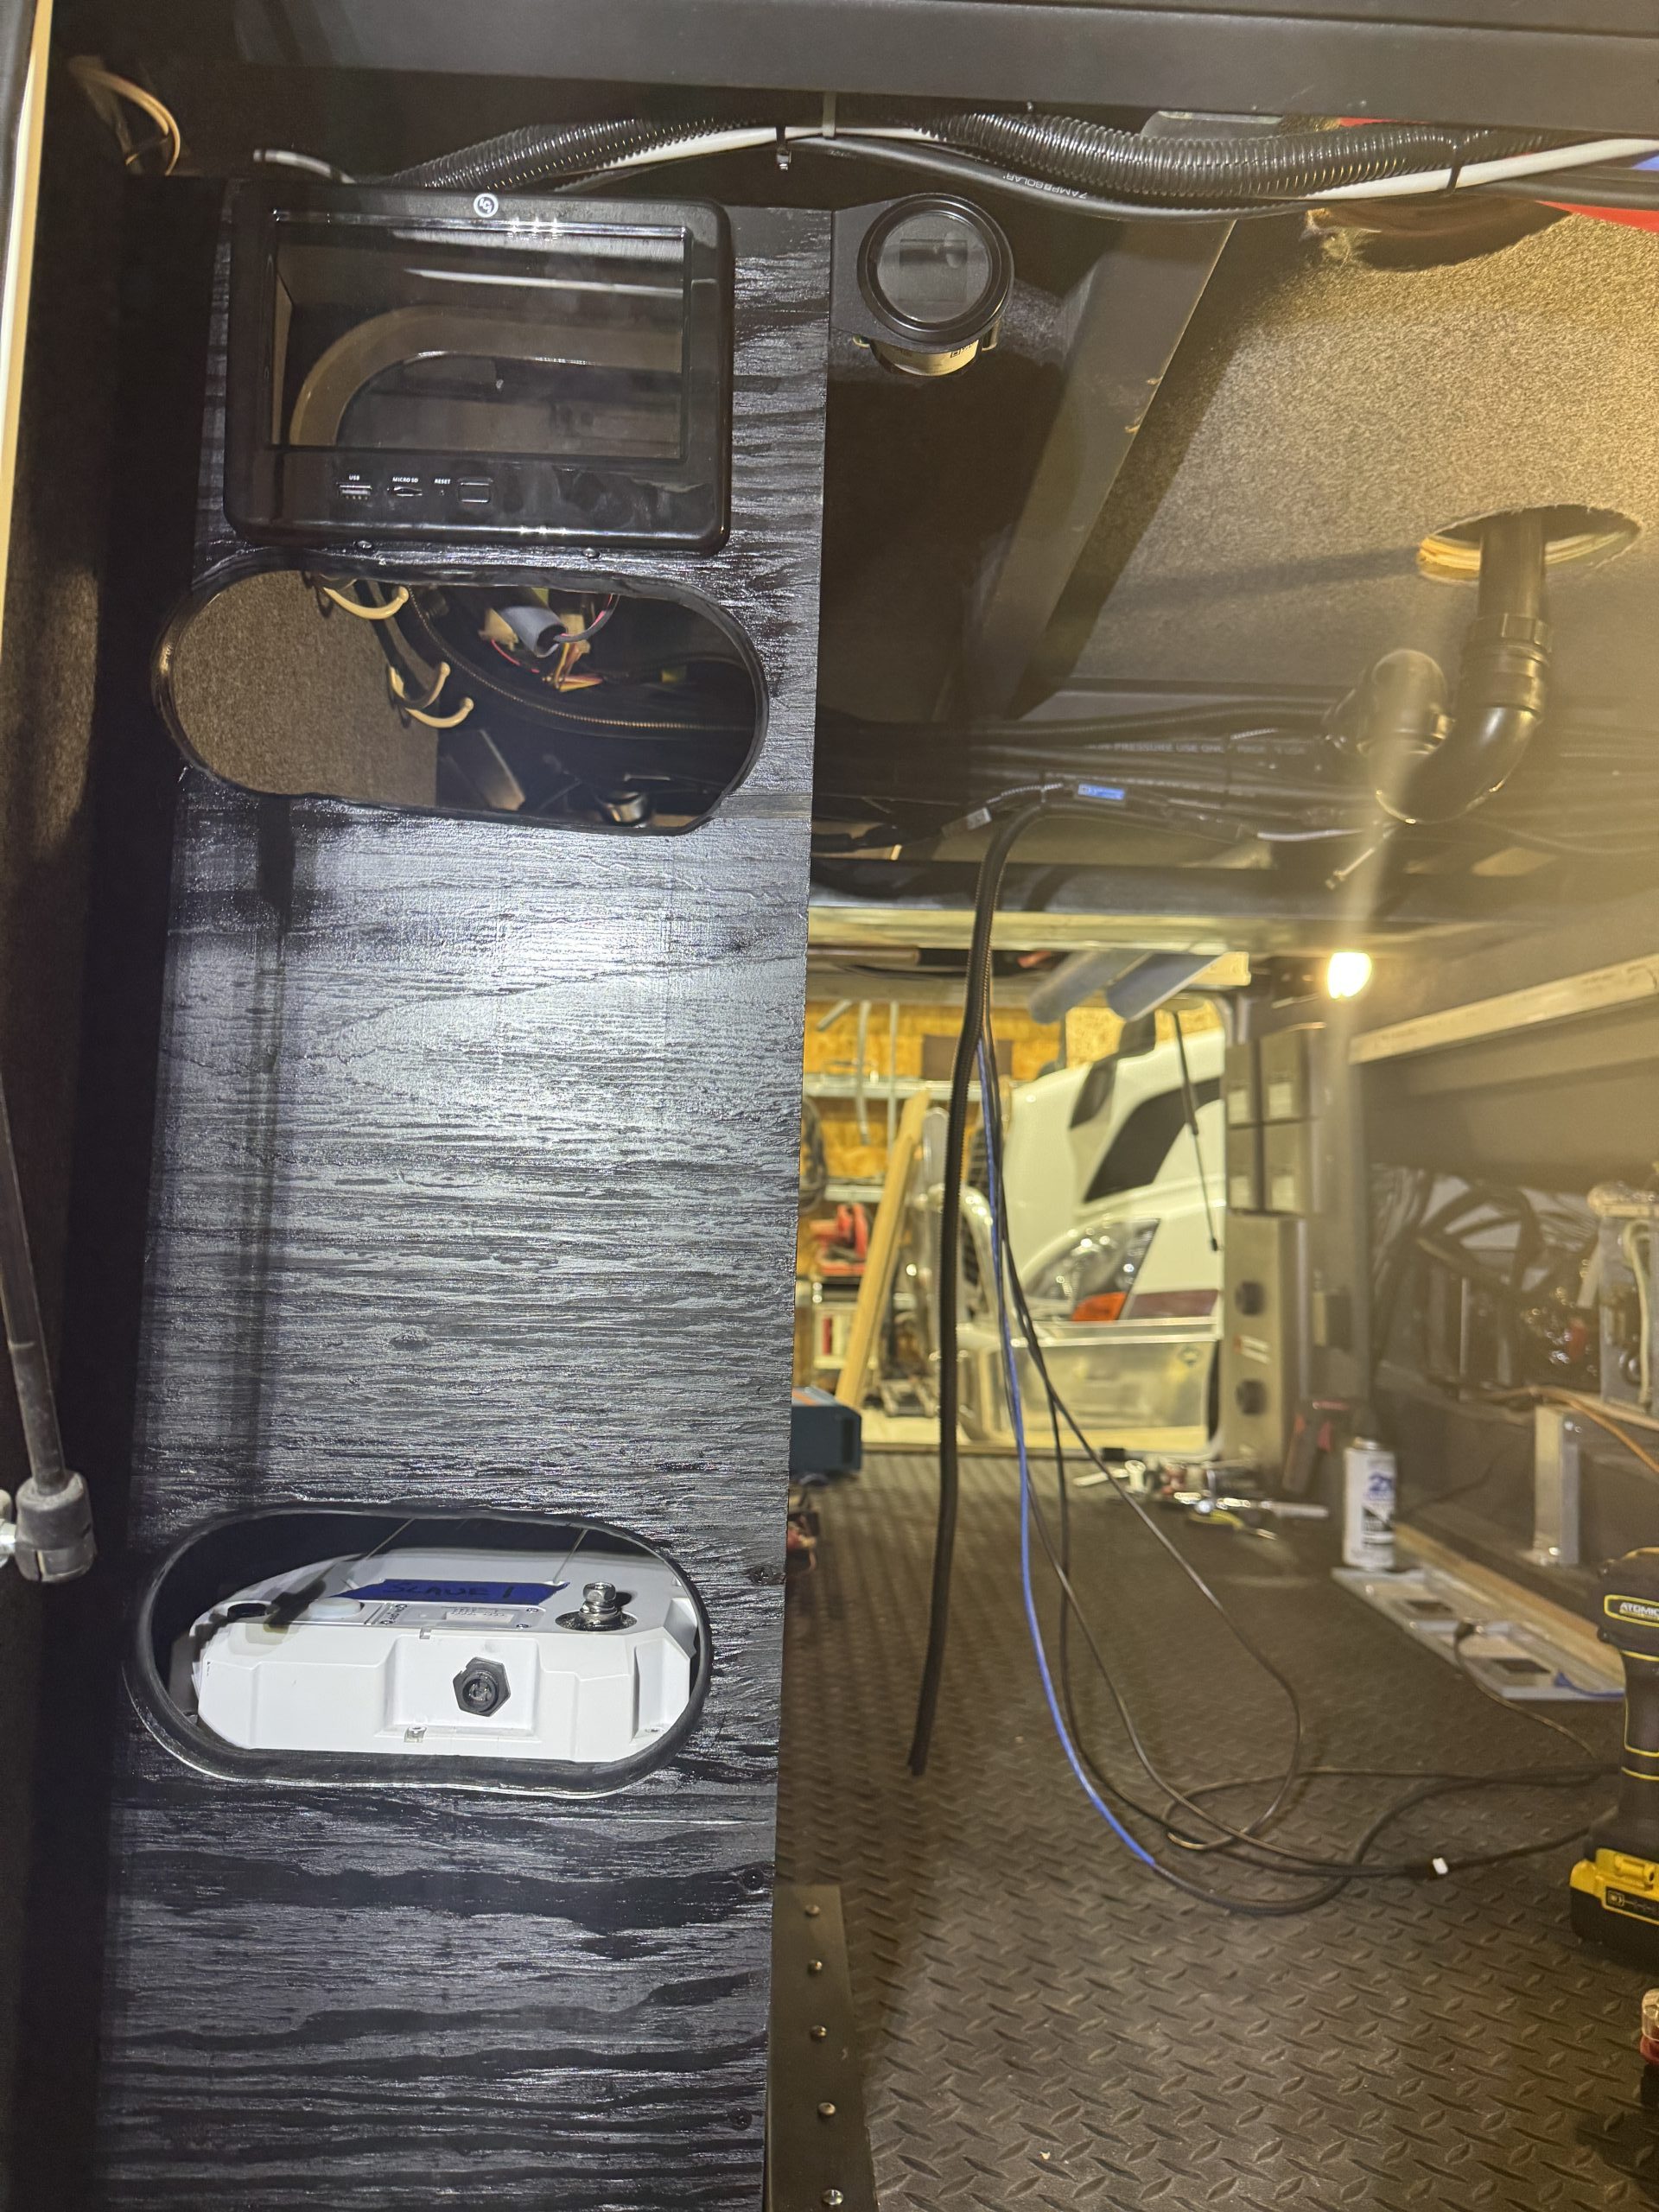
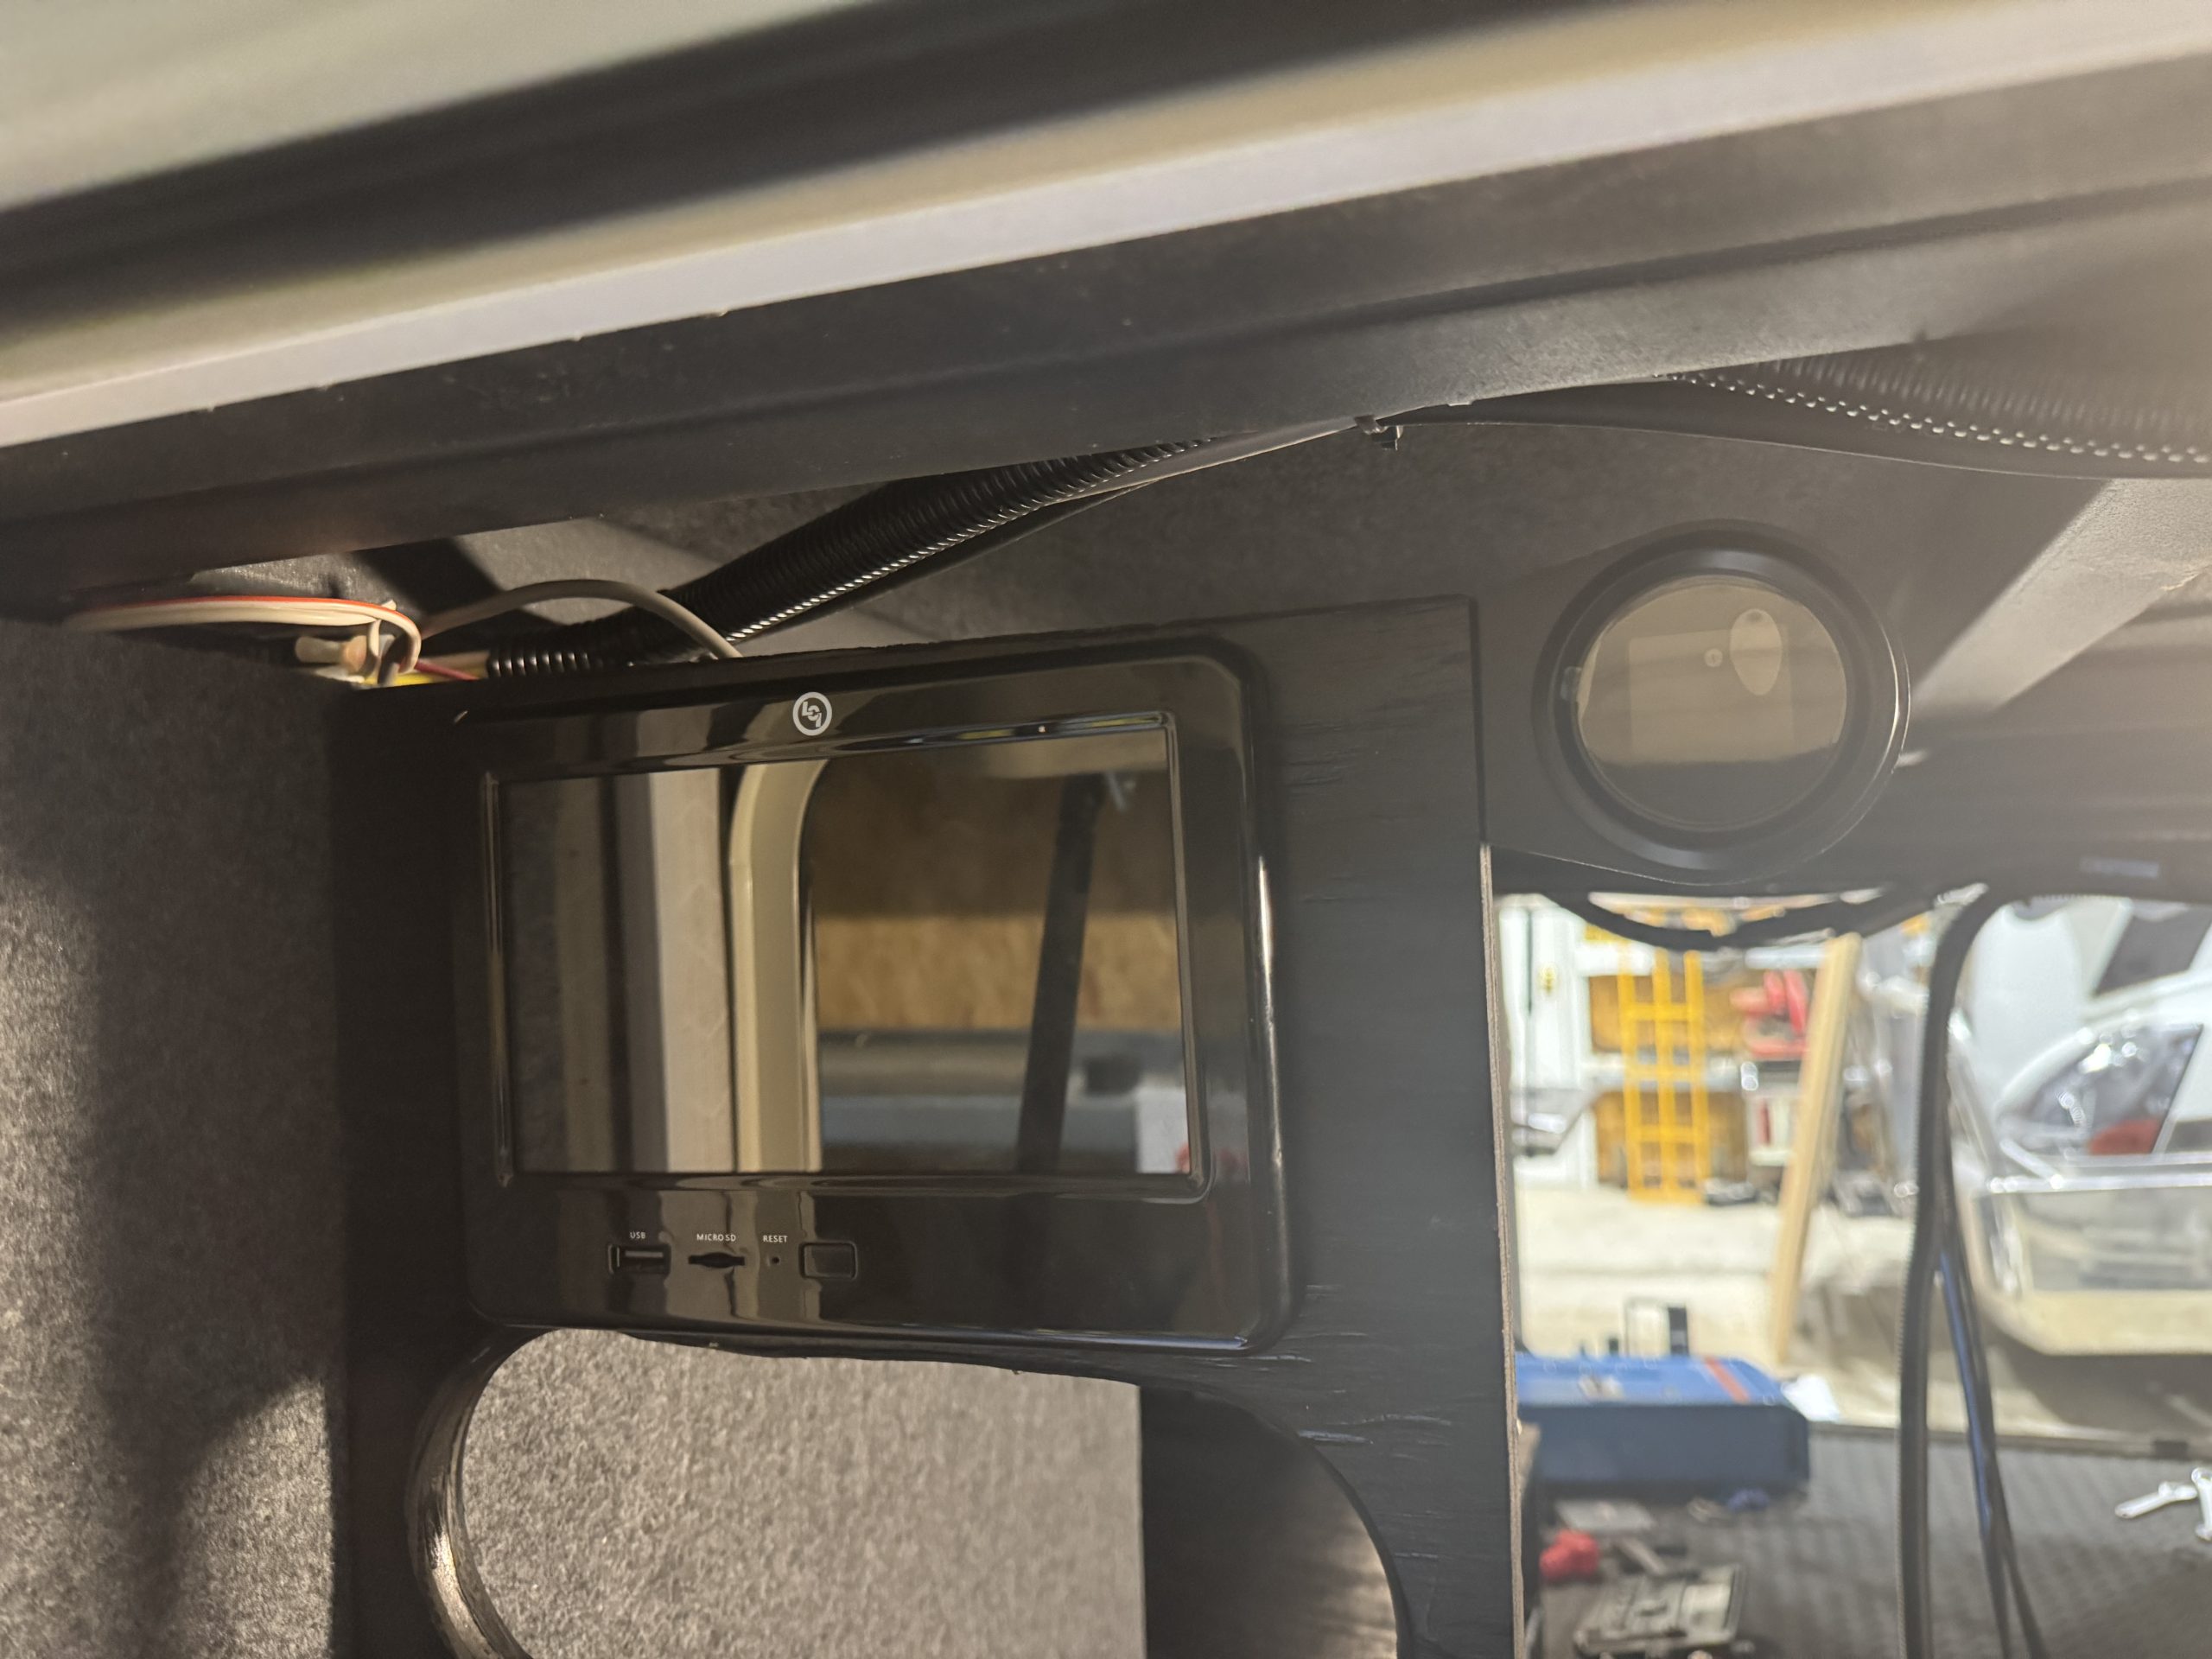
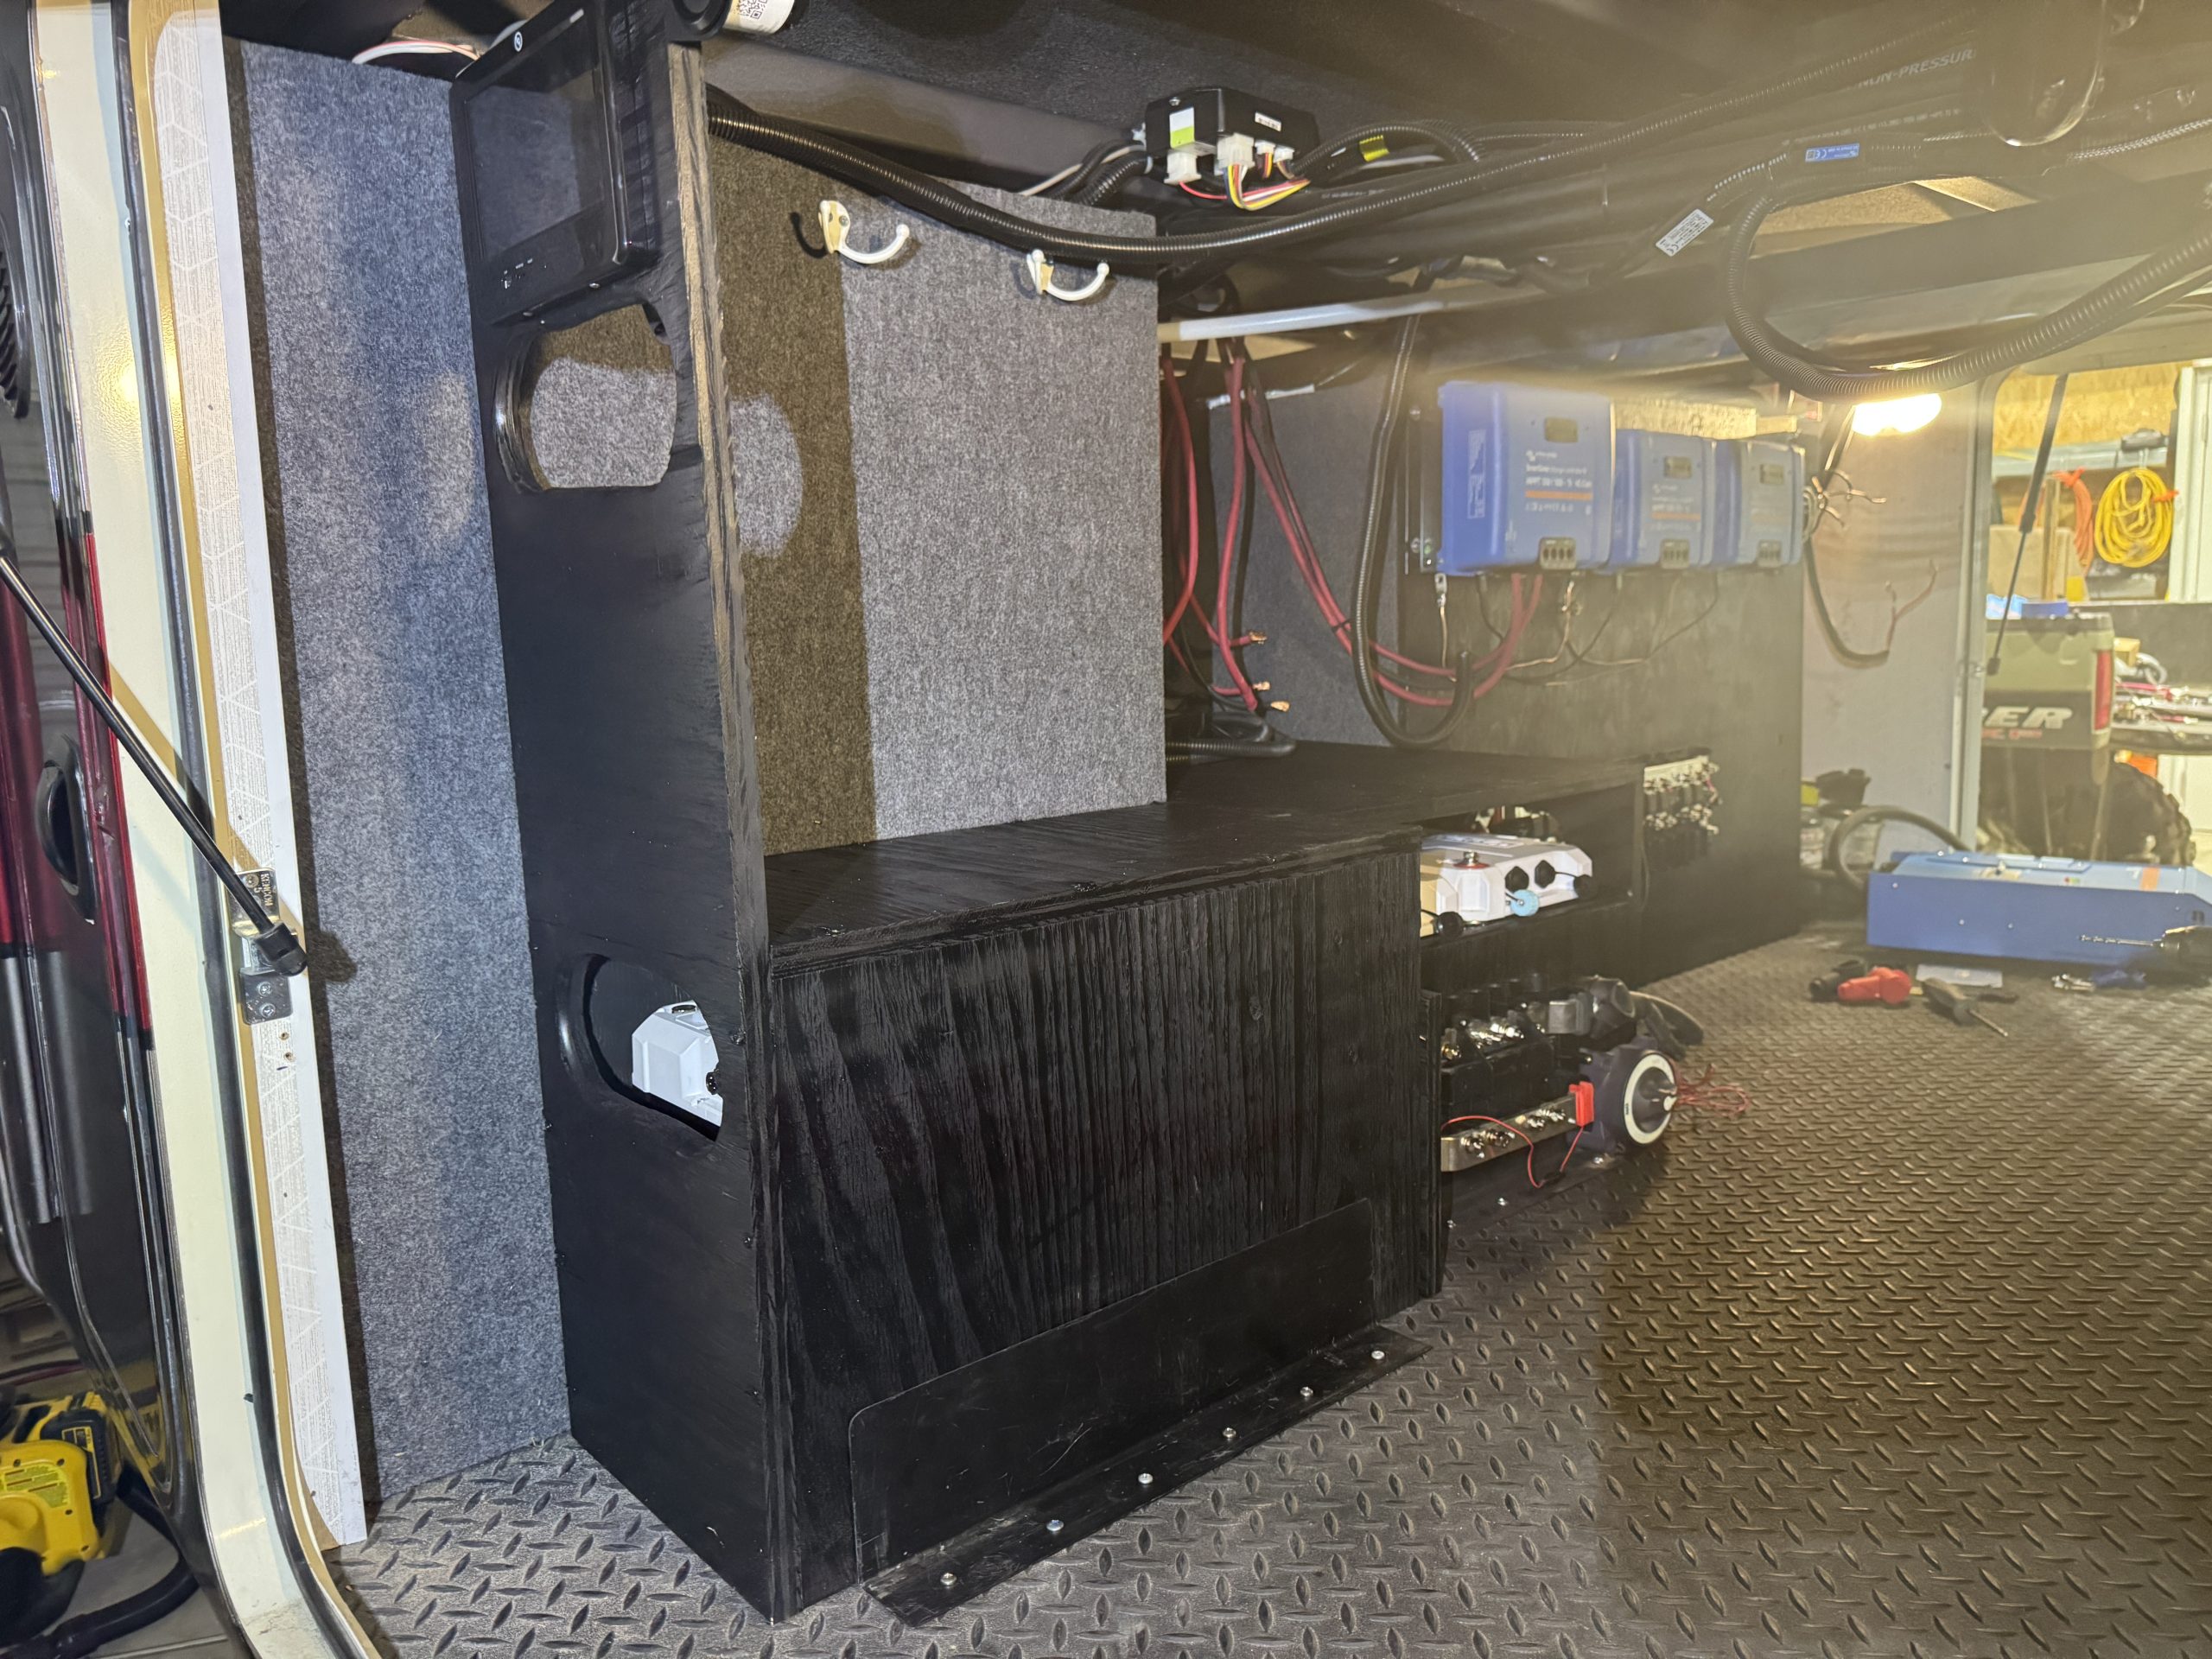
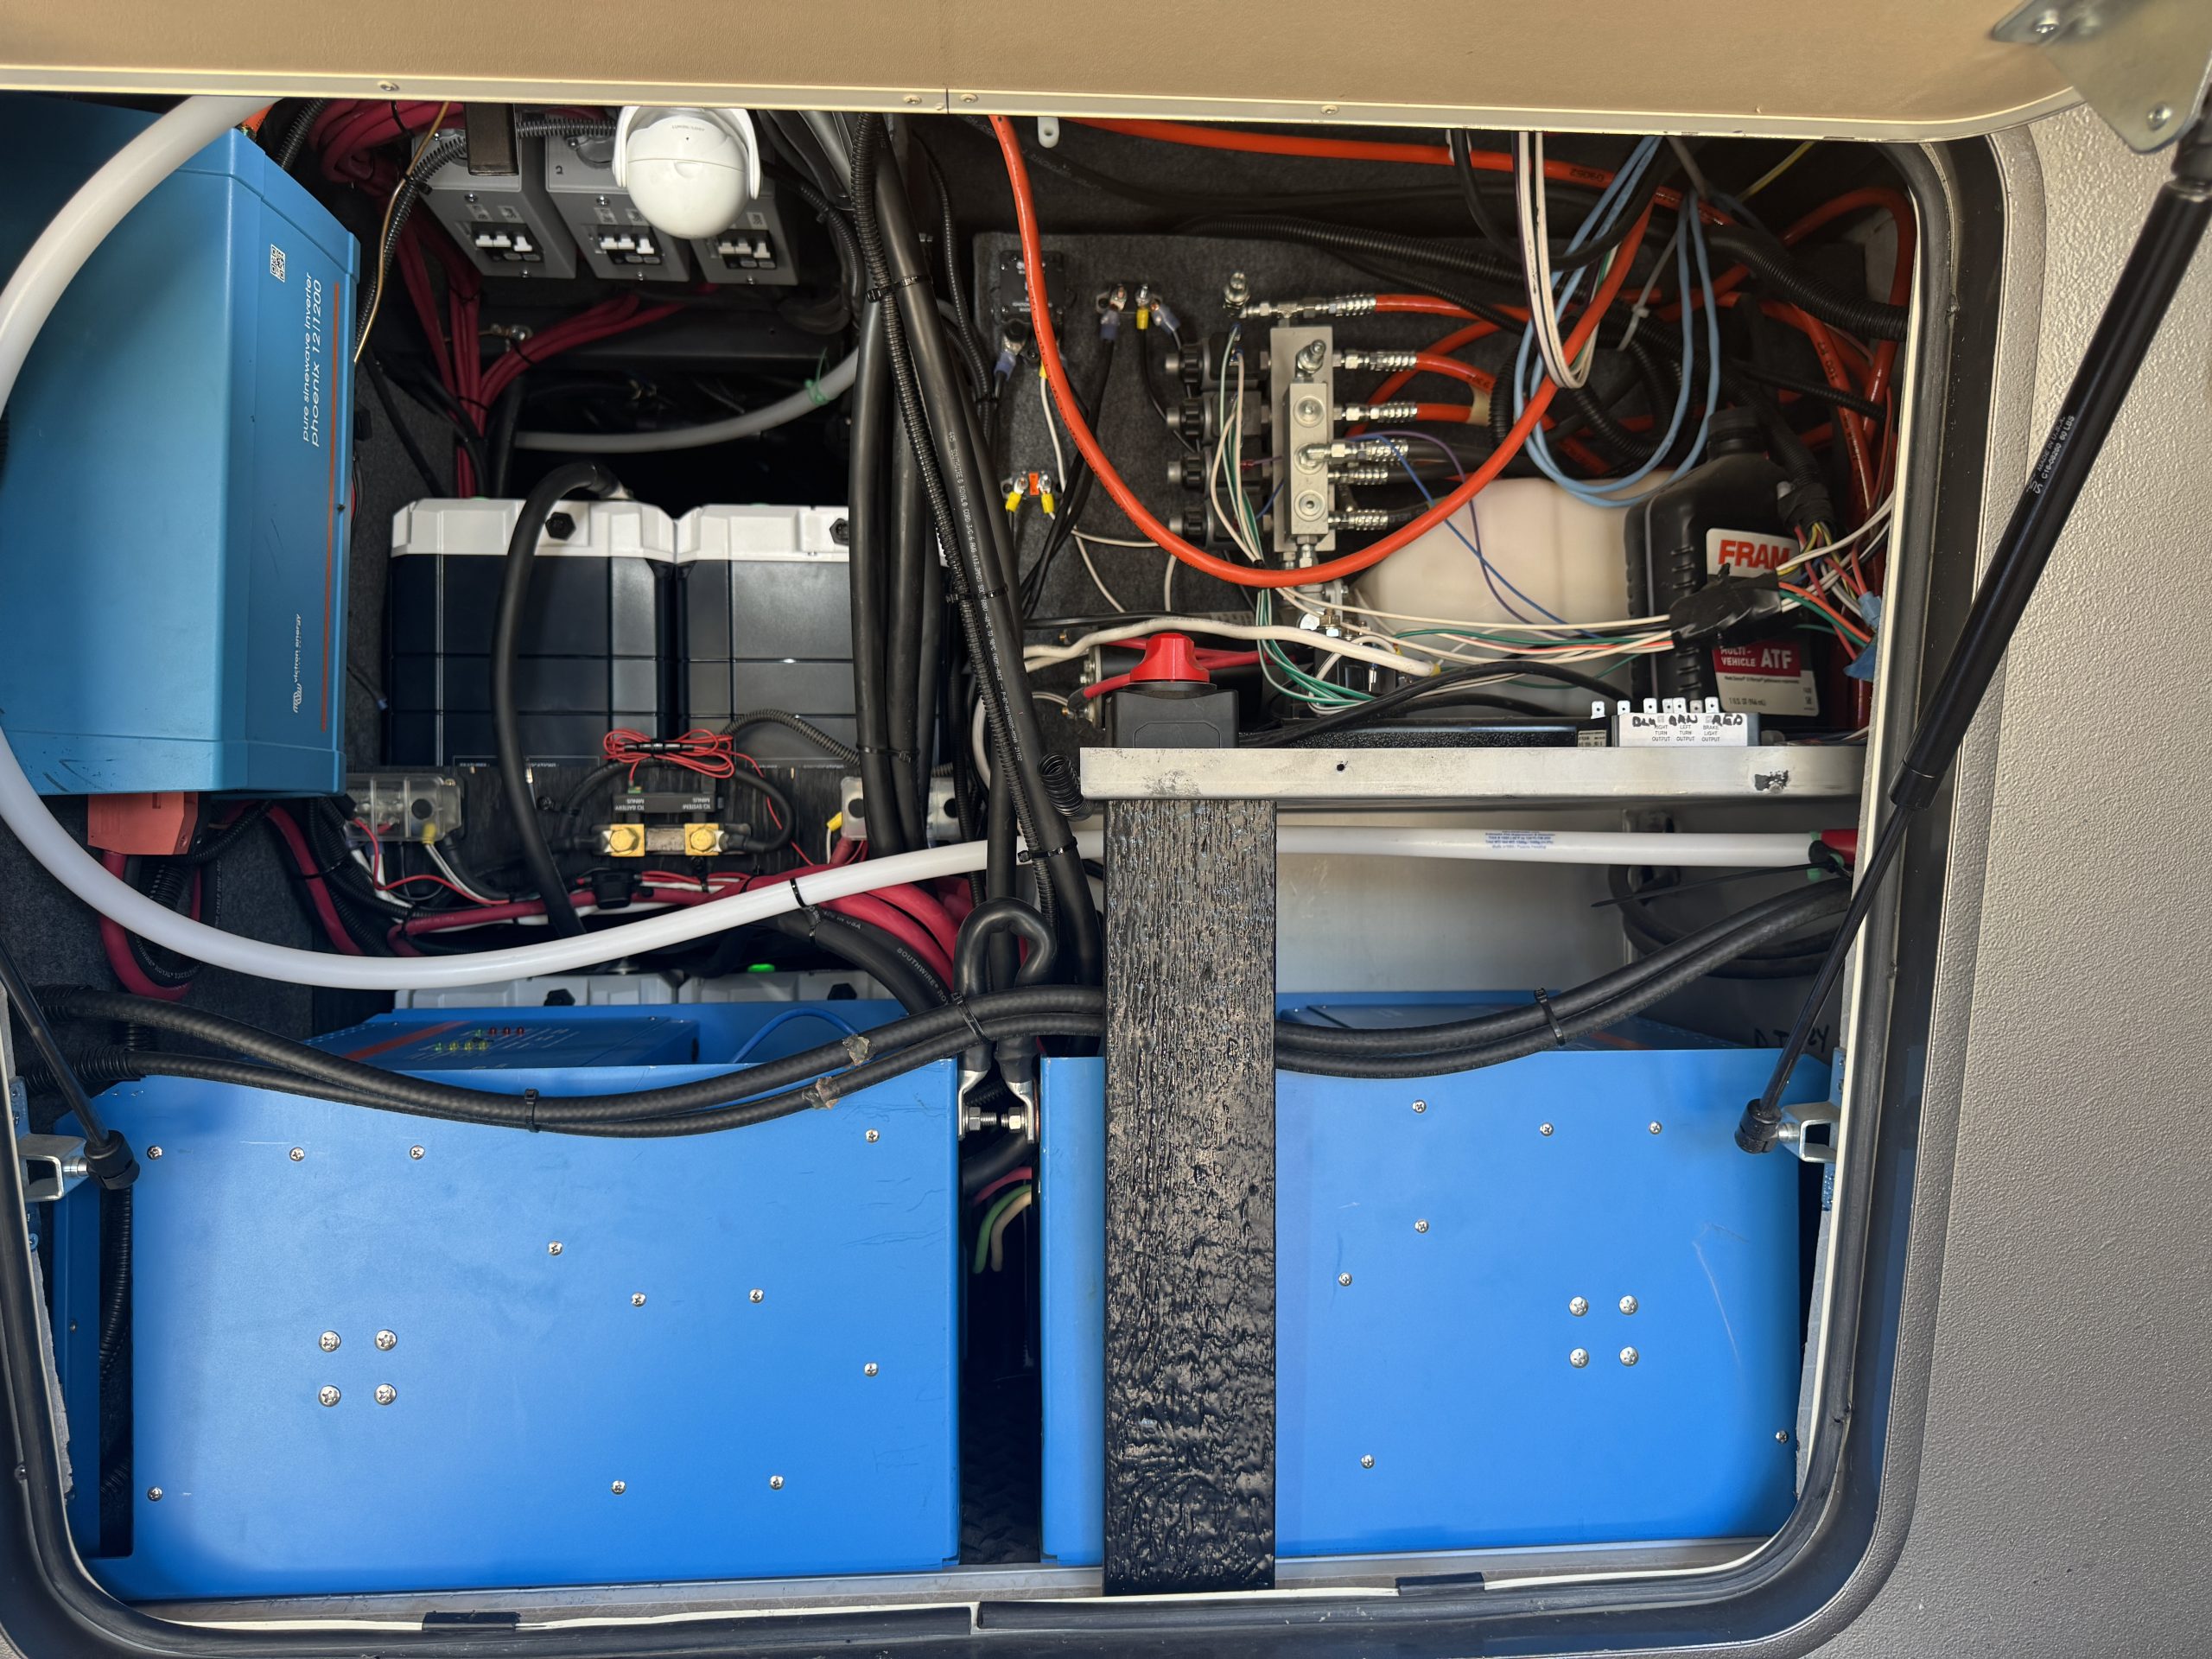
As part of the battery upgrade, I also took some time to re-work the equipment layout of my system. (Here is a link to the page describing the initial installation on my website.) When I installed the system initially, I did it in a rush because I only had four days from the time I brought the RV home from the dealership and then had to leave on our first planned trip. Because of the short time available and the large system I had to install, I didn’t get to spend much time on component layout for convenience. I simply installed things where they would fit rather than spending time on the best layout for using the system. This time, I spent nearly a day alone on coming up with the best overall layout for space utilization and best access to the system components. I can say, while my old system functioned flawlessly, I was never completely happy with the layout and wire runs. This time, I am much happier with the layout and the better access I have to each component in the system. I accomplished this while also minimizing the loss of storage space in my compartments. The installation took me five days to complete this time (and that was without having to install any solar panels – I had 18 panels to install the first time).
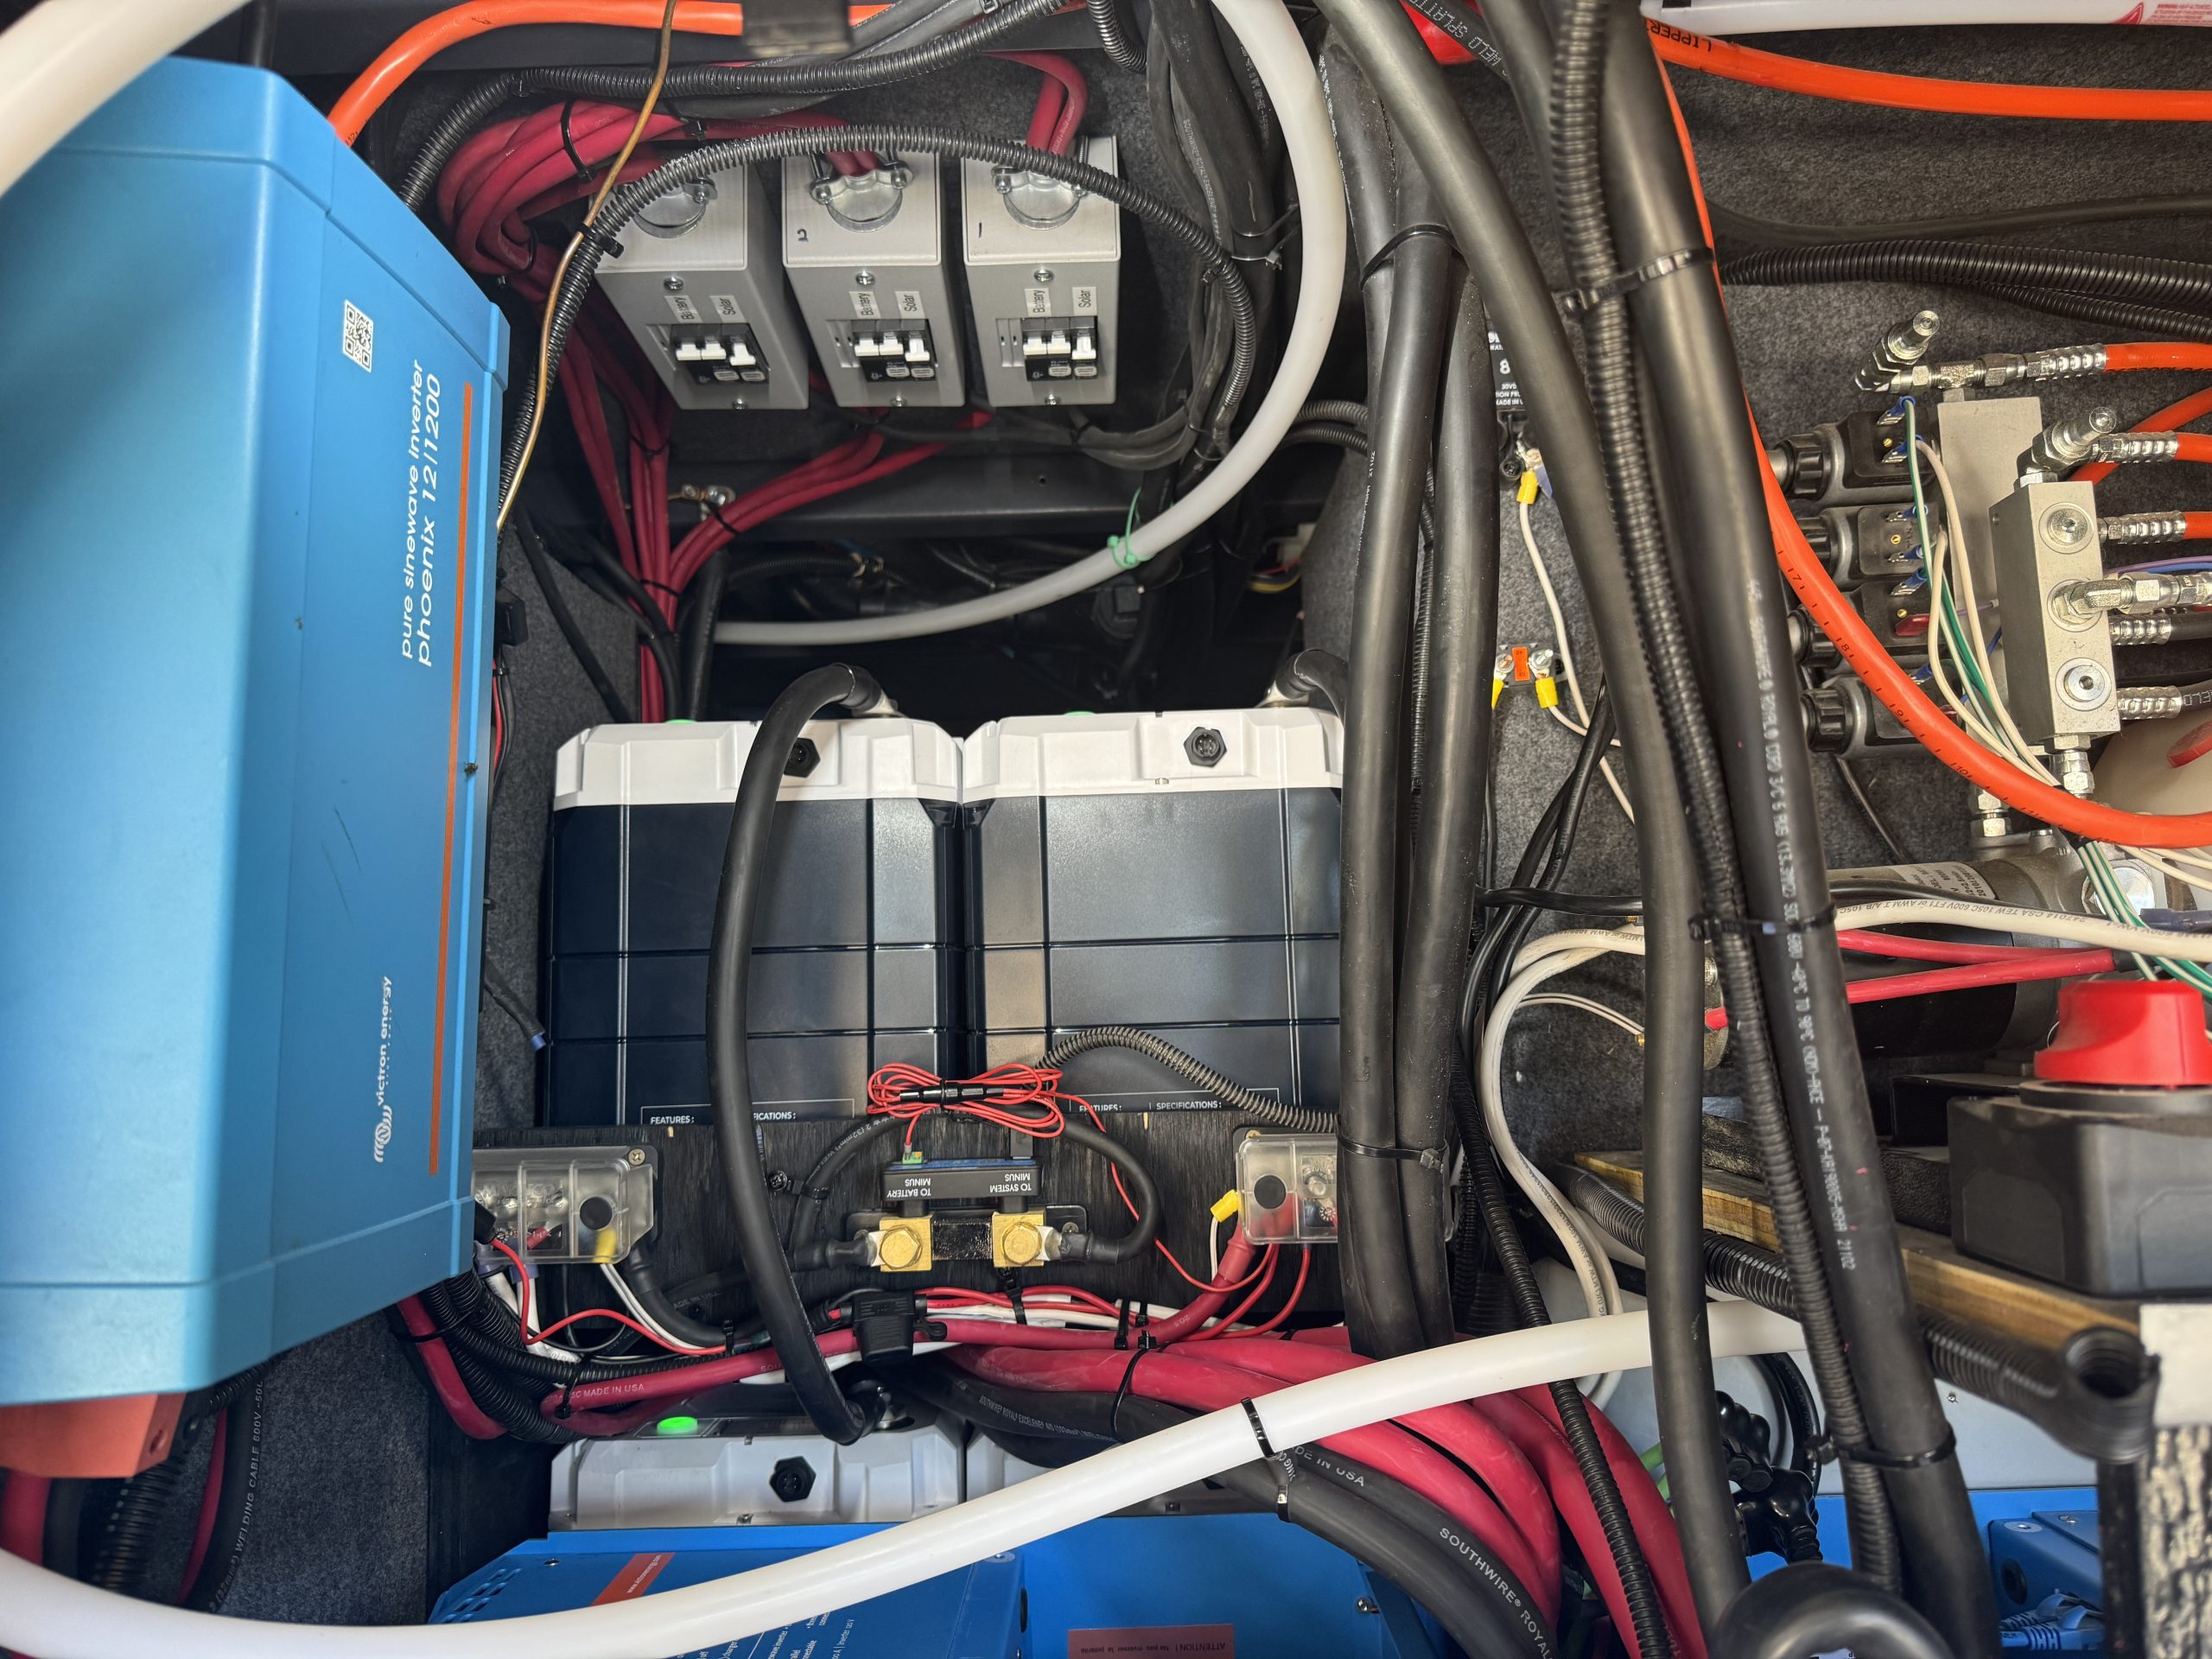
The EPOCH Elite Series batteries require a little more work than most batteries to install properly. This includes individual firmware updates, setting battery DIP switches for integrated communications and interconnecting all the batteries with communication cables. The Master battery has a small, remote display attached to the main comms harness that I mounted in the bay with the batteries. I had to extend the RJ45 cable on the same main comms harness that goes to the Victron GX device to reach the location where I had my Cerbo GX installed. This was easy to do with a female to female RJ45 adapter and a second Ethernet cable. I mounted my batteries in stacked pairs. Unfortunately the interconnect communication cables that come with the batteries weren’t long enough to reach a battery stacked on top of another battery (the cables are designed for side by side installation and reach that configuration perfectly). As a result, I had to use a couple of standard Victron RJ45 communication cables to reach the longer distance. This resulted in not having waterproof connectors for those connections (like the factory EPOCH cables have), but this was not a concern for my installation inside a storage compartment in my RV. I also had to contend with the fact EPOCH batteries have a sophisticated BMS installed to monitor and manage all the features of the Elite series batteries. When I initially connected the batteries to the rest of the system, the batteries would immediately shut down. I determined this was because the large capacity capacitors in my dual Quattro 5KVA inverter chargers were drained from lack of DC power and the heavy inrush of DC current trying to fill those capacitors back up made the EPOCH battery BMSs think there was a dead short somewhere. This resulted in the batteries shutting down to protect against the hazard they were detecting. This necessitated multiple start up and shut down cycles to slowly charge the capacitors in the Quattros before the batteries would remain on and active. This could have been avoided by pre-charging the Quattro capacitors, but I did not have the equipment needed to accomplish this task readily available when I hooked the batteries up (I do now so I can avoid this issue in the future).
Once the batteries were happy and remained on, the system functioned perfectly. The batteries communicated directly the the Victron Cerbo GX and took over control of all the chargers in the system. I implemented DVCC (Distributed Voltage and Charge Control) in the Cerbo settings and set the EPOCH battery BMS as the control. The EPOCH batteries populated all the necessary information about the battery bank in the Cerbo software and took over control of the system (just like integrated Victron batteries would do). The batteries were shipped to me at approximately one quarter charged capacity. This meant I had to add/charge approximately 2000 amps into the batteries via charging to get the bank full. This took some time (even with my Quattros both charging at just under 200 amps each) to get the battery bank full. I used this time to check all my connections and wiring for heat generation under heavy charge and also monitor the control the EPOCH BMS was exerting over the system. I was very happy with the results. I am looking forward to our next trip with the RV to put some real world usage to the system and see how the EPOCH external control of the Victron components works, as well as play around with all the extra battery capacity I now have.
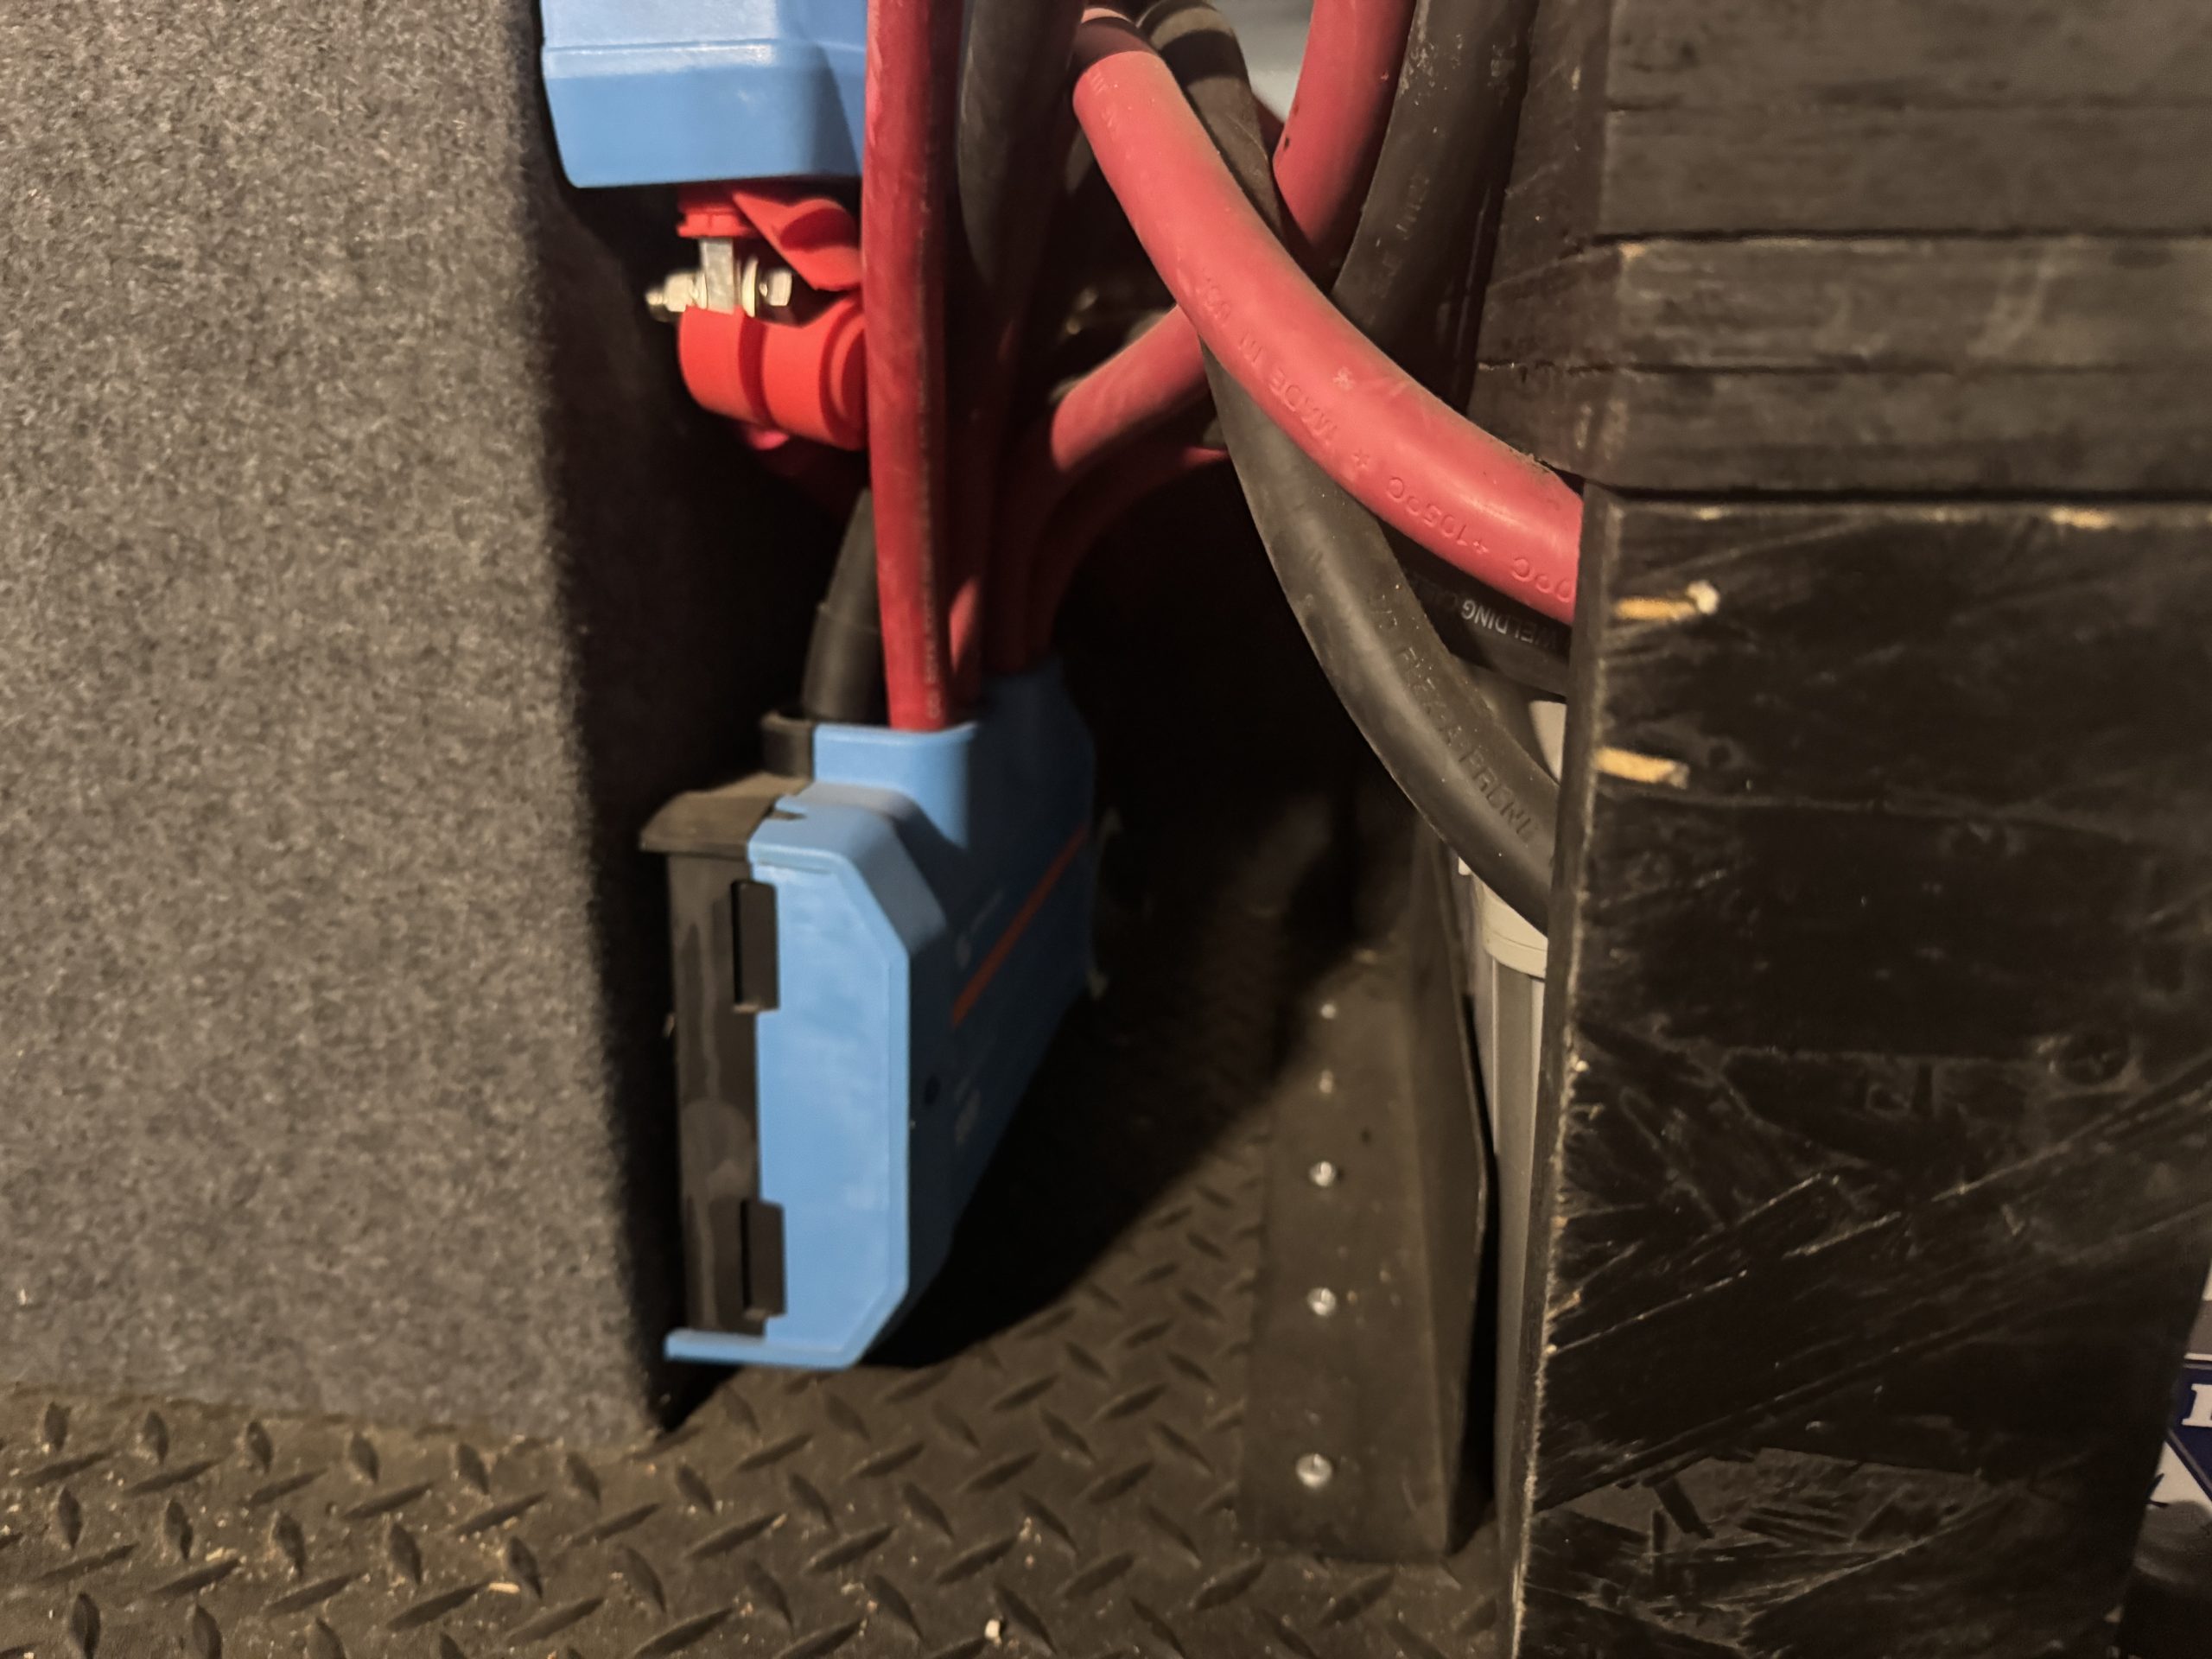
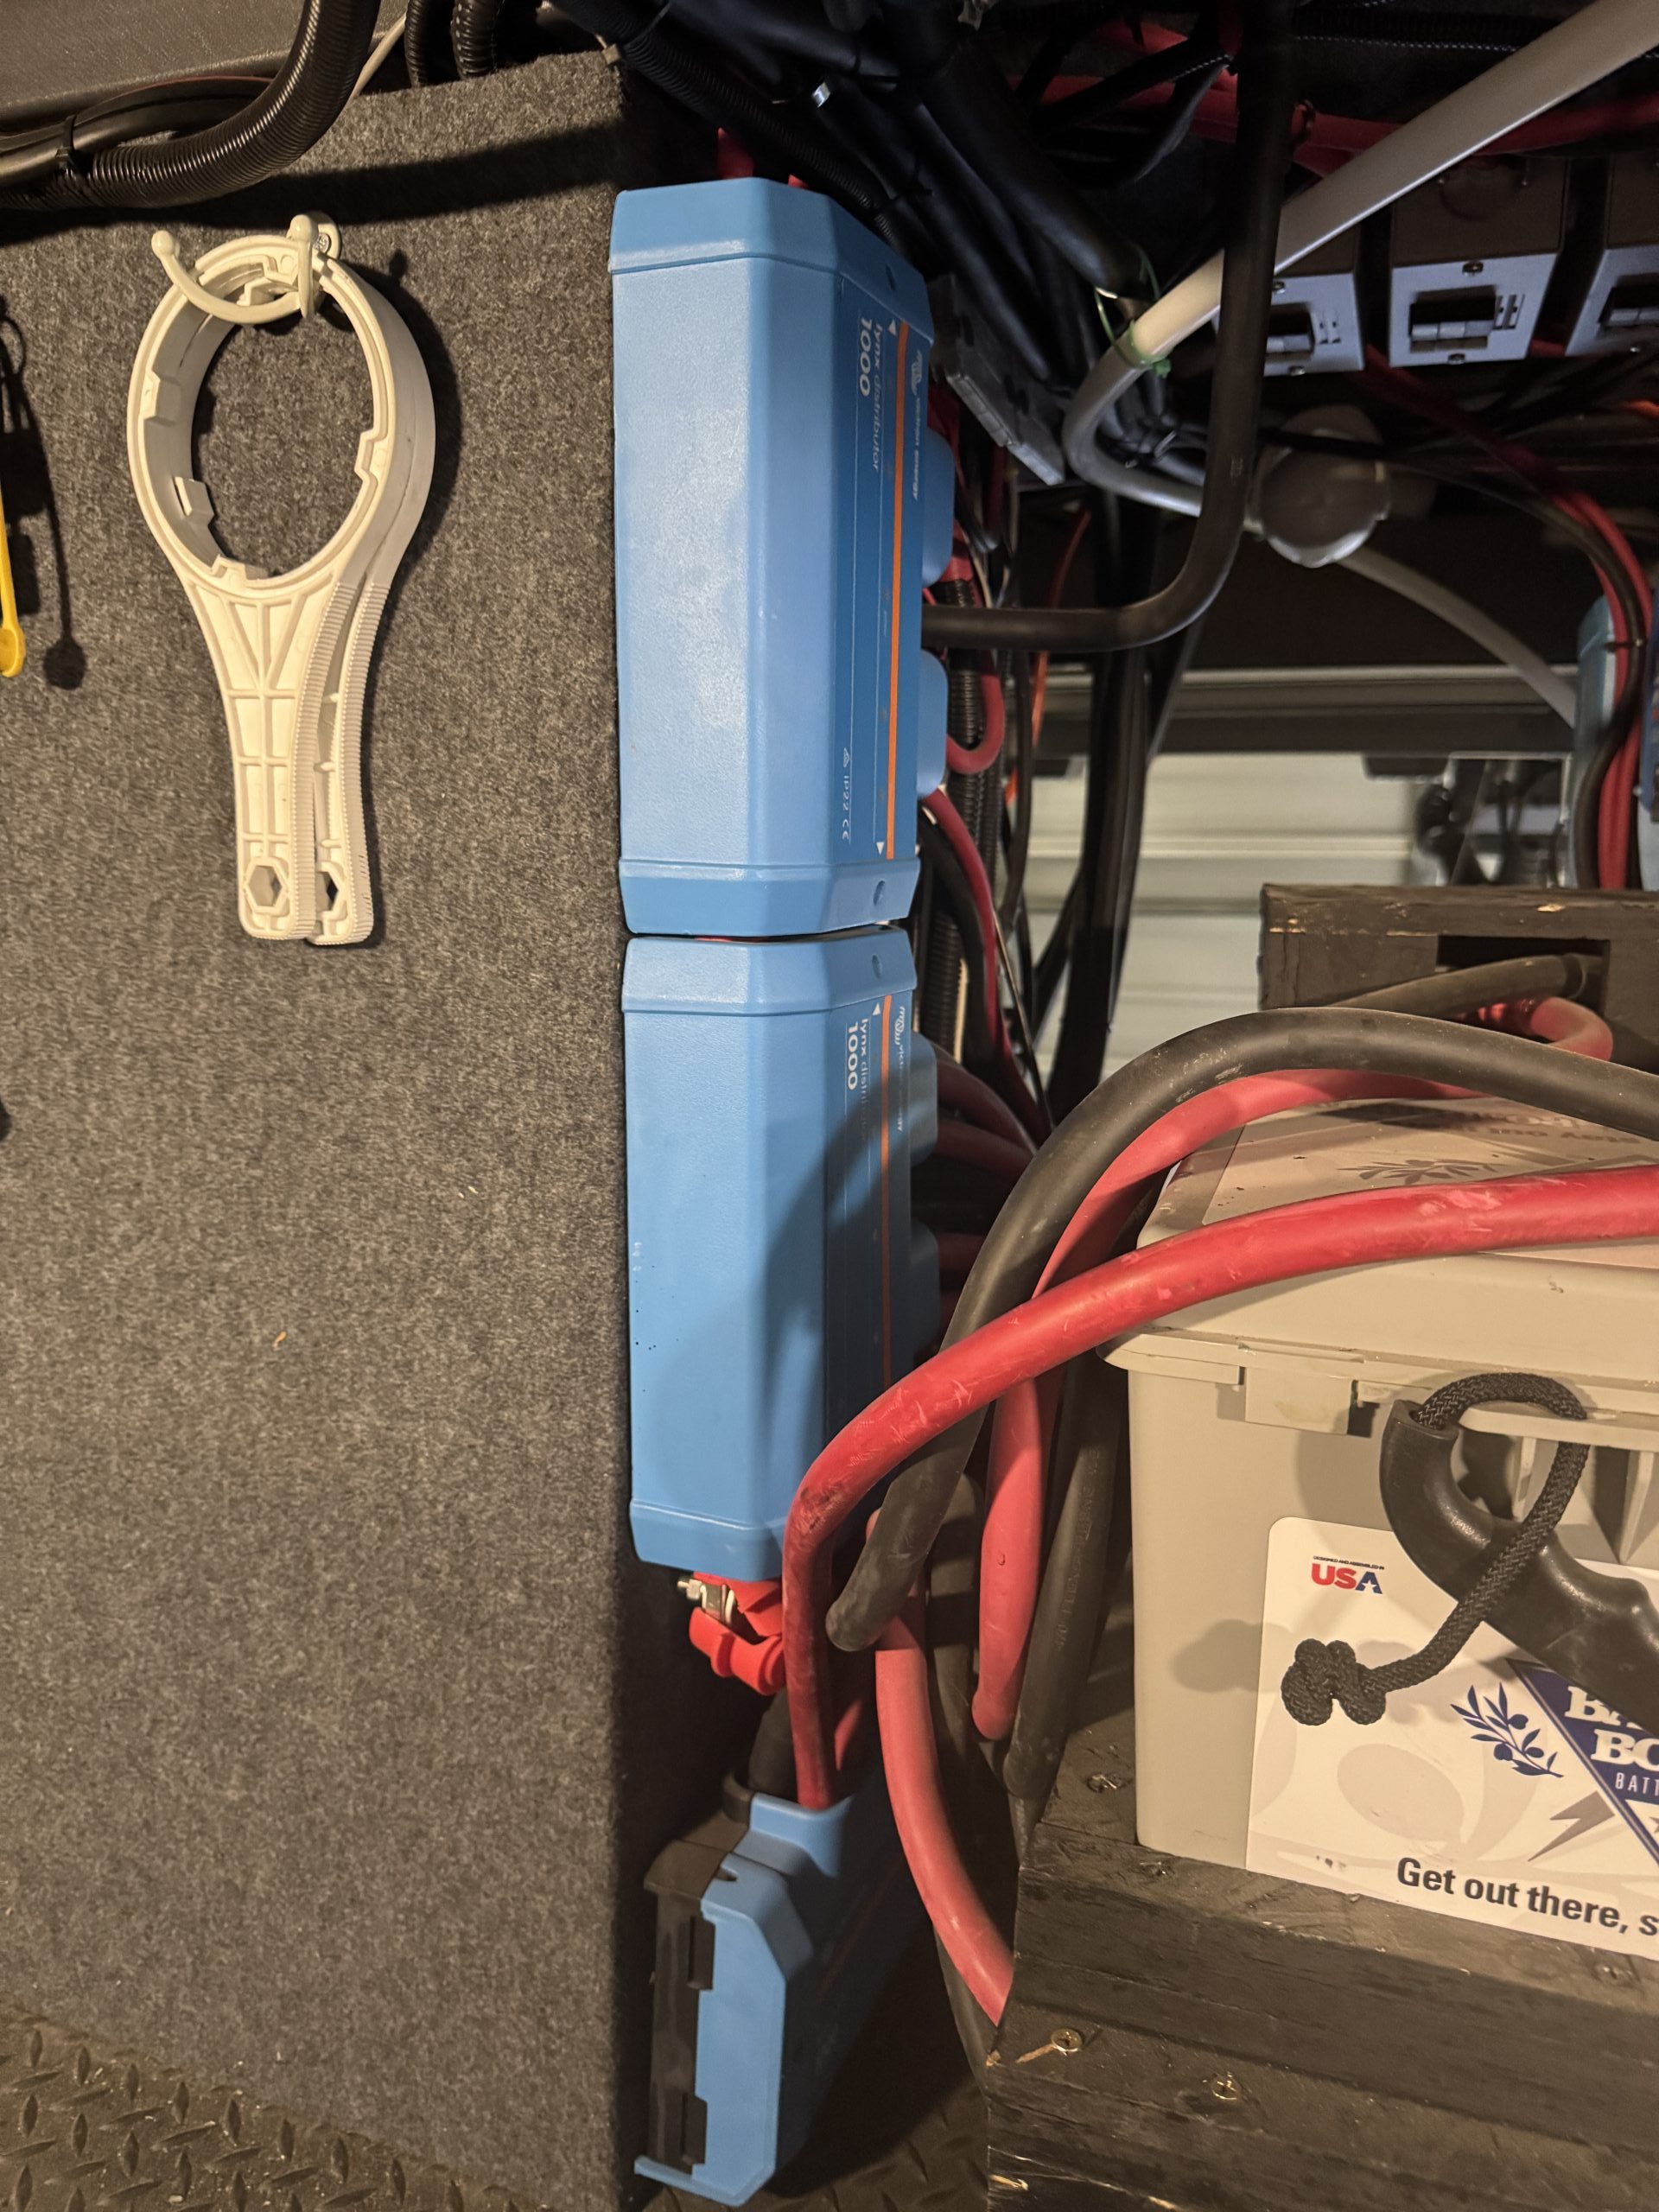
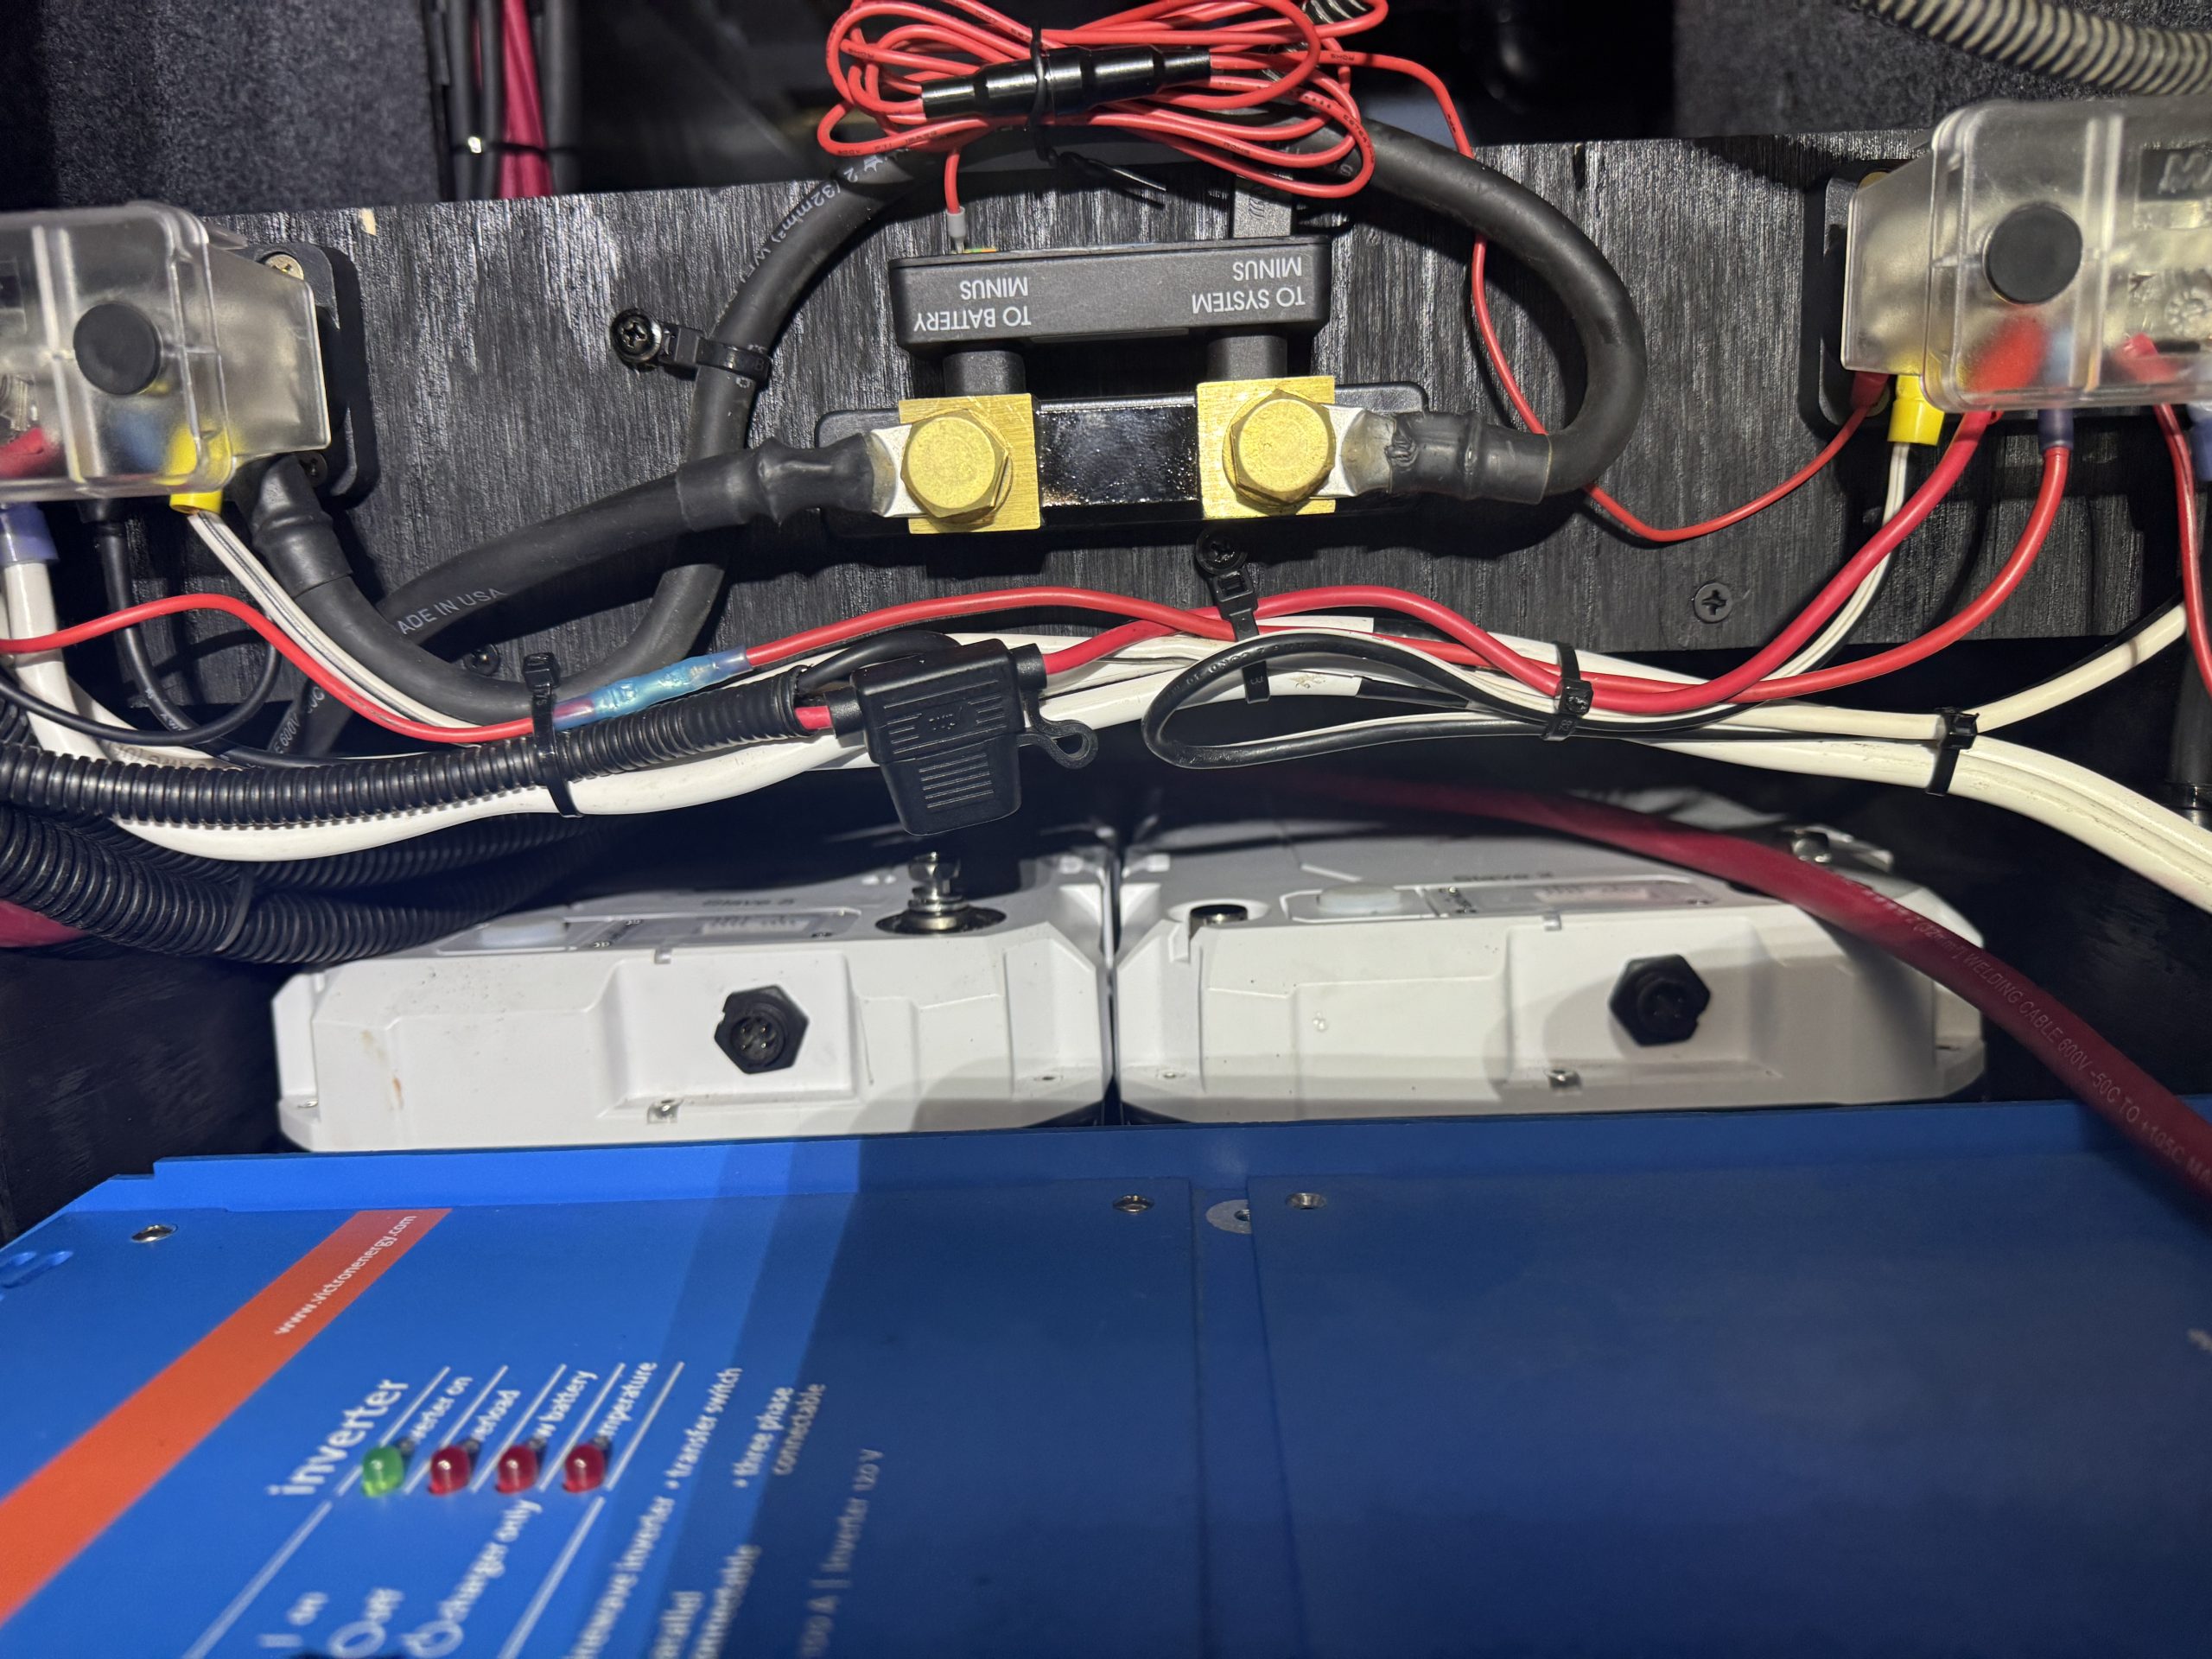
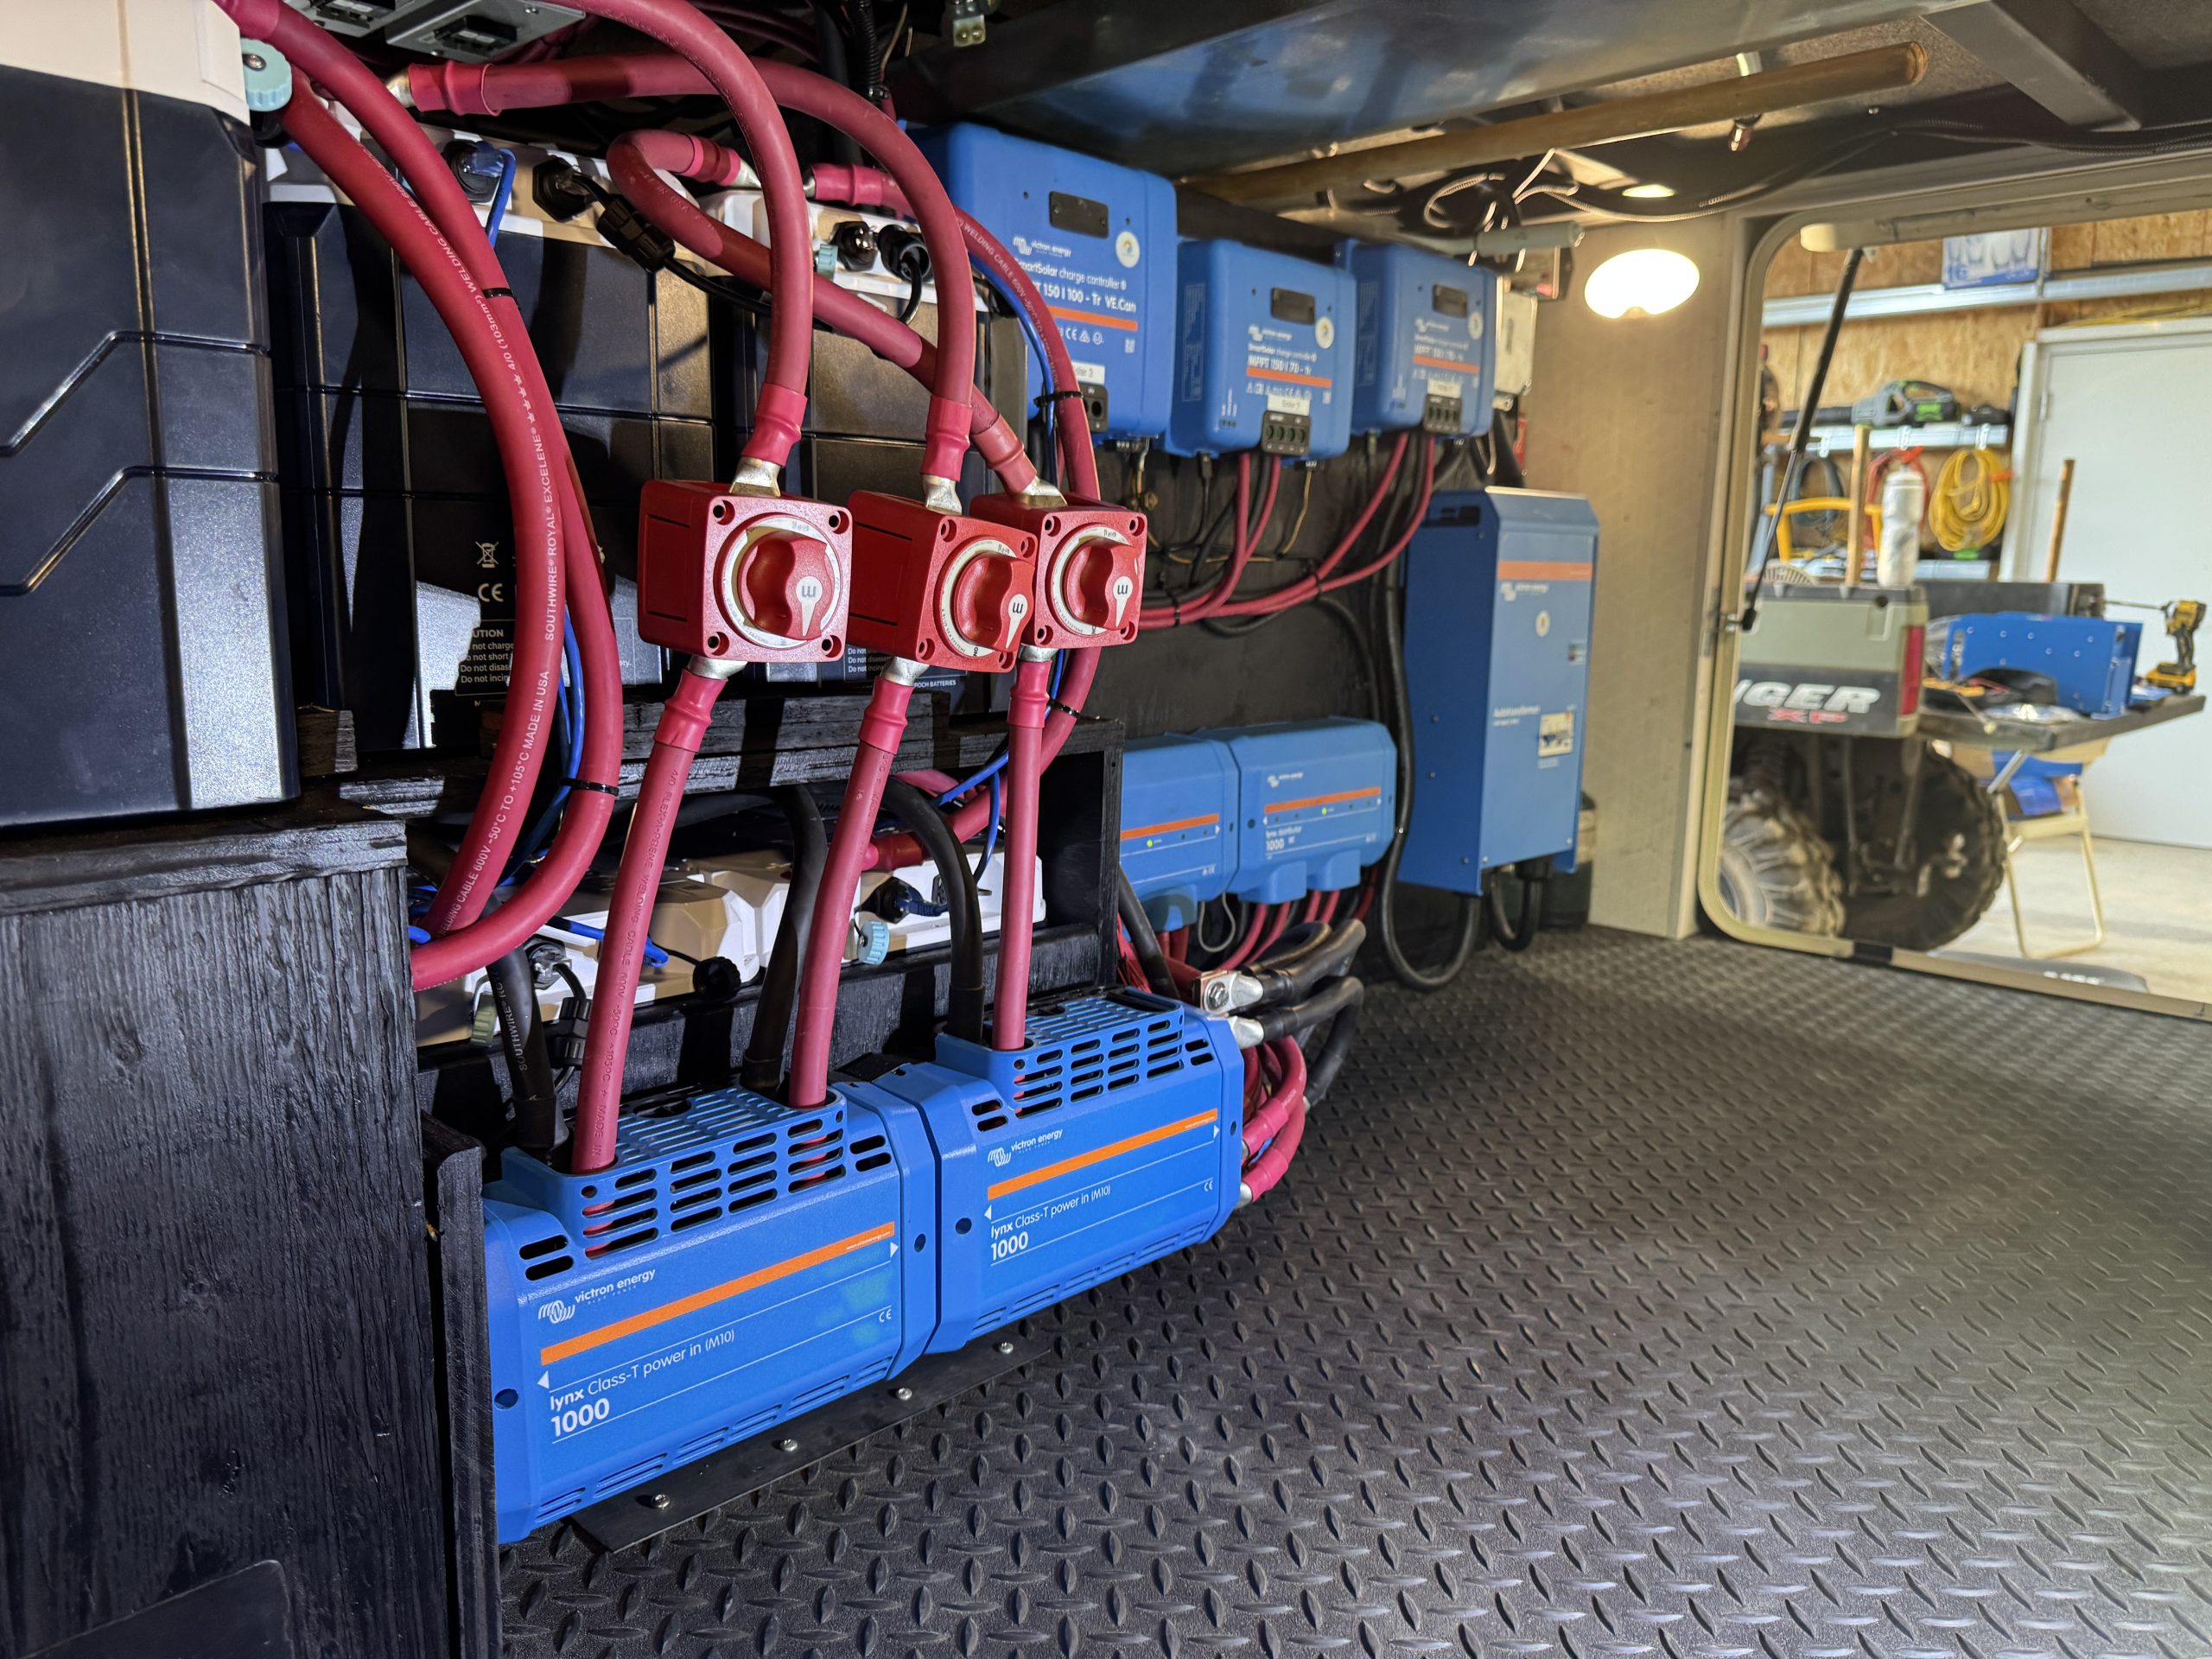
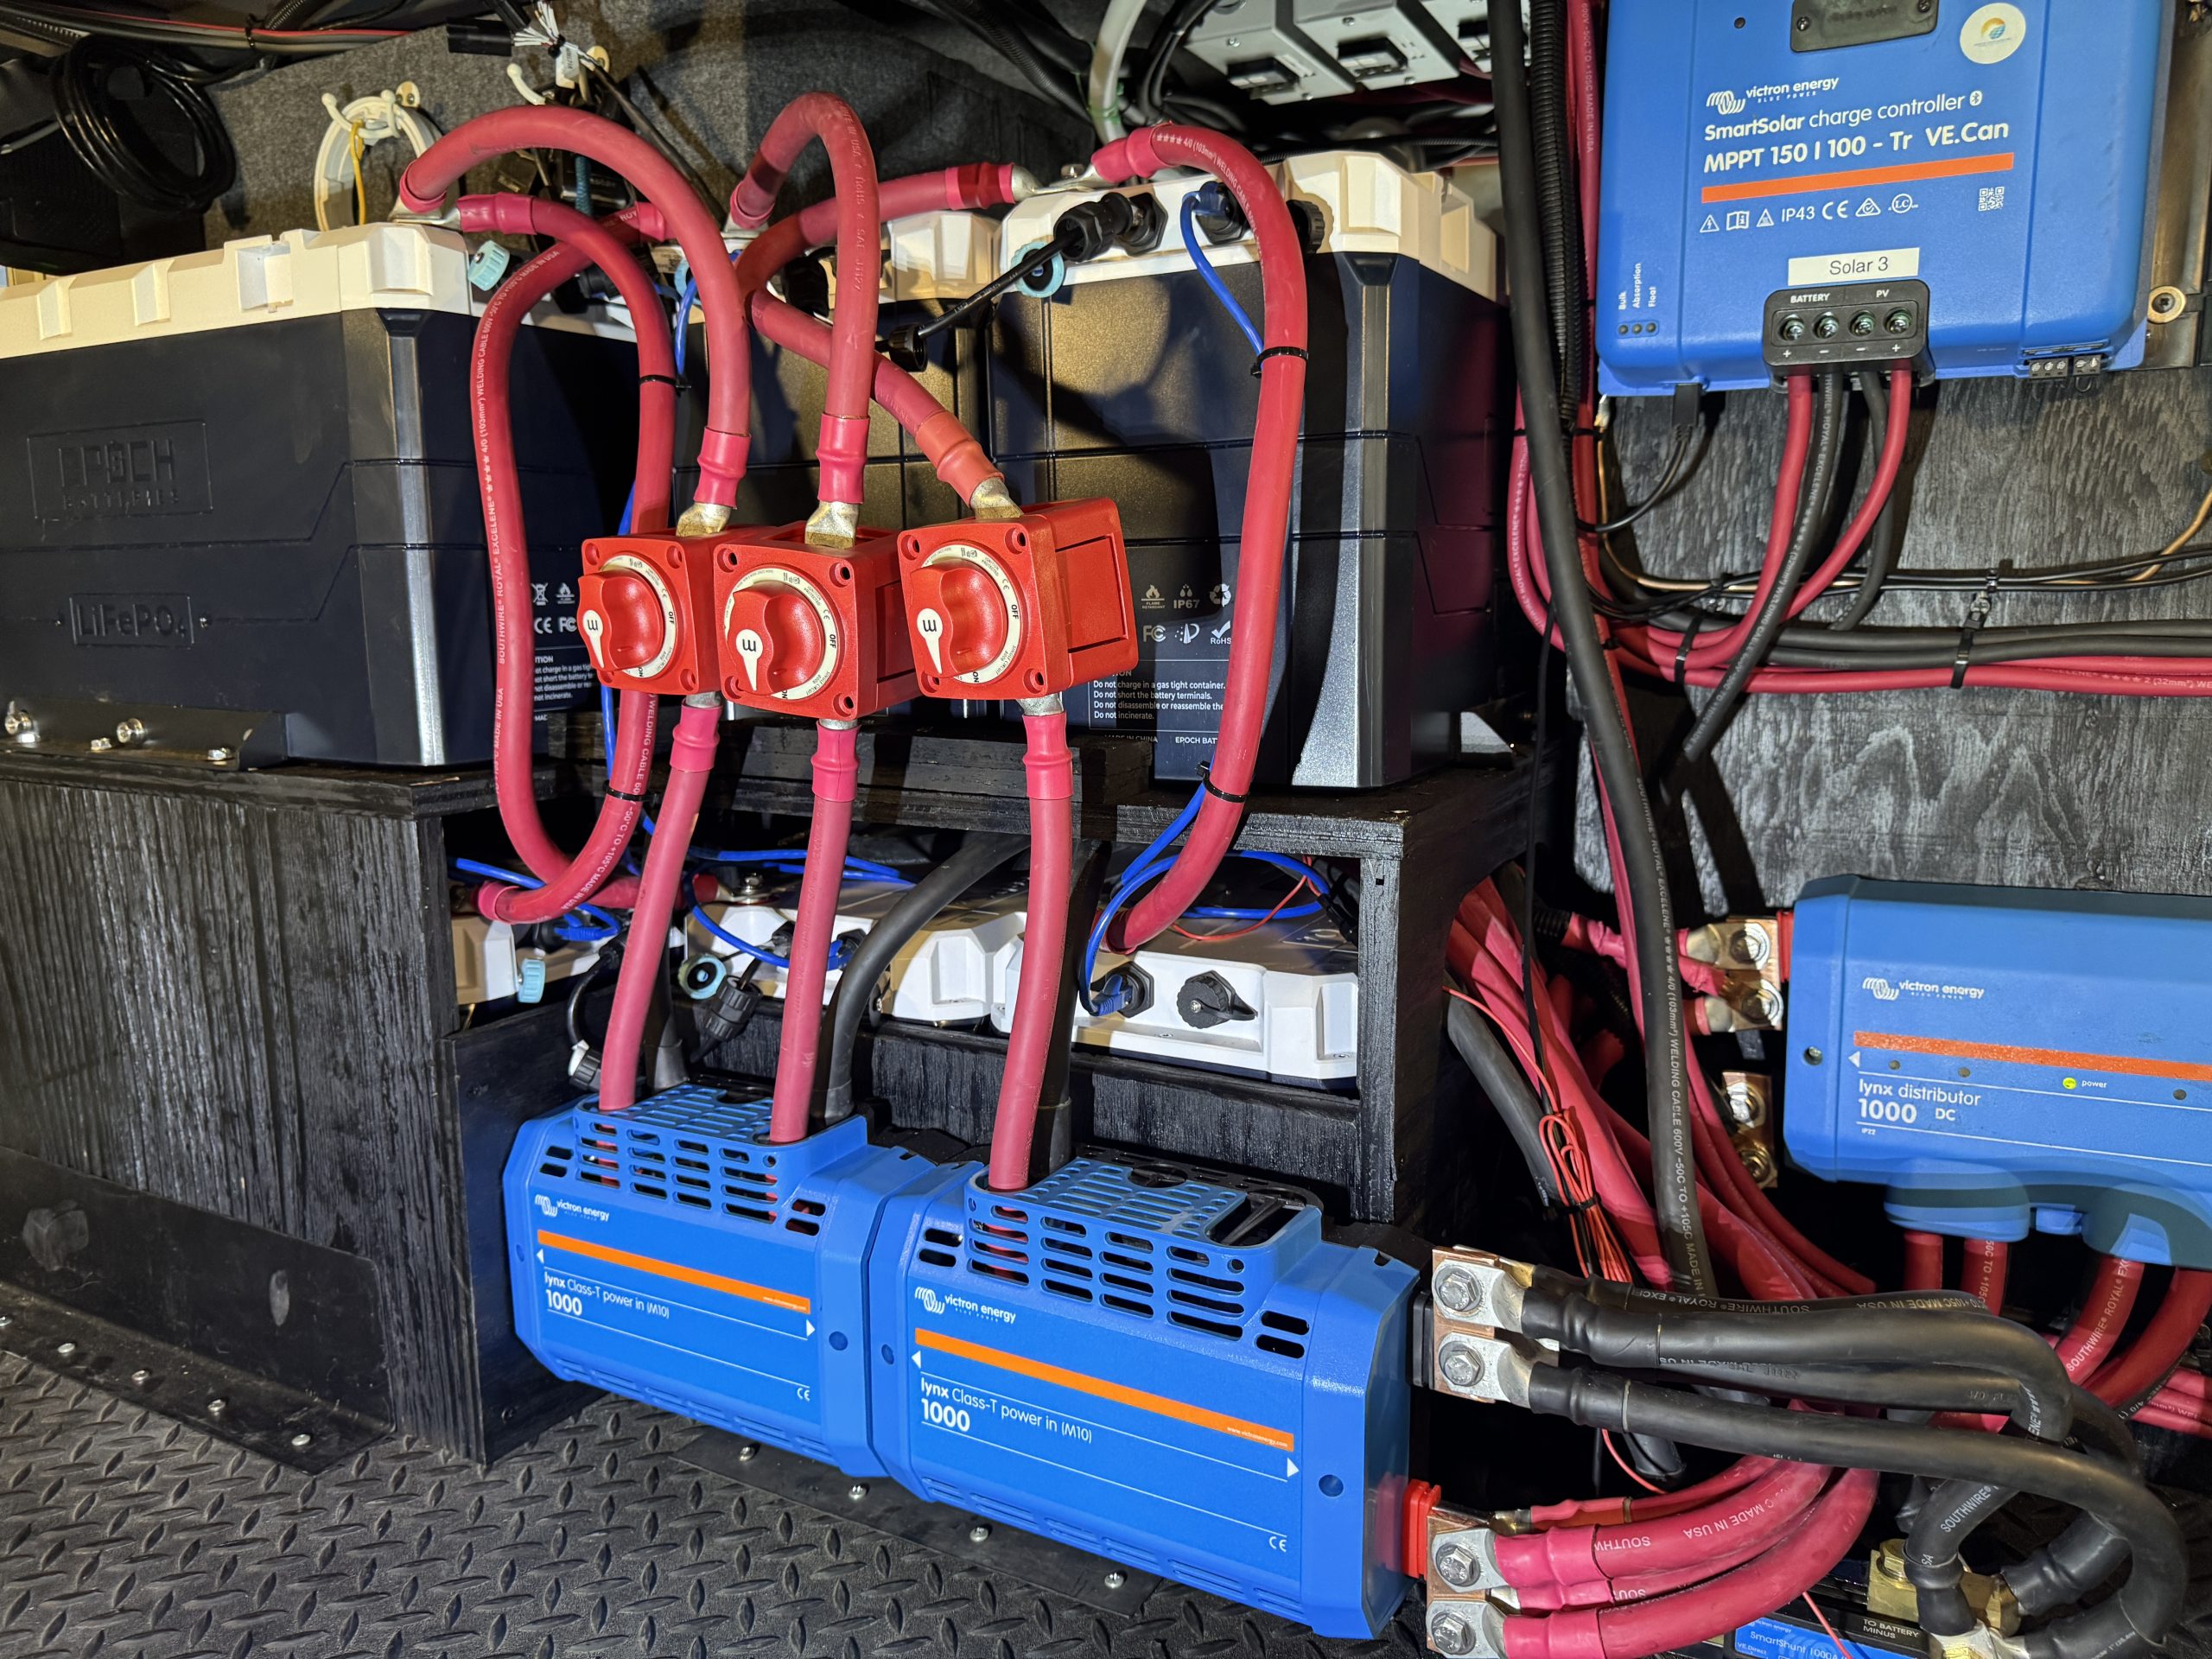
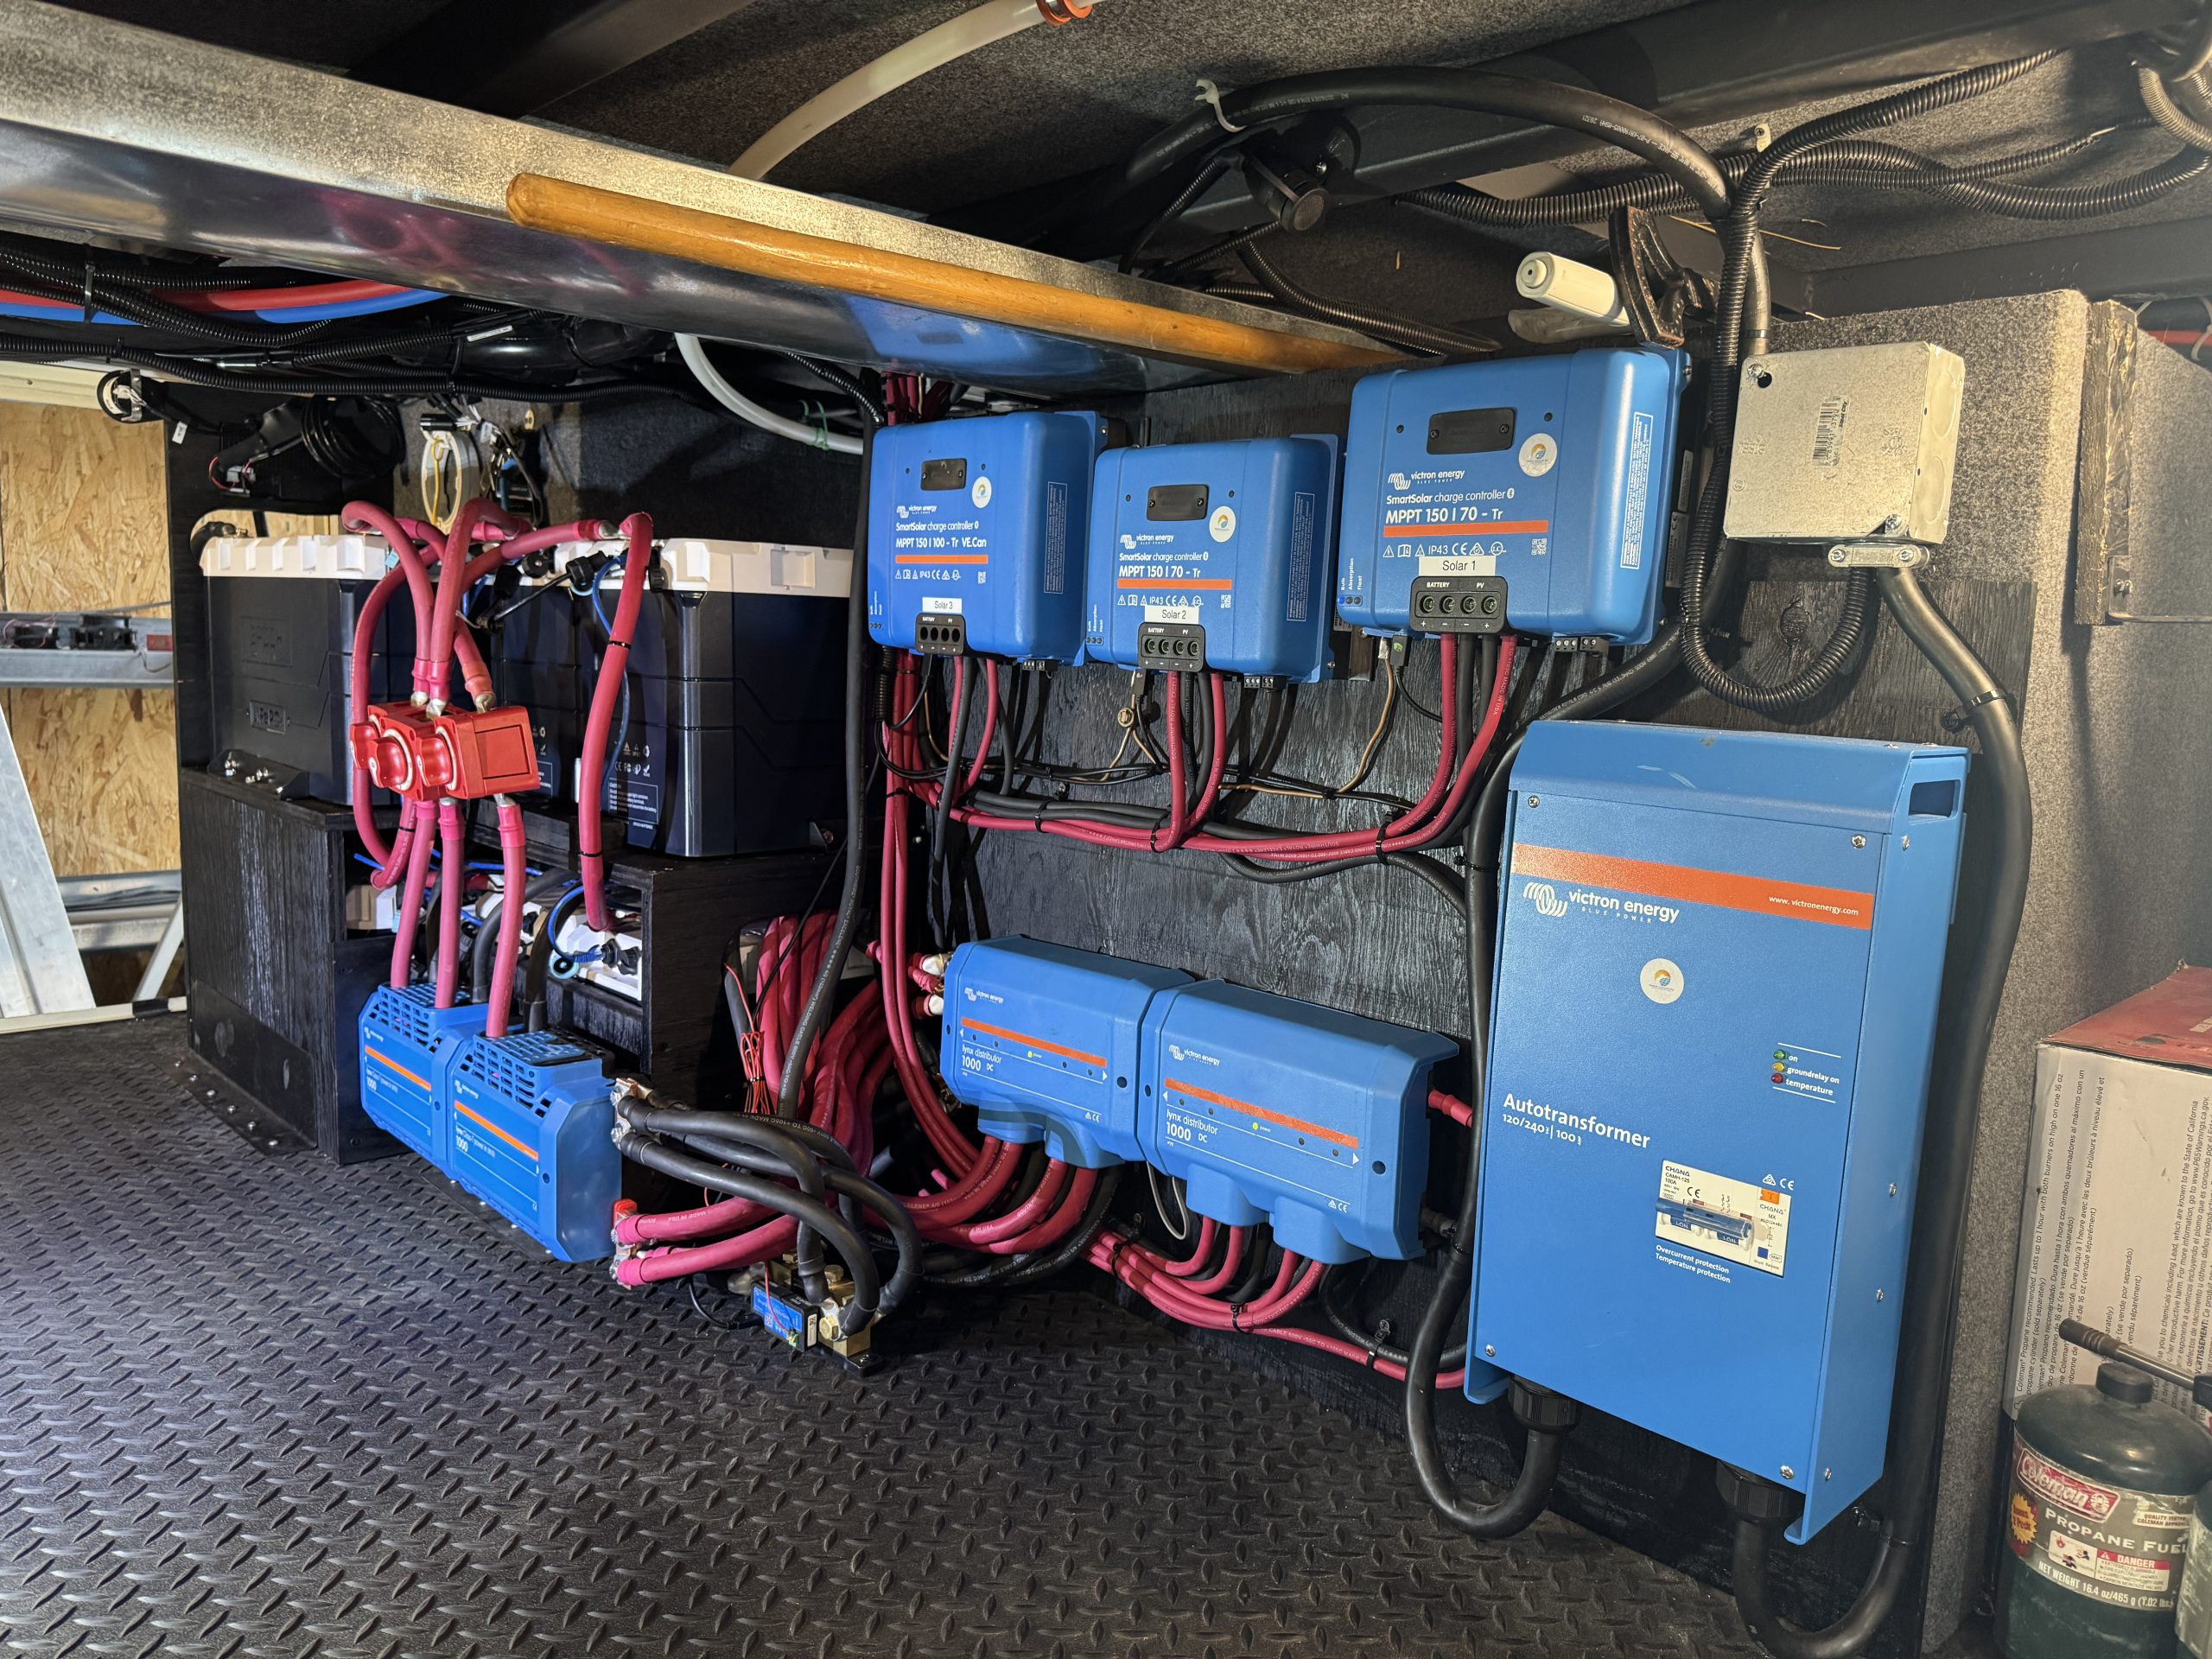
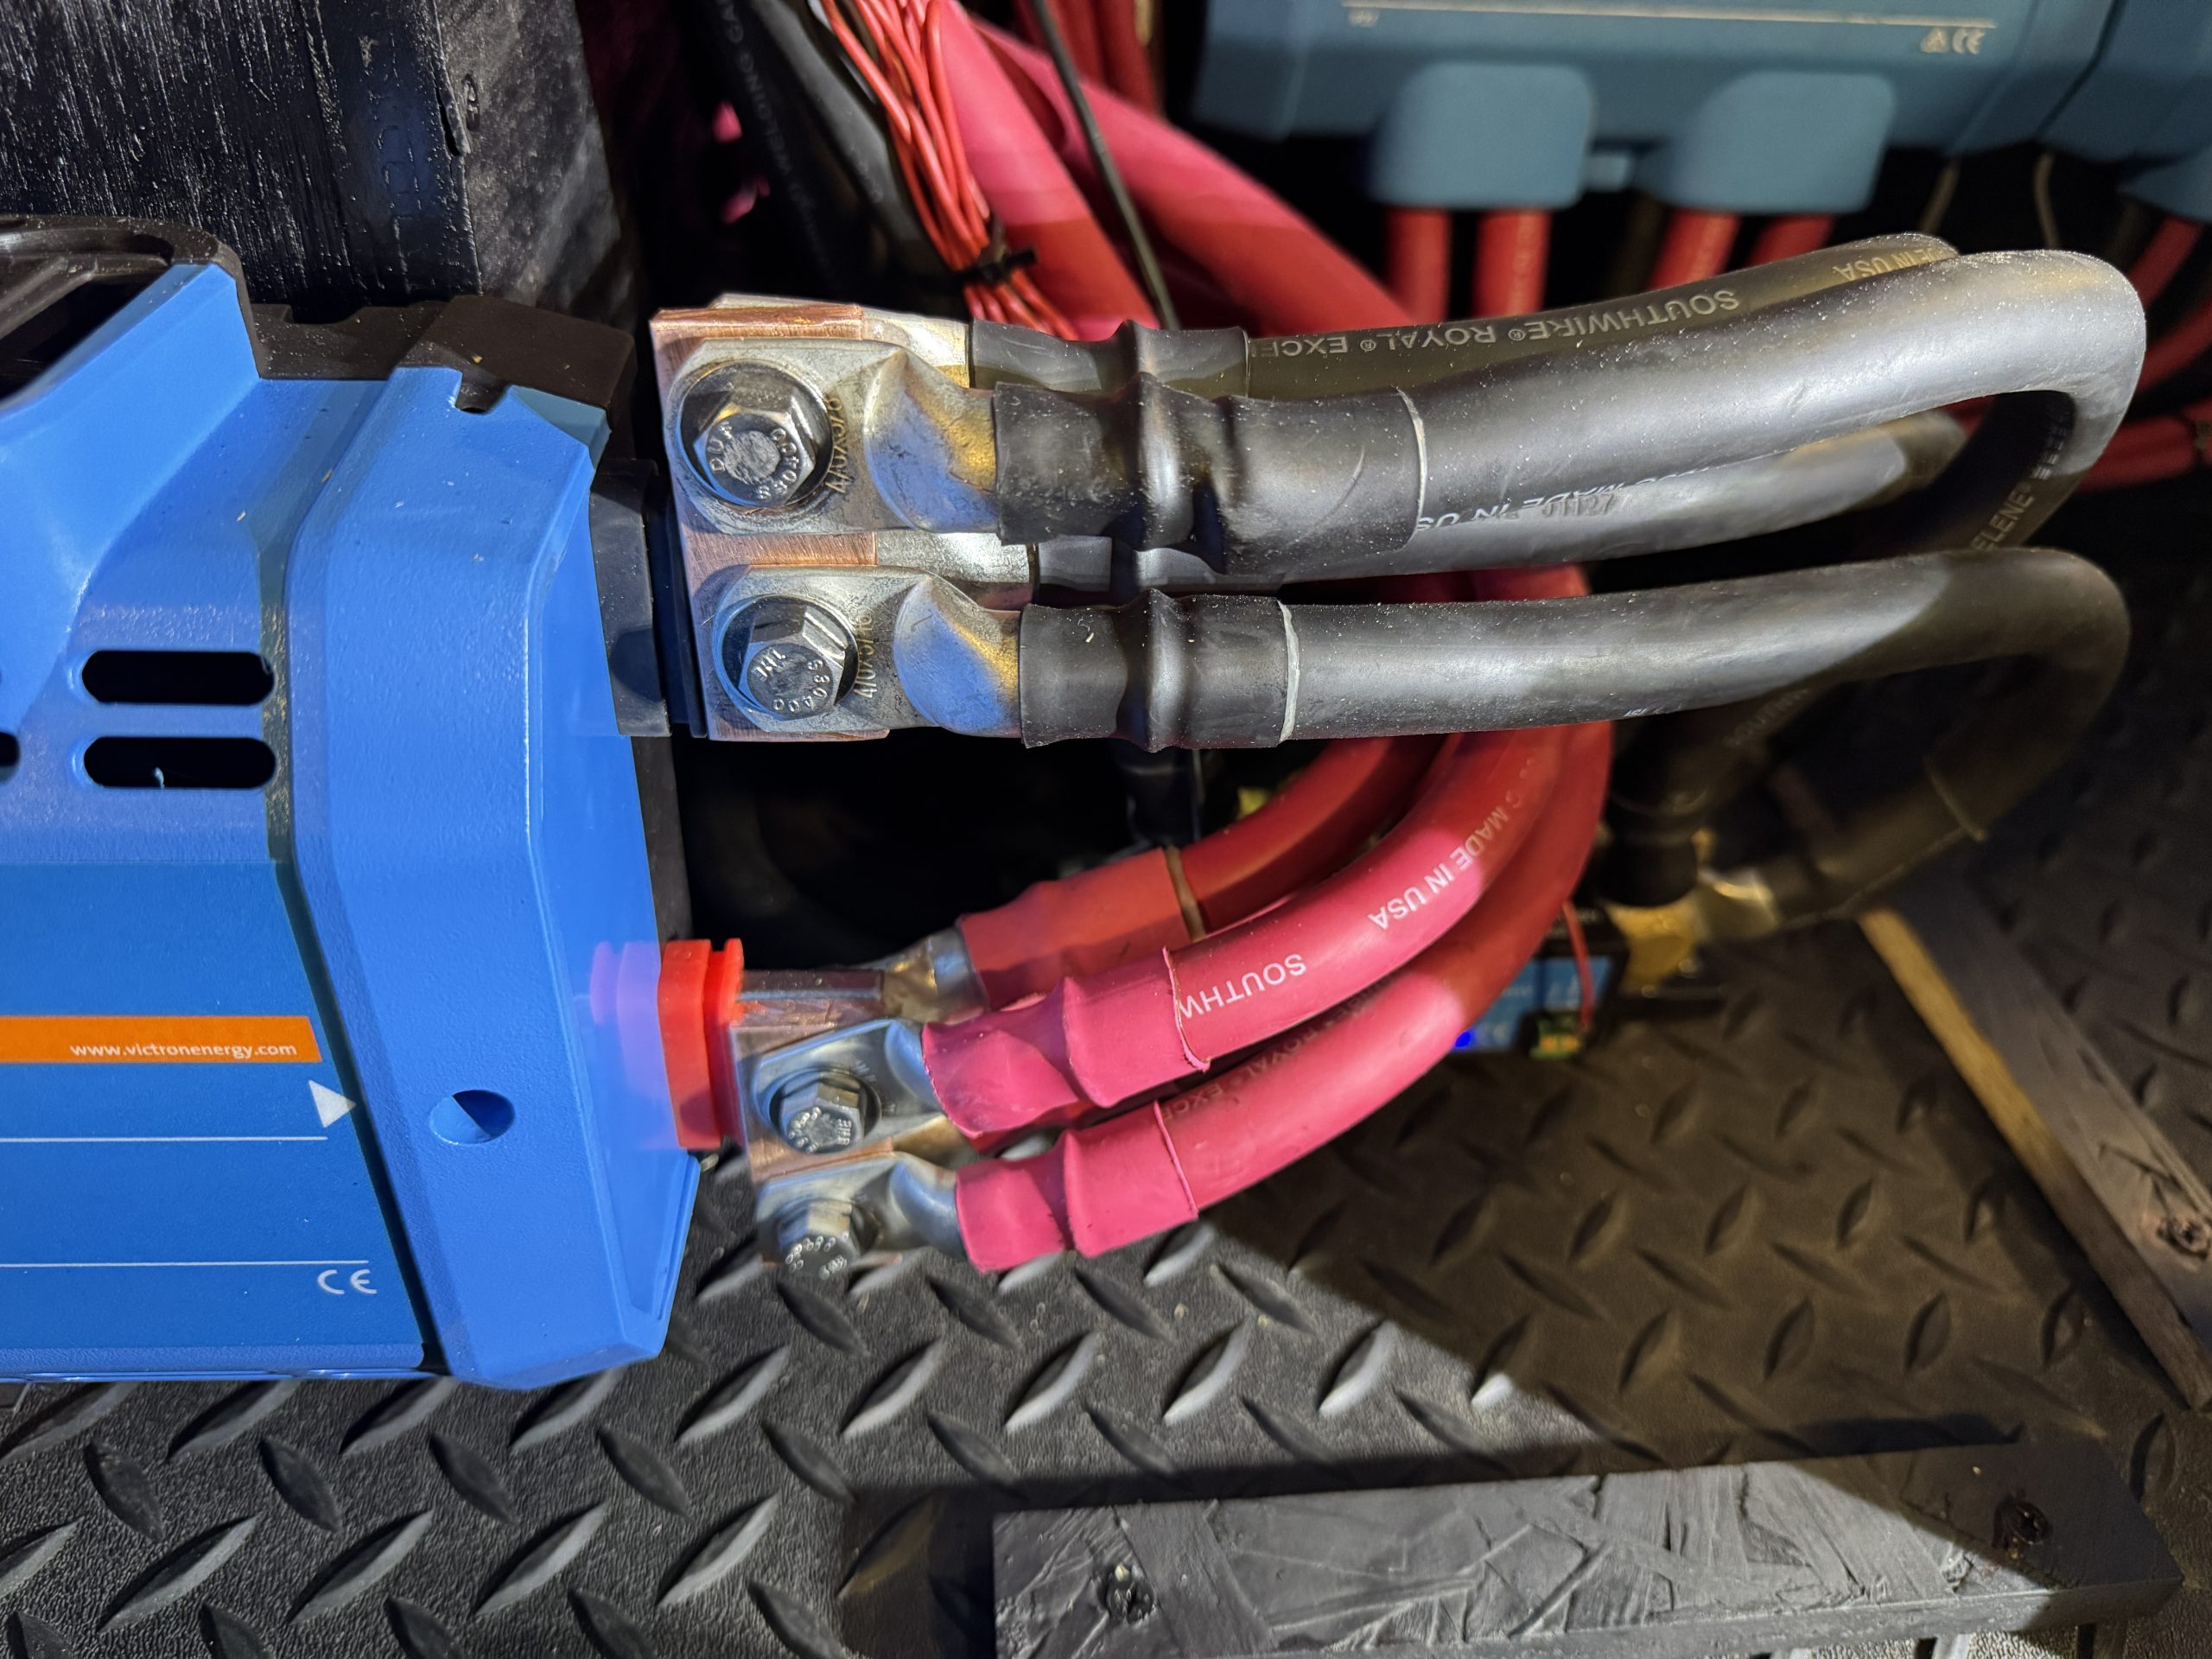
Update 9-1-2025: I did a quick update to the system. I removed the single Lynx Power In and replaced it with two Class T Lynx Power Ins. The battery pairs now connect to the Class T Power Ins with 350 amp Class T fuses for each pair of batteries. I also removed the single Blue Sea HD 3000 on/off switch and replaced it with three Blue Sea 6006 on/off switches. The switches are in the positive cable of each battery pair going to the Lynx Class T Power ins. These changes give me more protection for the batteries and more input/output capacity for the system (no longer limited to the single 3000 HD switch capacity). As part of this update, I also upgraded from two sets of 4/0 cable between the Power Ins and the Distributors to four sets of 4/0 cables (four positive cables and four negative cables). These cables connect to the ends of the last Class T Lynx Power In and go to the ends of the first Lynx Distributor. The negative cables go through a 1000 amp SmartShunt. In order to make room to connect four 4/0 cable lugs to the ends of the Power In and the Distributor, I added 1″ x 1/4″ copper busbar to each bus bar end on the Power In and the Distributor. This allowed for the added connection space for the cable lugs. It would have been nice to use a Lynx Shunt between the Power Ins and the Distributors, but the installation space did not allow for that. With four sets of 4/0 cables between the Power Ins and the Distributors, the cables barely get warm under heavy extended charge or extended heavy load. With the battery capacity I now have, it is easy to run heavy loads (300+ amps of current) for extended periods and with the dual 220 amp chargers in the Quattros, it is easy to charge at high current (300+ amps) for extended periods. Even after hours of loads like this, the cables are perfectly happy with no significant heat build up.